 Adobe Community
- Home
- Photoshop Elements
- Discussions
- Fading the edge of an image to 100% transparency
- Fading the edge of an image to 100% transparency

Copy link to clipboard
Copied
I need to fade the edge of an image to 100% transparency, save as PNG, and then I can put it on another image and it fits naturally. how should i do it?


 1 Correct answer

Try something like the following: (this is not the only way)
1. Double click on the background layer to make the background layer a regular layer
2. Add a new blank layer above. (Layer>New>Layer)
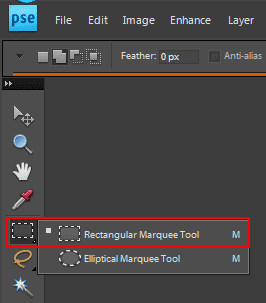
3. Use the rectangular marquee tool to draw a rectangular selection smaller than the photo
4. Edit>Fill>Black
5. Select>Deselect
6. Move the layer below the photo layer ( drag the thumbnail in the layers panel)
7. Click on the photo layer and go to Layer>Create Clipping Mask
8. Click
... 13
Replies
13
13
Replies
13

Copy link to clipboard
Copied
File >> New >> Blank File
Make the dimensions slightly bigger than your image, and set resolution e.g. 72 for web and for background color choose transparent.
If your main image is already open you can drag it from the project bin on top of the transparent template and position it or re-size it with the move tool.
Copy link to clipboard
Copied
Try something like the following: (this is not the only way)
1. Double click on the background layer to make the background layer a regular layer
2. Add a new blank layer above. (Layer>New>Layer)
3. Use the rectangular marquee tool to draw a rectangular selection smaller than the photo

4. Edit>Fill>Black
5. Select>Deselect
6. Move the layer below the photo layer ( drag the thumbnail in the layers panel)
7. Click on the photo layer and go to Layer>Create Clipping Mask
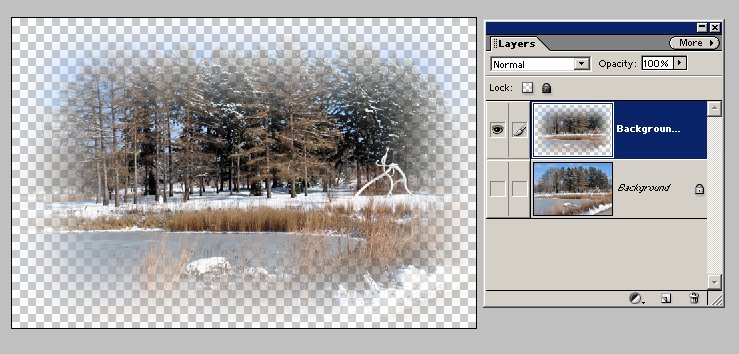
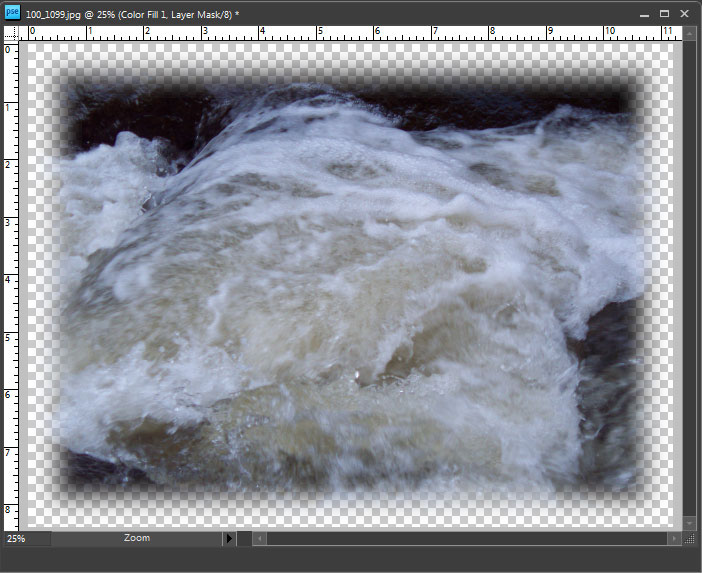
8. Click on the layer filled with black and go to Filter>Blur>Gaussian Blur to fade the edge to transparency.
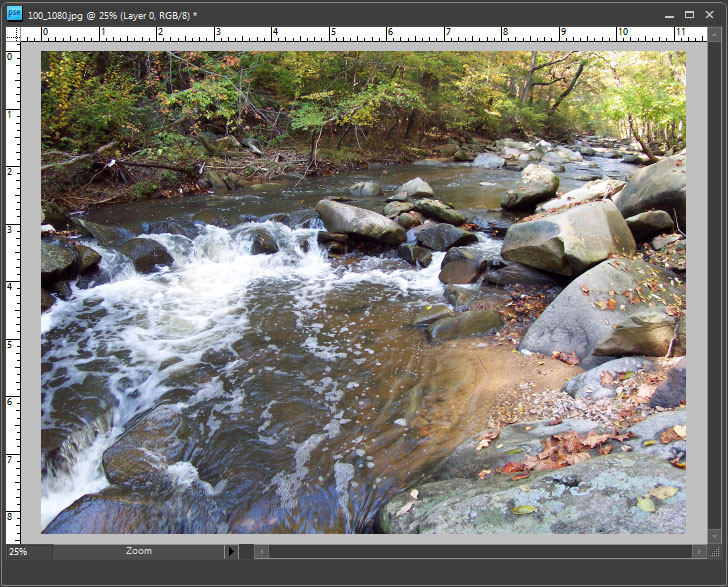
before:
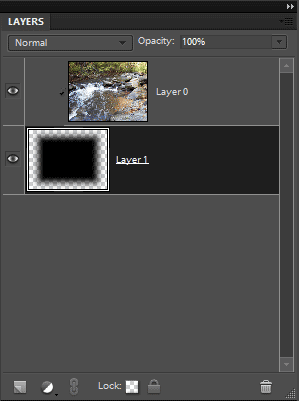
layers panel:
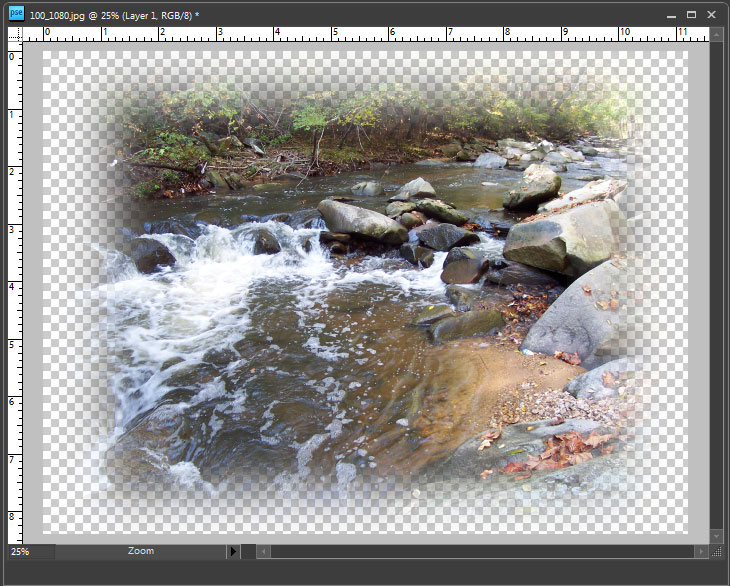
after:
added screenshots
Copy link to clipboard
Copied
if i want to make the result an rather odd shape (like an arrow, a plus sign, etc) i just change the black shape to be drawn, right?
thanks!

Copy link to clipboard
Copied
Use the Shape Selection tool. There are many shapes to choose from.
R_Kelly's post #2 provides excellent directions. Place the layer with the shape as described in step #6.
http://www.pixentral.com/show.php?picture=1LznYjTDMhm1aV4B3sjYVzOJD44Za1

Copy link to clipboard
Copied
1. Duplicate the Background layer and turn off the visibility of the Background layer.
2. On the duplicate layer, draw out an area with the Rectangular Marquee tool.
3. Invert and feather the selection. In my example I feathered 40 px, but ithe value will depend on the dimensions of your picture. You will have to experiment.
4. Delete the selection.
Note that you can omit the duplicate layer if you rename the Background layer to anything else and work on that.
Copy link to clipboard
Copied
Here's another variation:
1. Double click on the background layer to make the background layer a regular layer.
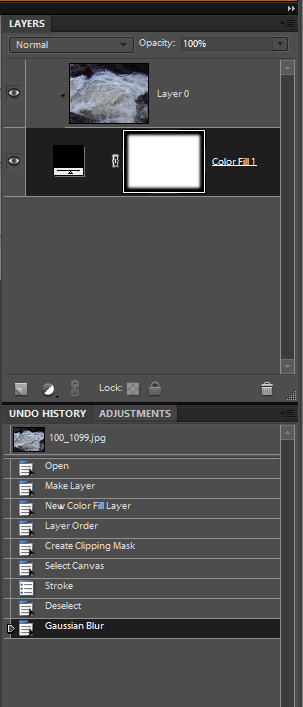
2. Add a color fill layer (Layer>New Fill Layer>Solid Color) black.
3. Move the fill layer below the photo in the layers panel.
4. Click on photo layer and go to Layer>Create>Clipping Mask
5. Click on the layer mask of the solid fill layer to make the mask active.
6. Selet>All
7. Edit>Stroke>Inside>Black (the Width is how much you want to contract the select from the border)
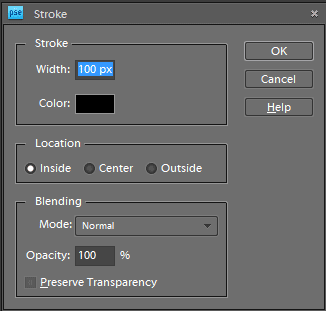
8. Select>Deselect
9. Filter>Blur>Gaussian Blur (the fade amount)
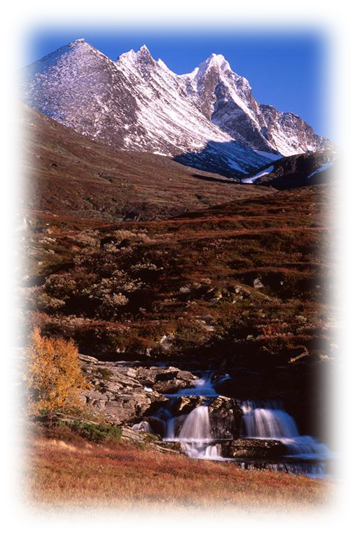
before:
layers panel:
after:

Copy link to clipboard
Copied
Here's another way which reveals an odd effect, which might be a bug:
- Double-click on the background layer to convert it to a normal layer.
- Select...All (Ctrl+A).
- Select...Modify...Contract: 60px.
- Select...Feather: 20px radius.
- Select...Inverse (Ctrl+Shift+I).
- Hit the Delete key.
To my eye, the odd effect is that the vignette looks wider at the center. (Most apparent on the vertical sides.)
Added:
I guess it's just an optical illusion -- when I dragged out a vertical guideline to measure the fade, it looks the same from top to bottom.
Added (2):
A non-destructive way is to simply use a layer mask. After step 4:
5. Click on the layer mask icon in the Layers panel.
Ken
Message was edited by: photodrawken to add comments.
Copy link to clipboard
Copied
Ken, after I do the Select All, Modify>Contract is disabled (grayed out).
For the record, I have PSE2.
Copy link to clipboard
Copied
Mark,
I can't reproduce that. I'm using PSE10, and "Contract" is available whether the layer is a background layer or a regular layer.
Ken
Copy link to clipboard
Copied
That changed in pse 6 i believe at the same time photoshop cs3 added being able to use the Select>Modify commands after Select>All.
Photoshop cs3 was the only version of photoshop to have that (someone apparently didn't like it and was returned back to the way it works in pse 2 in cs4-cs6)
Though photoshop elements continues to have that feature (pse 6-pse10).
Copy link to clipboard
Copied
Bizarre, but interesting. Let's not tell Adobe how PSE10 works! 
Ken
Copy link to clipboard
Copied
so far, thanks everybody, i tried the black-shape one but the feathering one doesn't seem to work.
anyway thx! 
Copy link to clipboard
Copied
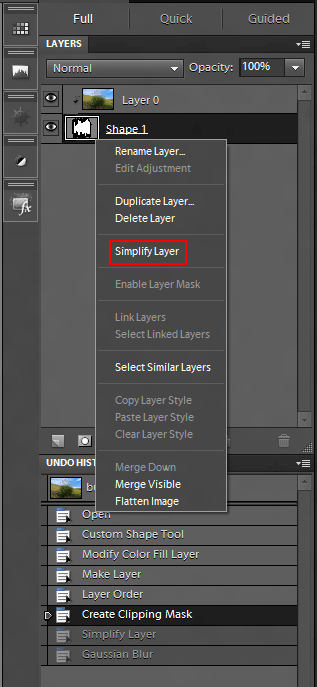
If your using a shape layer, then you need to simplify the layer before using gaussian blur.
Right click on the shape thumbnail in the layers panel and choose Simplify Layer.
If you still have a question, maybe if you posted a screenshot of your progress we could give more specific instructions.

 AdChoices