 Adobe Community

Copy link to clipboard
Copied
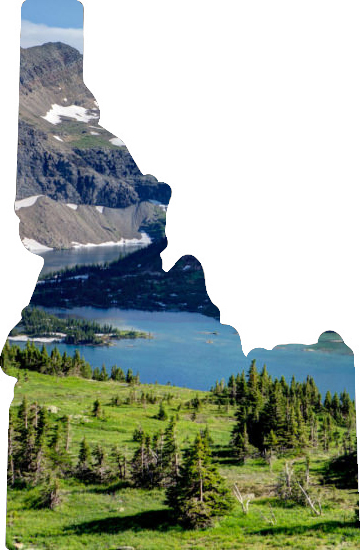
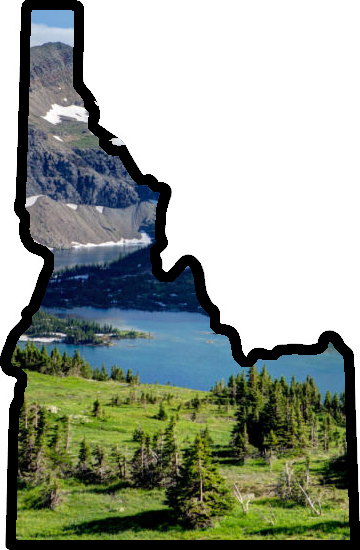
I have an outline of Idaho. I would like to fill it with a scene of an Idaho mountain and river.
I can get it to "fill with pattern", but I would like to be able to move the mountain/river picture around within the state outline before I commit?
Possible somehow? (go easy - I'm a rank amateur...) 
Regards,
Michelle


 1 Correct answer

OK. Here is one way to do it:
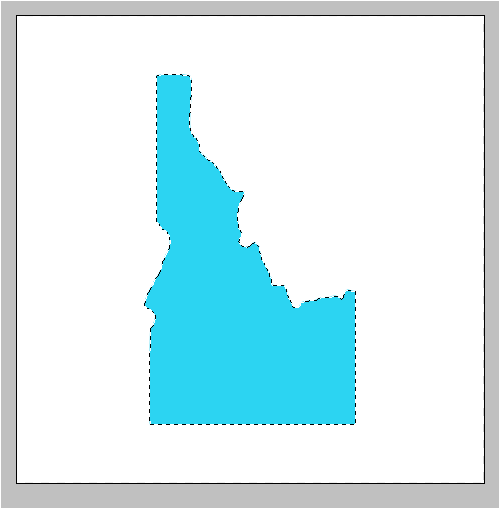
- Open the map outline and the photo you want to fill it with in the Editor.
- Choose the map outline and make a selection of the outside of the outline, using a selection tool, such as the quick selection tool (Press A).
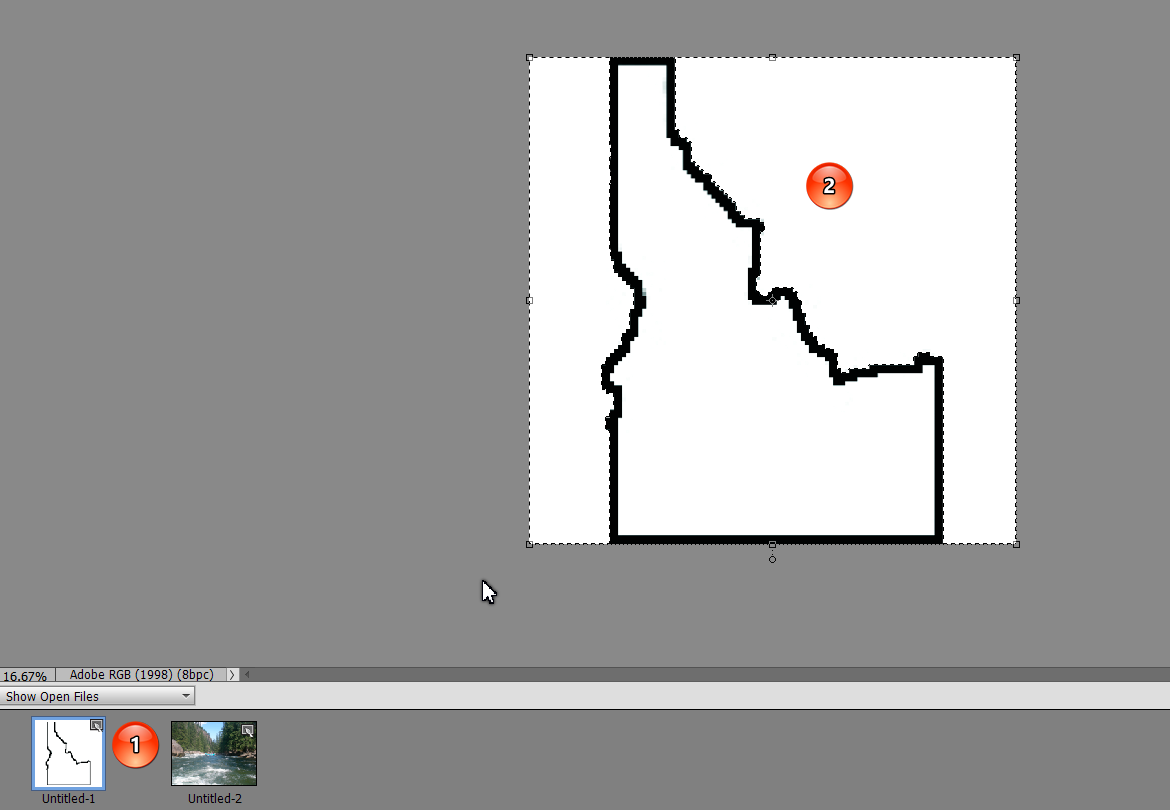
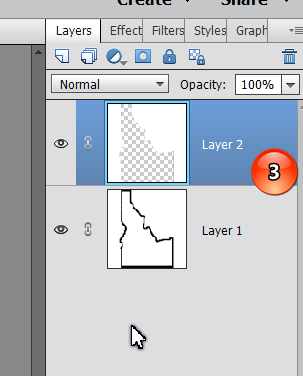
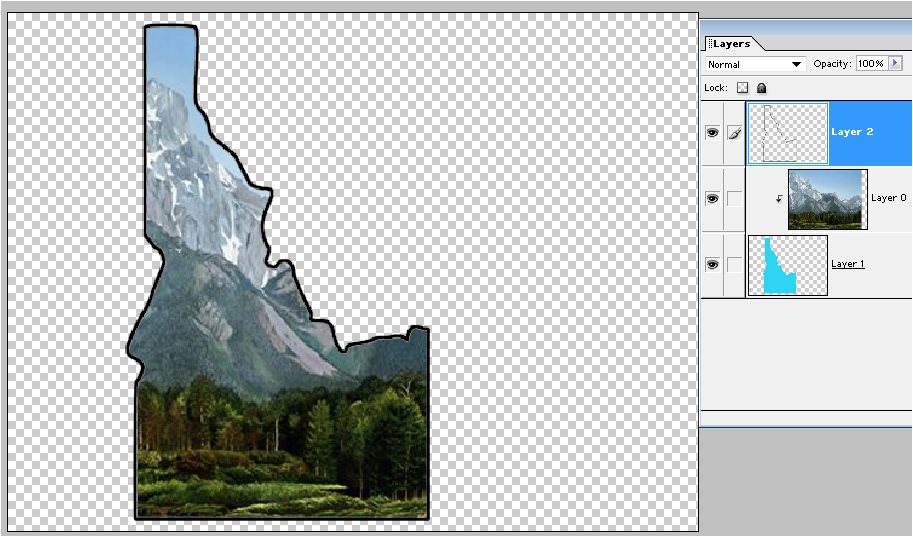
3. Press Ctrl+J and you should see a new layer with the map of Idaho cut out.
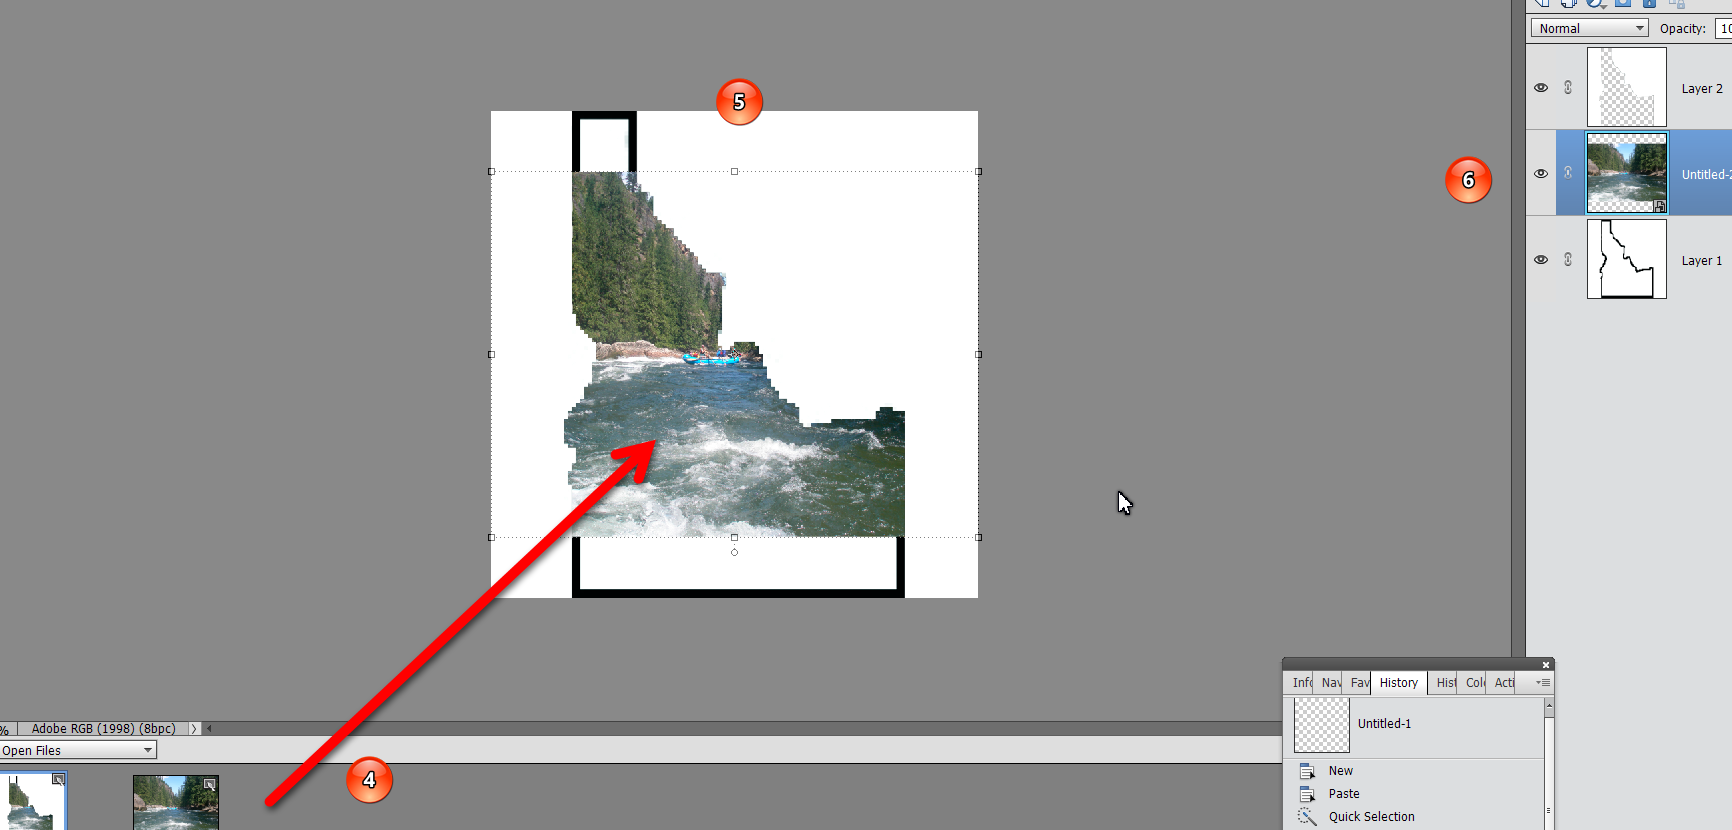
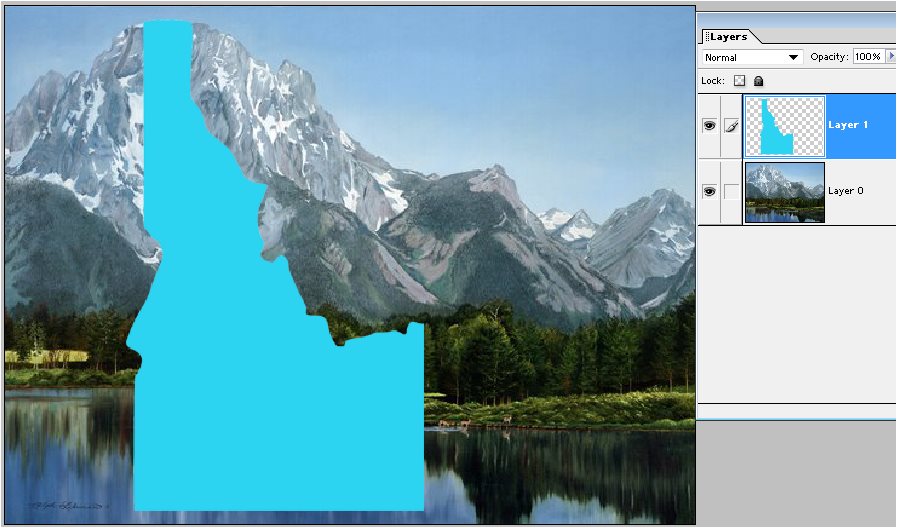
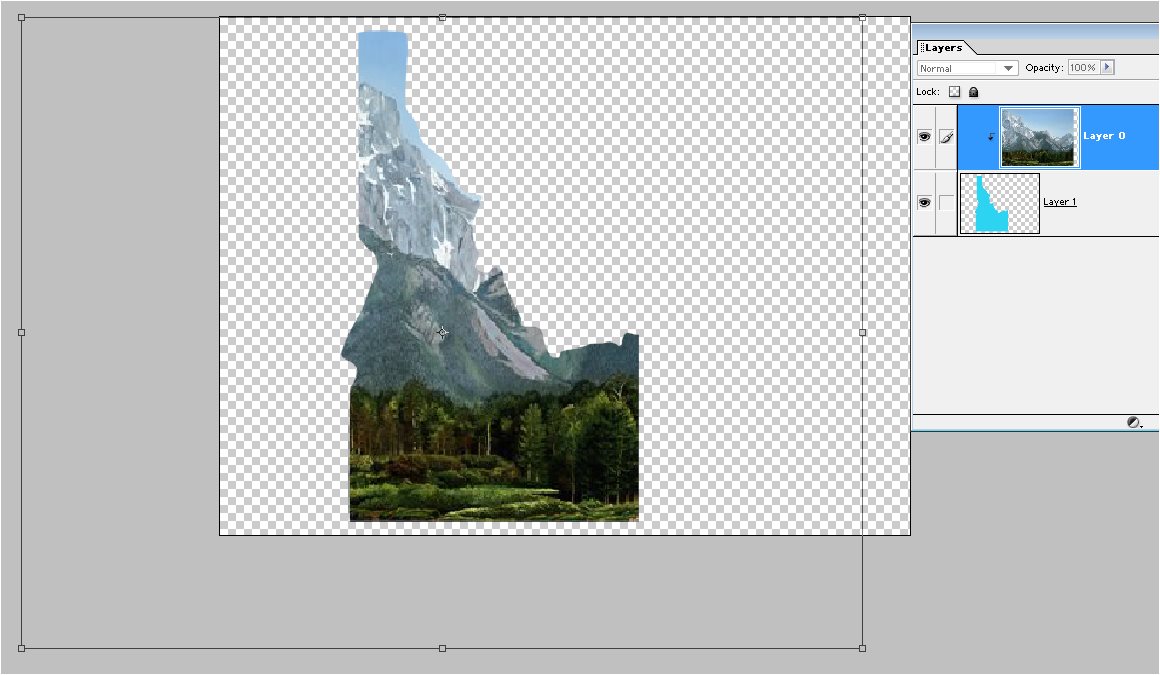
4. Click and drag the river photo to the inside of the map image.
5. You can adjust the size and position of the river image using the handles at the edge of the layer.
6
... 9
Replies
9
9
Replies
9
Copy link to clipboard
Copied
OK. Here is one way to do it:
- Open the map outline and the photo you want to fill it with in the Editor.
- Choose the map outline and make a selection of the outside of the outline, using a selection tool, such as the quick selection tool (Press A).

3. Press Ctrl+J and you should see a new layer with the map of Idaho cut out.

4. Click and drag the river photo to the inside of the map image.
5. You can adjust the size and position of the river image using the handles at the edge of the layer.
6. Your image panel should look something like this:
Let us know if you need more help.
Copy link to clipboard
Copied
THANK YOU!
(what is the CTRL>J for?)
(Montana would have made a nicer pic, but camp destination is northern ID this year...)
Copy link to clipboard
Copied
Glad you were able to follow my directions.
Ctrl+J creates a new layer of just the selected pixels.
Copy link to clipboard
Copied
Now to put a black border around it...suggestions on where to look.
But I'm off to Google...
Copy link to clipboard
Copied
mitch525252 wrote
Now to put a black border around it...suggestions on where to look.
But I'm off to Google...
Make a selection of the photo pixels. Then go to the Edit menu and choose Stroke (Outline) Selection. You can then choose the pixel size and color of the outline. The default is only 1 pixel which is rarely visible, so make sure you have at least 10 pixels filled in.
Copy link to clipboard
Copied

Copy link to clipboard
Copied
Another method...
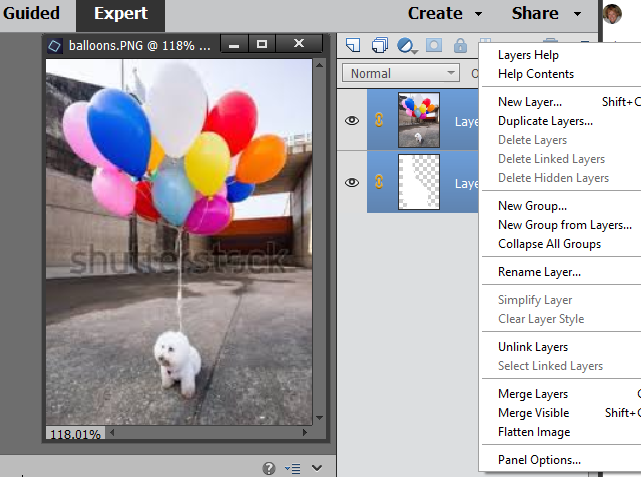
I did a Google Images search on "Idaho shape" and downloaded this.
Using the Magic Wand, click the shape to select it, and copy to the clipboard (Edit > Copy, or Ctrl-C).
Open the Idaho picture and paste the shape from the clipboard (Edit > Paste, or Ctrl-V).
This places the shape on a new layer with transparent background.
Resize the shape layer to fit inside the picture.
Move the shape layer beneath the picture layer and group the two. This crops the picture into the shape:

Use the Move tool to position or resize the picture as needed.
Note that here I actually resized the picture beyond the boundary of the shape layer.
To add the outline:
Ctrl-click the shape layer to select it, add a new blank layer at the top of the stack, and apply a stroke as previously described.
Copy link to clipboard
Copied
It's not working for me...(picture is just a test...)
Copy link to clipboard
Copied
You are almost there.
Now group the 2 layers. You can click the picture layer to activate it, and then Ctrl-G.

 AdChoices