 Adobe Community
- Home
- Photoshop Elements
- Discussions
- Is there a way to select in-focus foreground objec...
- Is there a way to select in-focus foreground objec...

Copy link to clipboard
Copied
I'm working with this photo of wildflowers:
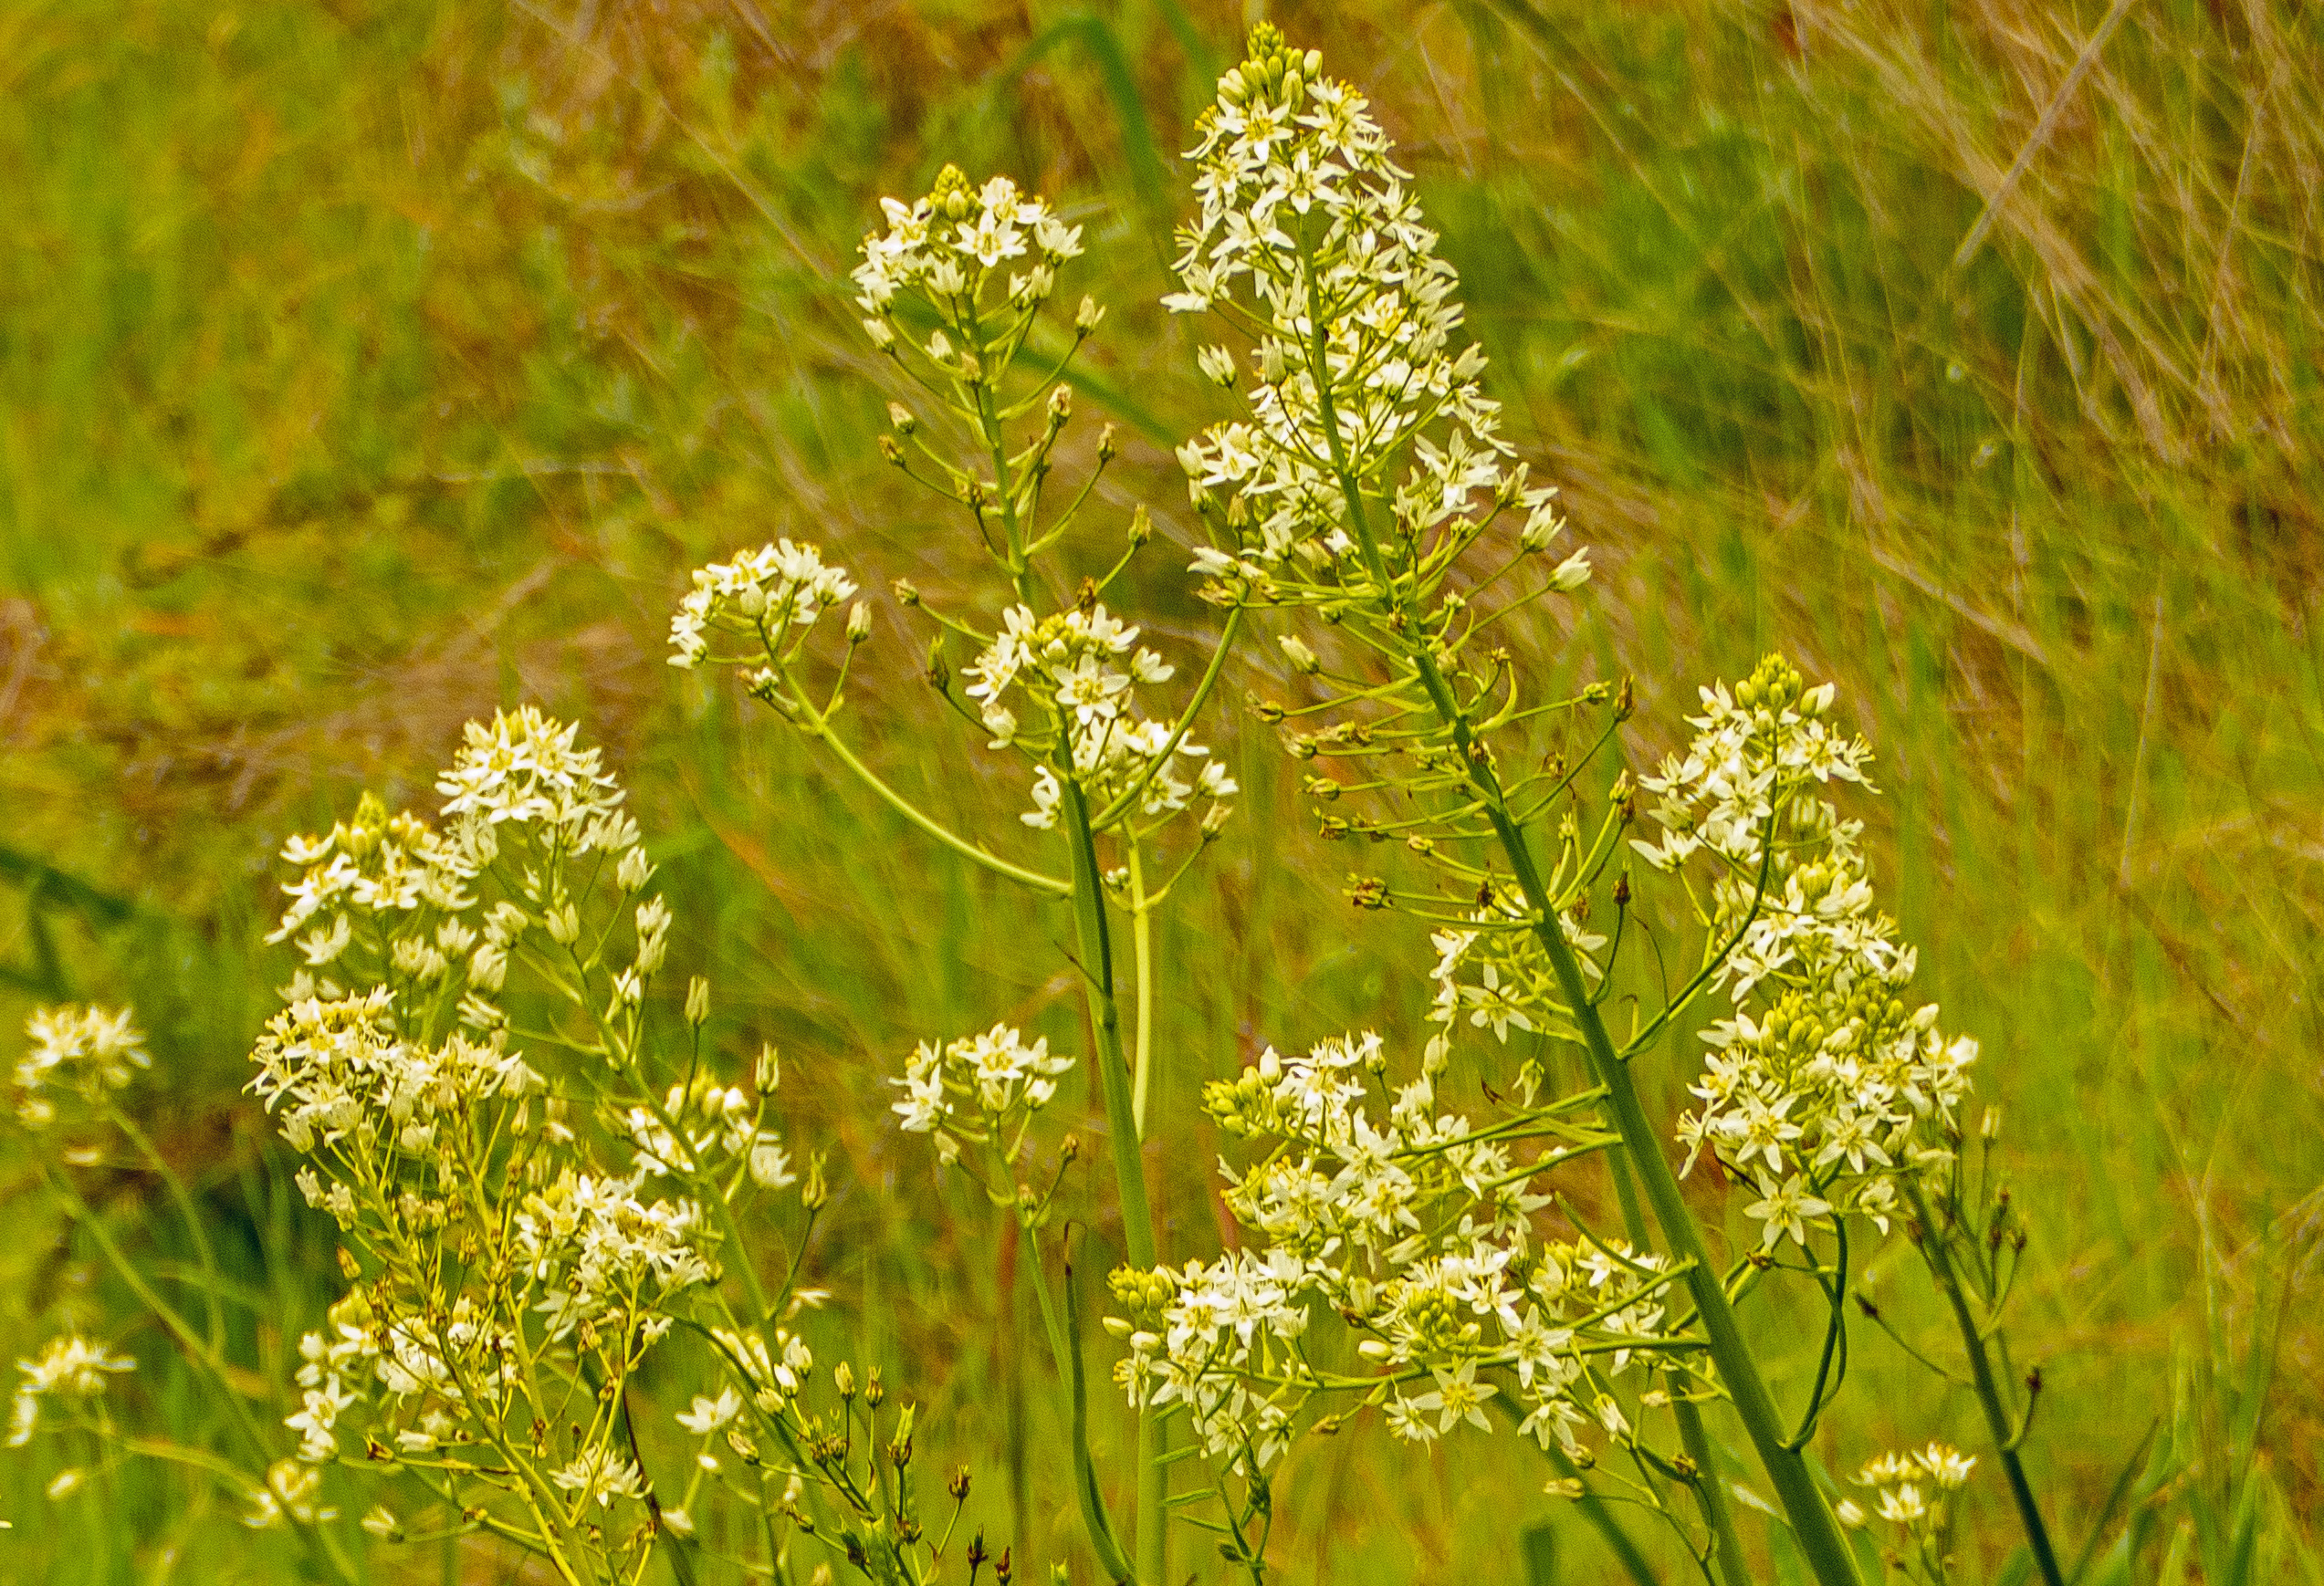
I enhanced the midtones of this photo and it improved the look of the flowers, but it also increased the midtones of the blurred background, and that detracted from the appearance of the flowers. I didn't know of a way to just select the in-focus objects, so I searched the web for help. I discovered that PSE used to have a tool that could do that, but they removed it a few releases ago. And Photoshop CC has a tool to do this. But that's all I found. So I guess it's not easy to do in PSE 18, but are there ways to accomplish it?


 1 Correct answer

gfbugaboo,
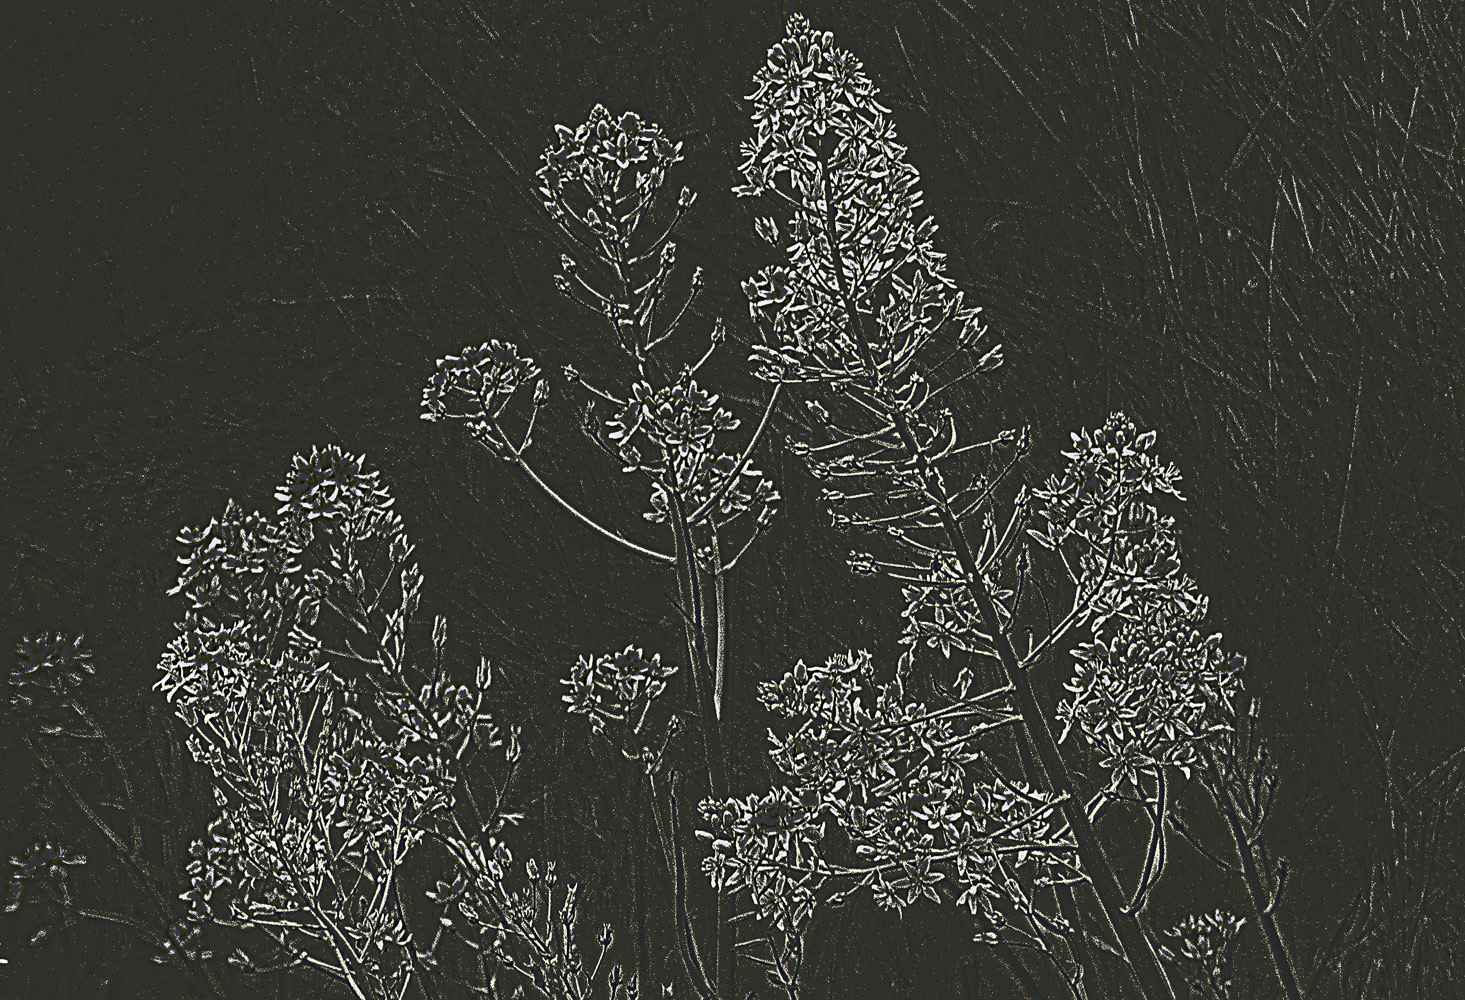
Try this:
- Open image file
- Activate the Sharpen tool, and set Mode:darken, & Strength 60% on the tool's option bar. "Paint" over the wildflowers to sharpen them. You may have to make a couple of passes in spots. (Note: you can adjust the cursor size with the bracket keys next to the letter P on the keyboard)
- Open a Levels adjustment layer above the background layer, and work the left and right sliders below the histogram to best advantage.
- Add a frame

 6
Replies
6
6
Replies
6

Copy link to clipboard
Copied
I don't know about a specific tool for that in Elements or Photoshop.
Instead of filtering on focus distance, I would create a kind of 'sharpness' mask based on the fact that 'in focus' parts will have sharper edge contrast, and the rest will be softer.
The tool to detect this sharpness is the filter 'other >> high pass'.
With your image, setting the radius to something about 5 will distinctly blur the background and show the foreground flowers.
You'll need to boost the contrast of the resulting layer. I suggest an 'auto level' or a black to white adjustment layer to mask strictly neutral grey (black at 50%, white at 48 and 52%). Maybe a threshold adjustment for still more contrast.
Then you can use the result as a mask for your targetted adjustments.
The highpass filter is the tool used for sharpening methods and for selective retouching in portraits, for instance to enhance global contrast and texture while softening unwanted details and blemishes.

Copy link to clipboard
Copied
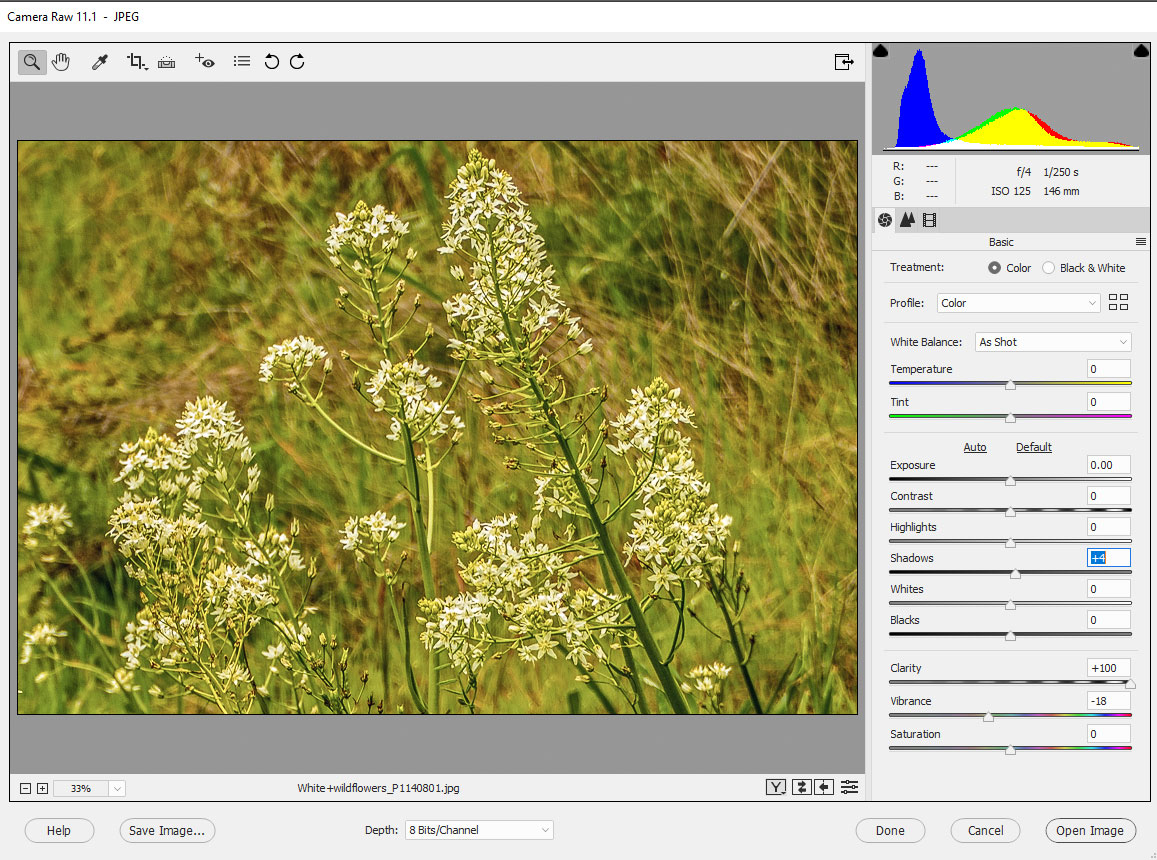
Try opening the image in camera raw and experiment with the sliders, notably clarity and vibrance. You could also adjust highlights and shadows separately – see image below. Go to:
File >> Open in camera raw
When you finish with the slider adjustments simply click the open image button (bottom right) and that will send the photo into the regular Editor where you can re-save or make further edits.
Copy link to clipboard
Copied
gfbugaboo,
Try this:
- Open image file
- Activate the Sharpen tool, and set Mode:darken, & Strength 60% on the tool's option bar. "Paint" over the wildflowers to sharpen them. You may have to make a couple of passes in spots. (Note: you can adjust the cursor size with the bracket keys next to the letter P on the keyboard)
- Open a Levels adjustment layer above the background layer, and work the left and right sliders below the histogram to best advantage.
- Add a frame

Copy link to clipboard
Copied
These were very helpful answers and I was able to accomplish pretty much what I wanted with two of them. I was unable to follow the first suggest, using the highpass filter, because I don't know enough (yet!) to follow all the instructions. That's a future project. I had originally used Camera Raw to edit the photo (I shot it in RAW and JPEG), but I went back to the settings, per 99jon's suggestion, and improved the photo by adjusting Shadows, which I hadn't changed before. The results I liked best came with hatstead's procedure; I ended up with something that look like what he posted here. One thing puzzled me about that procedure, though. I tried using the Sharpen tool, as instructed, but when I painted over the flowers, nothing happened; the tool had no effect. I don't know what I did wrong there, but it did not seem to matter a bit: when I then adjusted the histogram in the Levels adjustment layer, I got the same result halstead did. To see if there was any difference, I followed the same procedure on a copy of the photo, but skipped the Sharpen tool step; the results appear to be identical. So I'm pleased with the result, but puzzled as to purpose of the Sharpen tool (as well as why it had no effect at all when I tried it).
Copy link to clipboard
Copied
I forgot one other thing: Thanks!
Copy link to clipboard
Copied
You're welcome.
As indicated in my previous post, I set the Strength=60%, and had to make a couple of "paint" passes here and there. The changes are subtle, and this is good, as one does not want it to look distorted and fake.
As for the high pass filter, try it out for drill on a picture that is not so busy, e.g. a house.
- Open picture file
- Duplicate Background layer
- Set blending mode of Background copy layer to overlay
- Apply the High pass filter to Background copy layer and adjust radius to suit.

 AdChoices