• Global community
    • Language:
      • Deutsch
      • English
      • Español
      • Français
      • Português
  • 日本語コミュニティ
    Dedicated community for Japanese speakers
  • 한국 커뮤니티
    Dedicated community for Korean speakers
Exit
0

Cant edit the text in PSD file

New Here ,
Dec 08, 2017 Dec 08, 2017

Copy link to clipboard

Copied

Hello , I bought PSD from designer and I want to edit the text .

I know  shoud take the Horizontal type tool and put it on the text and then its working but this time i dont know what happen and I cant edit it .

if I dubble click on the text layer it open the layer in a new window .

HELP PLEASE

Untitled22-2.jpg

Views

4.7K

Translate

Translate

Report

Report
Community guidelines
Be kind and respectful, give credit to the original source of content, and search for duplicates before posting. Learn more
community guidelines

correct answers 1 Correct answer

Community Expert , Dec 09, 2017 Dec 09, 2017

I worked this out late yesterday, but there is a lot to it, so I didn't get round to laying it out.

First you need to define the red stripe pattern.

Create a new document, and turn on the Grid.  Make sure Snap is enabled under the View menu

Use the line tool to make your first line as below.  Holding down the Shift key will force the line to 45°.  You can see I used a 4 pixel line thickness. It is important that you go between the grid points so that we can make a seamless pattern

Run a second line

...

Votes

Translate

Translate
Adobe
Guide ,
Dec 08, 2017 Dec 08, 2017

Copy link to clipboard

Copied

It looks like the layer is a smart object. Double clicking indeed opens the layer in a new window. That is expected behavior. You should be able to edit the text in that new window provided it is a text layer and not a pixel layer.

Votes

Translate

Translate

Report

Report
Community guidelines
Be kind and respectful, give credit to the original source of content, and search for duplicates before posting. Learn more
community guidelines
New Here ,
Dec 08, 2017 Dec 08, 2017

Copy link to clipboard

Copied

I didn't understand what to do,  can you be more specific.

Votes

Translate

Translate

Report

Report
Community guidelines
Be kind and respectful, give credit to the original source of content, and search for duplicates before posting. Learn more
community guidelines
Guide ,
Dec 08, 2017 Dec 08, 2017

Copy link to clipboard

Copied

After you double clicked,  the layer in the new window should be editable. If the text is not editable it's no longer a text layer but a pixel layer. (the original text layer probably was rasterized which means the text is converted to pixels); it still looks like text but it is not, it's pixels) Nothing you can do about that.

Votes

Translate

Translate

Report

Report
Community guidelines
Be kind and respectful, give credit to the original source of content, and search for duplicates before posting. Learn more
community guidelines
Community Expert ,
Dec 08, 2017 Dec 08, 2017

Copy link to clipboard

Copied

Double click here (inside the green highlight area)

The layer will open in a new window. Move to that window and edit it.

The drop shadow is not tied to the Charlie Smart Object as far as I can tell, so if you edit the Charlie SO, they drop shadow won't update to suite.  We can tell you how to fix that, but I have to go out right now, and won't be back for several hours.  I'll show you later if no one else has.

Votes

Translate

Translate

Report

Report
Community guidelines
Be kind and respectful, give credit to the original source of content, and search for duplicates before posting. Learn more
community guidelines
Community Expert ,
Dec 09, 2017 Dec 09, 2017

Copy link to clipboard

Copied

I worked this out late yesterday, but there is a lot to it, so I didn't get round to laying it out.

First you need to define the red stripe pattern.

Create a new document, and turn on the Grid.  Make sure Snap is enabled under the View menu

Use the line tool to make your first line as below.  Holding down the Shift key will force the line to 45°.  You can see I used a 4 pixel line thickness. It is important that you go between the grid points so that we can make a seamless pattern

Run a second line three major grid segments across

Now you need to decide on the line density.  If you want five lines per grid, then you need a total of 3 x 5 +1 = 16 lines

So copy Line #1 14 times

Select all 16 lines and the Move tool, and use the align tool in the options bar to equally space out the lines

Nearly there.

Make a selection with the Rectangular Marquee tool using the grid square I have shown below, and letting it snap to the grid.

Note: when we define the pattern, it will use all pixels inside the selection, so turn off the background layer

You can just about see the marching ants below.

When you have the selection go Edit > Define Pattern and give it a name

If you select the Paint bucket, and use the drop-down to change from Foreground to pattern, you should see your new pattern.  Try it on a new layer.

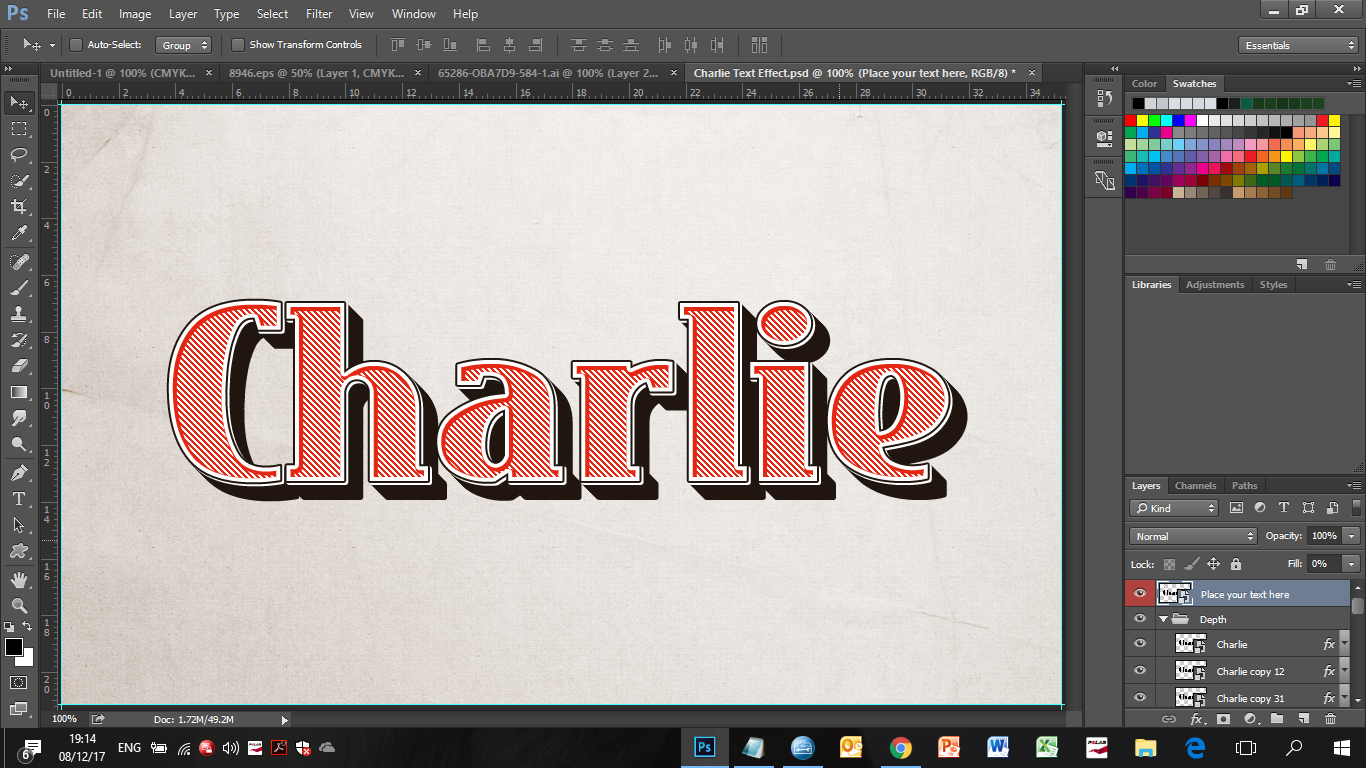
Now go to your Charlie document, and lay down the text layer in white (Note: You need CC2017 or later for this)

We'll use use the stackable Layer styles that came with CC2017 (I think)  These work just like Photoshop layers.  Styles at the top of the stack in Layer Styles, hide those beneath them, so the thinest (inside) stroke has to go at the top, and thicker (inside) stroke appear by protruding out from beneath them. Like this

So getting back to the Charlie graphic, I have pasted the original so we can see what needs to be done.

Double Click to open Layer Styles and add a 2 pixel (or whatever suites) stroke with it set to inside.

Note I have added a grey colour overlay as a temporary measure so we can see what we are doing.

Click on the + to create another Stroke, and select the lower one.

Make the colour White, and increase the size to 7 pixels (or whatever suites)

Now add an Inner Shadow using these settings.

The default blend mode is Multiply, and you might find Normal works better.

It is important that Size is set to zero to prevent the red shadow being blurred.

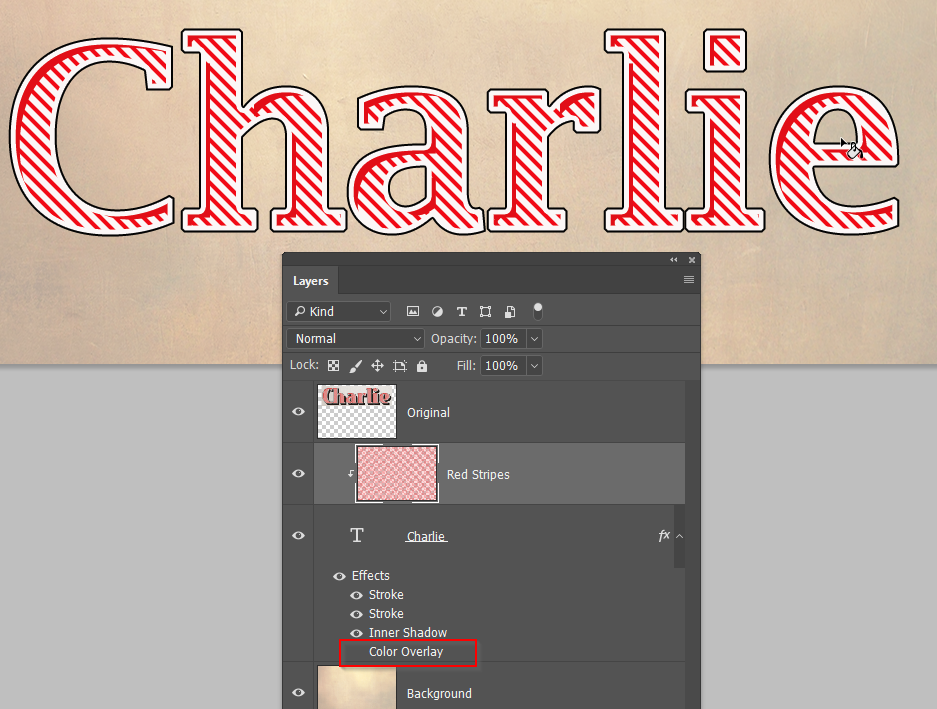
Make a new layer above the Charlie text layer, and chose the Paint bucket, set it to Pattern, and fill the layer with the red strips.

Then hover the intersection between the text and red stripe layers, hold down the Alt (Opt) key and click to clip the layers together.

You won't see anything initially, so turn off the Color overlay by clicking on its eye icon

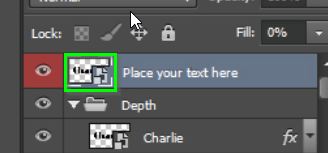
Copy the Type layer, and select the lower on in the layers panel

Right click over the effects, and chose Clear layer style

Then right click again, and choose RastyerizeType.

Select the Move tool, and use the cursor keys to move the layer two pixels right, and two pixels down

I have made the background black so you can see what we just did.

Now we need to use a trick called Free Transform Step & Repeat.  It can be a bit finicky, and does not play nicely with Smart Objects, so avoid using them, and set the Work space to Essentials if not already selected.  This gives us the best chance of making this work.

Copy the rasterized type layer, select the lower one and use Ctrl G to put the layer into a Group

Use Ctrl i to invert the layer and make it black.

Copy the black layer again, and start Free Transform.

Move the layer 1 pixel to the right, and one pixel down, and OK the free transform

Now for the Step & Repeat

Hold down Shift Alt Ctrl and hit the T key as many times as you need to create the drop shadow

Job done

Votes

Translate

Translate

Report

Report
Community guidelines
Be kind and respectful, give credit to the original source of content, and search for duplicates before posting. Learn more
community guidelines
Community Expert ,
Dec 10, 2017 Dec 10, 2017

Copy link to clipboard

Copied

LATEST

The drop shadow is not tied to the Charlie Smart Object as far as I can tell, so if you edit the Charlie SO, they drop shadow won't update to suite. 

Hi Trevor - nice tutorial.

It looks though, from the original screenshot, as if the shadows etc are tied to duplicate smart objects. That being the case , opening the top smart object (or actually any of the copies), updating the text then saving the smart object should work fine. This was for the benefit of the OP (I know you know this ).

Dave

Votes

Translate

Translate

Report

Report
Community guidelines
Be kind and respectful, give credit to the original source of content, and search for duplicates before posting. Learn more
community guidelines