 Adobe Community
- Home
- Photoshop ecosystem
- Discussions
- Re: Changing the colors on specific parts of a pic...
- Re: Changing the colors on specific parts of a pic...

Copy link to clipboard
Copied
I'd like to recolor different parts of a picture with different colors but keep the shading/texture on it. I've tried googling, but the answers don't seem to work too well for me. I tried making color blend mode layers stacked on top of a cut of the specific part I want colored, but then when making them all able to be viewed, they just overlap and ruin the colors. Do I specifically HAVE to do precision painting on the piece to get it to work? I tried color replacement tool but it only seems to make it pink.


 1 Correct answer

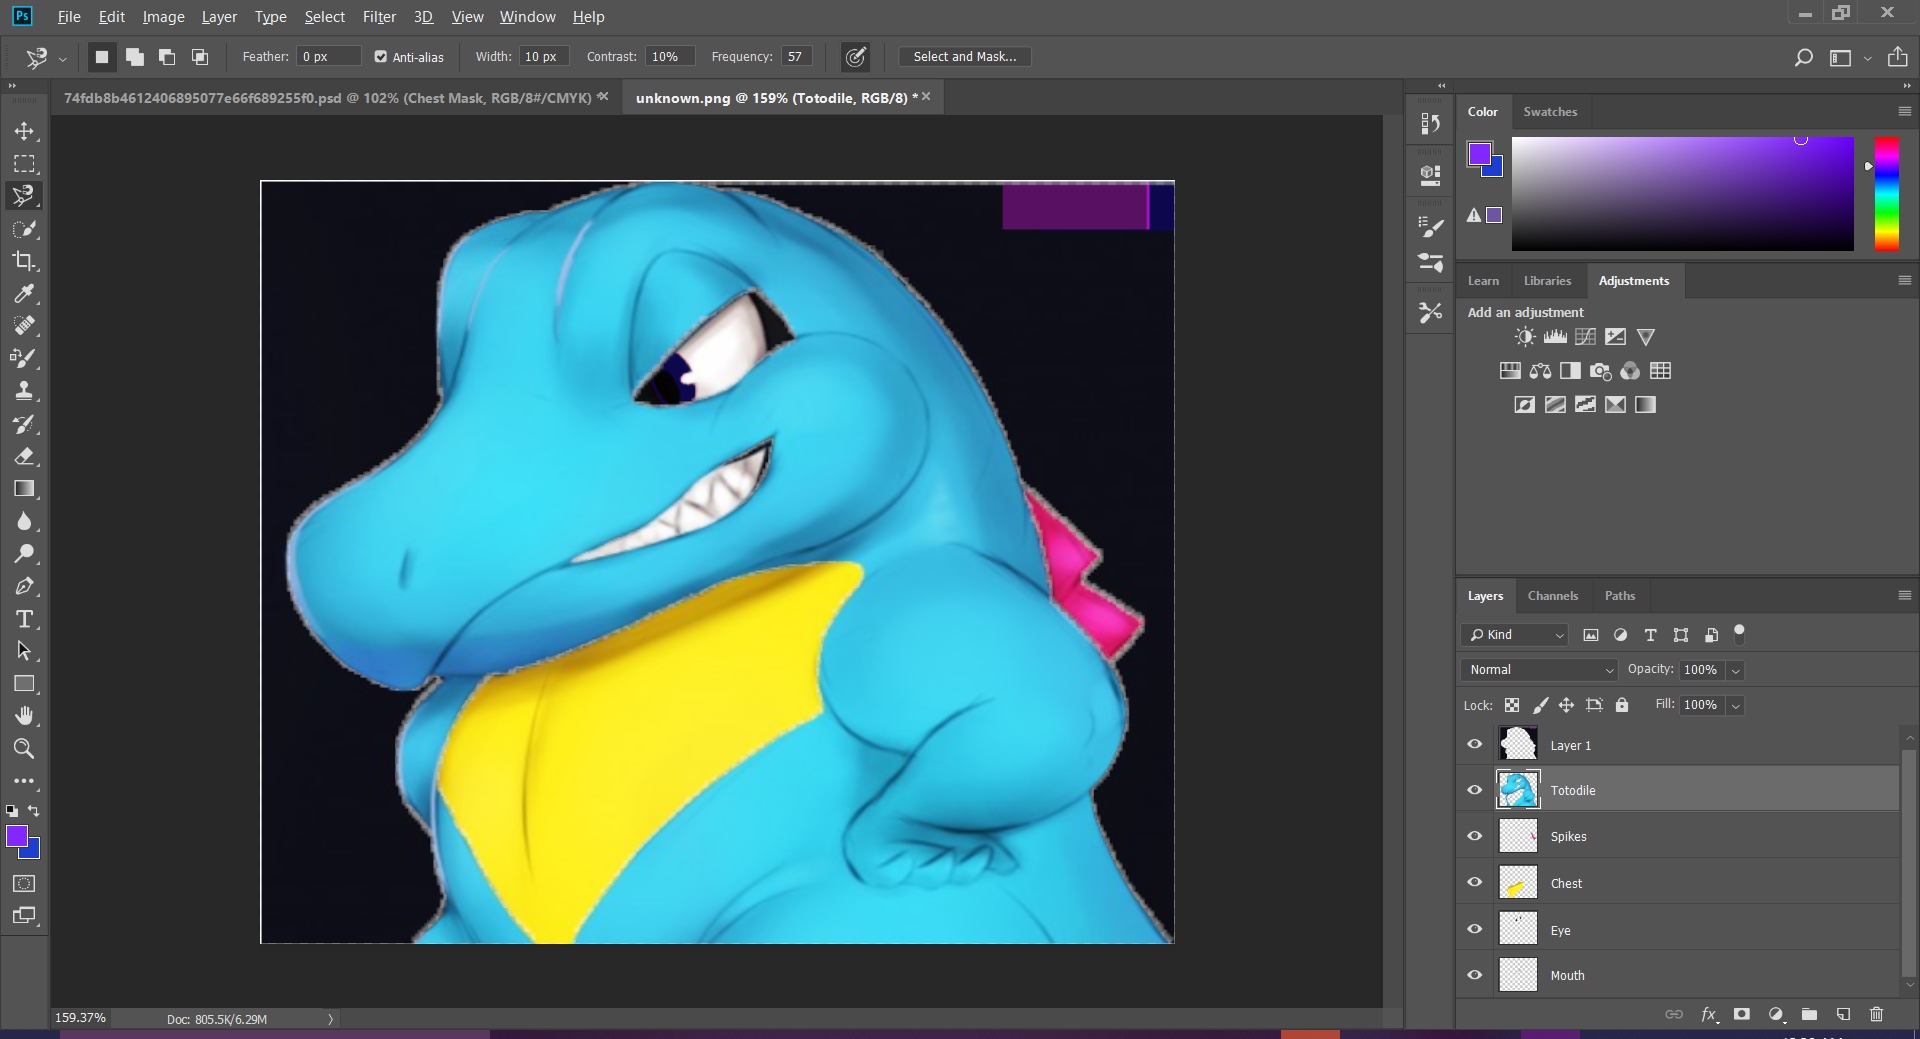
If you already have the sections on separate layers, put your color layer above each section layer and set blend mode to color.
Now Alt+Click in the layers panel on the border between each section layer and the color layer above it. That will clip the color layer so that it only affects the layer directly below it.
Dave
Explore related tutorials & articles
 12
Replies
12
12
Replies
12
Copy link to clipboard
Copied
Hi there, it's complicated to answer because your question is very generic my friend.
It'd be nice to see the image you want to work on and how you need to separate these colors.
As a generic rule, use the COLOR blanding more in order to affect just the colors and not the light or the "shading".
cheers,
Martin
Copy link to clipboard
Copied
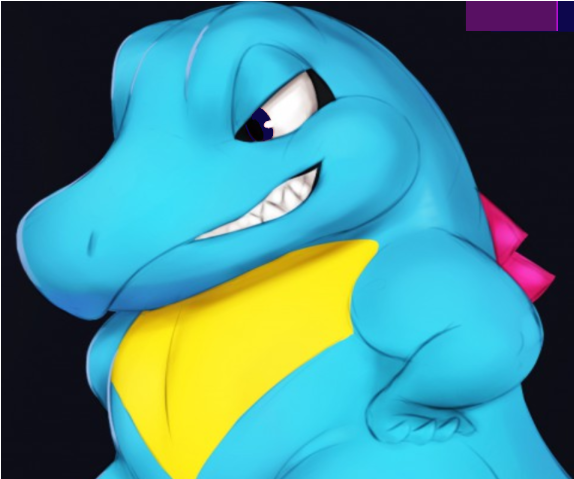
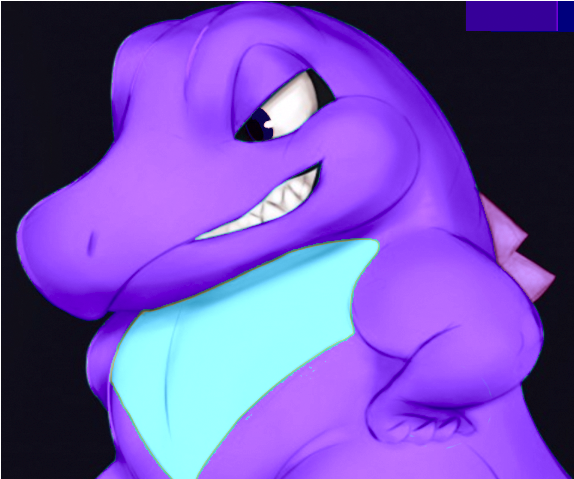
I want to recolor this as a reference image for another picture I'm hoping to commission of an artist. For instance I'd like to recolor the blue body to purple, the purple eye to a deep sapphire blue, the yellow chest to an icy blue, and the pink spikes to a lighter shade of purple. However I want to keep the shading instead of just using the paint bucket tool.
Like I said before, what I tried doing was cutting the separate pieces and putting them on layers, then making new layers on top of the cut piece layers for the recoloring, but it doesn't work like that as it also colors everything below it on the chain.
Copy link to clipboard
Copied
If you already have the sections on separate layers, put your color layer above each section layer and set blend mode to color.
Now Alt+Click in the layers panel on the border between each section layer and the color layer above it. That will clip the color layer so that it only affects the layer directly below it.
Dave
Copy link to clipboard
Copied
You may also want to use Hue/Sat layers set to colorize but clipped in the same way as I described above.

Dave
Copy link to clipboard
Copied
Holy crap that's cool.  Thanks a lot! I'll give this a try.
Copy link to clipboard
Copied
Using what you said, I was able to do it successfully. One thing I messed up on, however, was doing Layer From Cut. It would leave transparency on the main image once I put everything back together. Layer From Copy keeps the original image and just places it back onto the original image, taking away any transparency and leaving it looking pretty dang good.
Thanks a lot for all the help, everyone!
Copy link to clipboard
Copied
Hi
The method I gave you was based on the sections already being on separate layers.
For the future. If you are starting with a single coloured layer then a better practice is to mask rather than cut and copy. That way you would have your original coloured layer at the bottom and a collection of hue & Sat adjustment layers, above. Each of those new layers with a mask so that the adjustment layer only affects the section of the original layer that it should.
Dave
Copy link to clipboard
Copied
I saw an option for Select & Mask in the right click menu, but didn't see an option to do any adjustments to it like I can if I just select them. Are you saying select the area I want to do and then do the adjustments to it? Does it work that way? I thought it affected the entire layer.

Copy link to clipboard
Copied
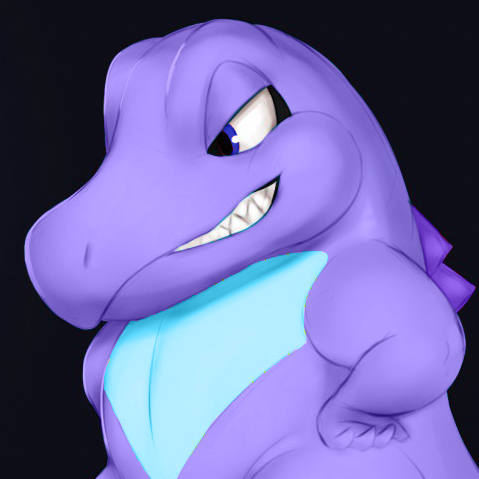
I was disappointed when we heard that the Development Team had abandoned the Extract Shading tool we saw at MAX in 2015
The second example of the room, would have been easy to do manually, but with more complex shapes like your dinosaur, Extract Shading might have proved extremely useful.
In actual fact, the dinosaur has almost no texture, so we can grab the shading from a channel, as shown above, but if the dinosaur was scaly, it might have proved more dificult.
Copy link to clipboard
Copied
Hi
Hi normally you would use a mask to show /hide areas of the image layer. The pixels in the image layer show where the mask is white and are hidden where the mask is black. However in this case you can use masks to control where an adjustment layer will affect the image.
To do that :
Make a selection of an area (using for example the quick select tool)
Add the Hue & Sat adjustment layer - it will automatically have a mask added with your selection
Repeat for the other areas
If required you can paint directly on the masks with black/white to alter or refine them.
Now it is just a case of making the adjustments in the Hue and saturation layers

Dave

Copy link to clipboard
Copied
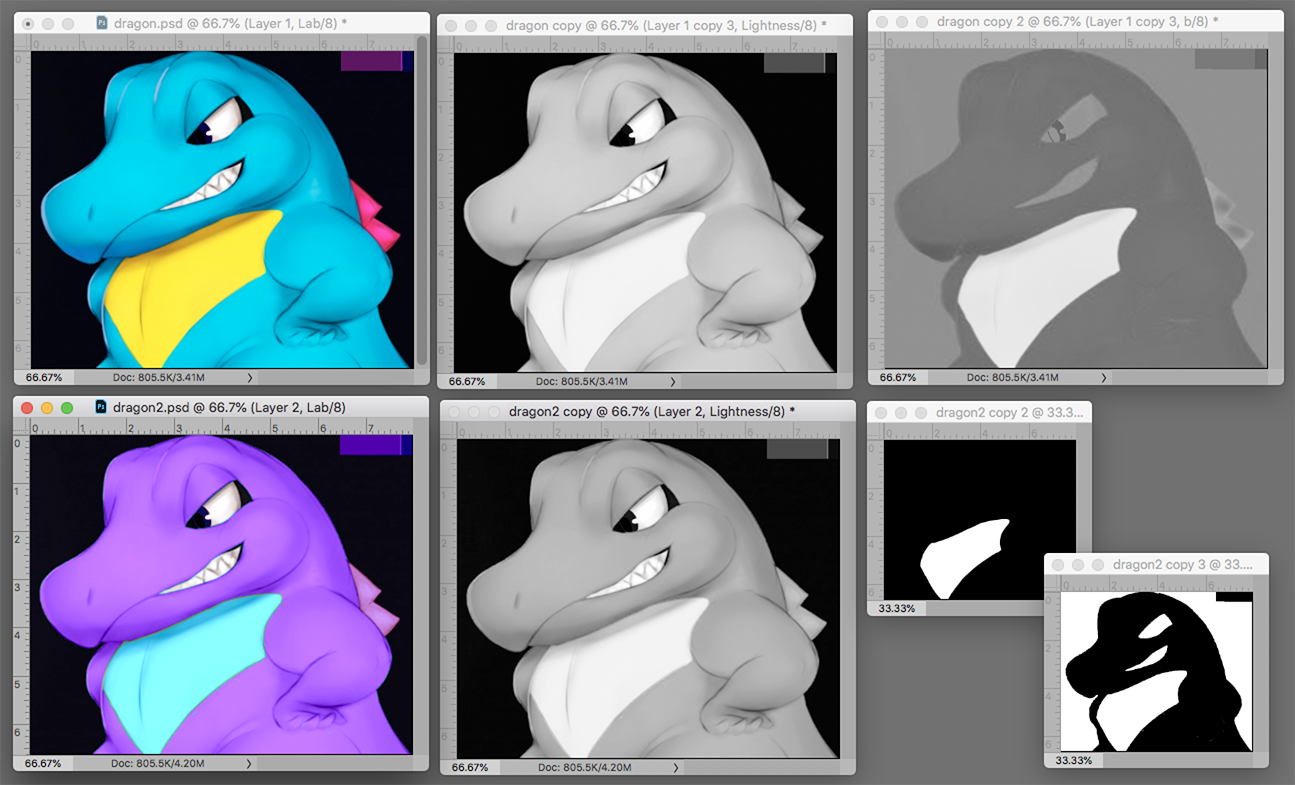
One of the limitations of RGB Mode is that any. change in color also changes the degree and color of the modeling and texture in an image. Switching to Lab Color Mode allows far more control of the shading and local contrast since it s in a separate channel from color. In addition, in this illustration, one of the Lab Channels a offers mask potential with almost no brushwork at all.
Top Row: Original Image, the L channel of Lab Coior, the b channel of Lab Color which governs blue and yellow
Bottom Row: Final Image, the modified L channel, the masks made from the b channel using Curves
(Not shown is the Spike mask made easy from the. a channel which governs magenta and green.)
With masks applied to duplicates of the original layer layers and Edit > Fill set to Color.
Copy link to clipboard
Copied
Hi Norman,
It's a shame people shy away from any mention of LAB mode on this forum. It's really the best method for color changes and also getting the very best out of saturation, you can even emulate HDR. There seems to be a mental block about using it which is a shame. On the other hand for people like me who do use it, it gives a competitive advantage as others can't make out how you have managed to squeeze such spectacular color from dull, lack lustre images.
Terri

 AdChoices