 Adobe Community
- Home
- Photoshop ecosystem
- Discussions
- cropping just one layer in CS6?
- cropping just one layer in CS6?

Copy link to clipboard
Copied
I have multiple layers. I lock the other layers and turn them off (the "eye" is turned off).
I attempt to crop the ONE layer that's selected. All layers are cropped.
What am I doing wrong? I searched tutorials and didn't find this issue,
I did go through the tutorial with the new crop functions.


 1 Correct answer

Hi Anita,
Here is an illustrated version of what R_Kelly is recommending:
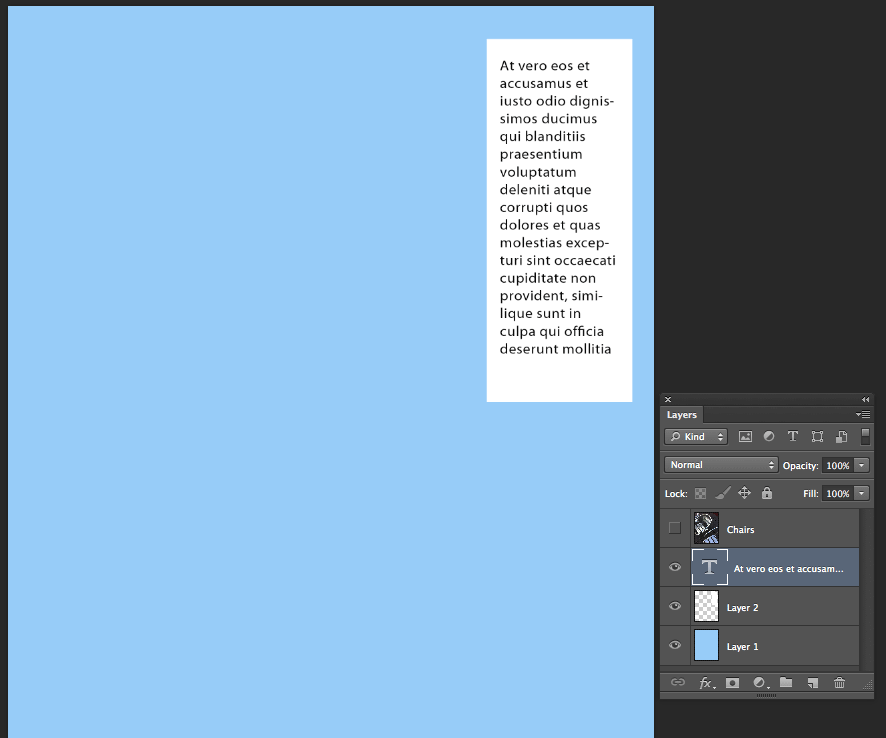
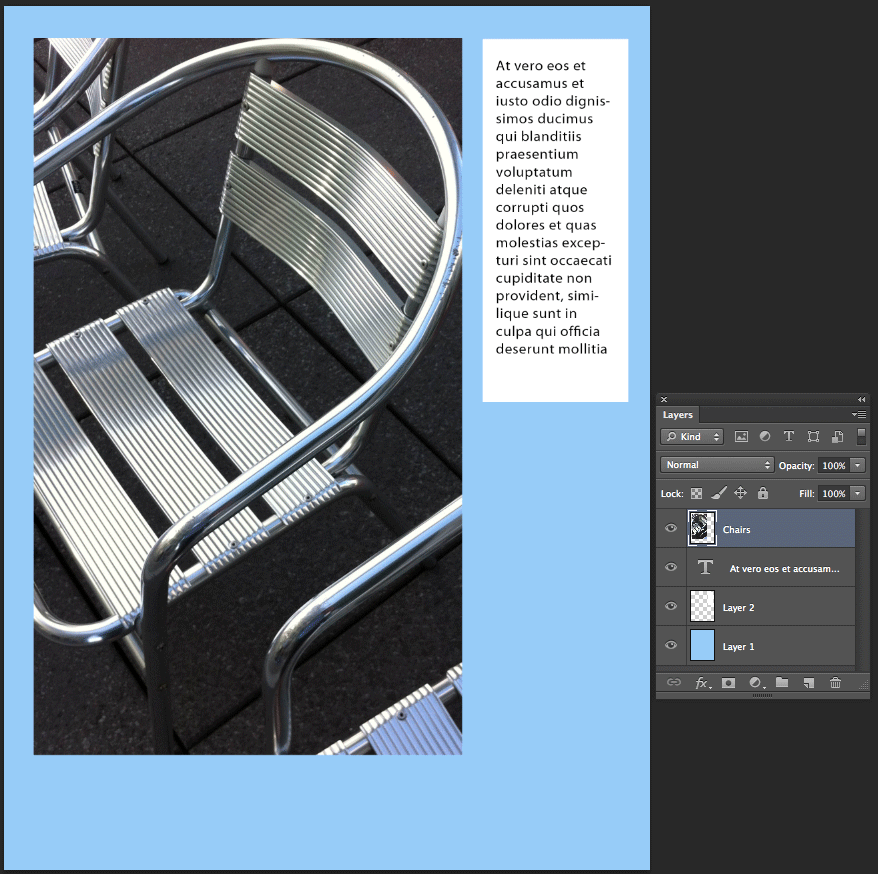
In the example below I have a file with multiple layers. The top layer (hidden in this illustration) is too large and will cover up the other layers. It needs to be "cropped". The recommended way to crop that layer would be to make a layer mask. Click here for a some great tutorials about layers and layer masks. A quick and easy way to crop it would be to do the following steps.
- Using one of the selection tools, create a se
Explore related tutorials & articles
 13
Replies
13
13
Replies
13

Copy link to clipboard
Copied
Hi Anita,
The crop tool will crop the whole image. (all the layers)
You might use the Rectangular Marquee Tool and either use a layer mask or invert the selection and delete the pixels on that layer.
Copy link to clipboard
Copied
Hi Anita,
Here is an illustrated version of what R_Kelly is recommending:
In the example below I have a file with multiple layers. The top layer (hidden in this illustration) is too large and will cover up the other layers. It needs to be "cropped". The recommended way to crop that layer would be to make a layer mask. Click here for a some great tutorials about layers and layer masks. A quick and easy way to crop it would be to do the following steps.

- Using one of the selection tools, create a selection that represents the shape you want for your layer. In this example, I used the rectangular marquee tool. Be sure you've targeted the correct layer when you make the selection.

- Once the selection is made, choose Select > Inverse. This will select all the pixels outside of the original selection.
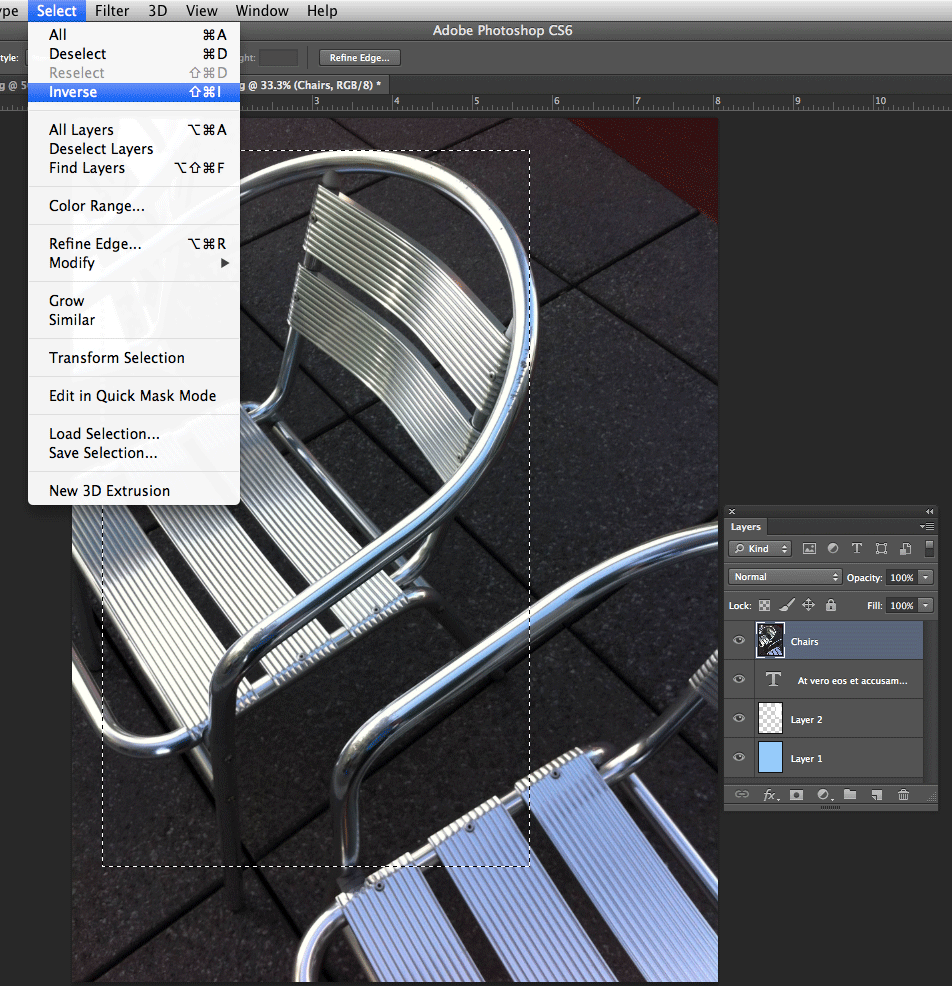
- To remove the unwanted pixels, choose Edit > Clear. The layers below your newly cropped layer should be visible now.
I hope this helps,
Luanne

Copy link to clipboard
Copied
Luanne,
In your example if the Chair layer extended beyond the canvas... there is no way to use Select+Inverse to delete the data beyond the canvas?
At one point, I think, you could do that in Photoshop. But no longer.
Copy link to clipboard
Copied
You are correct Charles. If you invert the selection and delete, it does not delete anything that extends beyond the canvas.

Copy link to clipboard
Copied
Luanne,
Thanks! I completely forgot about inverting background, and thank you for the detailed solution.
Why is masking recommended, doesn't that add to overall file size size the image is still there just the opacity changed? I was trying to keep file size down, am I wrong to think this way.
Anita
Copy link to clipboard
Copied
Why is masking recommended, doesn't that add to overall file size size the image
Yes, it can. But using a mask allows you to edit or adjust the "crop". So it is a trade off.
And keep in mind, when your project is finished and is flattened, there will be no difference in file size between a file that had a mask and one that deleteted pixels.
For me, I ALWAYS want to have the ability to adjust or correct bad decisions. So I always use a mask. Hard drive space is cheap.
Copy link to clipboard
Copied
Hi Anita,
I recommend using layer masks so that you have editing flexibility. Once you've deleted any pixels you won't be able to make changes to your crop later. You can move masks around and change their size and shape. Yes, they add to the file size but unless you make the perfect crop the first time you won't regret using a layer mask. I never have.
Luanne

Copy link to clipboard
Copied
The clear button is not highlighted and I can't use the tool.

Copy link to clipboard
Copied
Hi
I have had this challenge a few times too.
However I found a way to do it, assuming you have all other layers within the size of your canvas.
If you, like me, then import/paste a new layer with some thrash you dont need, but its way bigger than your canvas.
You can either move your big layer around and bit by bit delete the unwanted pixels, but you dont want to do this.
Instead do this:
1) Make sure what you need from the larger-than-canvas-layer is inside your canvas
2) Select all (your whole canvas)
3) Use the crop tool (only it's a "zero-crop" in respect of your canvas size)
4) larger-than-canvas-layer is now same size as your canvas and unwanted thrash is gone.
Skeeto
Copy link to clipboard
Copied
I know this is years old, but I was just looking for an answer to this and found this thread... what I ended up doing was just shift-dragging my enormous layer onto another document that is the same size.... then I cropped it there with the regular crop tool then shift-dragged it back to my original document. Let's you crop a single layer to your document size without having to crop anything else.

Copy link to clipboard
Copied
1. Make selection (Cmd+A if entire image)
2. Cmd+J
3. Turn off visibility of original layer and move above new layer
4. Select both layers and Cmd+E
This will create your crop and merge the name of your original layer. It sounds complicated but it's not, and fast when you've done it a few times.

Copy link to clipboard
Copied
The answer was just whatI was looking for.
Thanks

Copy link to clipboard
Copied
Hi, I just bought the program, so I'm literally brand new, but I can't seem to get your result. When I invert the selection, no matter what layer I've highlighted, it crops out both layers.
Is this no longer the way to do it?

 AdChoices