 Adobe Community
- Home
- Photoshop ecosystem
- Discussions
- Re: Fix Extreme Red Color Cast In Old Slide Can
- Re: Fix Extreme Red Color Cast In Old Slide Can
Fix Extreme Red Color Cast In Old Slide Can
Copy link to clipboard
Copied
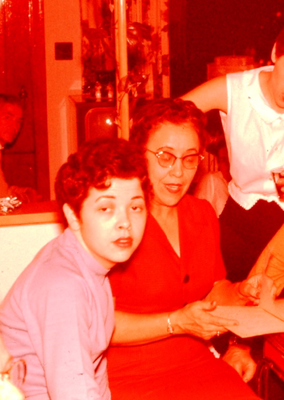
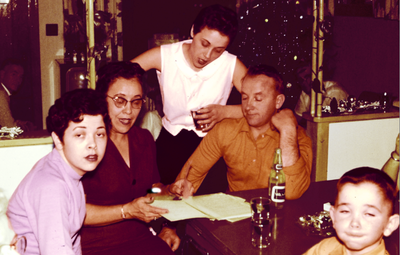
I have some old slides from the 50's that I have scanned and am now trying to fix. I am not a super experienced user, but have been successfully fixing up less extreme cases. In all the techniques I have tried I just cannot even get the photo close to something reasonable.
My question for anyone with experience is the following - is this a lost cause - or should I keep trying. Plan B is just to convert it to B&W.
Explore related tutorials & articles
Copy link to clipboard
Copied
Are the slides actually that »damaged« or do they look at least somewhat better in reality?
Copy link to clipboard
Copied
Regrettably, that is what some of them look like.
Copy link to clipboard
Copied
How much time are you willing to dedicate to each one?
Because I see no easy approach for this …
Copy link to clipboard
Copied
Kind of what I thought. I don't think the picture is worth the heroics I suspect will be required. Appreciate your opinion and insights on this.
Copy link to clipboard
Copied
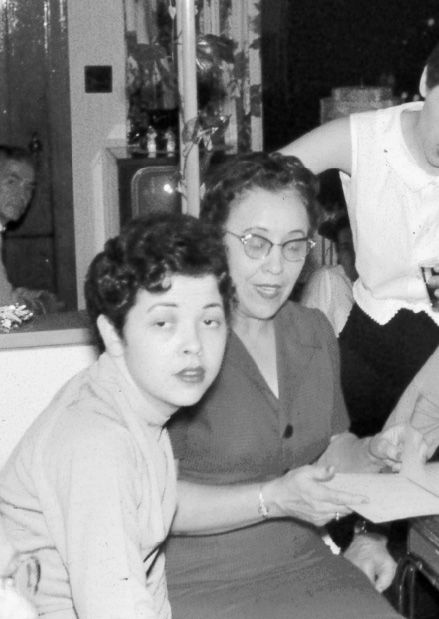
It will make a perfectly fine B&W image.
Copy link to clipboard
Copied
Agreed:) So much easier as well.
Copy link to clipboard
Copied
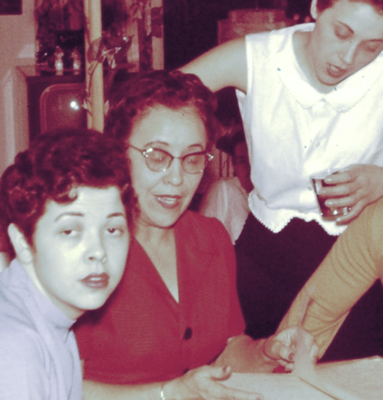
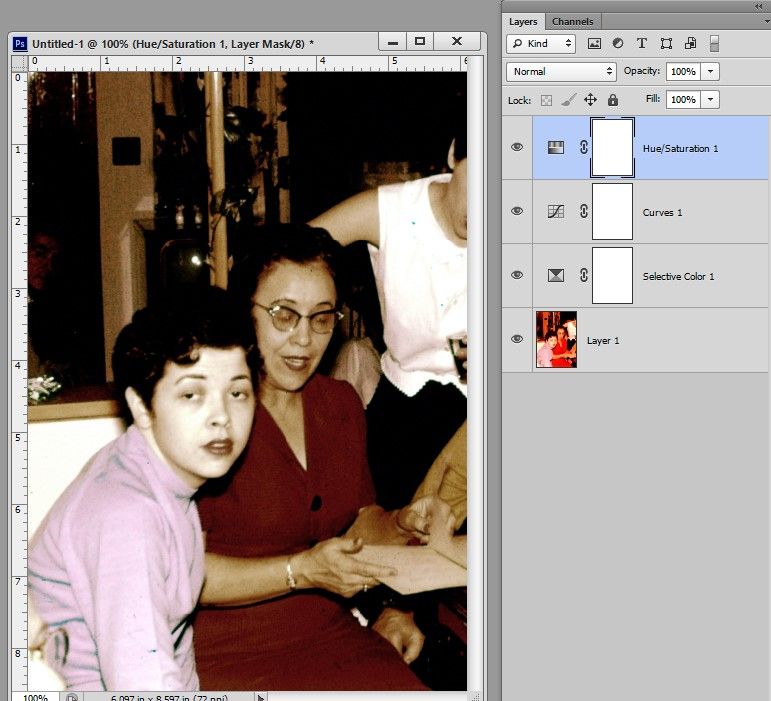
This is the best I could do without spending too much time on it. I started with a Selective color adjustment layer for the red color.
Copy link to clipboard
Copied
Thanks for the tip. I had not tried the selective colour layer. That red is really tough to balance out of the photo in one pass.
Copy link to clipboard
Copied
I have many old slides like that. It's not worth trying to correct them. Go with B&W.
Copy link to clipboard
Copied
For anyone still following this. The final output,, after spending far too much time on, it looks like this. I ended up splitting the people and background into 2 different layers and adjusting independently. Colour of the people still seems a bit off but overall an improvement..
Copy link to clipboard
Copied
The following is a Tech Sheet, one of many that I wrote and distributed to my students. I have found that its value continues today. I am sure many of our experts here will disagree with its foundation — working in CMYK — and will list its obvious shortcomings, but I have found that when working with critical flesh tones, anything that works deserves consideration.
One last comment: this technque would not apply to the image you posted (although you are welcome to give it a try) because your starting image and your latest version of it, have had their curve shapes distorted considerably.
***
Skin
Color of skin varies considerably depending upon ethnicity, type and level of illumination, nearby reflective surfaces, and even time of day. The Eastman Kodak Q-60 Color Input Target includes a dozen skin tone reference samples and those are far from the variety we see in one day. As a result, there is no single combination of RGB or CMYK values in Photoshop that produces the only “correct” flesh tone.
We can, however, come up with some guidelines that may be applied when using Curves to correct what we recognize to be unnatural skin color in a digital image. Moreover, since whatever shifted the skin tone away from normal also affected the colors in the rest of the photograph, correcting skin tones with a curve adjustment automatically contributes to correcting other colors throughout the entire image.
I have found flesh tones are more easily and precisely adjusted in CMYK mode. In that context, satisfactory Caucasian skin tone is rendered when:
the yellow value of the skin is similar to the magenta – certainly within ten points
the cyan is one-third to one-fifth the value of the magenta.
More often than not, the yellow is a bit stronger than the magenta, but it is not a hard and fast rule.
For example, c10 m40 y50 k0 is a common combination for light Caucasian skin. Fashion and cosmetic advertising typically reduces those numbers by about 25% -- but the proportion is similar. It is the relationship of the three colors to each other, rather than these exact values, that is the guide here. It provides a general direction for change when the color of a face tends toward lobster, cadaver or ghoul.
Making a skin color change using Curves
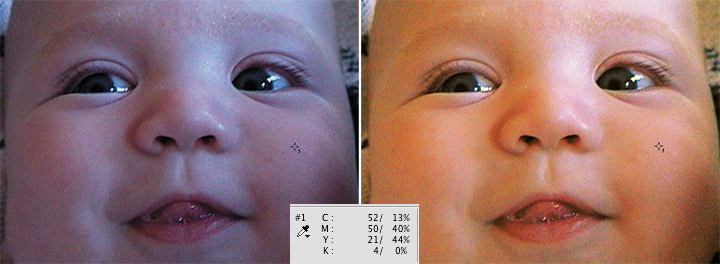
1. As mentioned above, for me, flesh tones are more easily and precisely adjusted in CMYK mode. Choose Image > Mode > CMYK Color. While using the Color Sampler tool with the Sample Size in the Options bar set to 3 x 3, position the cursor on a non-highlight part of the face and click. Note that the CMYK values that comprise that skin sample will appear in a separate panel labeled #1 within the Info panel.
2. Choose Image > Adjustments > Curves. Hold down the Cmd+Shift keys and click on the sampler mark in the image. It will seem that nothing has happened but if you look at the Info panel you will see it has added a segment to #1 showing the CMYK values again. Consider them Before and After. As you change the curve, the Info panel will show the change... the After. In addition, you will discover this command also placed a dot on the separate Cyan, Magenta, Yellow and Black curves for you. (Input and Output numbers will appear, as well. They may be slightly different from the numbers in the Info panel for that value, and the Info panel that will be our guide.)
3. Choose a channel from the drop-down menu in the Curves’ Channel field and tap the + key on the keyboard until the marker on the curve turns black. Use the up or down keyboard arrow to move the curve until, in the Info panel, the adjusted value – the After -- for that channel approaches the ratio mentioned above. As you alter the curve, the color of the image will change to reflect it.
4. Proceed from channel to channel and back again as you fine-tune the color, keeping in mind the c10, m40, y50 ratio. Once that relationship has been addressed, additional skin color correction becomes an aesthetic decision. To clear the Color Sampler tool mark, choose that tool and click on Clear in the Options bar.
One final hint: If you are going to err, err to the warm side. Then click OK and return to RGB mode if desired.
Note: With the Caucasian color ratio as the starting reference, Black skin tone composition is typically a stronger in both cyan and magenta. Often the cyan increases to about half of the magenta value. In addition, any touch of black can be considered part of the cyan calculation. The result is an enormous array of tans and rich browns. Asian skin tones, and there are many, are a bit stronger in yellow and cyan than the Caucasian example cited.
