 Adobe Community
- Home
- Photoshop ecosystem
- Discussions
- Help!! Photos are grainy AFTER I save them to .JPG...
- Help!! Photos are grainy AFTER I save them to .JPG...
Help!! Photos are grainy AFTER I save them to .JPG from RAW

Copy link to clipboard
Copied
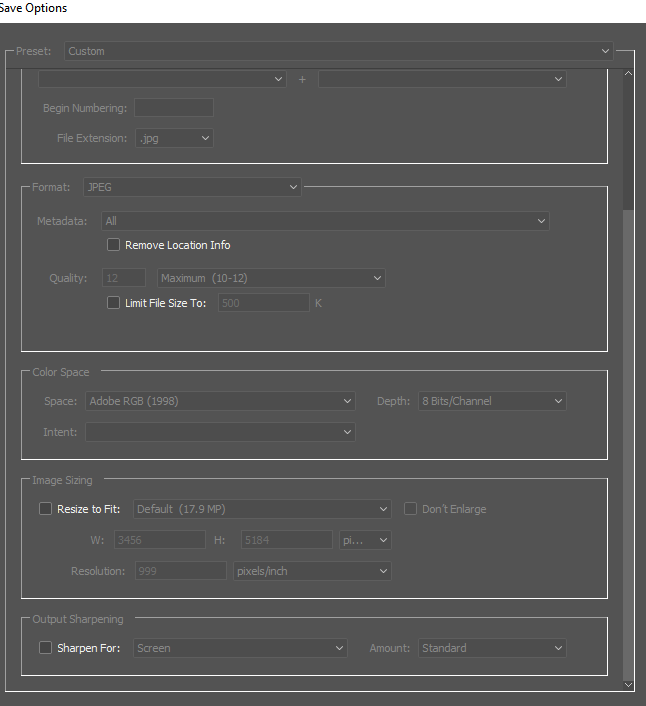
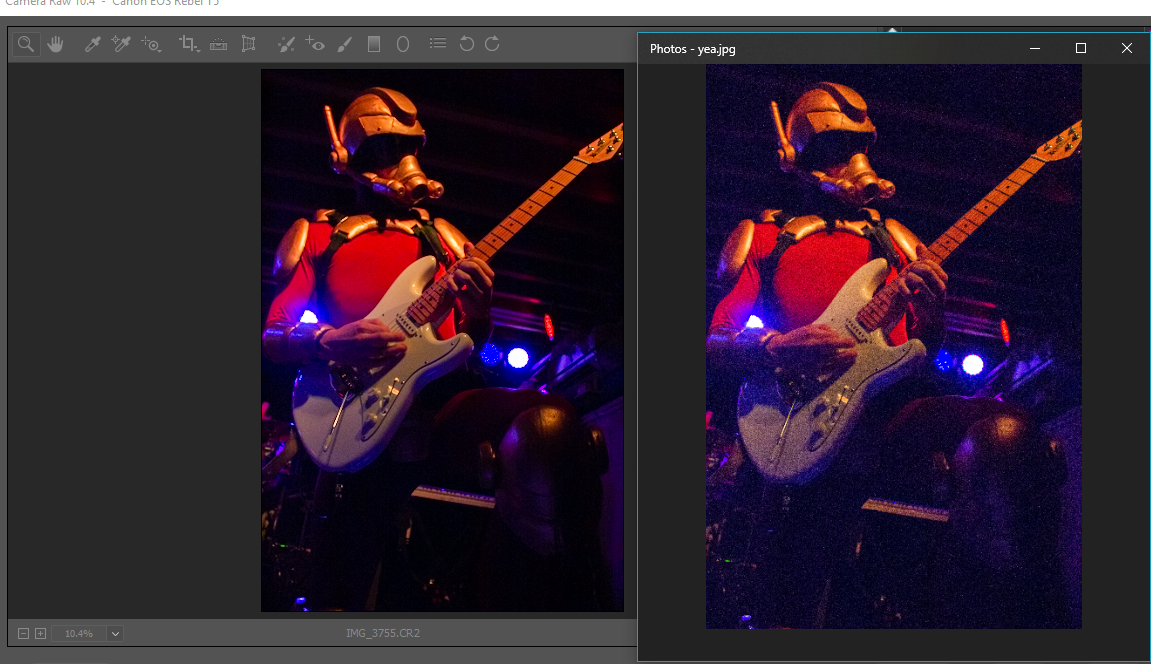
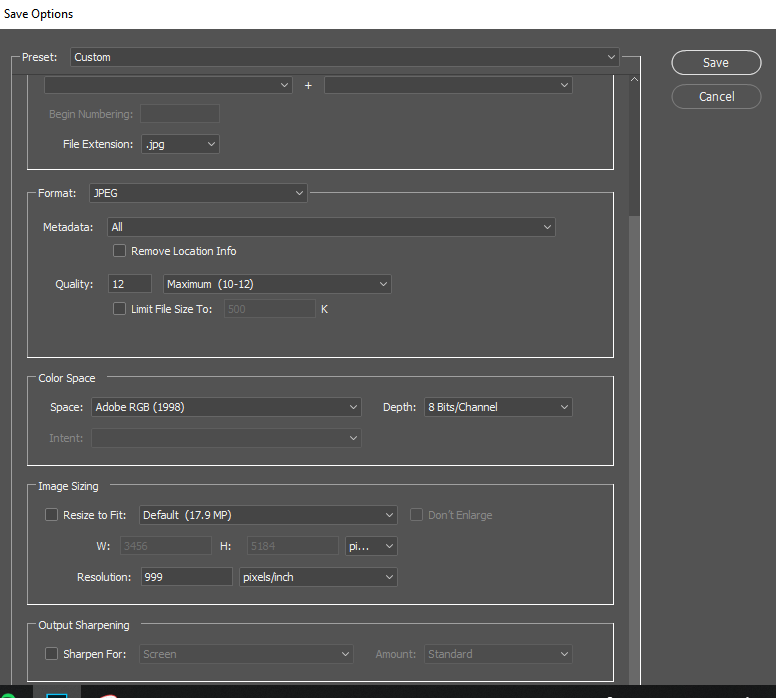
I didnt have this problem before when I was taking classes, but my teacher did help me adjust settings when needed. I'm doing a trial of photoshop CC 2018 and I'm having the most fusterating issue of the photos looking awesome when im editing them and horrible after I save to .JPG I've included photos of my save settings and the results I'm getting while editing. Thank you for the help!!!


Explore related tutorials & articles
 11
Replies
11
11
Replies
11

Copy link to clipboard
Copied
The save options screen capture doesn’t show any settings. Are you resizing the image when you export it? The grain looks like it could be noise. Do you see this in the raw file if you zoom way in?
Copy link to clipboard
Copied
It is probably noise since it was a dark concert, and I do see noise when I zoom in wich isn't really an issue for me. The image sizing is on default (17.9 MP) and thats never been a problem before (at least I don't think) would the resolution, metadata or color space affect the way this image is turning out at all? I will try to add a better image showing the save option settings snipping tool seems to make the settings darker when I try to screenshot for some reason.
Copy link to clipboard
Copied

Copy link to clipboard
Copied
Noise and sharpening can only be accurately evaluated at 100% view - where one image pixel is represented by one screen pixel.
Any other view will be inaccurate and misleading because the image has been scaled.
Different applications use different algorithms when scaling images, and the Photos app seems to apply a lot of sharpening.
If you compare the two at 100% view, they should display identically.
Some general advice about sharpening and noise reduction:
- Always work at 100% view
- If the image has noise, use the Masking slider (Detail tab in Camera Raw) to protect flat areas from sharpening.
Flat areas is where noise will be most visible, and you don't want to sharpen it. - Hold down the Alt key while dragging the slider to see the effect. White areas will be sharpened, black areas will be protected.
Noisy images may require a high setting, like 70 - 90.

Copy link to clipboard
Copied
Thank you. Im very new to Photoshop and this helped me tonight!
Thanks again

Copy link to clipboard
Copied
Hey everyone! I was having this same issue. My photos looked wonderful in Lightroom and Photoshop but once saved to my desktop, Windows Viewer would display them are extremely grainy. Turns out (because I married I genius... An IT guy) we both did some research and it's because the file was too big and the computer couldn't compress it correctly, thus making it very grainy. Once I saved my photos as a smaller file, they looked perfect. It had nothing to do with my ISO settings, nothing to do with improper lighting, it was all about the file size. Bigger isn't always better. Hope this helps everyone!

Copy link to clipboard
Copied

Copy link to clipboard
Copied
Hey Ashley, Did you re-size your image before editing or after? and did you do this within photoshop? I am having the exact issue... trying to find the best way to have it display like it does in my photoshop window all clear!

Copy link to clipboard
Copied
Thank you!!! I had this problem for the first time, yesterday. I was panicking!

Copy link to clipboard
Copied
OMG!! You are a PHOTO VIEWER GOOODDD!!! I completely forgot about the file size and that fixed my issue for my desktop! My laptop photo viewer shows a large file size photo fine which was confusing me. Could it be the graphics or screen resolution? My laptop is 4k and my desktop is 1080p. This is just out of curiosity. lol

Copy link to clipboard
Copied
Yes!!! Thanks for this heads up. My DNG files had a certain amount of grain, being high ISO, but the jpegs exported from Bridge were just off the hook with excessive grain. When I set a lower size, like 4000 pixels, the exported jpegs from Bridge looked much better and inline with what I was seeing in Camera Raw. I'm guessing Windows 10 does not like a 9000 pixel widge jpeg.

 AdChoices