 Adobe Community
Turn on suggestions
Auto-suggest helps you quickly narrow down your search results by suggesting possible matches as you type.
Exit
- Home
- Photoshop ecosystem
- Discussions
- Re: Help! The colorizing tool isn't working!
- Re: Help! The colorizing tool isn't working!
0
Help! The colorizing tool isn't working!
New Here
,
/t5/photoshop-ecosystem-discussions/help-the-colorizing-tool-isn-t-working/td-p/11985316
Apr 21, 2021
Apr 21, 2021
Copy link to clipboard
Copied
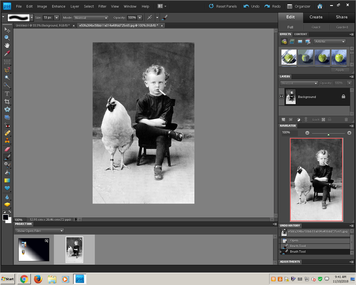
I'm following a tutorial provided by my com tech teacher, but I've run into an issue.
The tutorial states the following:
- Find an old photo to use. I googled: Old Black and white photos.
- Open it in Photoshop
- Create a Hue/Saturation Adjustment layer for the first color you will add
- Check the Colorize box to add color. Adjust the sliders until you find the right color for the part you are coloring. In this case, I am adding color to the face and arms, so I will choose a skin tone color.
- Select your paint bucket tool and check to make sure it is set to black. Click on the picture and the colour should disappear.
- Next select the brush tool and flip the colour to white. This will allow you to paint the color back in where you want it to appear.
- If you paint in color where you don’t want it, you can always flip the colour back to black and it lets you paint the color back out.
- For each new colour you want to add, add a new hue/saturation layer.
The problem is, when I get to the step where you use the paintbucket tool, nothing happens. I'm really not sure why, because as far as I can tell I'm following the instructions correctly. Weirdly enough, it did work the first time but then it stopped working when I created a second hue/saturation layer. I even tried resetting the whole document to retry, but it still refused to work. If anyone could help me figure out the problem, I'd really appreciate it.
TOPICS
Windows
Community guidelines
Be kind and respectful, give credit to the original source of content, and search for duplicates before posting.
Learn more
Explore related tutorials & articles
Community Expert
,
LATEST
/t5/photoshop-ecosystem-discussions/help-the-colorizing-tool-isn-t-working/m-p/11985871#M533456
Apr 21, 2021
Apr 21, 2021
Copy link to clipboard
Copied
Select the layer mask, not the adjustment layer then just use Edit/Fill to convert the mask to black.
Community guidelines
Be kind and respectful, give credit to the original source of content, and search for duplicates before posting.
Learn more
Resources
Quick links - Photoshop
Quick links - Photoshop Mobile
Troubleshoot & Learn new things
Copyright © 2024 Adobe. All rights reserved.


