 Adobe Community
- Home
- Photoshop ecosystem
- Discussions
- Re: How can I rotate an image and scale about orig...
- Re: How can I rotate an image and scale about orig...
How can I rotate an image and scale about origin point when viewing it magnified ?

Copy link to clipboard
Copied
Hi,
I have two images taken handheld of the same subject from the same viewpoint same focal length same aperture etc seconds apart and have one at 50% layer opacity.
I position this so that it matches the image underneath in part of the picture and drag the origin to that spot but it needs rotating to marry up.
when zoomed in to see I am marrying it up accurately and getting a perfect match the rotate handles are not accessible. One has to zoom out to see the handles sitting beyond the canvas but then accurate matching is no longer possible.
How can one rotate by hand when zoomed in ?
Also it needs a slight rescaling as I do so, so holding alt down and dragging the handle to scale about the seed point/origin is needed but again handles are only accessible when zoomed out and at that mag I am not able to be accurate. Also alt stops the rotate command from working !
This control is fundamental tooling yet seems decades out of date in its handling limits.
Otherwise the ability to select certain points on the second image and then select same points on the target image and say refit photo best fit would be a superb tool.
( options to allow for local distortion or uniform scaling maybe)
I have in fact loads of such pictures to rotate and scale to marry up.
is there maybe a plug in that provides better image rotation and scaling ? Anything that matches one photo to another ? Selecting source and destination points would be super.
I am CS6 .
DBenz


Explore related tutorials & articles
 9
Replies
9
9
Replies
9

Copy link to clipboard
Copied
Hi, 1st you can do it by using the rotate view tool in photoshop.
If its not work then apply this method.
- Open or create a Photoshop file. To do so, double-click on the blue app icon that contains the letters "Ps," then click on File in the menu bar at the top of the screen, and:
- Click on Open... to open an existing document; or
- Click on New... to create a new document.
2
Click on a layer. In the "Layers" menu in the lower-right corner of the screen, click on the layer that contains the object you want to rotate.- If you don't see the "Layers" menu, click on Windows in the menu bar at the top of the screen, then click on Layers. The "Layers" menu window will appear in the lower-right corner of the photoshop window.
3
Click on the Quick Select Tool. It's the paintbrush icon next to a dotted outline, near the top of the toolbar on the left side of the window.- If you don't see the Quick Select Tool, long-click on the Magic Wand Tool to open a menu that contains the Quick Select Tool.
4
Select an object. Use the Quick Select Tool to highlight the object you want to rotate.- If you want to rotate the entire layer, you need not select anything.
5
Click on Edit. It's in the menu bar at the top of the screen.
6
Click on Transform. It's in the middle of the drop-down menu.
7
Click on Rotate 180° to turn the object or layer upside down.
https://www.wikihow.com/Rotate-Objects-in-Photoshop#/Image:Rotate-Objects-in-Photoshop-Step-8.jpg
8
Click on Rotate 90° CW to turn the bottom of the object or layer upward and to the left.
https://www.wikihow.com/Rotate-Objects-in-Photoshop#/Image:Rotate-Objects-in-Photoshop-Step-9.jpg
9
Click on Rotate 90° CCW to turn the bottom of the object or layer upward and to the right.
https://www.wikihow.com/Rotate-Objects-in-Photoshop#/Image:Rotate-Objects-in-Photoshop-Step-10.jpg
10
Click on Rotate to rotate the object freely. A box with eight small squares will surround your selection.- Click and hold on one of the small squares and use the on-screen pointer to rotate the object.
- The degrees of rotation will appear in a small box above the pointer as you rotate the object.
https://www.wikihow.com/Rotate-Objects-in-Photoshop#/Image:Rotate-Objects-in-Photoshop-Step-11.jpg
11
Press ⏎ Return when you're satisfied with the rotation.


Copy link to clipboard
Copied
Hi, Check this video too! It will help you too to do it,
Photoshop Quick Tip: How to Rotate a Selection or an Image | Photoshop Tutorial - YouTube

Copy link to clipboard
Copied
To align the two images, you can select both layers in the Layers panel and choose Align from the Layer menu. That should save time from having to zoom in to align the images.

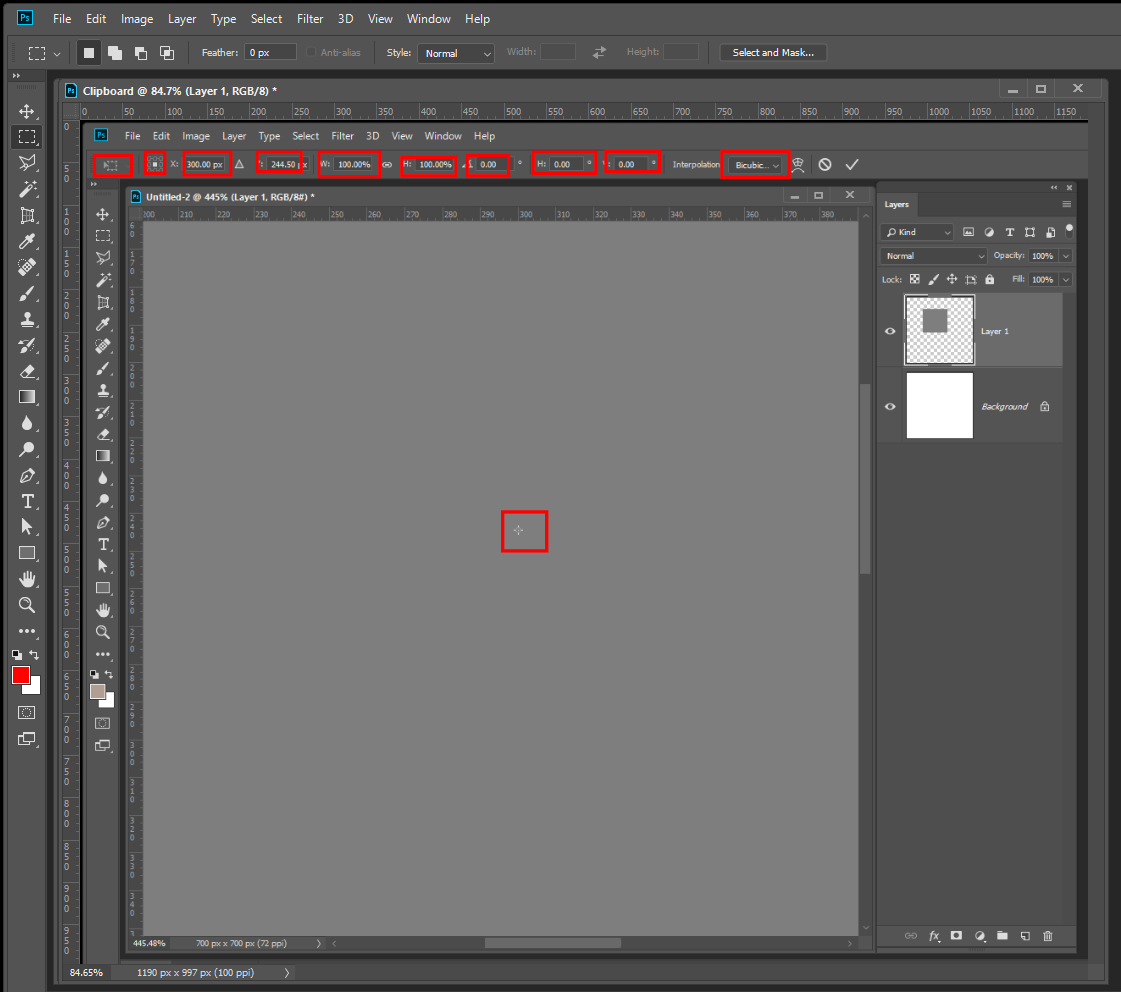
As far as rotation, I know this isn't exactly what you want, but when zoomed in, you can use the Options bar to adjust the angle.

If you click inside the cell for angle you can use the up and down arrows on your keyboard to rotate 1/10th a degree at a time. If you hold down Shift, the arrow keys will rotate 1 degree at a time. If you hold down Shift+Alt, the arrow keys will go in 10 degree increments.

Copy link to clipboard
Copied
You can use ant of the 9 anchor points the teh free transform optoin bar set the rotation angle and scale percentages there as well. In the bounding bot display you alsi have the option where toy can grag and position the rotation point.
Copy link to clipboard
Copied
Hi, someone has selected correct answer yet is that not for me to decide ?
This question has NOT been answered until I try the suggestions and see if they allow for the precise rotation and scaling at the same time about the 'anchor' point that I am after.
DBenz

Copy link to clipboard
Copied
Merlin3 wrote
Hi, someone has selected correct answer yet is that not for me to decide ?
This question has NOT been answered until I try the suggestions and see if they allow for the precise rotation and scaling at the same time about the 'anchor' point that I am after.
DBenz
Hi Merlin3. Mods and admins can select a post as the Correct answer, but none are so set as I type this, so I'm guessing that another moderator has unchecked the Correct answer. Barbara and JJ gave you good advice. The other poster spent a long time answering, but appears to have not read the actual question.
I don't know of any way to rotate when using Free Transform, and the outer handles are not visible, other than using the Options Bar as Barbara and JJ showed you. As well as entering values in that field, you can also 'drag' to the left of the angle value field. You can also hold down the Shift key while using the up and down cursor keys, to rotate by 0.1°. So one workflow might be to drag to make an initial 'coarse' adjustment, and use the cursor keys to fine tune.

I can't think of any reason why you couldn't make an Action, or several Actions triggered by shortcuts, that rotated by say 10°, 5° and 1°. The weakness with that idea is that you would not be able to adjust the centre rotate handle, but you could chose a workflow to match your current requirement.
Copy link to clipboard
Copied
Hi,
I have tried out all three posts, Hassan, that is just basic rotation or scaling and doesnt cover this need.
Margaret, tried that , I dont need to align the tops of the photos, and it locked the two layers into one anyway.
JJMack,
I have the one image as 50% translucent over the other, I move it until a rivet matches a rivet in the photo below, I now need to rotate carefully and also scale until other features match or are best fit.
I enter a rotation angle and the image jumps round, I find I can use arrow keys (Margaret) but its jumpy, and I also need to to be scaling at same time, but entering scaling values also makes the whole process jumpy, its not the same as the flowing unsteppy adjustment when zoomed out and holding alt down and using shift to uniform scale about the anchor point, but rotation is killed when using alt to scale using the anchor point.
It needs these controls to still function when zoomed in. Entering numbers is clunky and is going to take ages to hit upon the right combination yet adjusting handles does it MUCH QUICKER but then zoomed out I cant see if I am matching things up accurately.
It needs the natural movement of a mouse to rotate and scale at same time, not number entries, having to think do I need 103.05 then do I need 103.07 or would 103.09 be better along with 2.07 angle rather than 2.05, one number undoes a near match, keep fiddling with numbers, nightmare, mouse movement is quick and where this should be at.
I try for up down arrows to adjust scale value by 0.01% but either get 1% increases with just arrow keys or 5% if using shift, far too much. I need the rotate 0.01 increment value also for scale but can only do 1% or 5%, far too much. What option gives 0.01% ?
If I could adjust those values by a flowing 0.01% and toggle between scale and rotate that might do it. For rotation 1 degree is far too fierce as is 0.1 of a degree but the 0.01% that arrow keys give is workable, but not with that wild 1% in scaling.
For dragging it changes by 1% far too fierce.
Adobe have no mouse controlled rotate and scale when zoomed in, basic need missing !!!! They dont however use this program as end users do.
I have been rotating and scaling thousands of images over many years, and these controls are basic and crying out for control when zoomed in.
I need an intelligent plugin for CS6 to solve this basic need.
Merlin
Copy link to clipboard
Copied
It sound like you have all sorts of problems perspective, spacing and other alignment problems. That you are scaling, distorting and rotating to fudge it the best you can.
With a mouse wheel you can zoom in and out quickly. When zoomed way in you can use the arrow keys to tweak the alignment of the rivet move the layers position. Then zoom out and move the center control point to the rivet. Now rotation will be around that point and with the Alt and Shift key held press you can scale from this point and with just the alt key held you can scale horizontally and vertically from this point. If you did not know that this may be useful
Copy link to clipboard
Copied
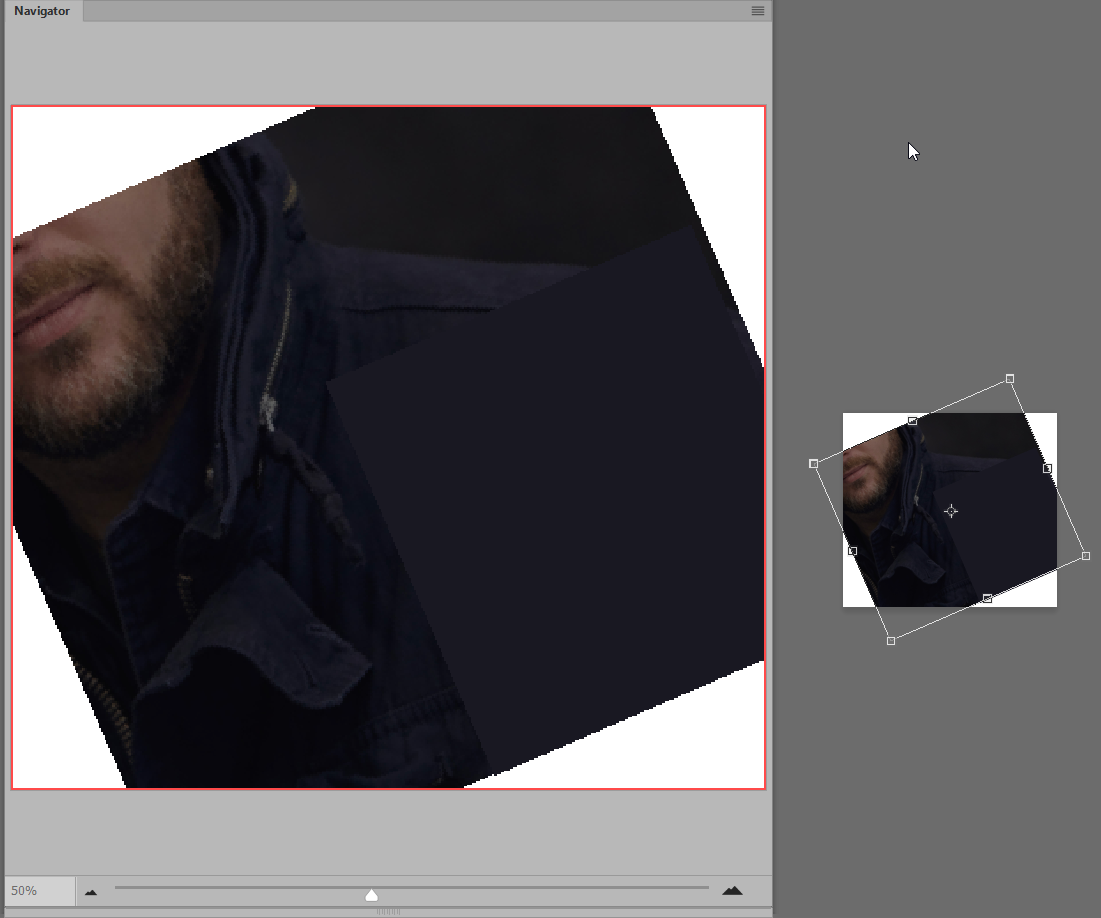
The Nafigator panel might work for you as a workaround. You could zoom out your image so that you can use the bounding box to rotate, and at the same time see the image larger in the Navigator.

 AdChoices