 Adobe Community
- Home
- Photoshop ecosystem
- Discussions
- Re: How to lighten up black parts of an image in P...
- Re: How to lighten up black parts of an image in P...

Copy link to clipboard
Copied
Having received on my first post a month ago very nice and reliable advice, I dare to ask the comunity again.
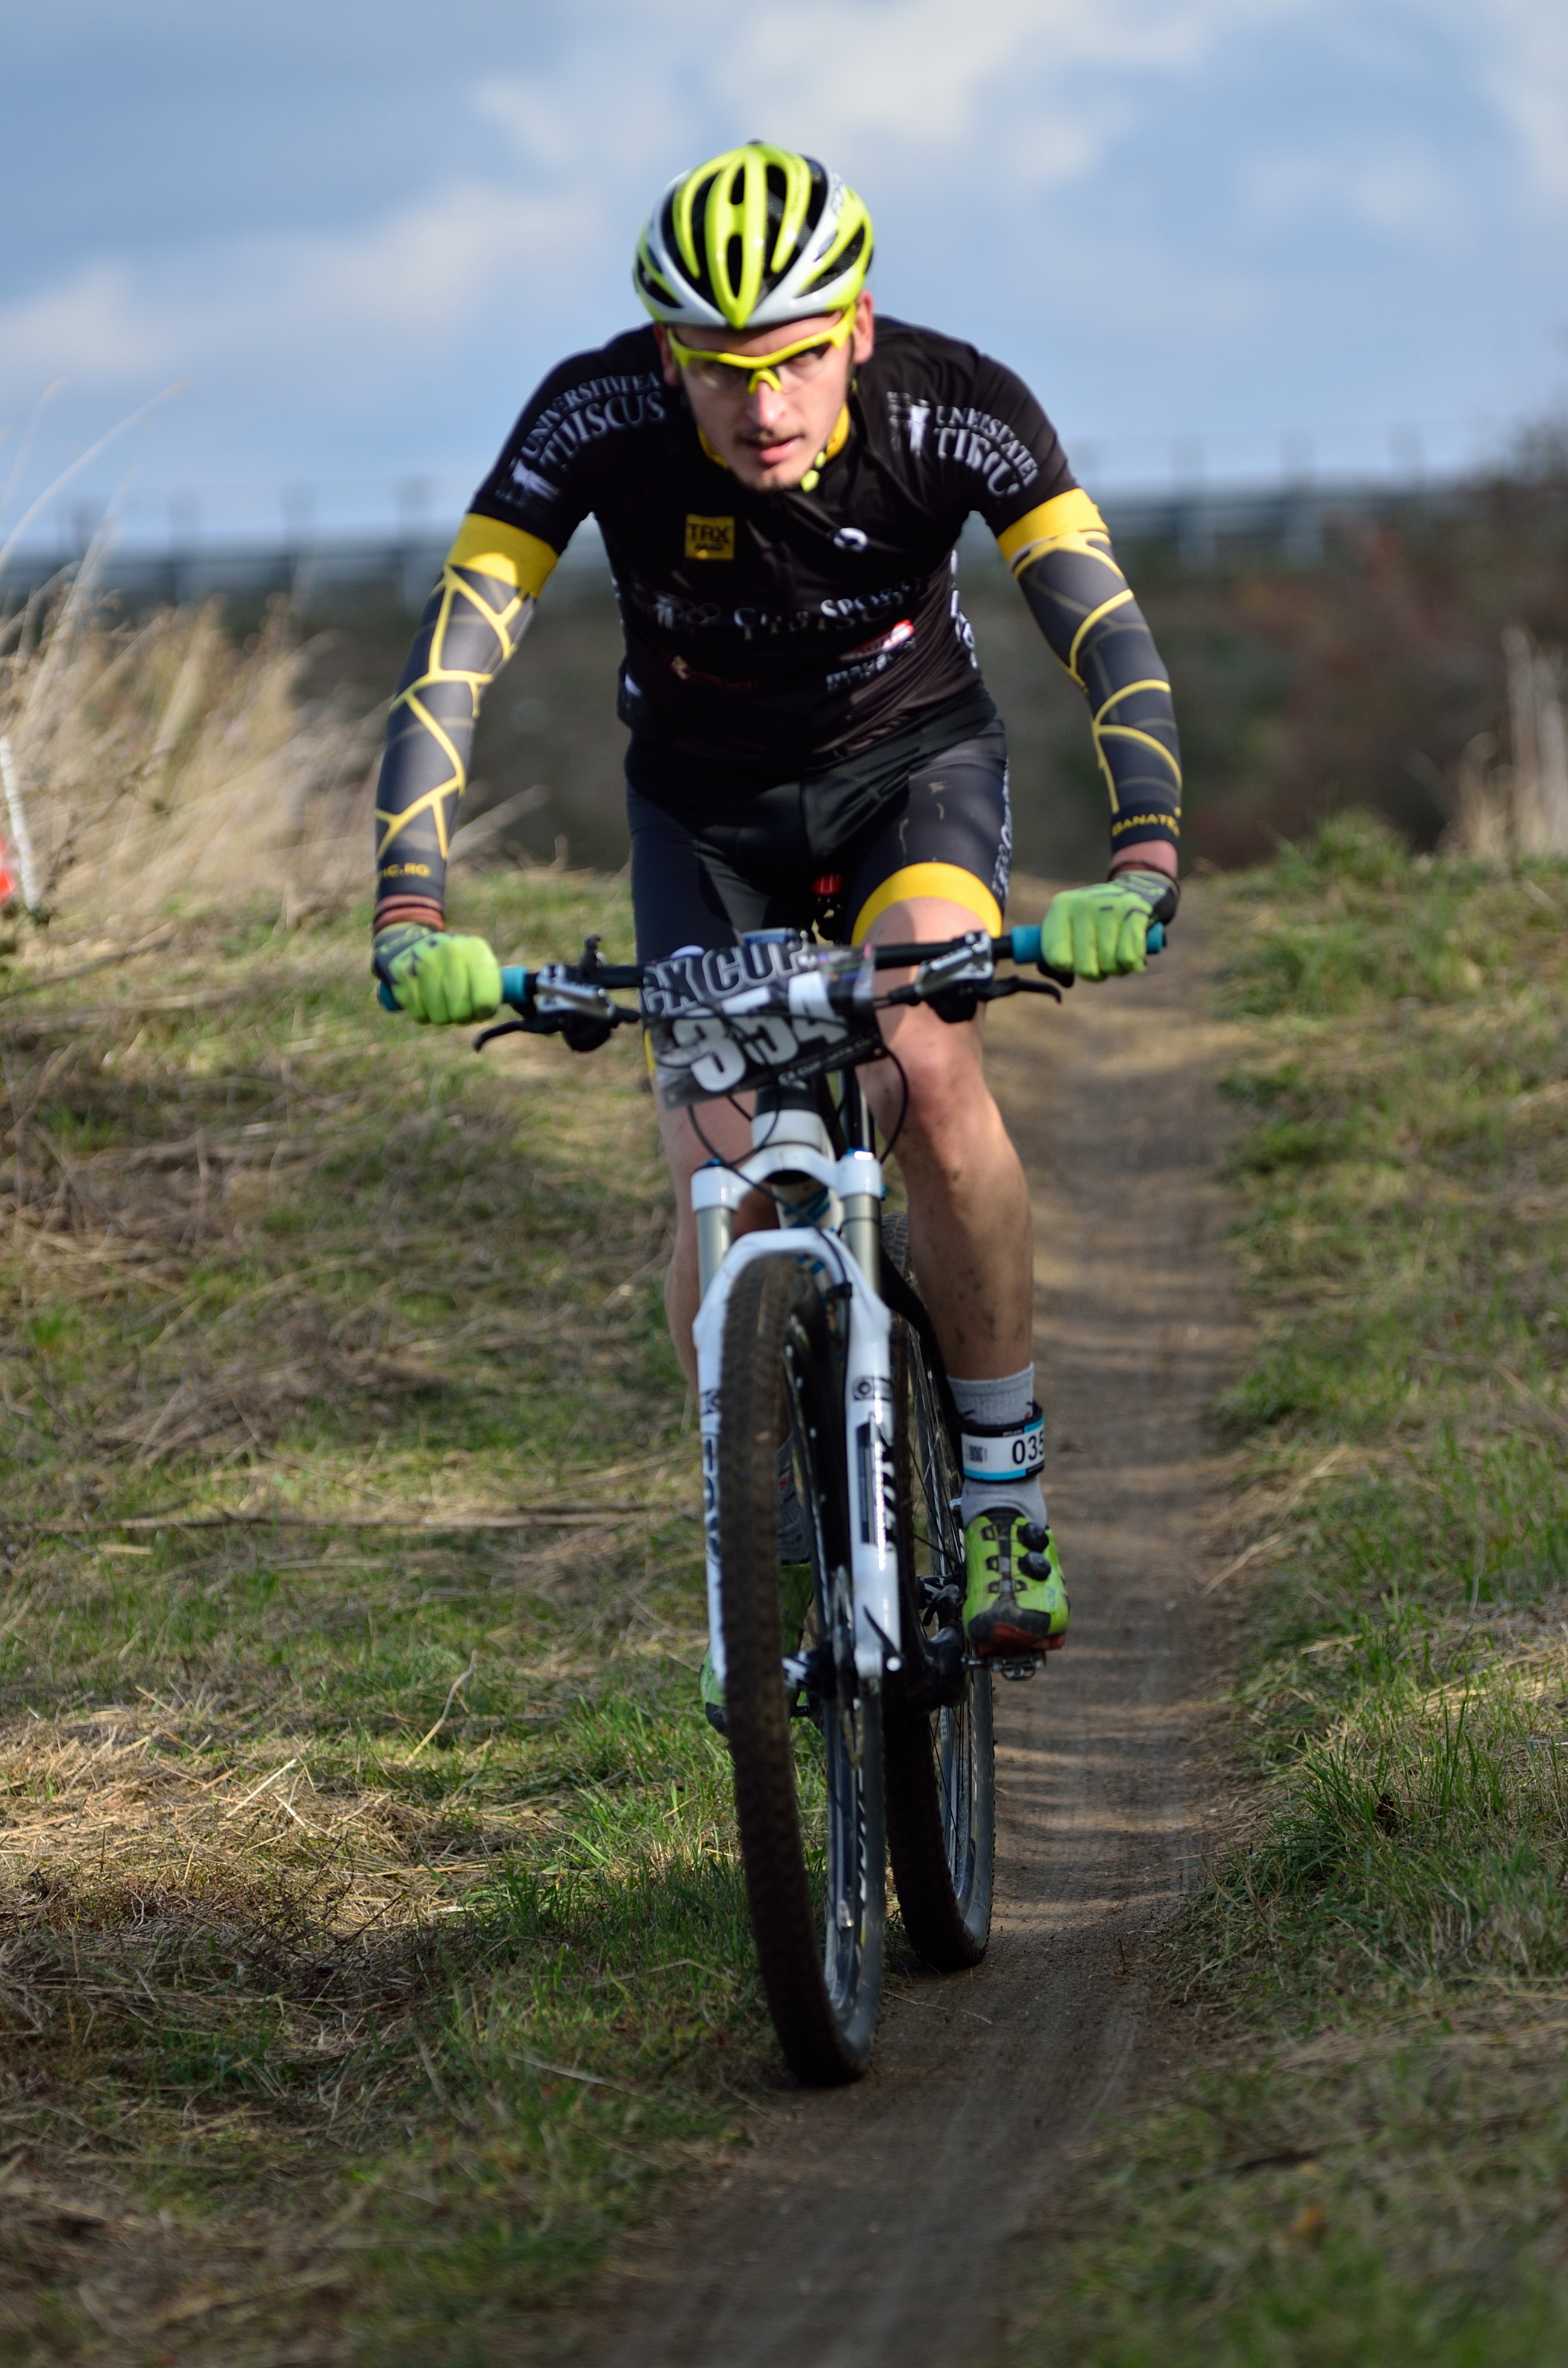
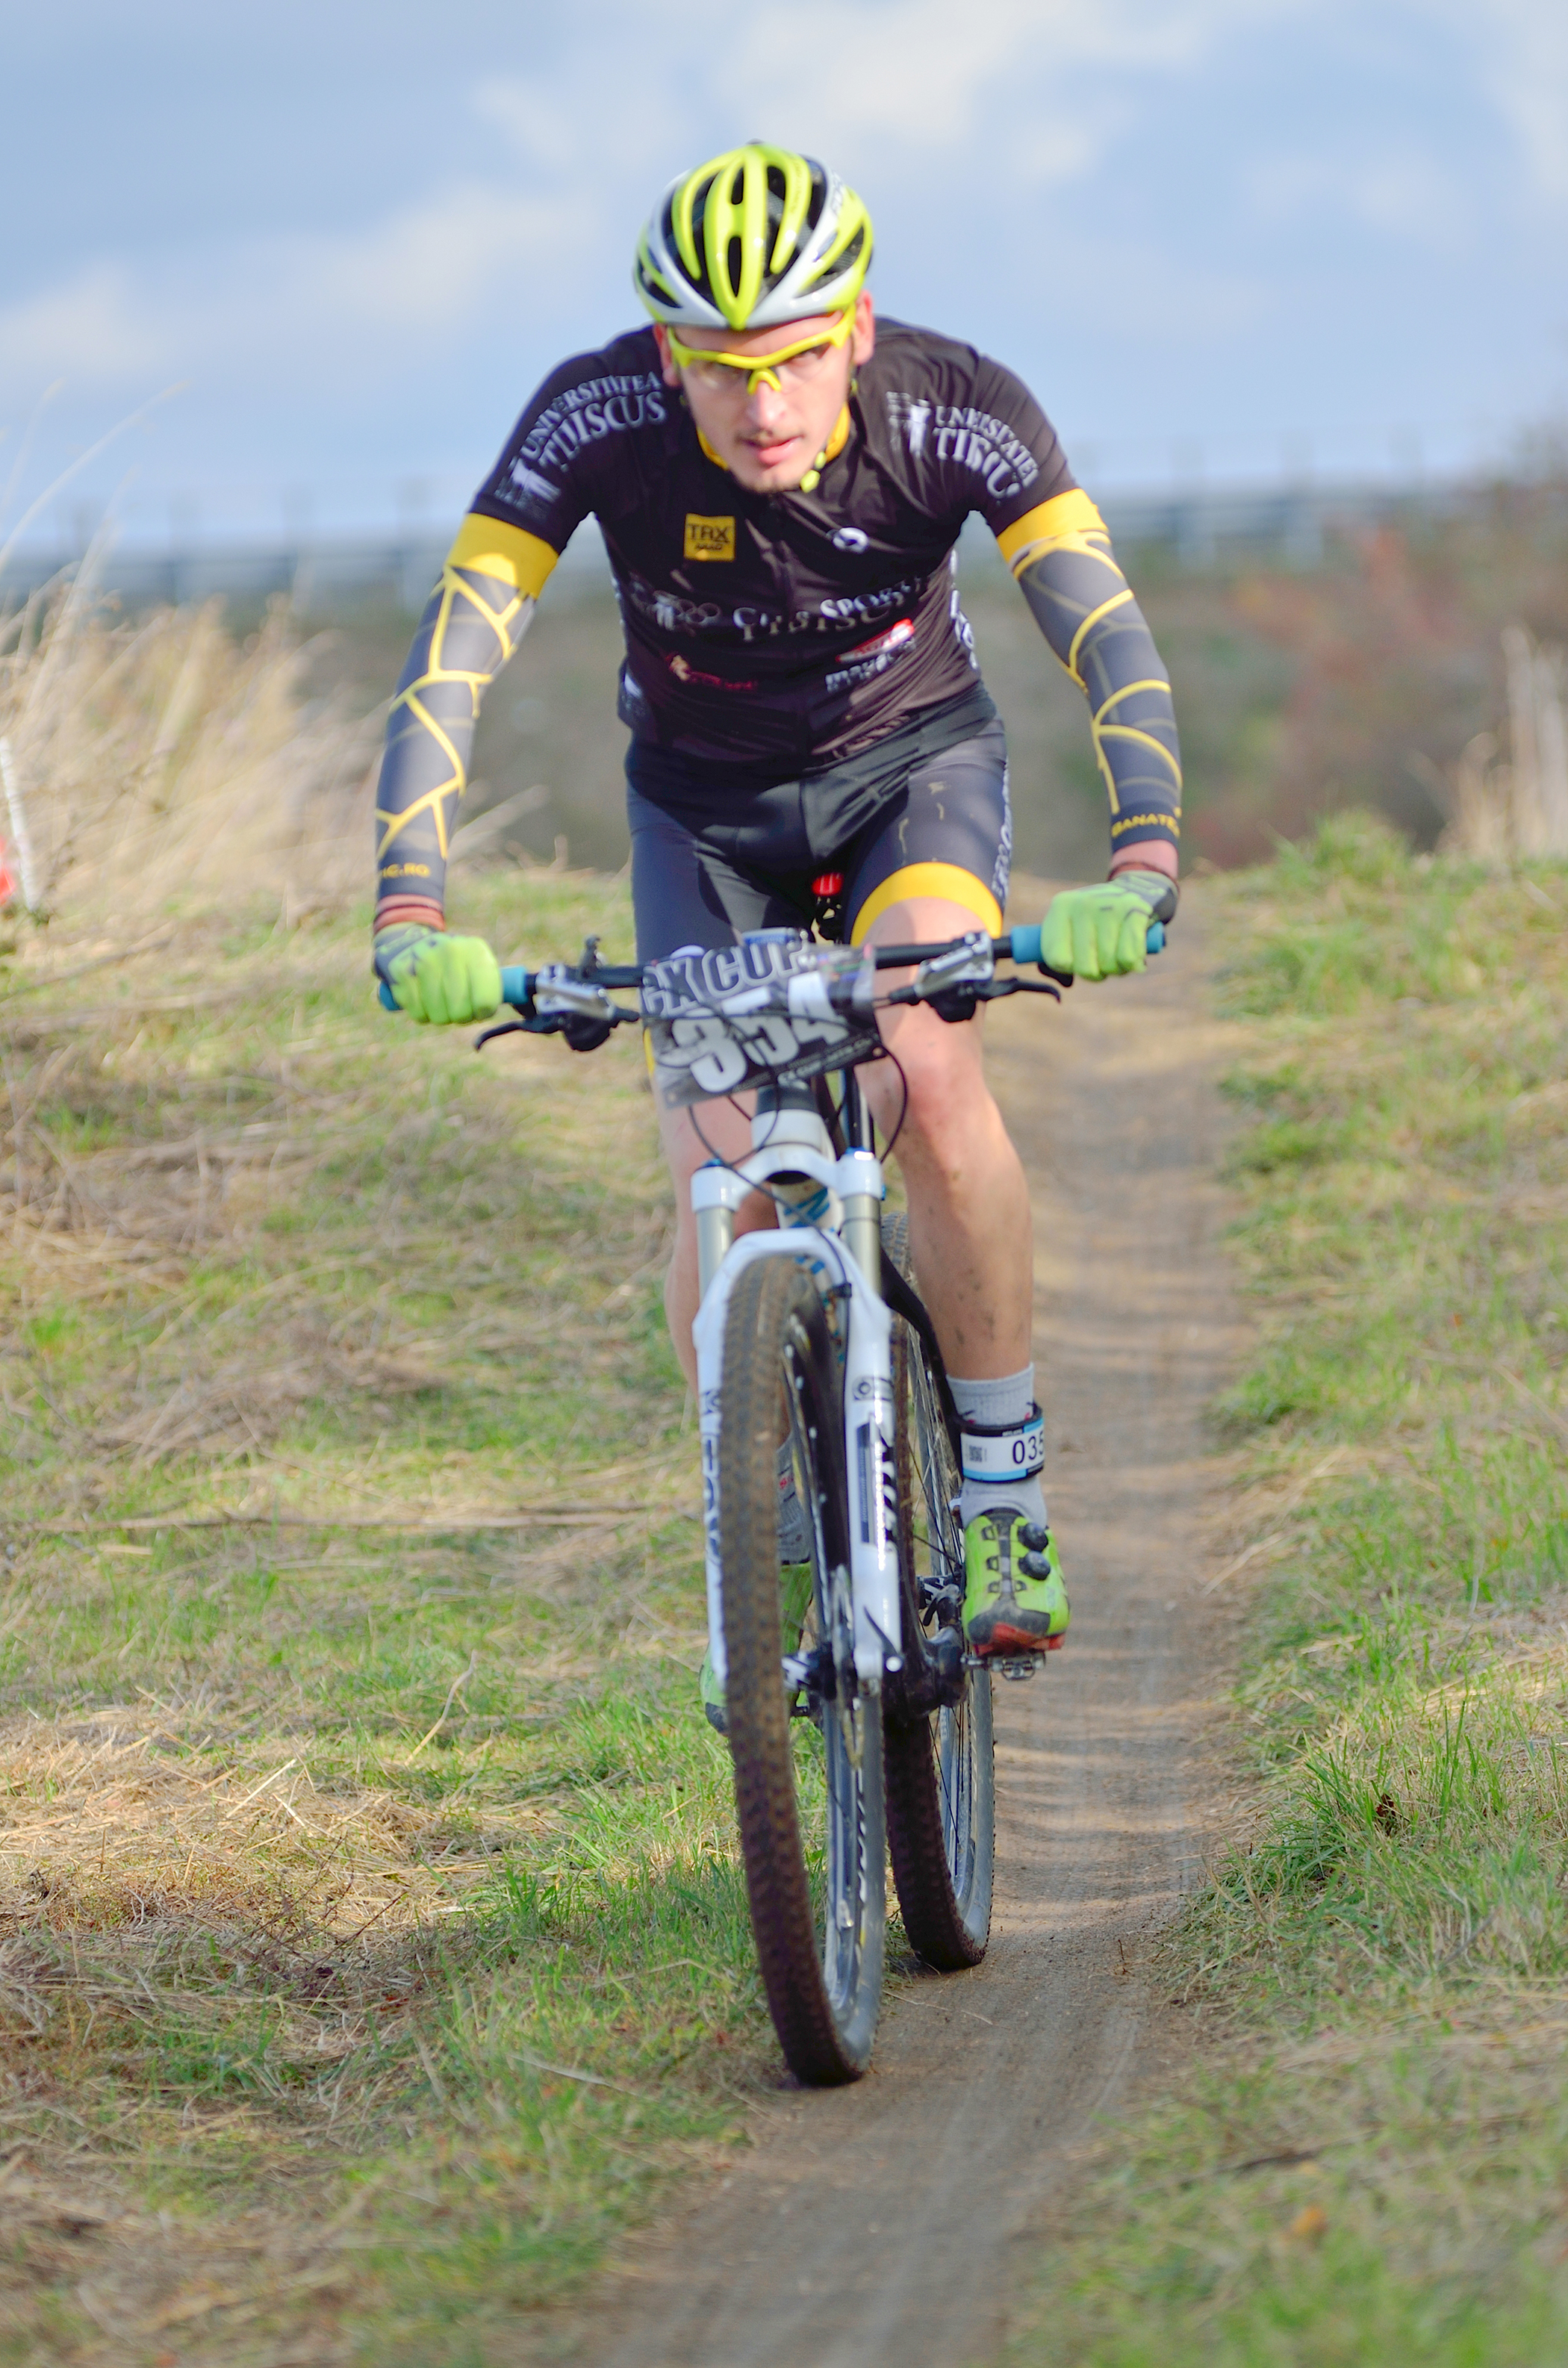
What would be the quick and professional way to lightern up black parts of an image. I am not talking about shadows. I am specifically talking about blacks and greys.
I put an image above as an example. I want his suit to be lighter. Thank you in advance. Keep in mind I am moderatly familiar with photoshop and I am still learning. Detailed, step-by-step instructions would suit me best, but any answer I will greatly appreciate. Thank you.


 1 Correct answer

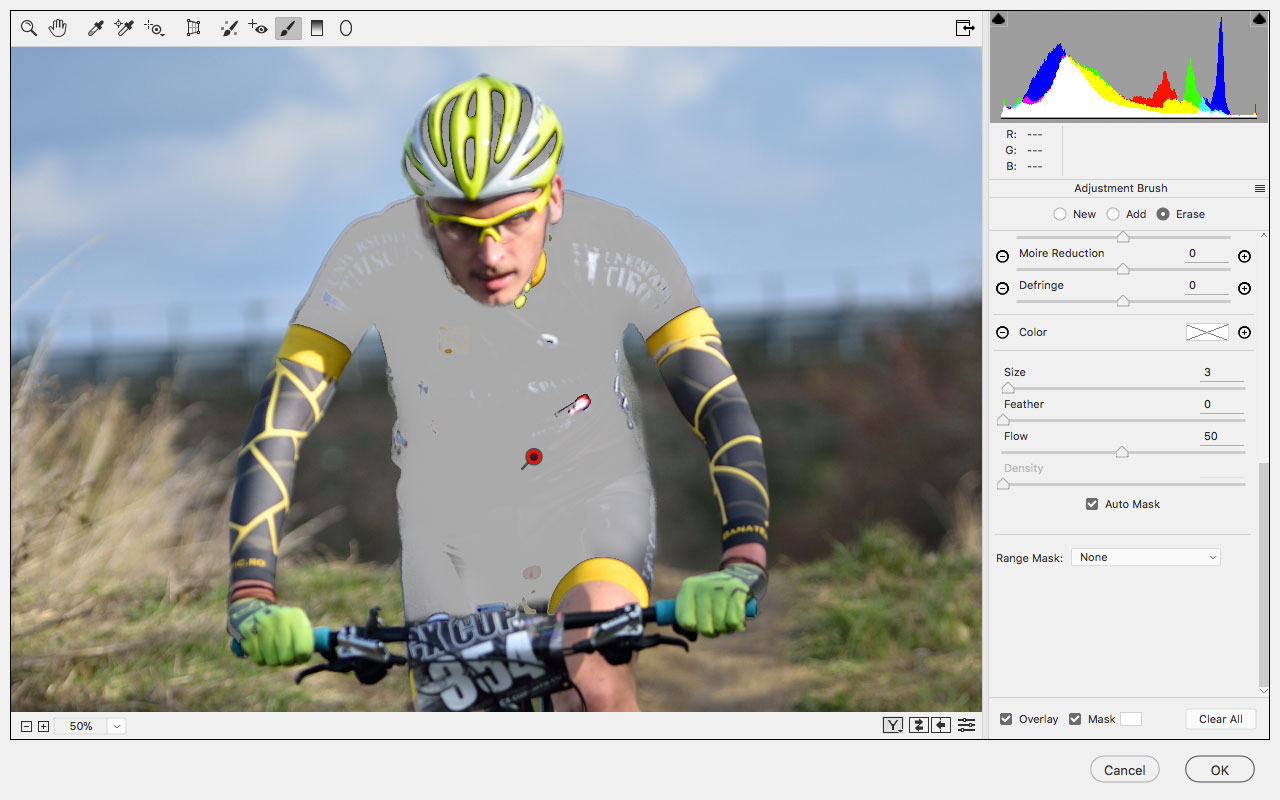
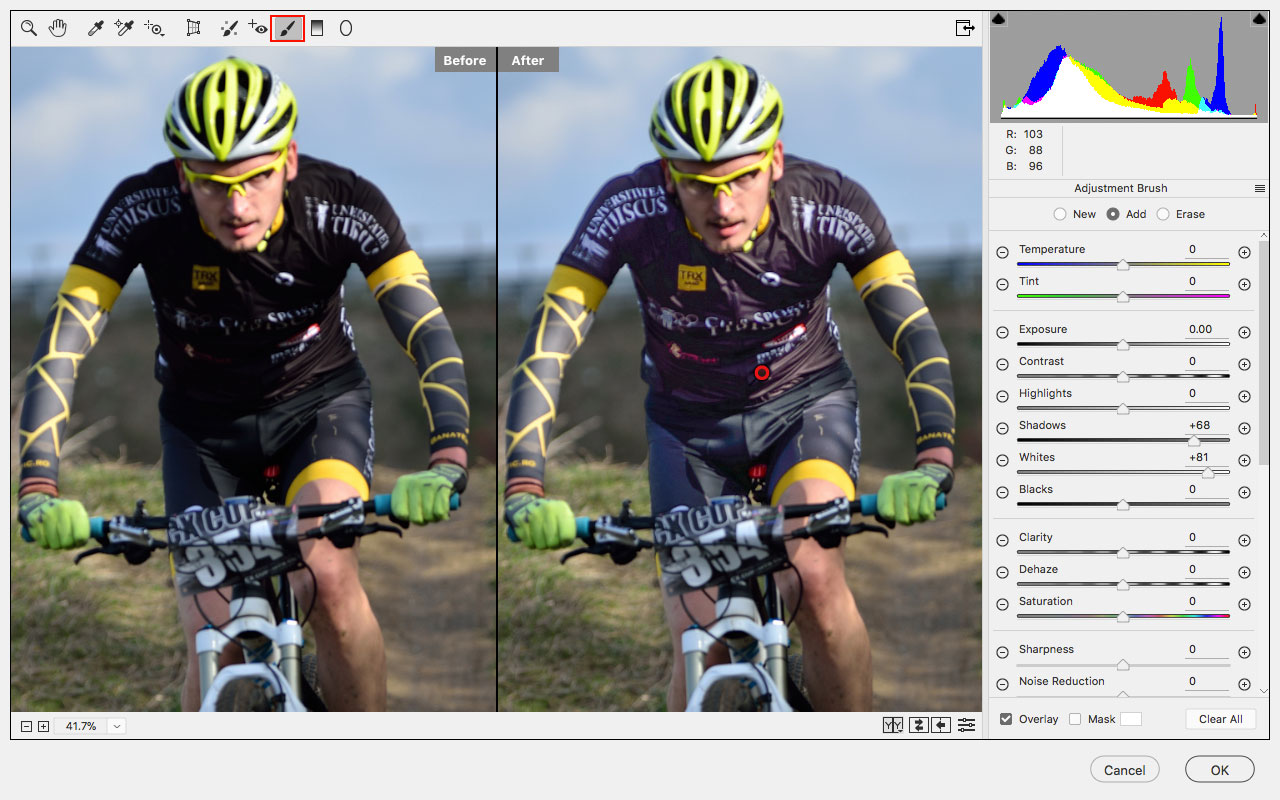
You can use the Adjustment Brush in the Camera Raw Filter, which uses a mask to apply the edits to only the areas you select, play with any of the sliders to see the effect and to reset the slider to default just double click on the slider.
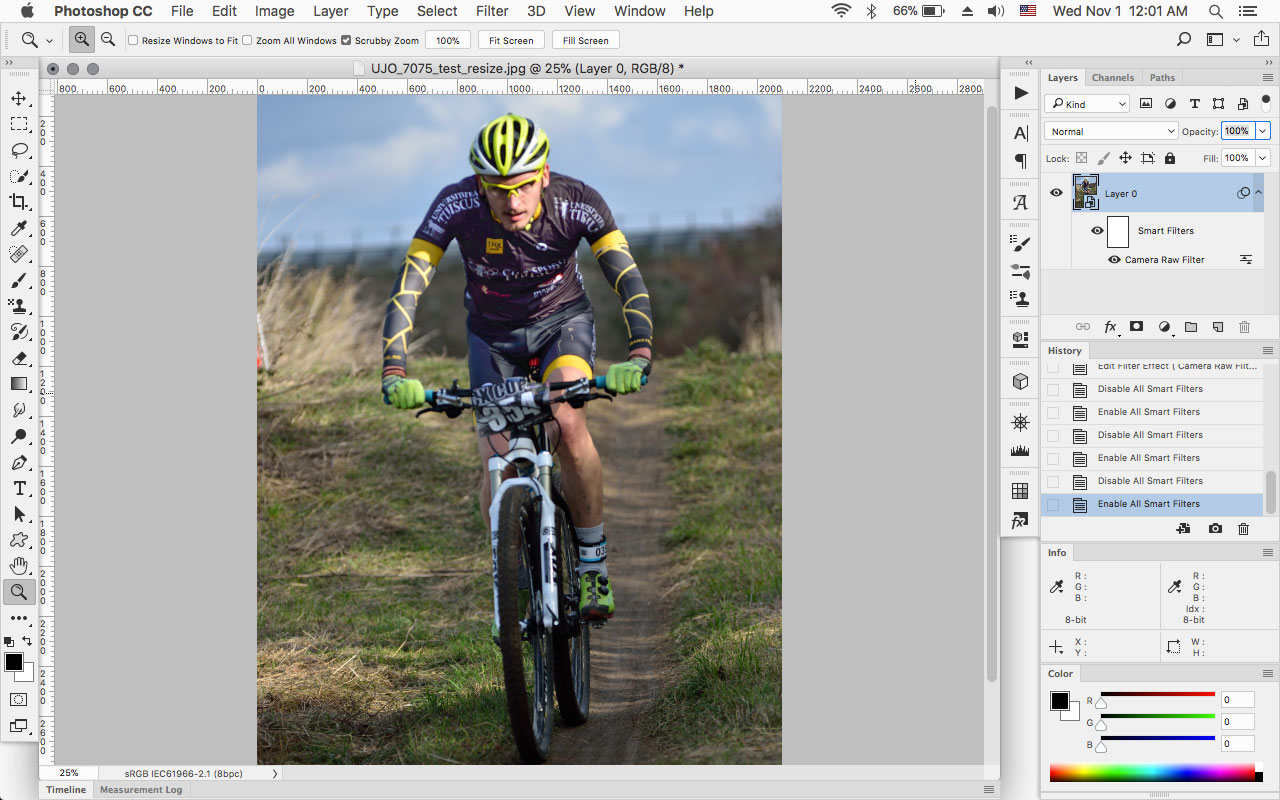
Turning the layer to a Smart Object and then applying the camera raw filter as a smart filter. allows you to go back and change the adjustments if you desire.
Apply Smart Filters in Photoshop
Make local adjustments in Adobe Camera Raw
the mask that gets created
Explore related tutorials & articles
 12
Replies
12
12
Replies
12
Copy link to clipboard
Copied
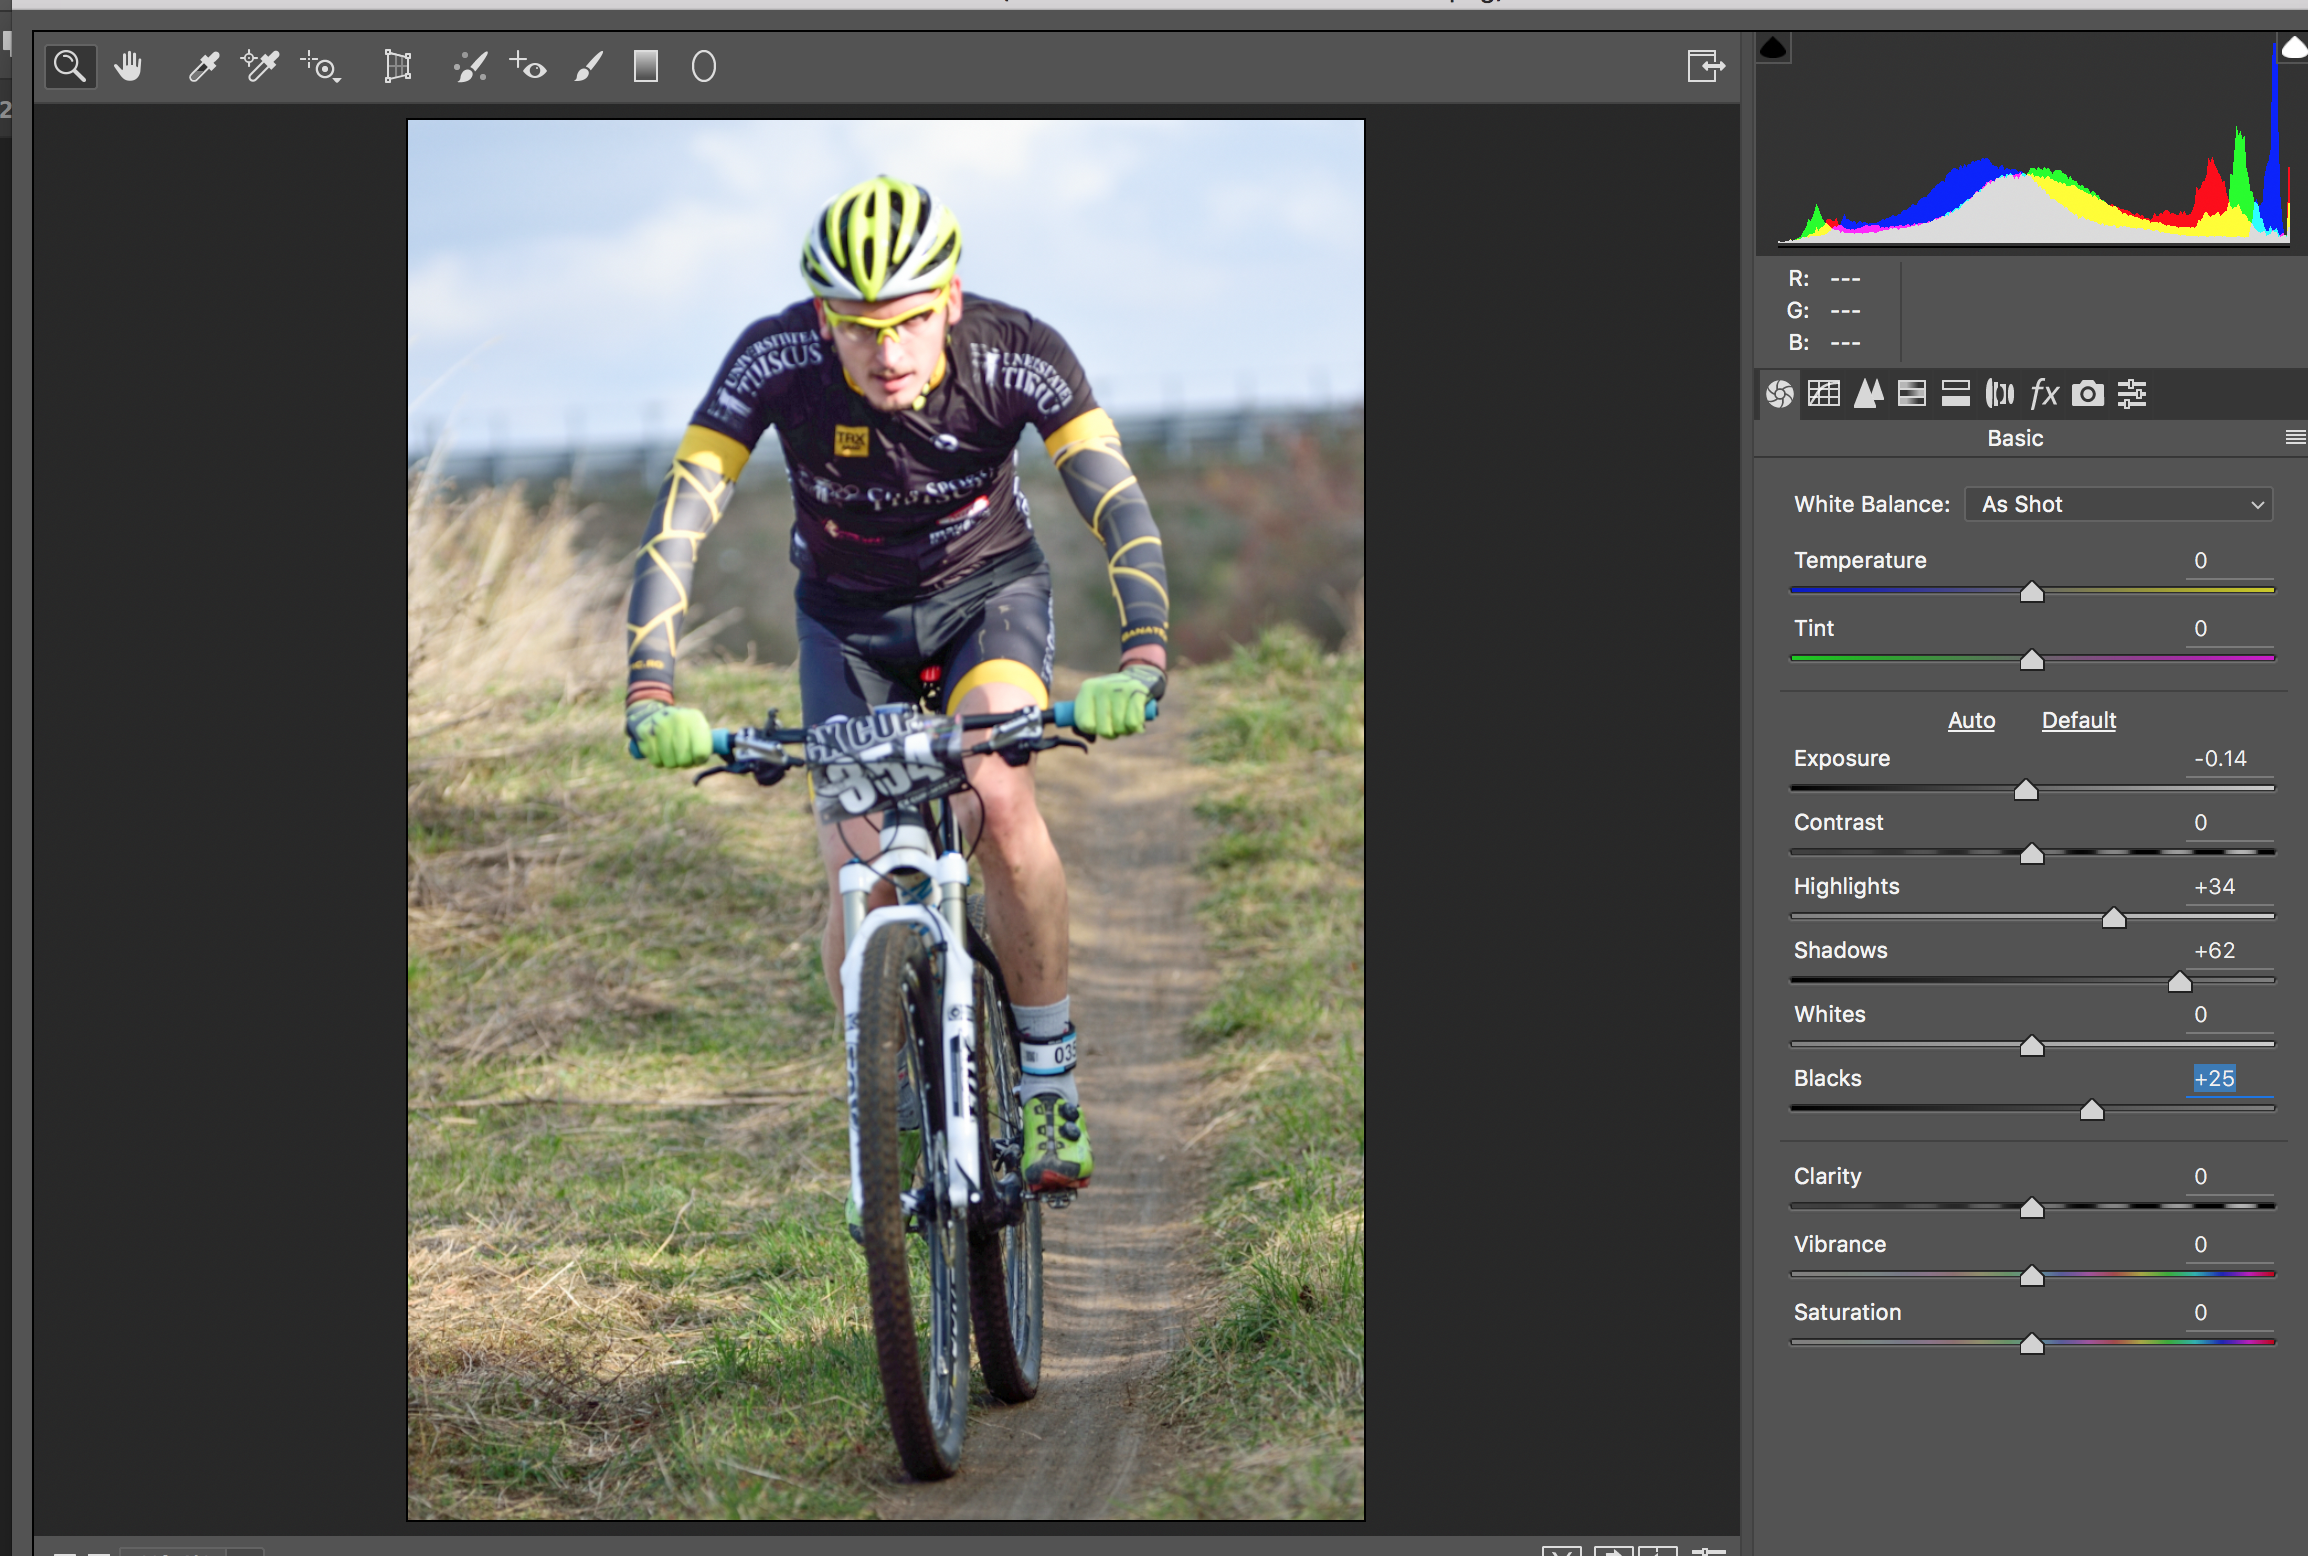
Once the image is open in PS, in the menu bar, go to Filters -> Camera Raw. In camera raw, move the "shadows" and or "blacks" sliders to suit your taste. Then, click OK in the lower right hand corner of the Camera Raw filter.
Copy link to clipboard
Copied
Your solution doesn't work. I like the background the way it is. If I drag the Blacks slider to the max, it does not lighten up enough but already affects the green around the cyclist. Running it again (Ctrl-F) applyies again the processing and this is when it becomes very obvious that it doesn't affect just the dark balcks on the costume.
This is how it looks after 2 applications of the camera raw filter with sliding the Blacks all the way to the right. Compare the grass to the left and right with the original image. I want that to stay identical and only affect some of the most dark parts from the suit.
Copy link to clipboard
Copied
You can use the Adjustment Brush in the Camera Raw Filter, which uses a mask to apply the edits to only the areas you select, play with any of the sliders to see the effect and to reset the slider to default just double click on the slider.
Turning the layer to a Smart Object and then applying the camera raw filter as a smart filter. allows you to go back and change the adjustments if you desire.
Apply Smart Filters in Photoshop
Make local adjustments in Adobe Camera Raw
the mask that gets created


Copy link to clipboard
Copied
Thanks. I did it this way, but forgot to selectsomeone as correct answer so I did it now.

Copy link to clipboard
Copied
Few options:
One option to make a smart filter and use camera raw filter.
and play with the dark and lights.
Another way is to use Adjustment layers and paly with the mask to reveal and conceal the lights and dark!!

Copy link to clipboard
Copied
Make a selection of the black in his outfit and use a curves layer clipped to it.

Copy link to clipboard
Copied
Or you can use blend if sliders to target just the darks then touch up areas with a mask.

Copy link to clipboard
Copied
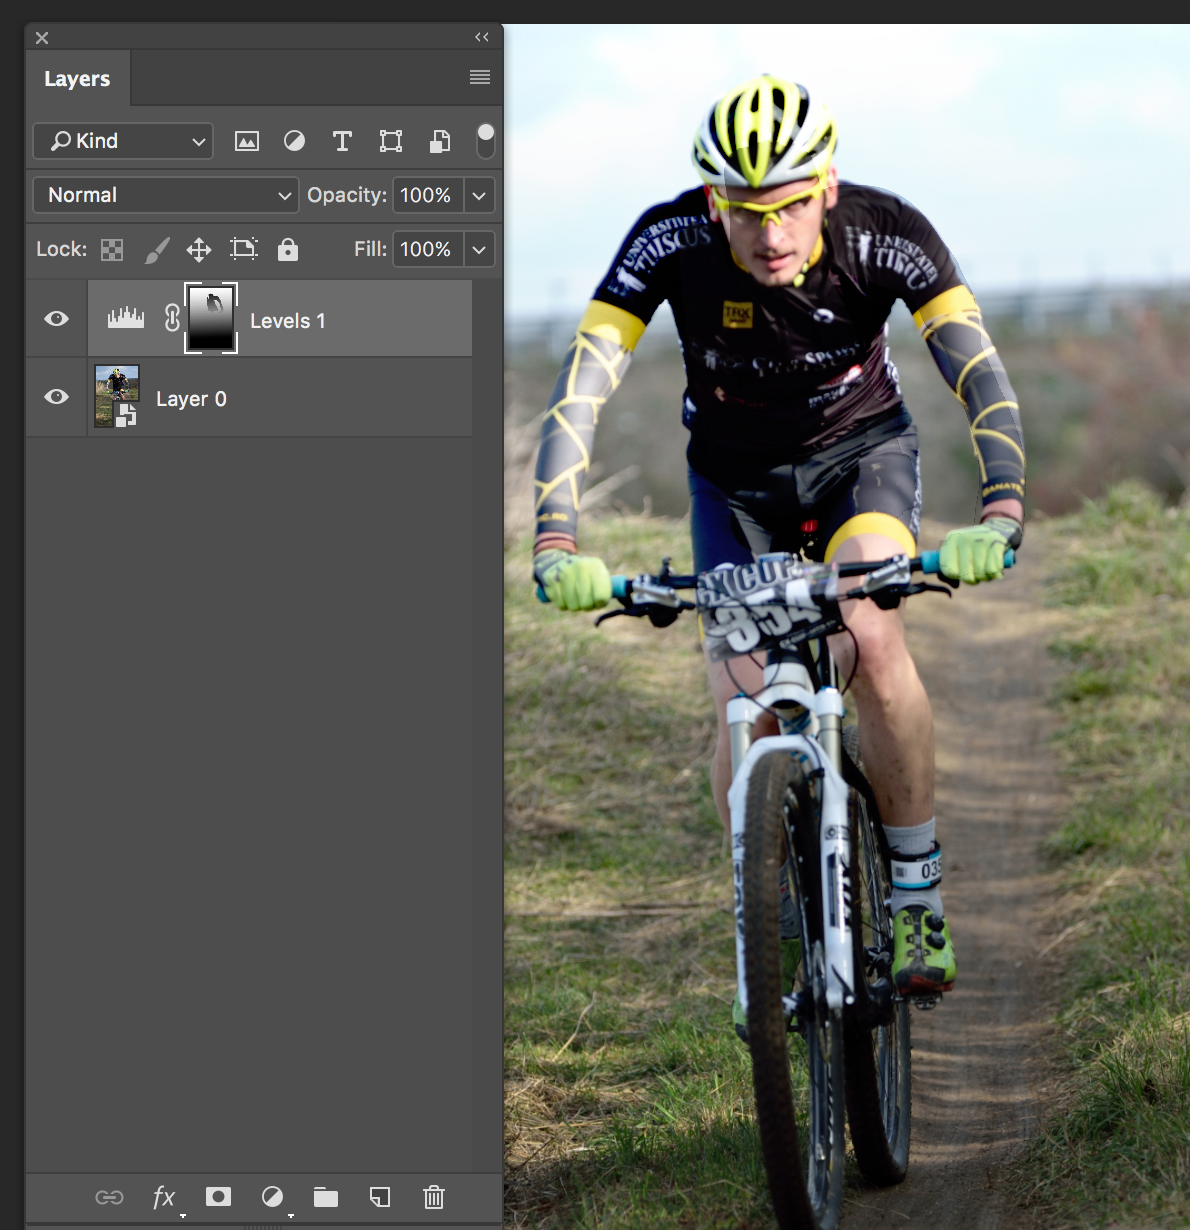
There are a lot of different techniques you can use - hopefully other people will share their techniques as well, so you get an idea of the different approaches. I tend to work with Adjustment Layers.
Here's an example (not the best pic I know, but hopefully you can follow along):
- Open the image in Photoshop
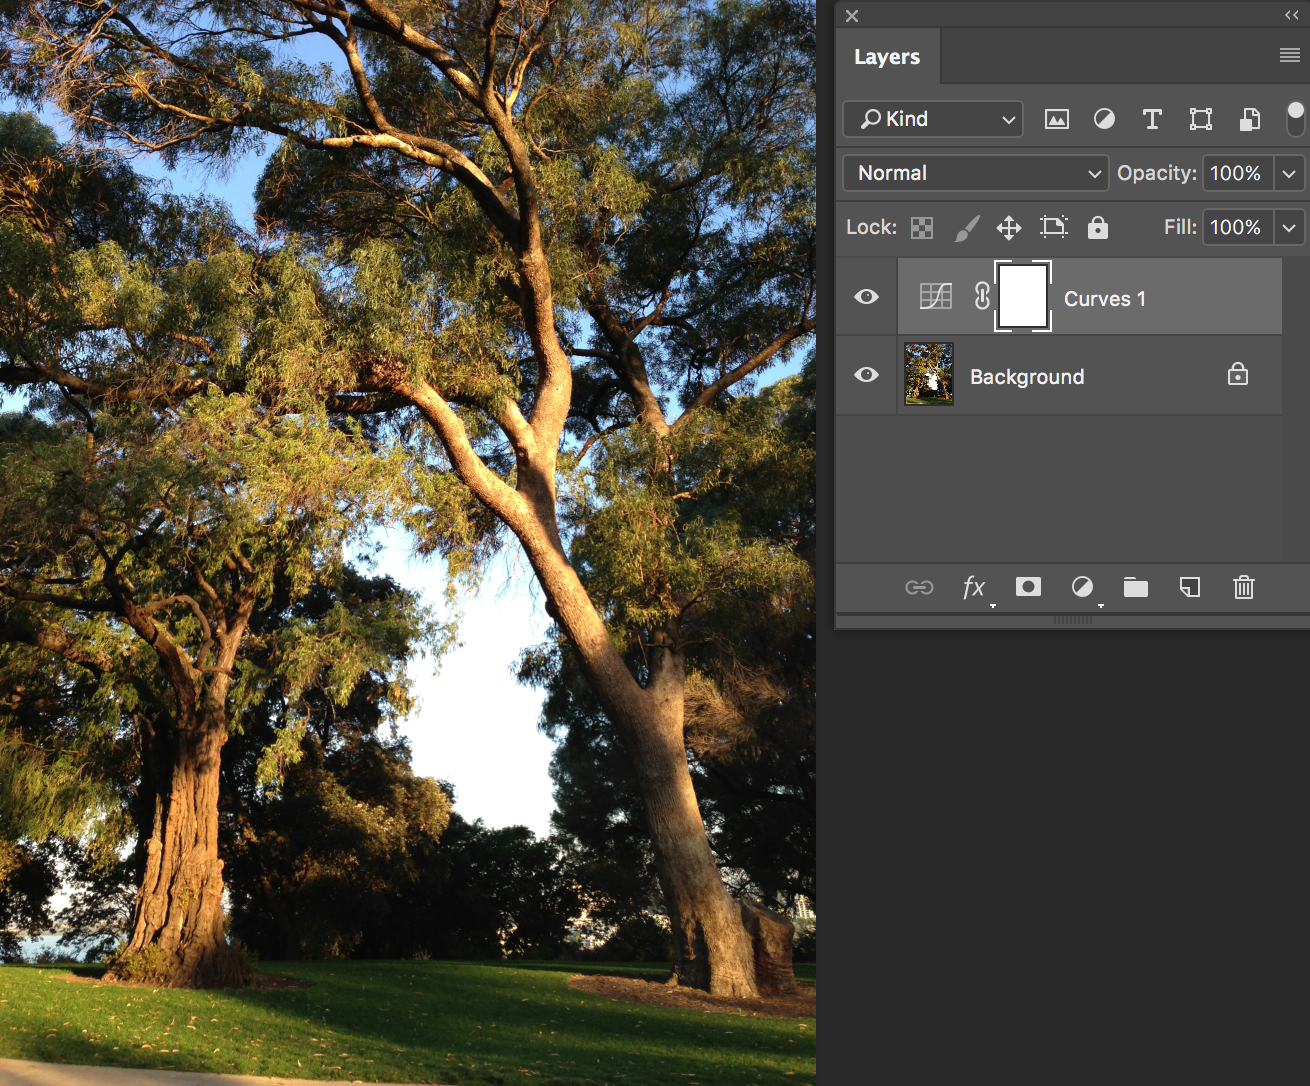
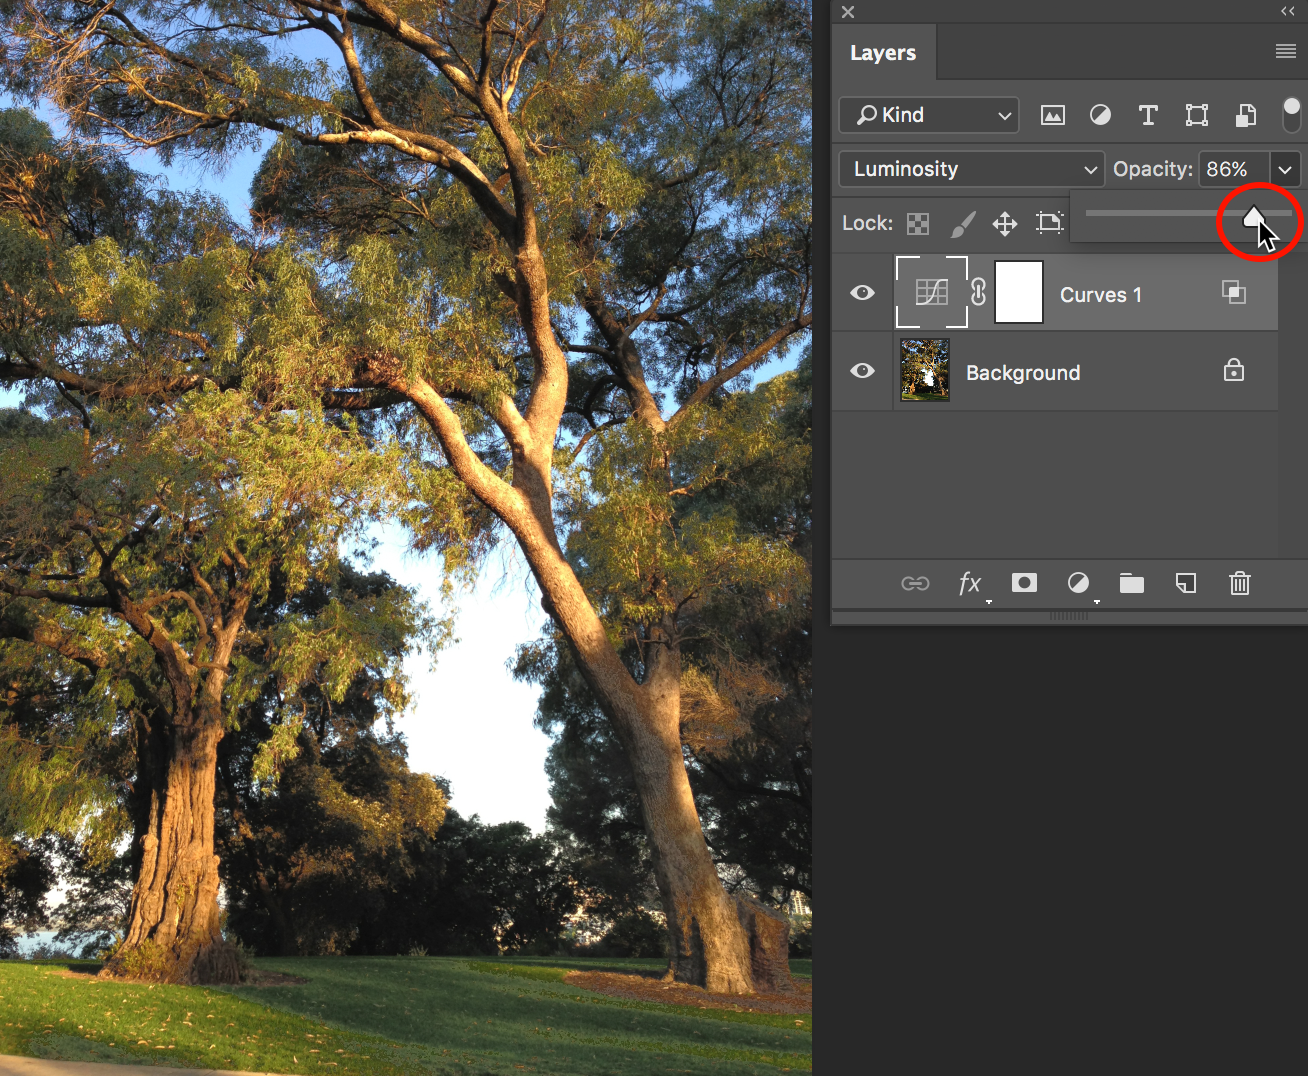
- Choose Layer > New Adjustment Layer > Curves (you should see a new adjustment layer added in the Layers panel above the Background).
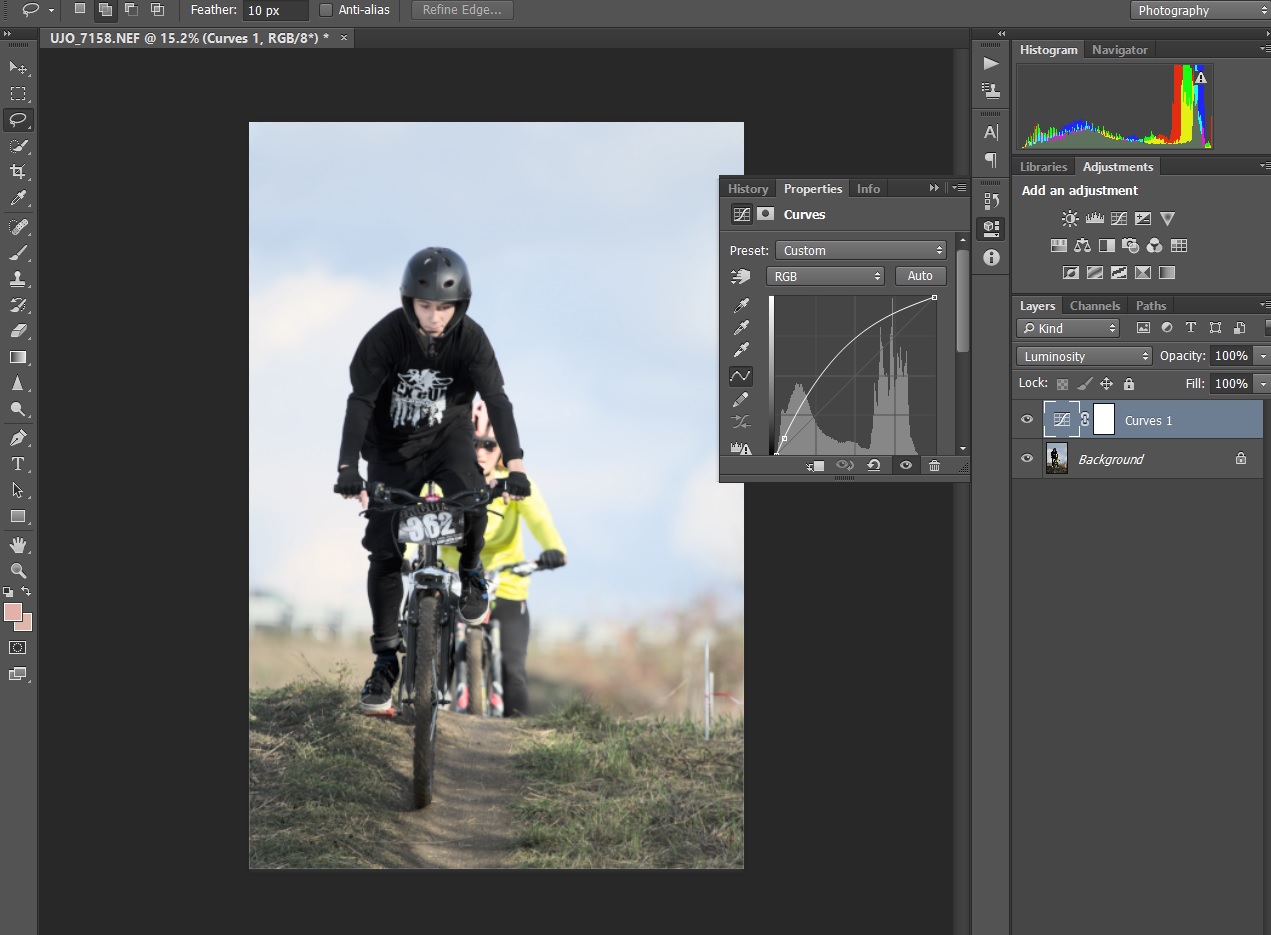
- Next in the Properties panel, add a point to the curve and move it upwards. You can add multiple points if needed.
Note: you can also use the on image adjustment tool (the icon with the point finger), and click on it then drag upwards in a shadow/dark area of your image, this will automatically add a new point on the curve.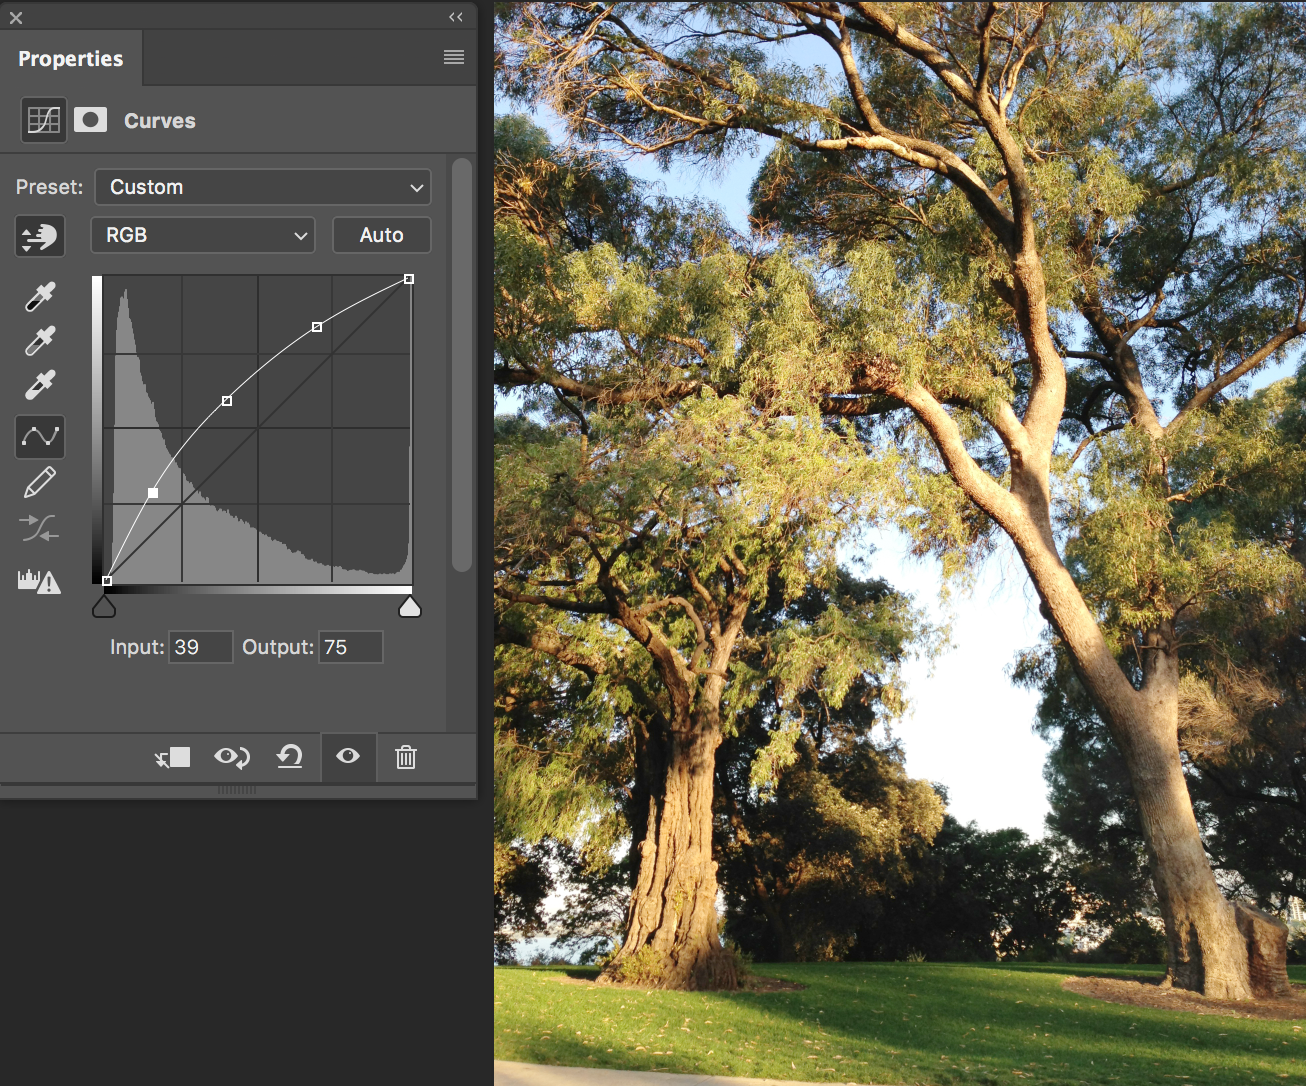
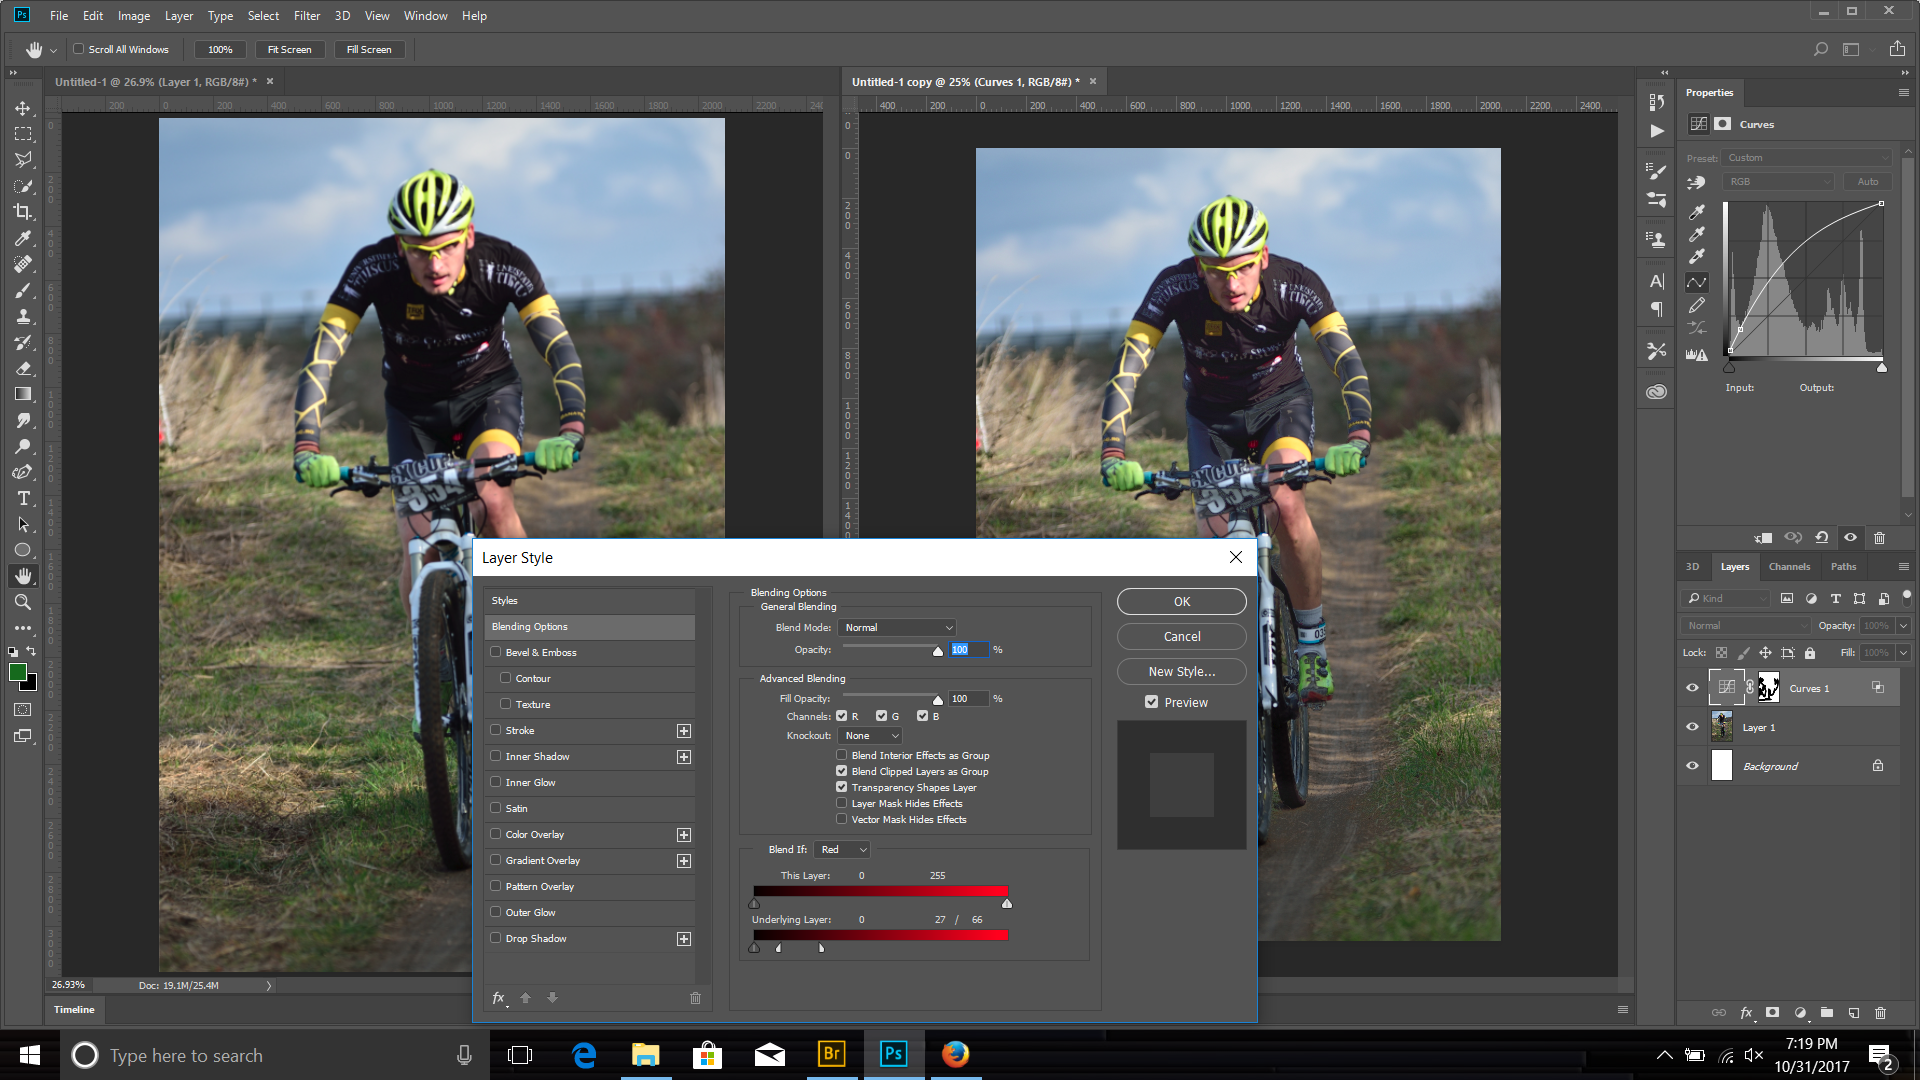
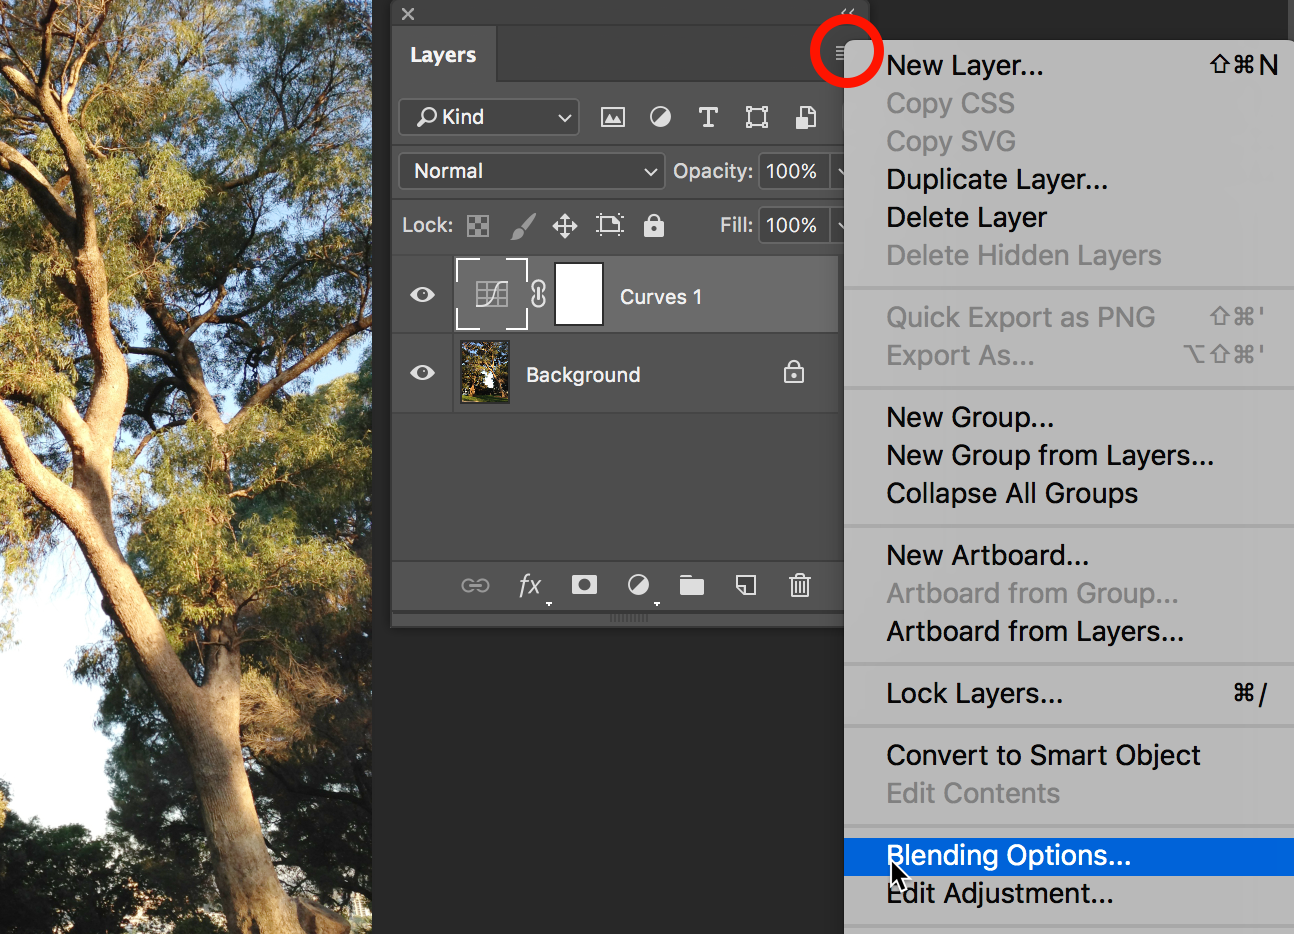
Focus on the shadow areas of the image and ignore anything that happens to the light parts of the image as you are adjusting the curve in the Properties panel. The entire image will start to lighten up as right now all the pixels will be affected. We'll fix that in the next step. - Select the Curves adjustment layer and choose Blending Options from the Layers panel menu.
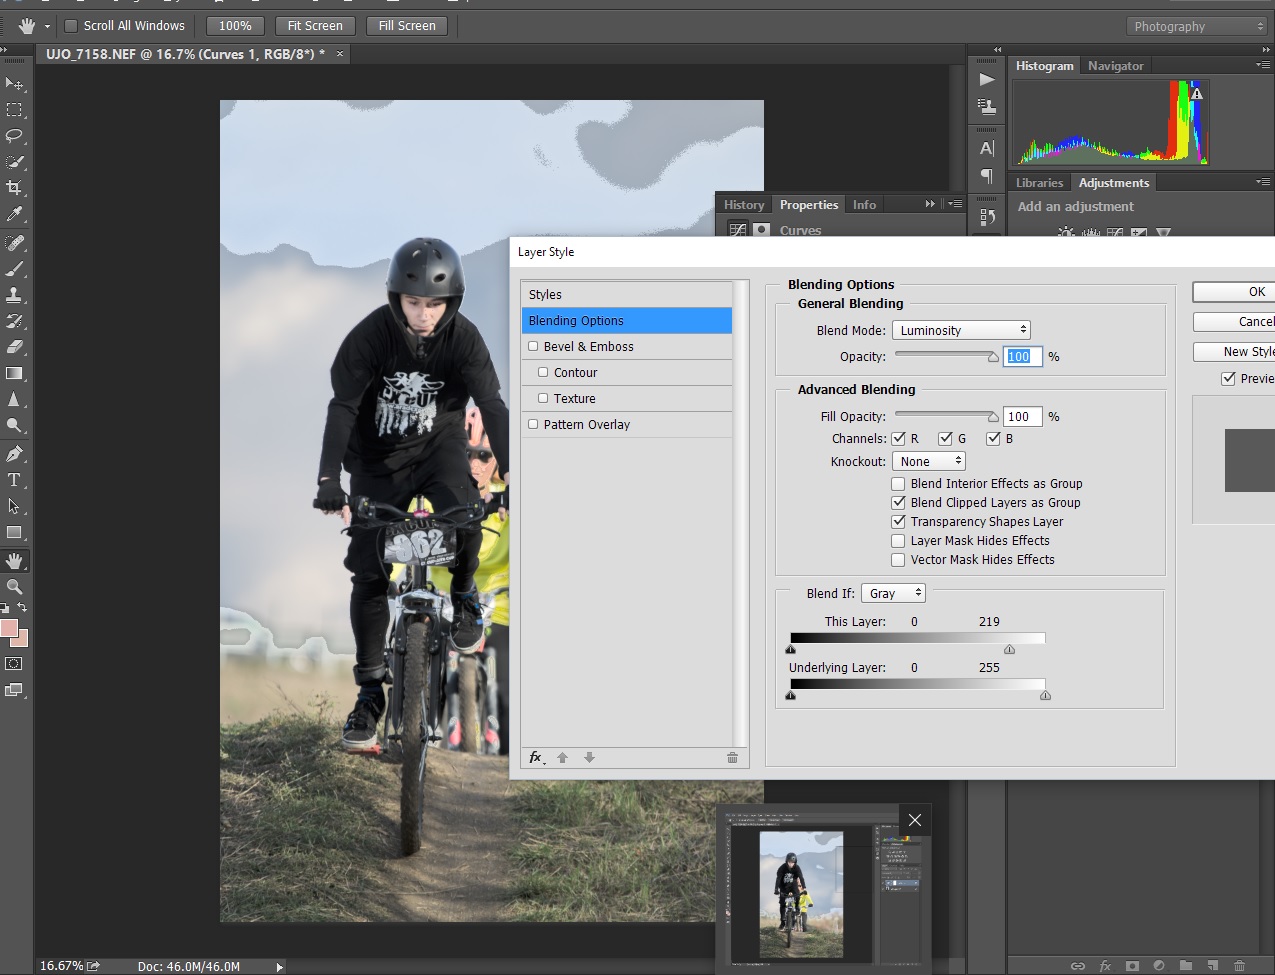
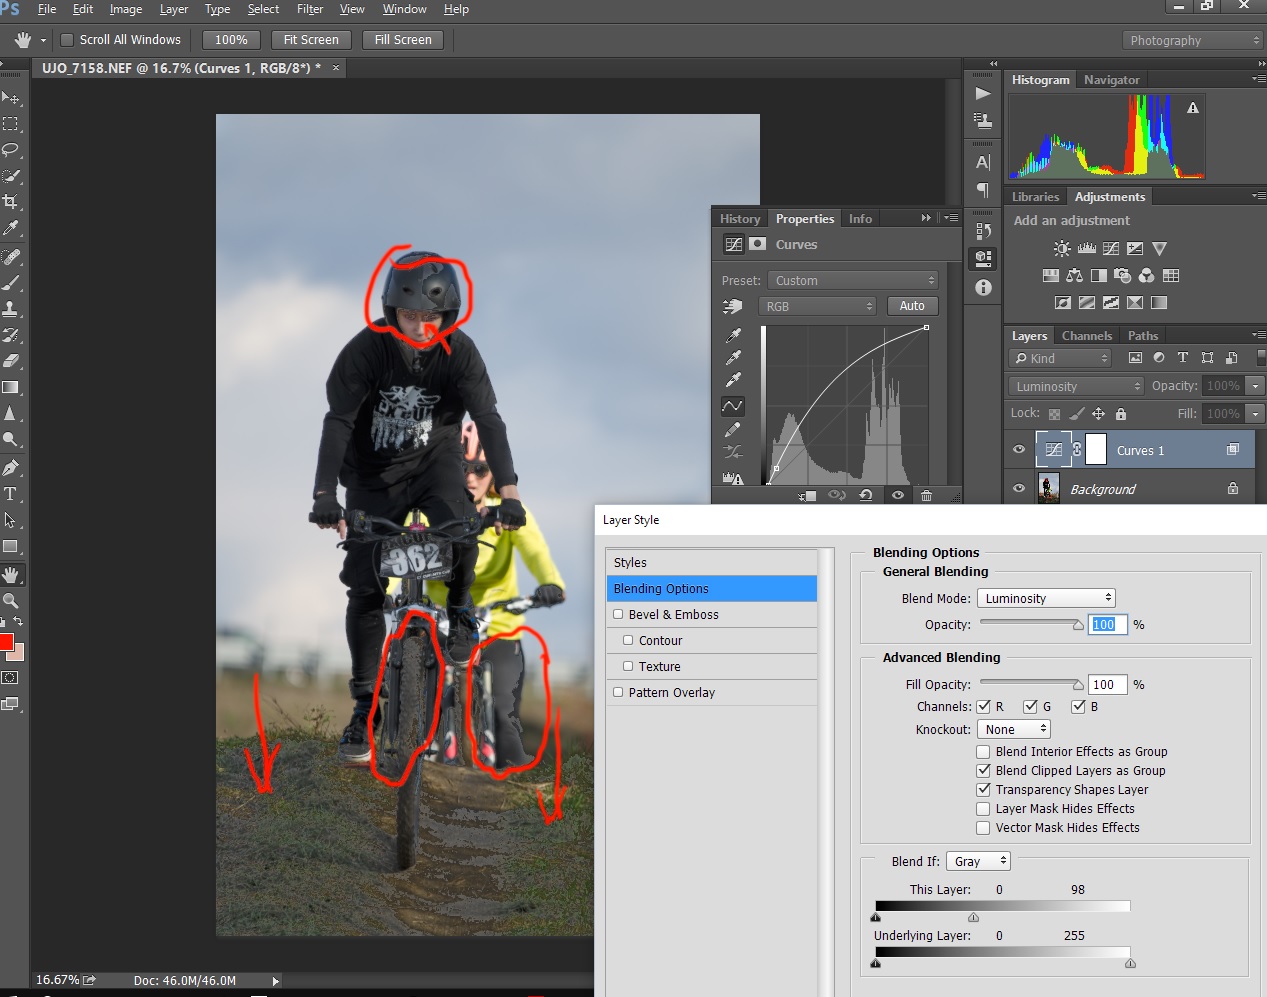
- Set the Blend Mode under General Blending to Luminosity, you'll see a bit of colour pop-back into the image where it was pulled out by the curves adjustment in step 3. Then in the Blend If section, leave Blend If set to Grey, and drag the white slider for This Layer to the left. What this will do is apply the curves adjustment only to the darker colours in the image.
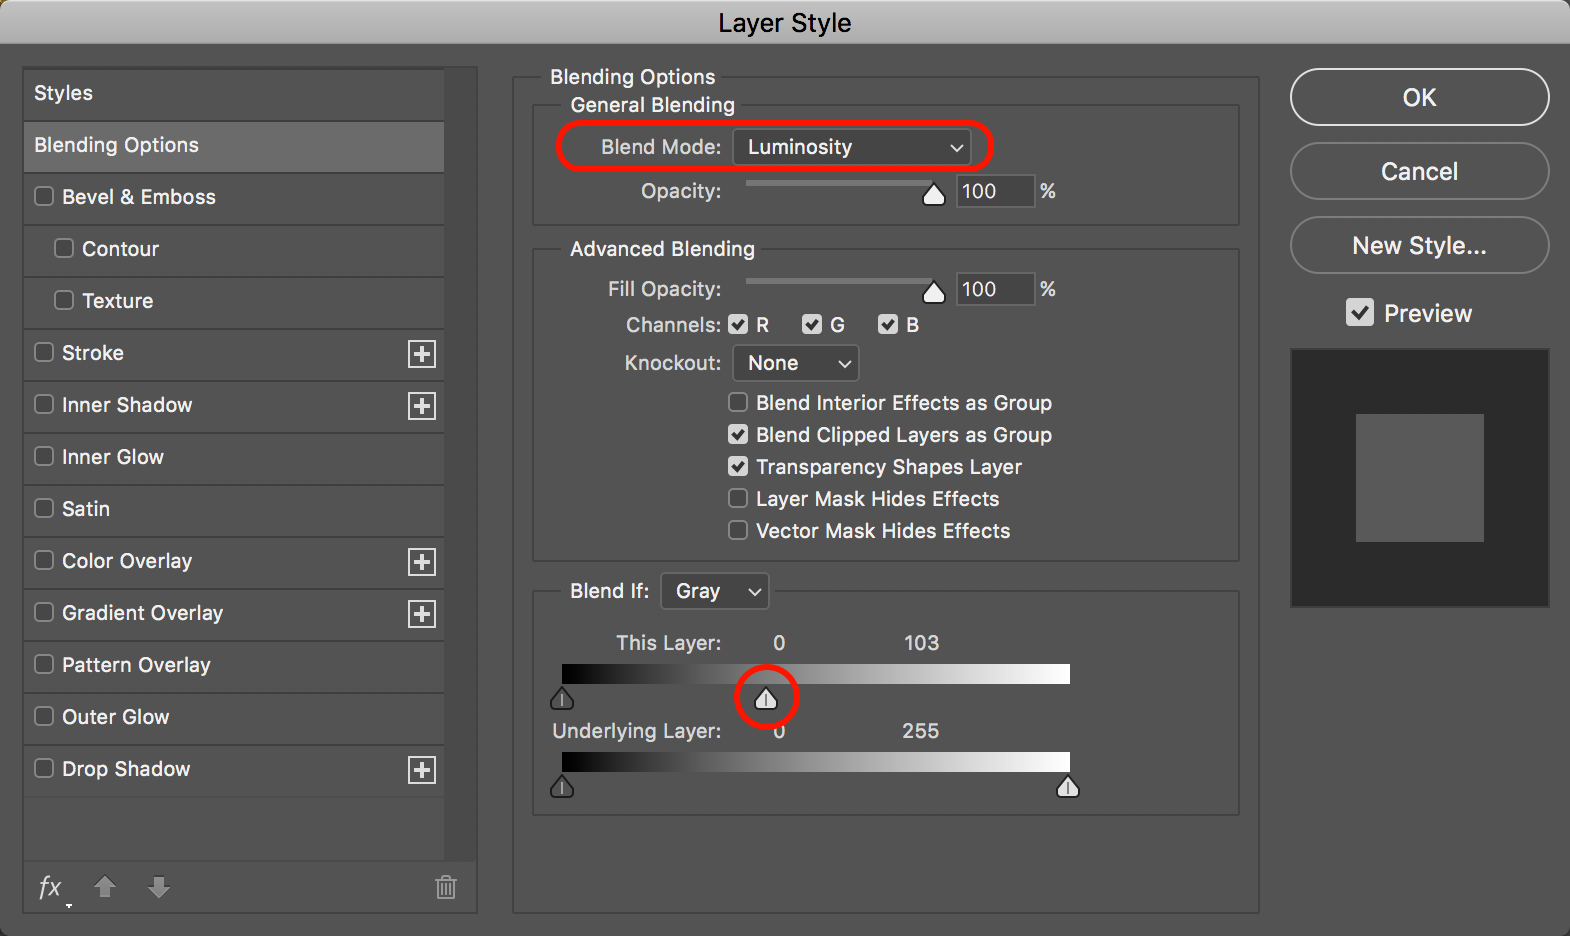
- Click OK.
- You now still have the option to reduce the opacity of the Curves adjustment layer if needed, to decrease the severity of the lightening effect you've applied.

Copy link to clipboard
Copied
Photoshop offers multiple ways to do almost anything. Personally I think the Camera Raw filter is the best option as outlined by KR Seals. You can make this edit non destructively if you make it a smart object first, as explained by chanaart. I would move the shadow slider to the right, as far as needed to see the details in his shirt. If the background goes too light try moving the exposure and highlights slider to the left just slightly. I think you can accomplish what you want with these edits. If you can’t get the rider and the background both looking good, you can apply a mask to the camera raw edit so that it only effects the rider. Similar to what Chuck Uebele recommends.
Copy link to clipboard
Copied
I did not manage to do it with Cary Jensen's tutorial unfortunately  Thatwas the only one I could follow due to the step by step explanation. When I open the Blending Options and move the right white slider to the left as described in the photo above - the one above of which it says "This Layer" some very strange efects appear on the image , and then I click "OK" and no amount of playing with the oppacity gets rid of all the artifacts.
1:
2.
Copy link to clipboard
Copied
If you would be kindenough to expand on the instructions you gave , (make them more verbose) perhaps I couldtry your solution too, as it seems there is some consesus as to this approach would be best.
Copy link to clipboard
Copied
Wow. I am impressed of the friendliness and availbility of the people on this forum to teach the not-so-advanced users things in a very concise manner. (After all, we were alll sometime at that point) I will definitely try some of the suggestions posted here when I get home and I will offer one of you the "correct answer." badge. Thank you for taking the time and patience to explain in detail , especially Cari Jansen for your lenghty tutorialwhich I can folllow.
Oh...and apologies if I messed up some words or some sentences sound weird, I am not living in an english-speaking country.

 AdChoices