 Adobe Community
- Home
- Photoshop ecosystem
- Discussions
- Re: How to remove large patch of redness
- Re: How to remove large patch of redness
How to remove large patch of redness
Copy link to clipboard
Copied
Hi there,
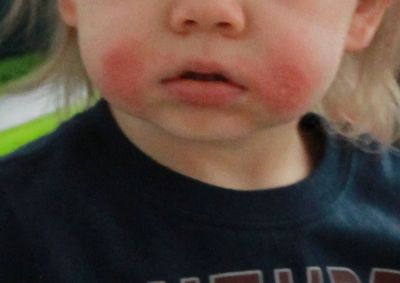
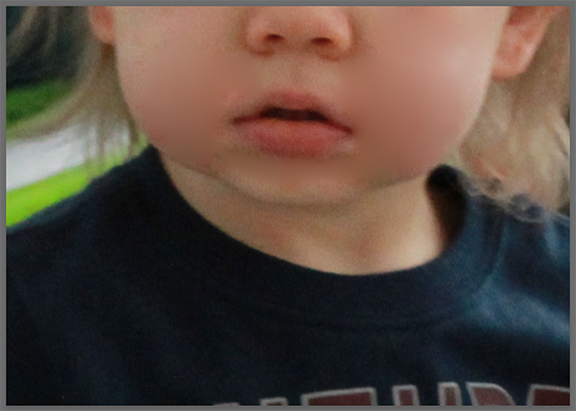
I'm new to photoshop but have a basic understanding, however, I cannot figure out how to edit this baby's face. He has large patches of eczema. I have tried using the healing brush as I have successfully used it on blemishes before, but with all of his photos the healing brush makes it look discolored and doesn't remove the whole patch.
Is there a better way to remove large patches? Am I missing something?
I attached a photo of the area I'm trying to correct.
Thanks!
Explore related tutorials & articles
Copy link to clipboard
Copied
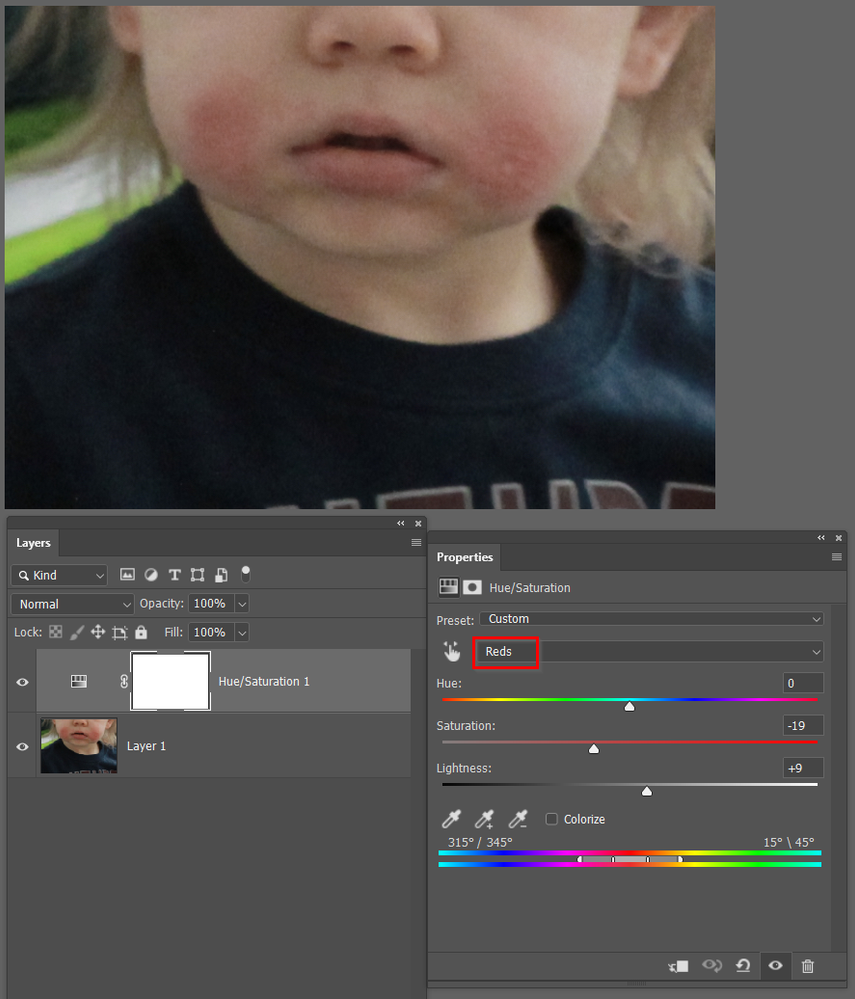
I'd probably keep it simple with a Hue Saturation adjustment layer
In this instance I have used the Master dropdown and selected Reds so it only affects the reds in the image, and reduce saturation and increased lightness.
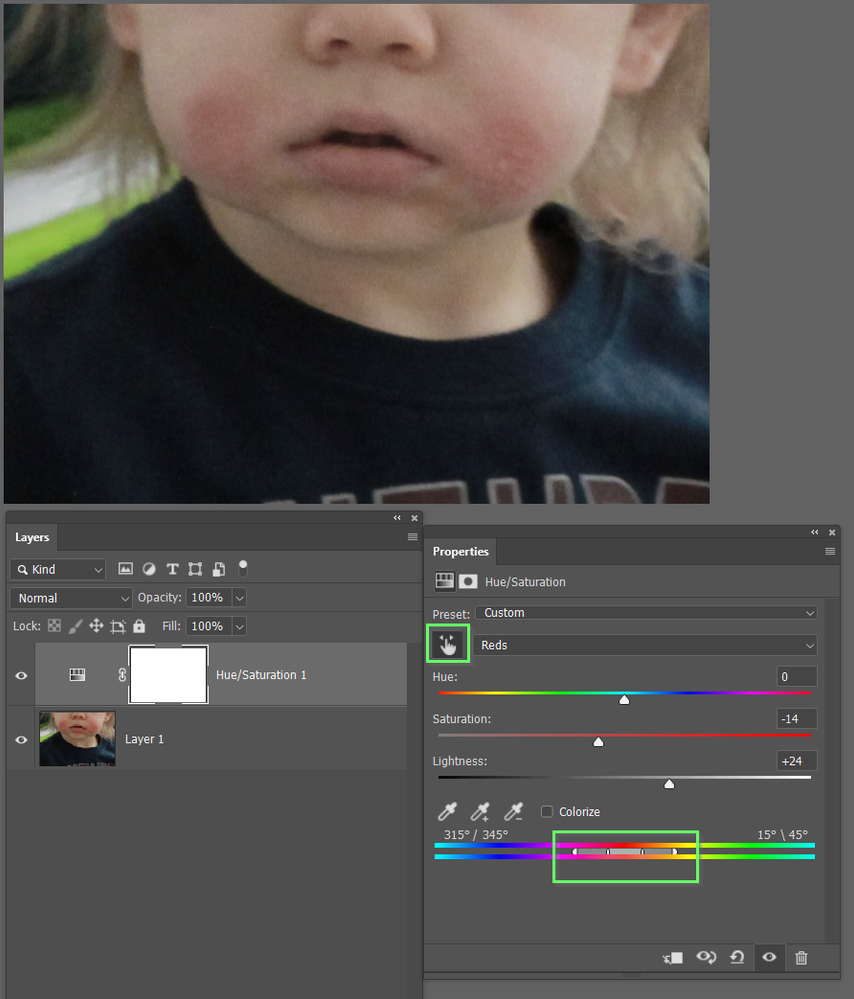
An alternative is to use the little finger scrubby tool and click on the area you want to affect, This will usually be more accurate, but I don't think it makes a difference in your case. The range of colors you have selected will be shown in the color bars at the bottom of the Properties panel, and you can manually drag those sliders to extend or reduce thew range.
Paint with black in the layer mask if the edit has affected unwanted pixels. If you do use the mask, then it will probably best to set some Feather from Mask Properties.
Copy link to clipboard
Copied
Thanks so much for this info and adding the pics of how-to! Going to try this method out.
Copy link to clipboard
Copied
I would use color range. Zoom in to the pixel level and select the most red and off color pixels. That will make a pretty good selection. Then use either or curves or hue/saturation to tweak the reds to a more yellow hue.
Another option that is more advanced would be frequency separation.
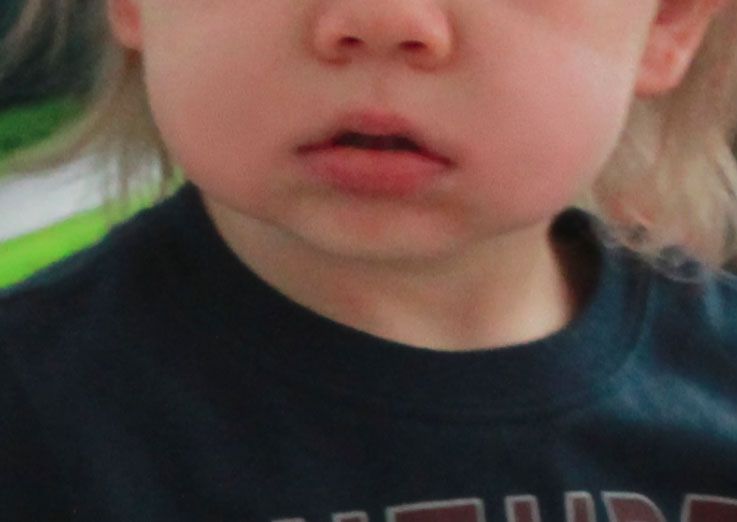
Here's a quick attempt at frequency separation, you need to do a lot of subtle painting at low opacity to blend in the colors.
Copy link to clipboard
Copied
Thanks so much for sharing this info! Going to try this out it looks really good like that!
Copy link to clipboard
Copied
After creating the high and low frequency layers for the frequency separation, I added a blank layer between the two to do the retouching. I used a very soft brush at 5 to 10 opacity. I sampled colors just outside the red area and slowly painted over the red area to blend it in.
Copy link to clipboard
Copied
BEFORE AFTER
Choose a normal flesh tone within the image.
Widen the canvas and add that tone as a flat color patch of about half or a quarter of the image size.
Choose the Patch tool (matches texture and tonal modeling of surrounding area). Select a portion of a cheek and drag to the color patch.
Repeat with small selections for correction.
Increase the contrast slightly depending on the content of remainder of the image
Crop out the flat tone sample.
