 Adobe Community
- Home
- Photoshop ecosystem
- Discussions
- Re: Losing detail in highlights after ACR to Photo...
- Re: Losing detail in highlights after ACR to Photo...
Losing detail in highlights after ACR to Photoshop

Copy link to clipboard
Copied
I have an image with white-like highlight on the subject face, however not blown out. When I take down the exposure in ACR the highlights show all the details again nicely. However when I don't touch the exposure in ACR and just proceed to Photoshop, the exposure and brightness adjustment layer yield a far inferior, rather uncomparable result with little to no detail. Also when I immediatelly apply Camera Raw filter on the created background layer the results are again immediatelly worse.
I seem to have improved the quality by switching from 8 bit / channel to ProPhoto RGB 16 bit / channel but the difference is still there and very apparent. From what I have researched there might be really no way of fixing that and no right space or bit depth to fix this. I want to confirm that is true and that I will always lose data before I get to retouch the photo in Photoshop.
My goal was to selectively burn the blown parts of the image in PS but once I get to it the data has already been lost.
Probably a newbie problem. Is there any workflow to to be able to do this or any other/better approach to recover the details in the highlights?
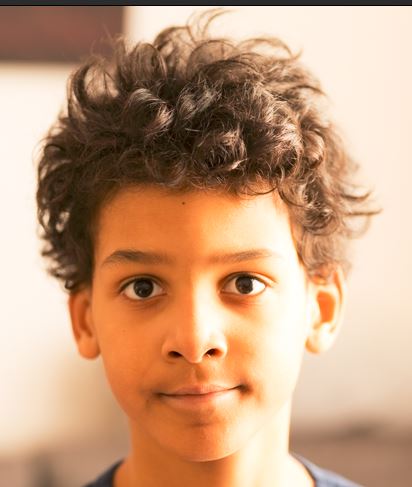
Original photo in ACR:
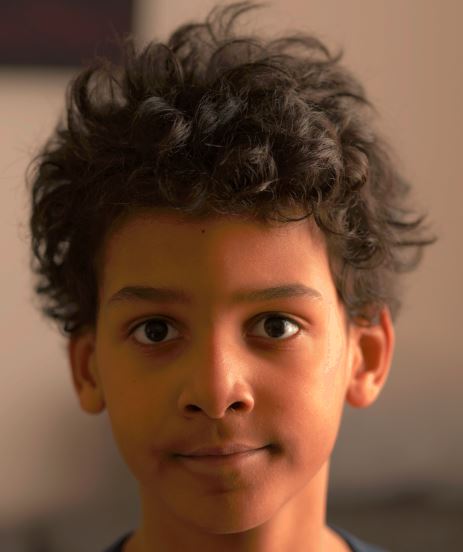
In ACR with exposure taken down:
Reopened in ACR after opening in Photoshop and exposure taken down:
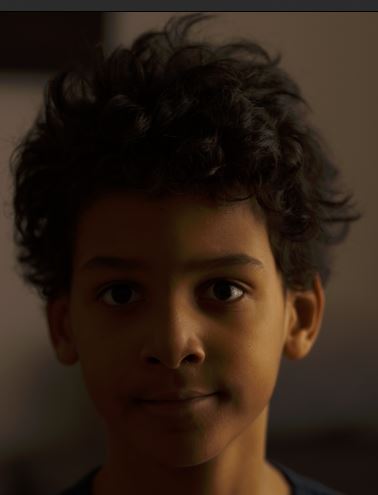
In Photoshop with brightness taken down:
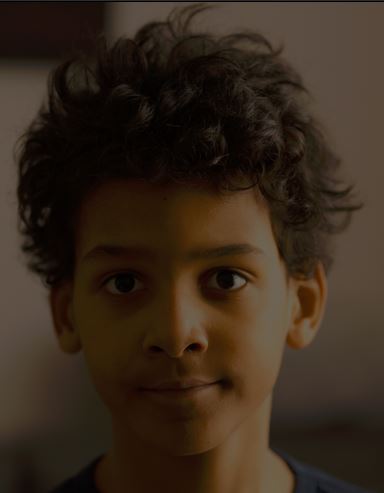
In Photoshop with exposure adjusment layer tuned down:


Explore related tutorials & articles
 8
Replies
8
8
Replies
8

Copy link to clipboard
Copied
This is the difference between raw and RGB. And a very effective demonstration at that.
A lot of data gets thrown away when ACR renders an RGB file to open into Photoshop. Only a small subset is used. A raw file contains everything the sensor recorded. If you could see it, it would be a very compressed and flat (and dark) grayscale image - not a useful image at all. It contains 12-14 stops of dynamic range, while a finished image, gamma encoded and contrast corrected, can only hold a little over half that. The rest is thrown out.
This is why you should always do as much as possible in ACR, before sending to Photoshop.
Copy link to clipboard
Copied
Thank you very much for confirming although it's not good news. Are there any techniques you would suggest to cope with the situation on the picture?

Copy link to clipboard
Copied
Open as Smart Object in Photoshop
Are you actually starting with a Raw file? If so, are you opening that file in Photoshop as an image or as a Smart Object?
If you choose Open Image, you will simply get the image as it appears in that moment with all of the other information effectively thrown away.
If you choose Open Object, your image will still appear the same but all of the original Raw image information will be preserved within a Smart Object. Double clicking on that Smart Object thumbnail within Photoshop will get your back into Camera Raw where you can continue to make edits with all of the original information. Keep in mind this is an embedded copy of your original Raw file, not the original Raw file.
You can switch the Open button between Open Image and Open Object by holding down the Alt/Option key. If you prefer to change this option permanently, you can do so via the area I've circled in red below.

Local edits
It sounds like you are wanting to make a lot of local edits in Photoshop. Have you tried making these in Camera Raw? The range of tools in Photoshop is much larger than in Camera Raw. However, try to make the edits in Camera Raw if possible as you are making non-destructive edits to the original information which should give superior results.
Copy link to clipboard
Copied
Expanding on my previous post, you might want to check out this page from Adobe...

Copy link to clipboard
Copied
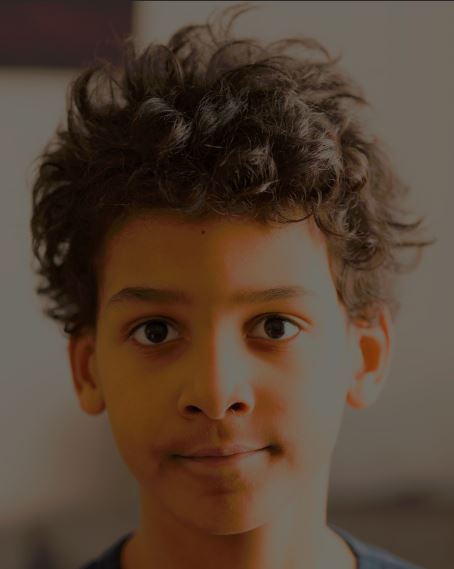
Hi!
I think that ACR can be really useful when dealing with difficult images. Here is the image that you uploaded done in Camera Raw shown with the sliders I used.

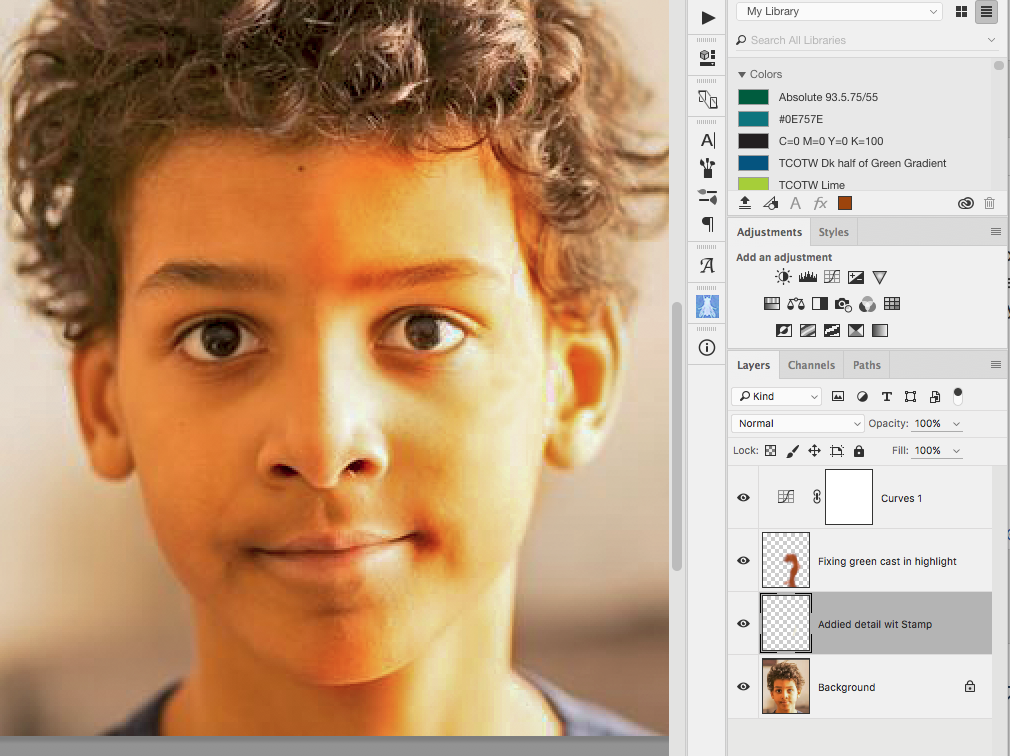
For the area on the right side of his face where there is no detail, you can use the Stamp Tool with a low opacity to add the detail back in. Then, to counteract the green cast on the highlighted area, you can add a layer and set it to Soft Light. Then with a brush, paint in the highlighted area with a darker color from the skin on the other side of the face. Make sure to adjust the opacity of that layer to temper the amount of color you add. Then the last thing I did was add a Curves adjustment to bring up the mid tones. See below:
Let us know if that helps!
Michelle

Copy link to clipboard
Copied
Hi Michelle, I think it is important for readers to keep in mind that using ACR to “edit” a rendered file is very different to working on the raw data. It is all about *rendering* the raw data “correctly”. This may be in a single render, or one may need different renderings and then combining them back together to get the best from both. As demonstrated earlier in the topic thread, if the image is over exposed in raw processing, then the rendered file simply has no data in the blown areas. In ACR, a huge amount of highlight data can be extracted.
Copy link to clipboard
Copied
Stephen is spot on.
I made a demonstration screenshot for another thread. Here's how you pull back overexposed highlights in ACR/Lightroom. The important thing here is that you actually retrieve additional data from the raw file - data that weren't originally used:
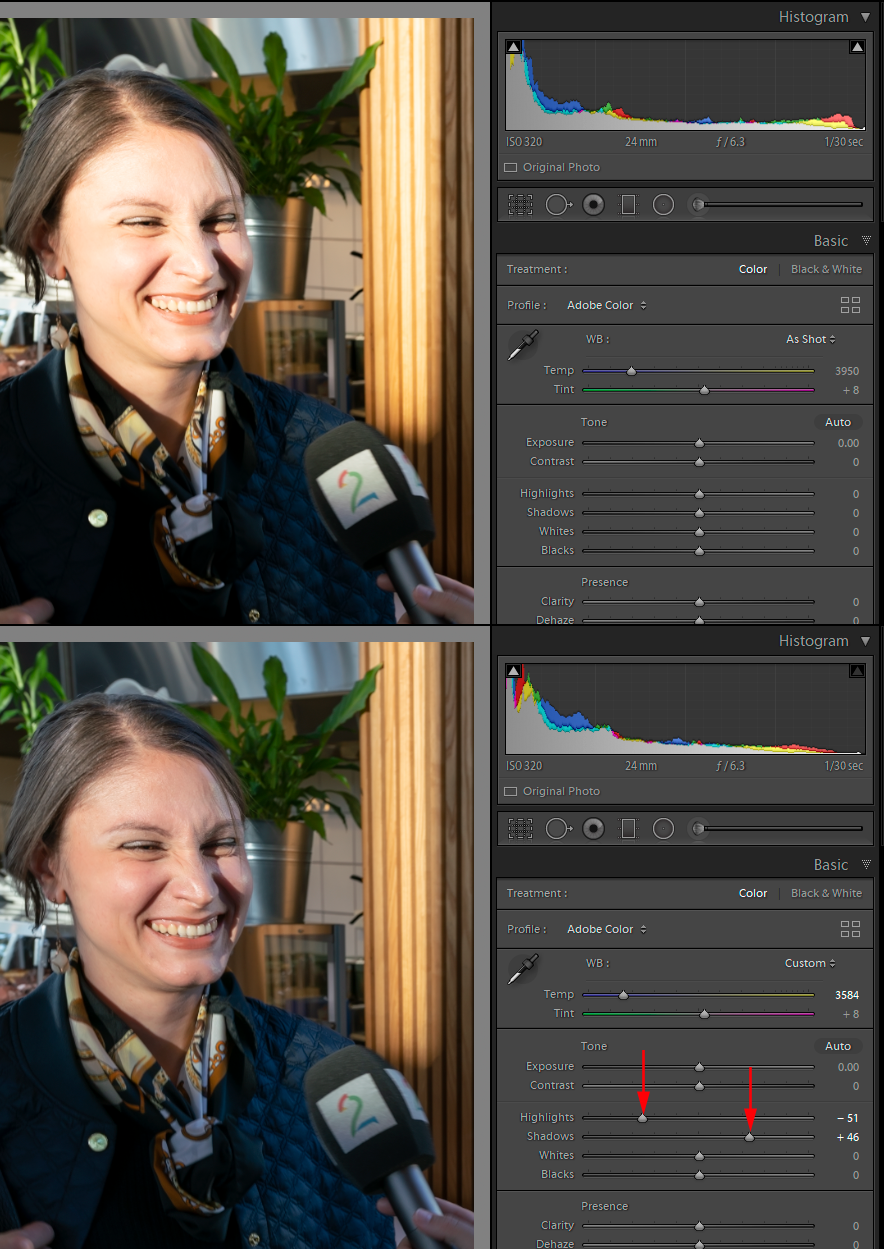
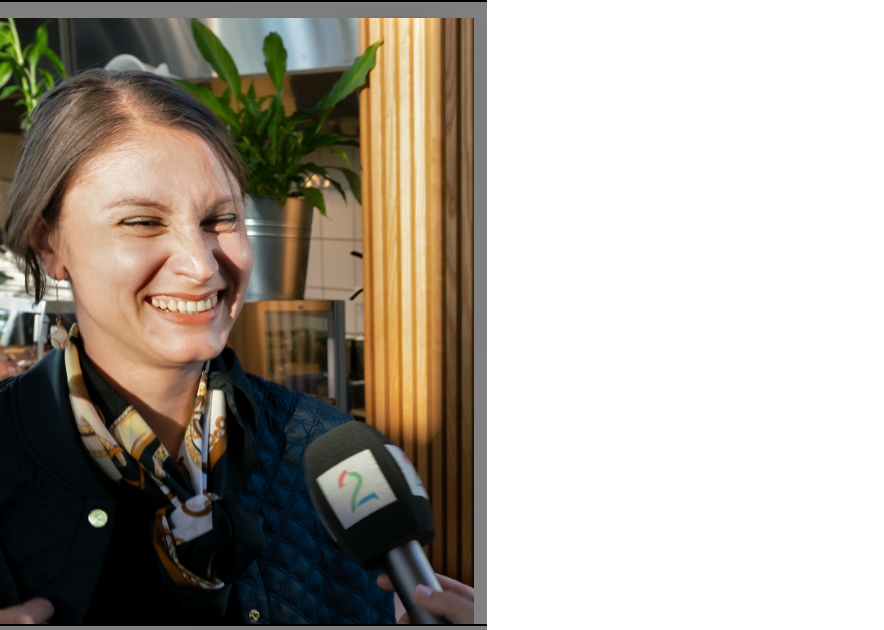
If you render the first version into Photoshop, those additional data are discarded. You can't get it back. So you can only compensate with what you have, and the result is, well...horrible. Here's Photoshop - waxy, patchy skin and bad color. Ouch-
Copy link to clipboard
Copied
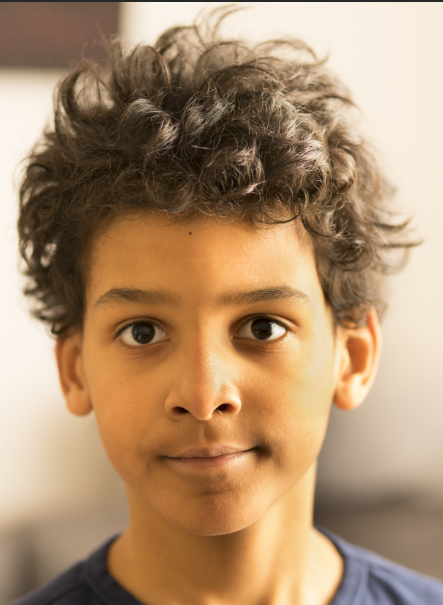
Thank you all for all the replies. So I tried getting the highlight details back right in ACR and this what I've been able to achieve using around four adjustment brush sections with exposures taken down. Unfortunately when I tried to bring the exposures even lower in the most blown out parts there was a strong yellow/green tint starting to appear in the skin tone so the taken down skin didn't match up with the rest. I tried to improve it with the local temparature and tint sliders but couldn't match it. Even in the photo below it's already starting to creep in.
I have also uploaded the original raw file here in case someone would like try do better (will stay uploaded for a week)  WeTransfer

 AdChoices