• Global community
    • Language:
      • Deutsch
      • English
      • Español
      • Français
      • Português
  • 日本語コミュニティ
    Dedicated community for Japanese speakers
  • 한국 커뮤니티
    Dedicated community for Korean speakers
Exit
0

Marquee Tool

Community Beginner ,
Mar 08, 2021 Mar 08, 2021

Copy link to clipboard

Copied

The area copied with marquee tool is smaller than the original image when copied to another image. How do I copy the exact size image.

The image gets cropped down when copying by the Marquee Tool.

As can be seen the image gets cropped down both in height and width.
In the attached print screen, both images are idenical. One ha sbeen copied through Marquee Tool and superimposed on the other, As can be seen the second image is smaller.

Views

377

Translate

Translate

Report

Report
Community guidelines
Be kind and respectful, give credit to the original source of content, and search for duplicates before posting. Learn more
community guidelines

correct answers 2 Correct answers

Community Expert , Mar 08, 2021 Mar 08, 2021

When copying between documents, onlt the pixel size is relevent.

Make sure units are set to pixels (right click inside a ruler)

And drag from the box at the intersetion of the rulers to the exact top left corner of the invoice.  Zoom in if you need to

image.png

Now check the exact size of the invoice from the ruler.

Repeat on the other document.  If the pixel sizes match, then they will line up.  If they don't just use Free Transform to stretch the smaller to match the larger.

Votes

Translate

Translate
Community Expert , Mar 08, 2021 Mar 08, 2021

Try this:


  • Calculate number of pixels by multiplying inches by resolution.
  • Activate Rectangular Marquee tool.
  • In the options bar set exact dimensions in pixels for marquee, from the Style drop down list choose Fixed Size then type pixel values into W and H fields followed by px.
  • Click once on image then reposition selection, copy then paste.


steps to set fixed dimensions for rectangular marquee.jpg

Votes

Translate

Translate
Adobe
Community Expert ,
Mar 08, 2021 Mar 08, 2021

Copy link to clipboard

Copied

When copying between documents, onlt the pixel size is relevent.

Make sure units are set to pixels (right click inside a ruler)

And drag from the box at the intersetion of the rulers to the exact top left corner of the invoice.  Zoom in if you need to

image.png

Now check the exact size of the invoice from the ruler.

Repeat on the other document.  If the pixel sizes match, then they will line up.  If they don't just use Free Transform to stretch the smaller to match the larger.

Votes

Translate

Translate

Report

Report
Community guidelines
Be kind and respectful, give credit to the original source of content, and search for duplicates before posting. Learn more
community guidelines
Community Beginner ,
Mar 08, 2021 Mar 08, 2021

Copy link to clipboard

Copied

Thank you Trevor for a prompt response.

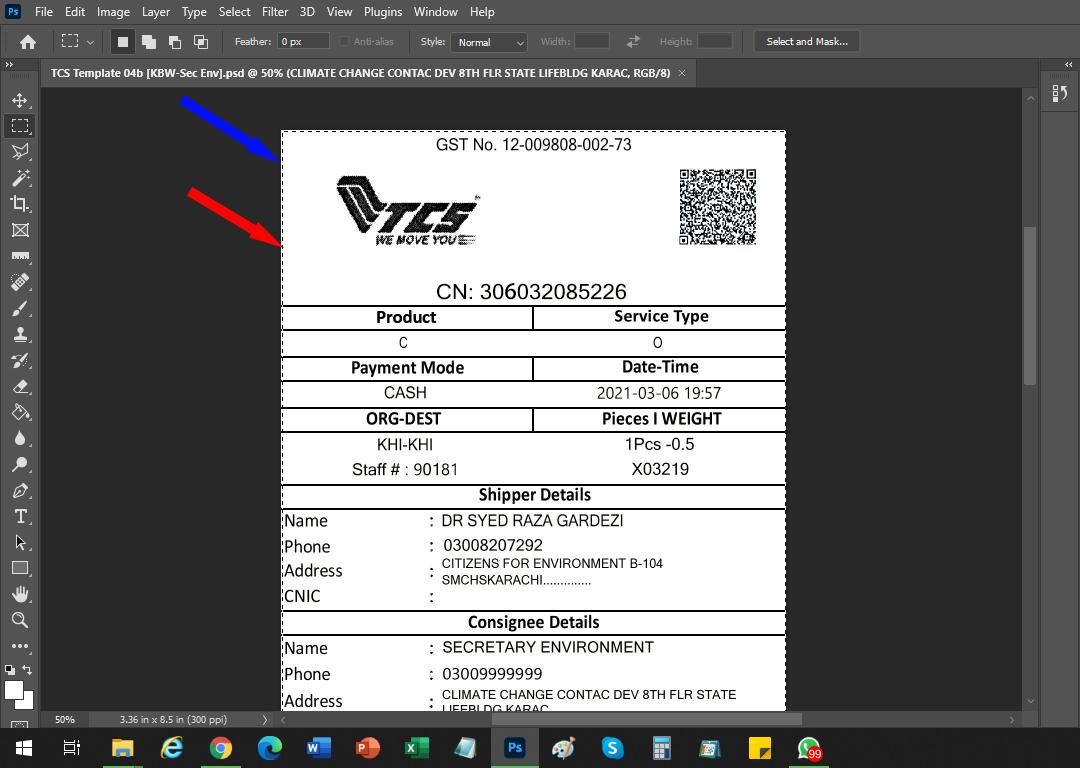
However, as can be seen from the attached screen-shot, the selected image is croped smaller than the original by a slight amount (but sufficient for it to be a problem for me). For example if the original image is 3.69 inches by 8.56 inhes, the copied image will be cropped down to 3.63 by 8.52. It happens only with the left and top border of the image. the right and the bottom borders are copied fully.

The Blue Arrow in the image shows the original image, while the Red Arrow shows the cropped down selelcted area which will get copied.

I have even tried using the "Select All" option from the Top Bar. Same problem.

Why isn't the whole image being copied. It is getting croped down.
Thanks, once again, for your prompt help.

Regards,

Dr Raza Gardezi

Votes

Translate

Translate

Report

Report
Community guidelines
Be kind and respectful, give credit to the original source of content, and search for duplicates before posting. Learn more
community guidelines
Community Expert ,
Mar 08, 2021 Mar 08, 2021

Copy link to clipboard

Copied

Try this:


  • Calculate number of pixels by multiplying inches by resolution.
  • Activate Rectangular Marquee tool.
  • In the options bar set exact dimensions in pixels for marquee, from the Style drop down list choose Fixed Size then type pixel values into W and H fields followed by px.
  • Click once on image then reposition selection, copy then paste.


steps to set fixed dimensions for rectangular marquee.jpg

Votes

Translate

Translate

Report

Report
Community guidelines
Be kind and respectful, give credit to the original source of content, and search for duplicates before posting. Learn more
community guidelines
Community Beginner ,
Mar 10, 2021 Mar 10, 2021

Copy link to clipboard

Copied

Trevor Dennis & Bojan Živković,

Thank you both.

You both have given correct answers and have resolved my issue.

You both get full credit.

Thank you once again, for helping me with my problem.
Regards,

Dr Raza Gardezi

Votes

Translate

Translate

Report

Report
Community guidelines
Be kind and respectful, give credit to the original source of content, and search for duplicates before posting. Learn more
community guidelines
Community Beginner ,
Mar 10, 2021 Mar 10, 2021

Copy link to clipboard

Copied

LATEST

Dear Trevor Dennis & Bojan Živković,

Thank you both.

You both have given correct answers and have resolved my issue.

You both get full credit.

Thank you once again, for helping me with my problem.
Regards,

Dr Raza Gardezi

Votes

Translate

Translate

Report

Report
Community guidelines
Be kind and respectful, give credit to the original source of content, and search for duplicates before posting. Learn more
community guidelines