 Adobe Community
- Home
- Photoshop ecosystem
- Discussions
- Re: New user - help with colour and shading of sma...
- Re: New user - help with colour and shading of sma...

Copy link to clipboard
Copied
Hi everyone,
I'm very new to Photoshop but I recently got a pen display and I'm really loving it. I am making maps for a tabletop game and found smart objects to be really useful so that I could produce a few trees and paste them all over, rotating them and resizing them.
At first the smart object was just black pen lines, and in a layer under the trees object, I coloured them in, highlighted and shaded them. I then thought to save time I could add colour to the smart object, to save me putting the same base colour over each tree and I could just shade/highlight, but this is where I'm stumped and probably need another method which I don't yet know. Using the smart object with colour, I can no longer shade in between the colour and pen layers (without doing it inside the object (which I can't do because the different rotation would make the shading wrong)).
Is there another method I can use to place many copies of my tree, not have to colour them in with the base green, and then still be able to shade/highlight under the black pen details of the tree.
I really hope that's clear xD
Kind regards,
Zarakk


 1 Correct answer

You could use the blend if sliders so that it knocks out the black, but doesn't knock out the dark green.

Explore related tutorials & articles
 8
Replies
8
8
Replies
8

Copy link to clipboard
Copied
Hi Zarakk,
Thanks for reaching out to us, could you please share some screenshots as that would be really helpful to understand what's going on?
Also, a video would be helpful as well.
Could you please check this thread and let us know if it helps?
Regards,
Sahil

Copy link to clipboard
Copied
Please post screenshots including the pertinent Panels to illustrate, as Sahil.Chawla already requested.
Several approaches seem possible, like
• doing the shading with Layers with Blend if-settings to avoid affecting the black lines
• using two instances of the SO with two different Layer Comps applied (one for the lines, one for the colors) for each current one
• …

Copy link to clipboard
Copied
To change a smart object layer pixels you need to work on its object then commit your changes to the temp object work document then Photoshop will updated the smarts object layer Object and render new pixels for the updated smart object layer.. You can not directly change smart object layers pixels with Photoshop tools. You have to change the object to updated a smart object layers content. You can clip adjustment layers to smart object layer and attach Smart filters to a smart object layer to change the appearance of a smart object layer however, these filters and adjustments do not change the layers actual pixels.
Copy link to clipboard
Copied
Hi guys, thanks for trying to help.
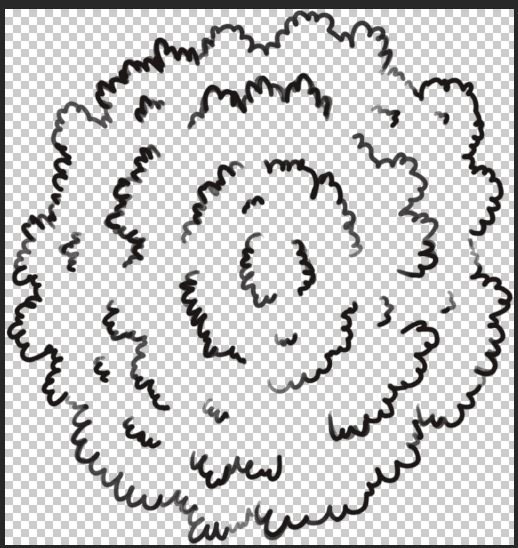
So this is an example of what I want. The black lines are a smart object, so that I can copy and paste as much as I want:
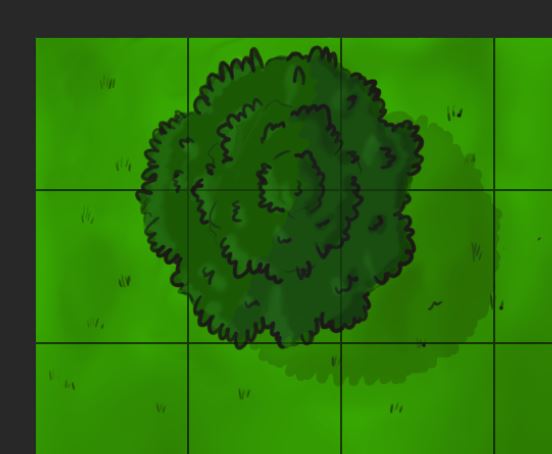
I then made 3 layers before the folder containing all the trees, one for base green, one for the high and lowlights and one for the shadow that sits over half the tree (not the one on the grass). This is what I want it to look like,
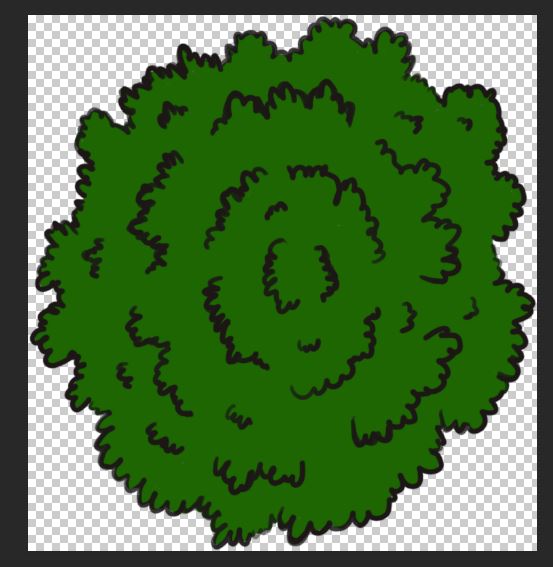
However, I then thought "Man I don't want to colour in the solid green, carefully sticking to the lines, for all 80 or so trees" so I put the base colour inside the smart object on a layer below the black pen. This gave me a smart object that looks like this:
However, now that the base green is in the smart image, there is no way to do the shading on top of the green and below the black pen.
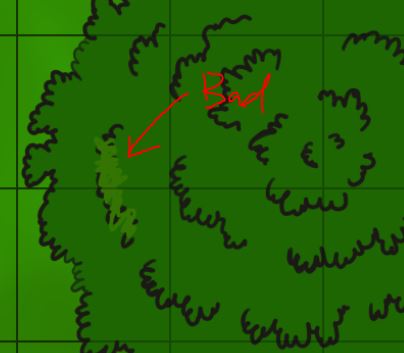
So I guess what I'm asking is, is there a way to bring in a version of the tree that is pen only, but still not have to redo the solid for every tree? And then be able to do the shading after the green and before the smart object?
Thank you for any help,
Zarakk
Copy link to clipboard
Copied
You could use the blend if sliders so that it knocks out the black, but doesn't knock out the dark green.

Copy link to clipboard
Copied
Thank you SO MUCH. This works so well and I imagine is a really powerful thing to know in general!
Thank you to everyone for trying to help. What a lovely community.
Zarakk
Copy link to clipboard
Copied
You can also clip the light green layer to the Smart Object so the shading will not go outside the tree.
Copy link to clipboard
Copied
Amazing!

 AdChoices