 Adobe Community

Copy link to clipboard
Copied
Hi Everyone
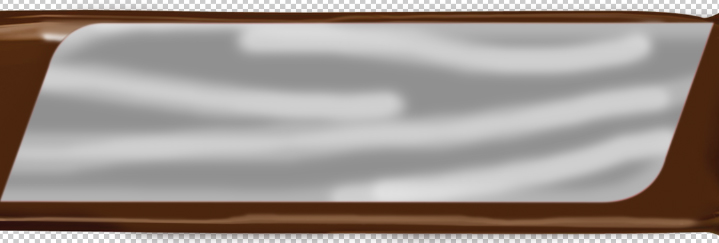
I am trying to apply plastic wrap effect but not sure what is the issue the effect is applying only on the center part, below is the screenshot, kindly help.
Thanks
SajidAttar


 1 Correct answer

It seems to work just fine. You are probably not aware that some effects operate on the whole image and thus their magic may not work as expected in "undefined" (empty, transparent or unselected) areas or that other colors in the image affect their perceived intensity. That being the case, you sometimes even need to create the effect in a separate document and copy & paste the result. Really seems to me one of those cases - your brown regions are interpreted as "steep" edges, affecting the insid
...Explore related tutorials & articles
 11
Replies
11
11
Replies
11

Copy link to clipboard
Copied
It's hard to know without seeing the "before" state too. Can you please upload a screenshot of the image before you applied plastic wrap and also a screenshot of the plastic wrap settings.
Copy link to clipboard
Copied
Hi
many thanks for the reply, below are the images as asked.
before the effect apply.
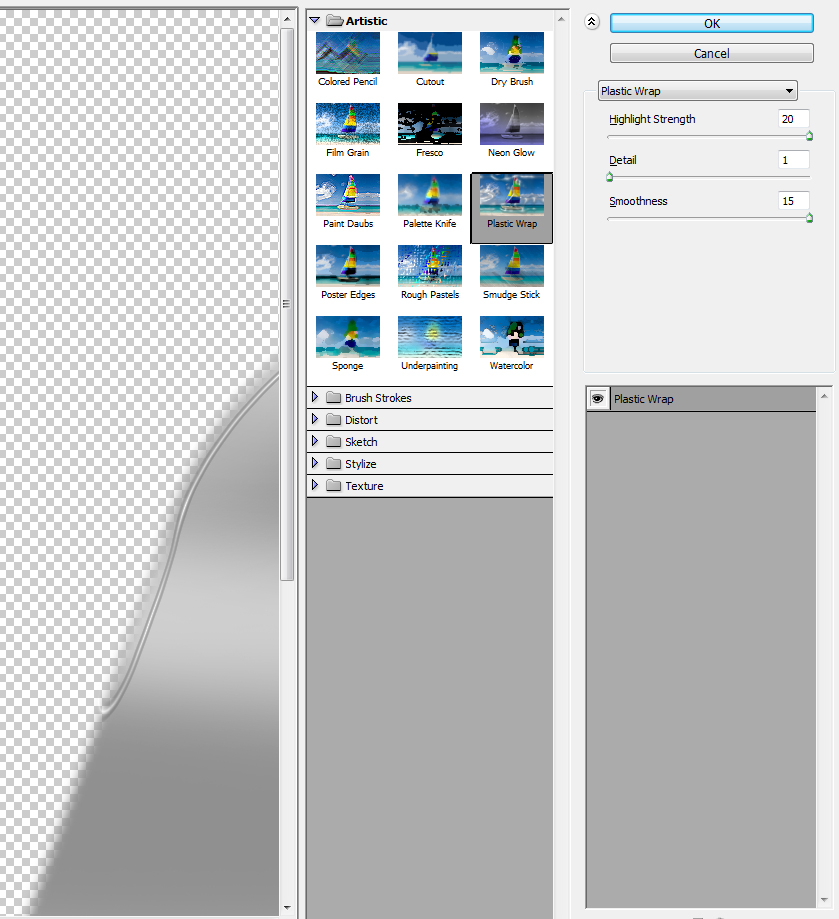
PlasticWrap-Setting
Copy link to clipboard
Copied
It seems to work just fine. You are probably not aware that some effects operate on the whole image and thus their magic may not work as expected in "undefined" (empty, transparent or unselected) areas or that other colors in the image affect their perceived intensity. That being the case, you sometimes even need to create the effect in a separate document and copy & paste the result. Really seems to me one of those cases - your brown regions are interpreted as "steep" edges, affecting the insides of your gray area. Ergo you will have to separate out things.
Mylenium
Copy link to clipboard
Copied
Thank You so much, I will definitely try your suggestion.

Copy link to clipboard
Copied
I'm having this same issue, with ANY and EVERY image I apply Plastic Wrap to. The ALL have the effect applied ONLY to the center of the image and it's also extremely bright.
Copy link to clipboard
Copied
As a quick fixe, try adding a blue to the Grey parts of the image to soften it before adding plastic wrap. You could also try evening out and lowering the contrast ore applying. Levels will help you adjust the gamma point to determine which areas are down and which are up.
Copy link to clipboard
Copied
Thanks, will give a try to that.
Copy link to clipboard
Copied
I'm having this same issue, with ANY and EVERY image I apply Plastic Wrap to. The ALL have the effect applied ONLY to the center of the image and it's also extremely bright.
Is there a setting in preferences or something else I'm missing?
Please help!

Copy link to clipboard
Copied
That's the way Plastic Wrap works. Similar to Lighting Effects and Emboss, it needs areas of light and dark tone to work on, by lifting one and dropping the other. Because it can be tricky to combine just the right settings to make it work, use the Filter Gallery.
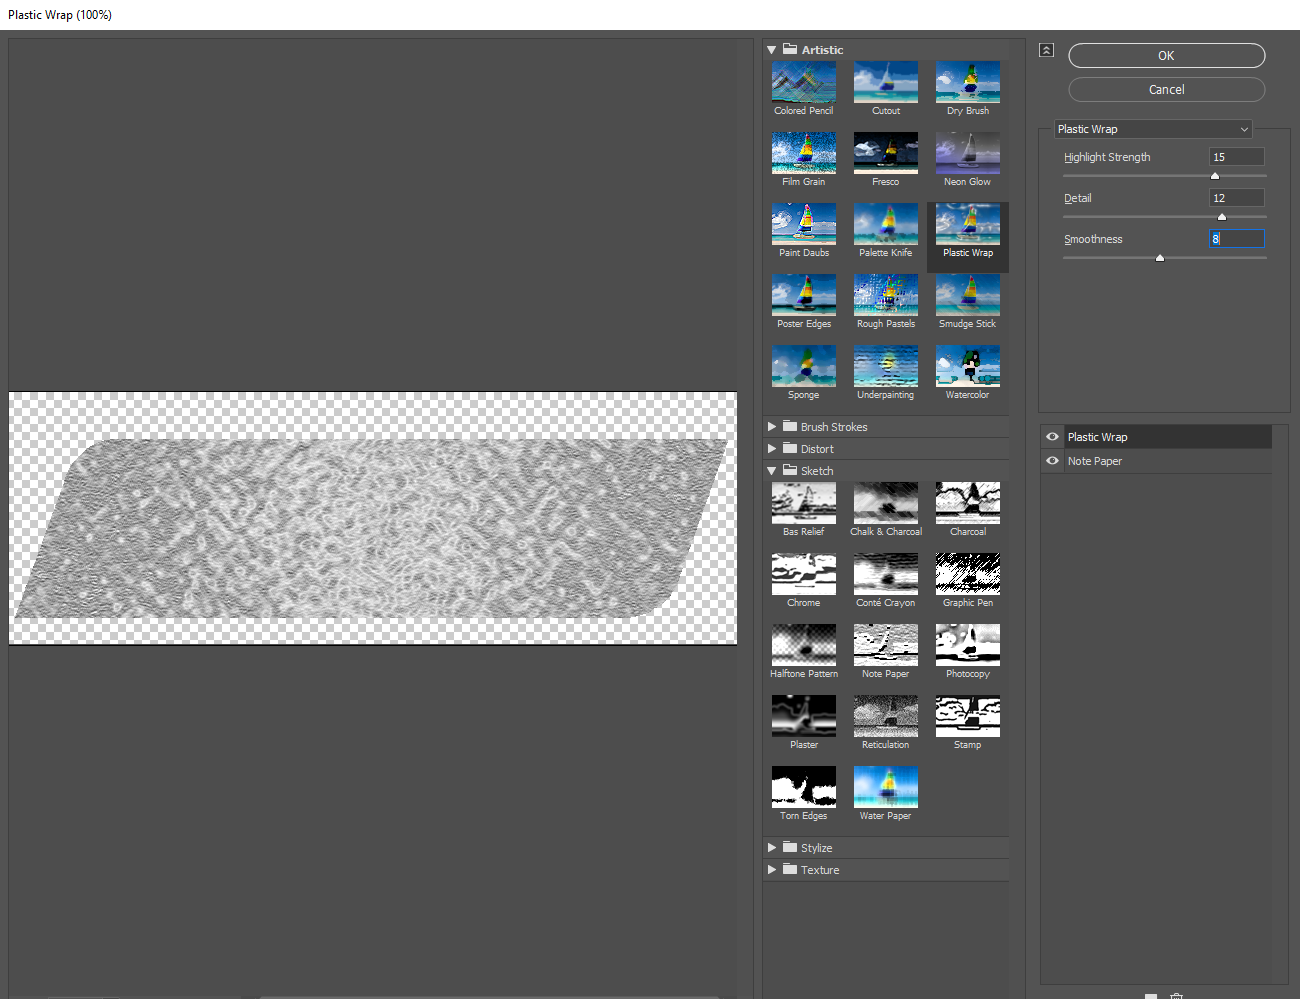
You need to give Plastic wrap something to work on. Using Filter Gallery lets you do this non destructively 'within this operation'. Read on to see what I mean. So I started with the shape in a mid grey. Ignore where it says 'Sponge' That just happens to be the last setting which I have turned off to show the original
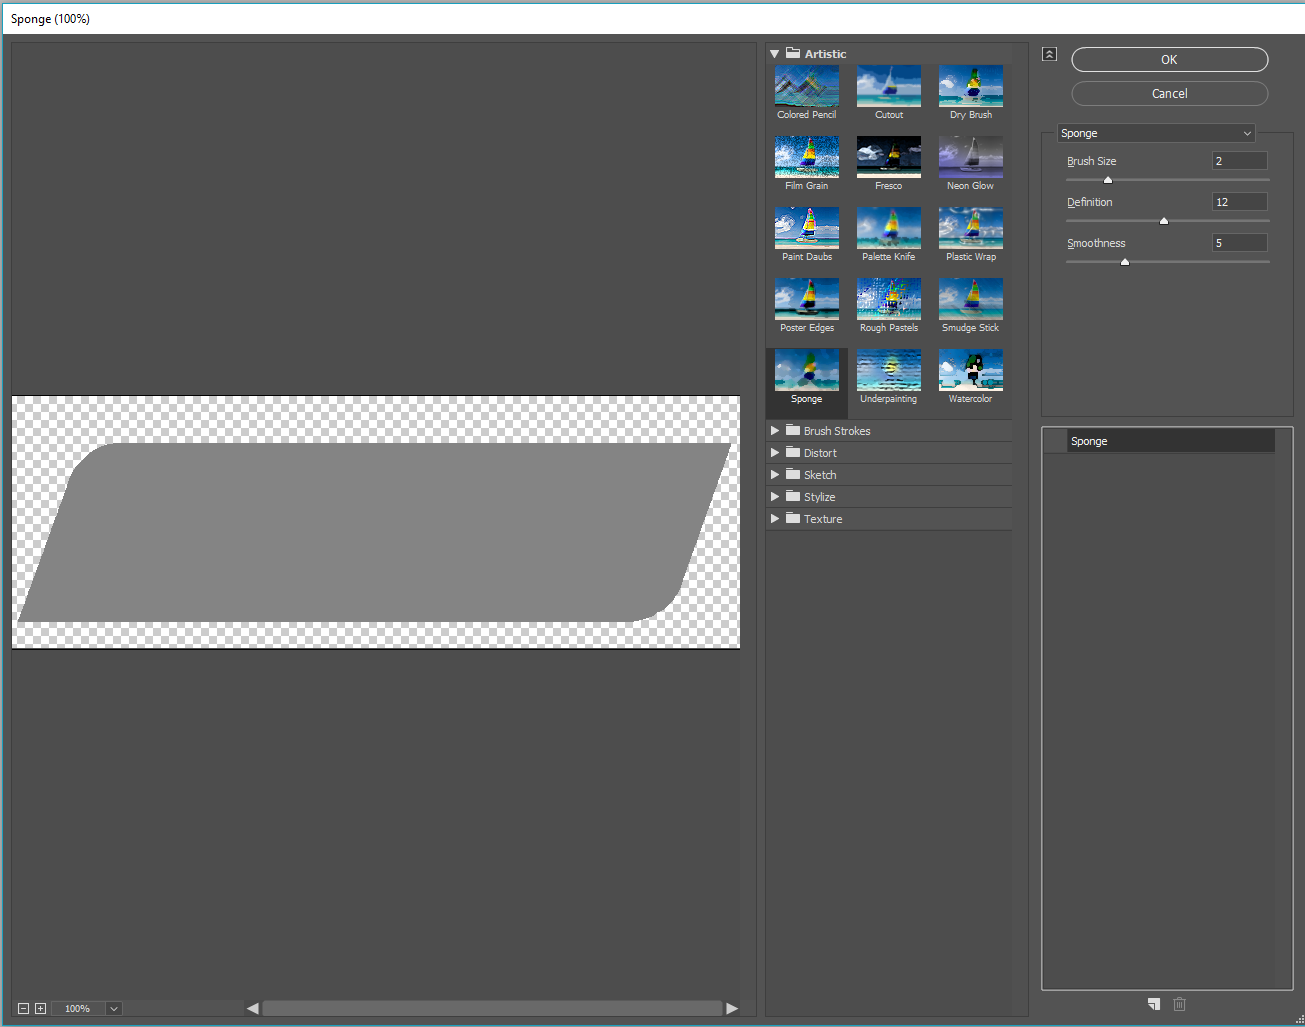
Having tried a few alternatives to give it the right sort of texture, I ended up with Note Paper. All I am trying to do is give the surface an overall texture.

Don't OK this, but rather click on the New Filter icon (highlighted in red at the bottom of my screen shot). You now have two lots of Note Paper filter.
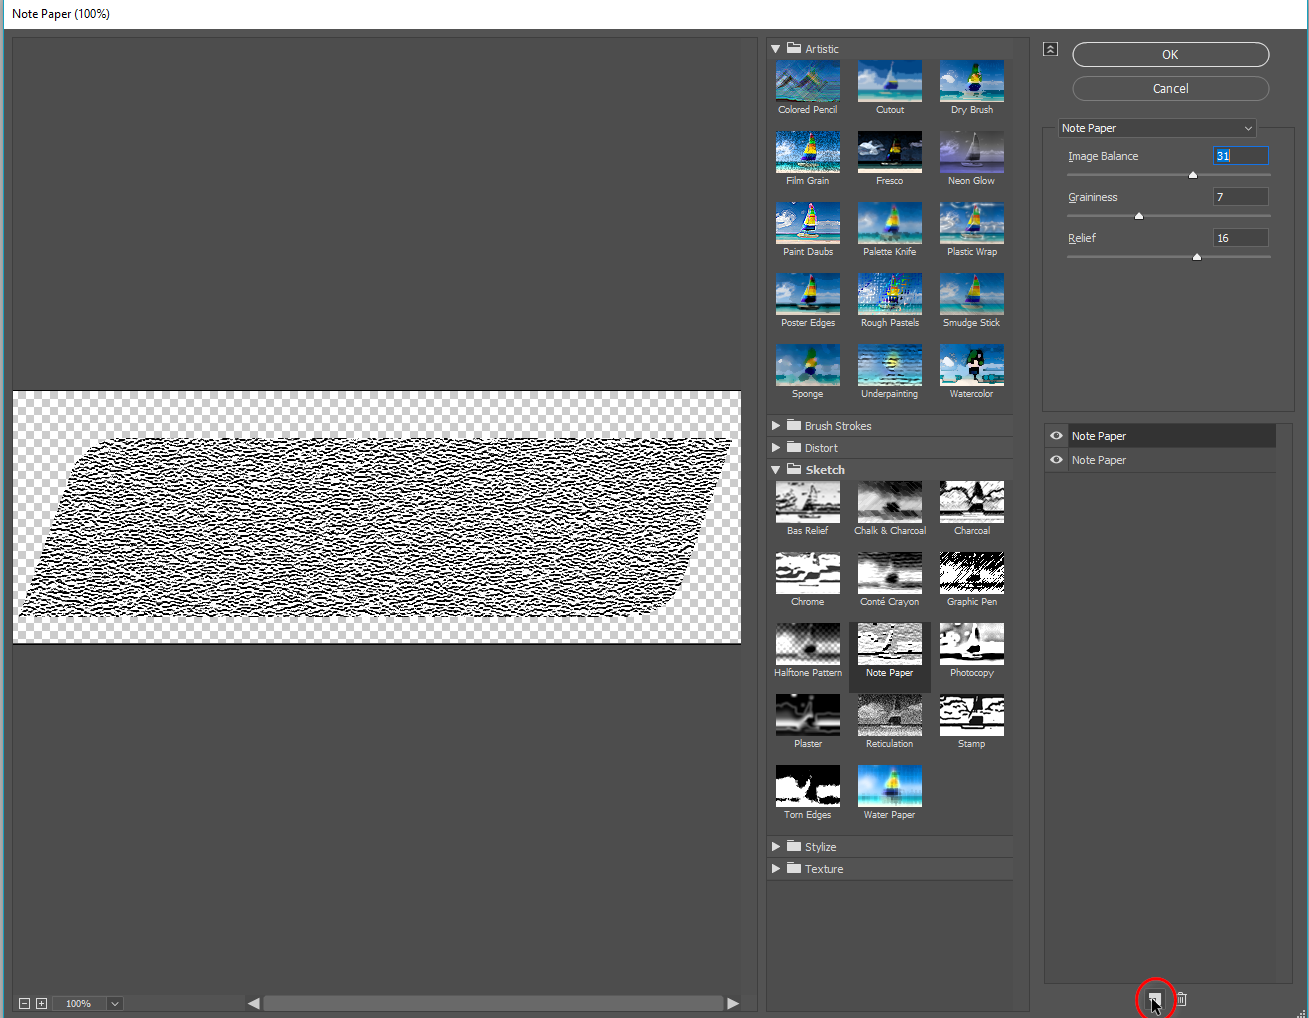
Select one and change it to Plastic Wrap, and adjust the settings for best effect. The advantage of this approach is that you can go back to the Note Paper filter and fine tune its settings to see how it works combined with Plastic Wrap. Because this is just a bit fiddly, it's a huge advantage working with both filters at the same time.
I've done that here and managed to push the warp effect nearer to the corners, but it is always going to be a compromise when using Plastic Wrap on a long thin rectangle like this, because it is lit from the centre.

In this particular instance, your graphic looks like the inside of a car door trim, in which case I wonder if Plastic Wrap is the right approach? Here, for instance, I have simply painted a white stroke on a layer above the grey shape. Blurred it, and clipped it to the grey layer. This gives me the flexibility to move the highlight for best effect.

Or Free Transform to make it a sharper curve (that is using 'curve' as in the shape of the trim, which now better matches the apparent shape of the wood behind it.

Copy link to clipboard
Copied
Here you go. A brushed metal look with an Inner Shadow layer style to make it look like part of the door trim.

Copy link to clipboard
Copied
I'm having this same issue, with ANY and EVERY image I apply Plastic Wrap to. The ALL have the effect applied ONLY to the center of the image and it's also extremely bright.
Is there a setting in preferences or something else I'm missing?
Please help!
Thanks!

 AdChoices