 Adobe Community
- Home
- Photoshop ecosystem
- Discussions
- Re: Restoring a water damaged photo
- Re: Restoring a water damaged photo
Restoring a water damaged photo
Copy link to clipboard
Copied
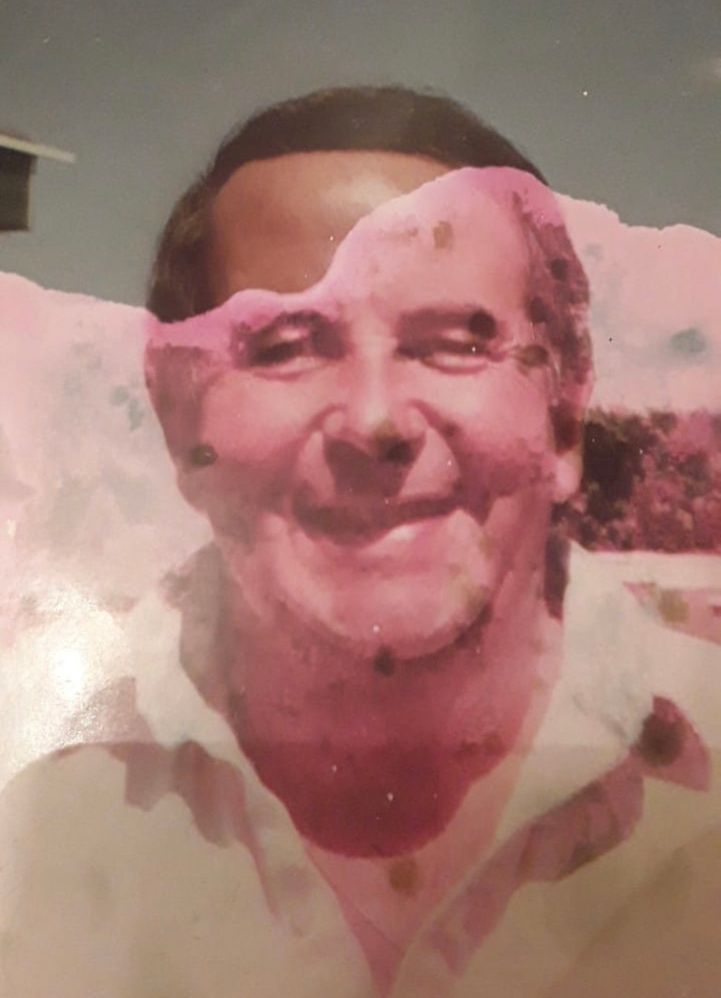
i am trying to restore this image in photoshop i am using the Clone tool but it has made him look fake is there a better way to do this ? here is the original image
Explore related tutorials & articles
Copy link to clipboard
Copied
There really isnt a lot of original clean source material to use.
There are several options:
1. isolate the discolored areas and attempt to use adjustment layers to change the color/tone to match each piece.
2. Find another image for a source and clone/patch from there.
3. Hand paint the discolored image.
This is a seriously rough pass using just the healing brush tool and two adjustment layers. There is potential to improve obviously.
Copy link to clipboard
Copied
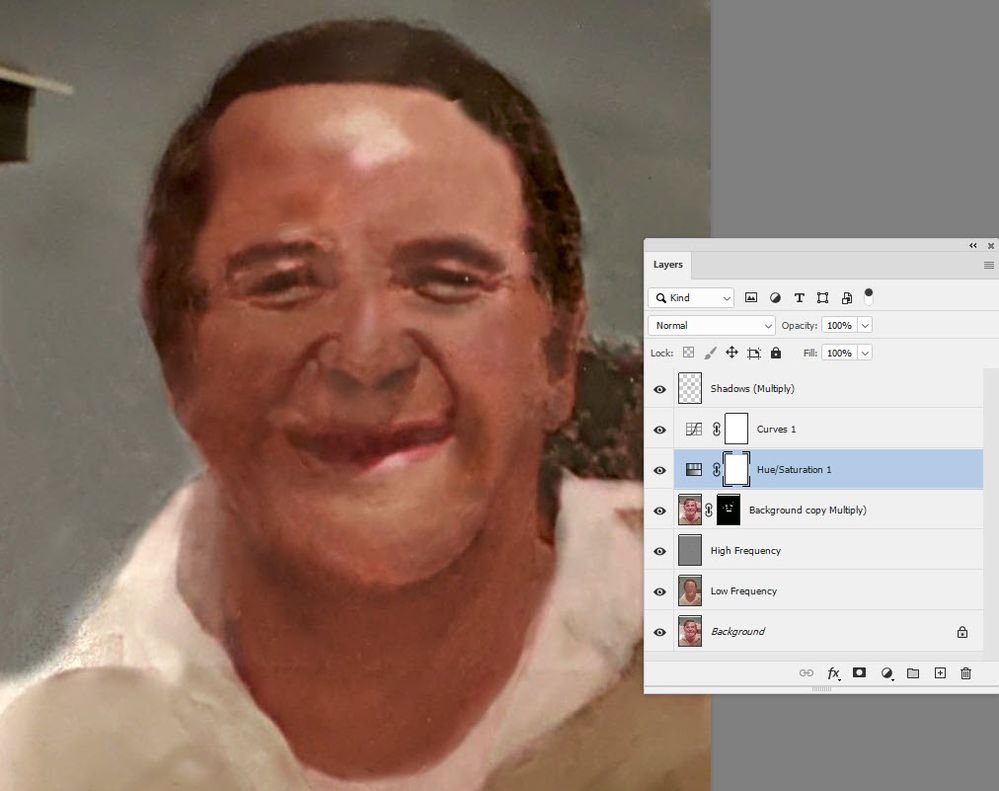
You could try frequency separation (see below) where you can separate the fine detail from the smooth colours then paint on the low frequency and clone/heal the high frequency.
This needs a lot more work, but hopefully you get the idea:
For frequency separation :
1. Make 2 duplicates of your image layer
Name the lower - "Low frequency"
Name the Higher - "High Frequency"
2. Select the Low frequency layer and use Filter Gaussian Blur (around 6.0)
3. Select the High frequency layer
Go to menu Image > Apply Image
Set the source layer to Low Frequency
Set the blending mode to Subtract
Set Scale to 2 *
Set offset to 128 *
Click OK
4. Change the blending mode of the high frequency layer to Linear Light
5. Now you can clone out blemishes on the high frequency layer and lighten or darken areas on the low frequency layer
* Note - the above steps are for 8 bit/channel images. For 16 bit/channel step 3 changes slightly
3. Select the High frequency layer
Go to menu Image > Apply Image
Set the source layer to Low Frequency
Check "Invert" next to channel
Set the blending mode to Add
Set Scale to 2
Set Offset to 0
Click OK
Now carry on with step 4 above
Dave


