• Global community
    • Language:
      • Deutsch
      • English
      • Español
      • Français
      • Português
  • 日本語コミュニティ
    Dedicated community for Japanese speakers
  • 한국 커뮤니티
    Dedicated community for Korean speakers
Exit
0

How does clip>time stretch work?

Participant ,
Nov 27, 2018 Nov 27, 2018

Copy link to clipboard

Copied

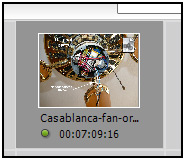
I tried to change the duration of a slide clip to about 7 seconds using Clip>Time Stretch.  As shown in the screen capture below taken from Project Assets it says I was successful (or changed to 7 hours?), but the actual duration is still about 4.5 seconds, which is apparently the default.

Untitled-1.jpg

. Windows 10 -- Premiere Elements 2018 -- Photoshop CC

Views

1.8K

Translate

Translate

Report

Report
Community guidelines
Be kind and respectful, give credit to the original source of content, and search for duplicates before posting. Learn more
community guidelines

correct answers 1 Correct answer

Community Expert , Nov 28, 2018 Nov 28, 2018

For a single still, you grab the edge and slide it.  You do it on the timeline, not in the assets panel.  As you hover the mouse over the left or right edge a red symbol pops up.  When it does, use the mouse button.  Everything moves as you do the sliding.

Time stretch is for video clips and groups of stills, not single stills. 

Votes

Translate

Translate
Community Expert ,
Nov 27, 2018 Nov 27, 2018

Copy link to clipboard

Copied

It changes it on the timeline, not the Project Assets.

Change a clip’s speed by using Time Stretch

  • To slow down a clip that has another clip on its right in the Expert view timeline, drag it to an empty track or to the end of the movie. This way, you can stretch it without bumping into an adjacent clip.

  • Select the clip in the Expert view timeline.

    Note:If you haven’t yet inserted the clip into the Expert view timeline, you can select it in the Project Assets panel instead.

  • Choose Clip > Time Stretch. Alternatively, click the Tools panel on the Action bar and choose Time Stretch.

  • In the Time Stretch dialog box, type a percentage for Speed. A value less the 100% slows down the clip; a value greater than 100% increases its speed.

  • (Optional) To keep the pitch of an audio clip unchanged, select Maintain Audio Pitch.

  • Click OK. Preview your changes, and then make adjustments as necessary.

  • If you moved the clip in step 1, drag it back into place in the movie.

Set the duration of a clip

The duration of a video or audio clip is the length of time it plays from its first frame (In point) to its last frame (Out point). The initial duration of a clip is the same as it was when the clip was imported or captured. Most often, you change a clip’s duration by trimming frames from either end. But you can also trim the end of a clip by designating a specific duration.Unlike video, still images are not limited to the length of the original clip. You can set their duration to any length.

  • Select a clip in Project Assets panel or in the Expert view timeline.

  • Choose Clip > Time Stretch.

  • In the Time Stretch dialog box, click the Link button to unlink speed and duration. When linked, changing the duration also changes the playback speed of the clip.

    Note:When you increase the speed beyond a certain limit, the duration changes even if you have unlinked speed and duration.

  • Type a new duration, and click OK.

from here:

Change clip speed & duration in Premiere Elements

Votes

Translate

Translate

Report

Report
Community guidelines
Be kind and respectful, give credit to the original source of content, and search for duplicates before posting. Learn more
community guidelines
Participant ,
Nov 27, 2018 Nov 27, 2018

Copy link to clipboard

Copied

Unlike video, still images are not limited to the length of the original clip. You can set their duration to any length.

  • Select a clip in Project Assets panel or in the Expert view timeline

  • Choose Clip > Time Stretch.

In the Time Stretch dialog box, click the Link button to unlink speed and duration. When linked, changing the duration also changes the playback speed of the clip.

Type a new duration, and click OK.

I'm trying to increase the duration of of a still image. I had found the page you linked to and followed the procedure above. 

My point is the length shown is increased (screen capture) but the length in timeline does not change.

. Windows 10 -- Premiere Elements 2018 -- Photoshop CC

Votes

Translate

Translate

Report

Report
Community guidelines
Be kind and respectful, give credit to the original source of content, and search for duplicates before posting. Learn more
community guidelines
Participant ,
Nov 27, 2018 Nov 27, 2018

Copy link to clipboard

Copied

When you increase the length of a clip is it supposed to push the part of the timeline to the right to make room for the new length?

. Windows 10 -- Premiere Elements 2018 -- Photoshop CC

Votes

Translate

Translate

Report

Report
Community guidelines
Be kind and respectful, give credit to the original source of content, and search for duplicates before posting. Learn more
community guidelines
Participant ,
Nov 27, 2018 Nov 27, 2018

Copy link to clipboard

Copied

I may have figured it out.  If you change the length then delete the version on the timeline and replace it with the one where you increased the time, it appears to work.  Very clumsy.  Not the way I'd design a railroad.

. Windows 10 -- Premiere Elements 2018 -- Photoshop CC

Votes

Translate

Translate

Report

Report
Community guidelines
Be kind and respectful, give credit to the original source of content, and search for duplicates before posting. Learn more
community guidelines
Community Expert ,
Nov 28, 2018 Nov 28, 2018

Copy link to clipboard

Copied

For a single still, you grab the edge and slide it.  You do it on the timeline, not in the assets panel.  As you hover the mouse over the left or right edge a red symbol pops up.  When it does, use the mouse button.  Everything moves as you do the sliding.

Time stretch is for video clips and groups of stills, not single stills. 

Votes

Translate

Translate

Report

Report
Community guidelines
Be kind and respectful, give credit to the original source of content, and search for duplicates before posting. Learn more
community guidelines
Community Expert ,
Nov 28, 2018 Nov 28, 2018

Copy link to clipboard

Copied

whsprague  wrote

For a single still...

...a slide clip...

I was thinking video and completely missed that it was a still and Time Stretch was not even needed.

Votes

Translate

Translate

Report

Report
Community guidelines
Be kind and respectful, give credit to the original source of content, and search for duplicates before posting. Learn more
community guidelines
Community Expert ,
Nov 28, 2018 Nov 28, 2018

Copy link to clipboard

Copied

LATEST

The OP's first sentence included "slide clip".  Mention of "still image" didn't show up until well into the discussion. 

A hidden feature in Time Stretch is changing the length of an entire slide show.  Say you put a couple dozen slide on Video 1.  The play length will be determined by the default duration in Settings.  Add a favorite song and the image sequence duration is not likely to match.  Select all of the images on the timeline, open Time Stretch and "scrub" the "Duration" until the image time matches the song time. 

It is not perfect!  It works best as a first step after loading the timeline.  The stills have to be of the same imported length.  It will not work if individual frames are adjusted before trying to use time stretch.

Votes

Translate

Translate

Report

Report
Community guidelines
Be kind and respectful, give credit to the original source of content, and search for duplicates before posting. Learn more
community guidelines