 Adobe Community
- Home
- Premiere Pro
- Discussions
- Re: Footage gets overexposed after importing into ...
- Re: Footage gets overexposed after importing into ...
Footage gets overexposed after importing into project

Copy link to clipboard
Copied
Hey community,
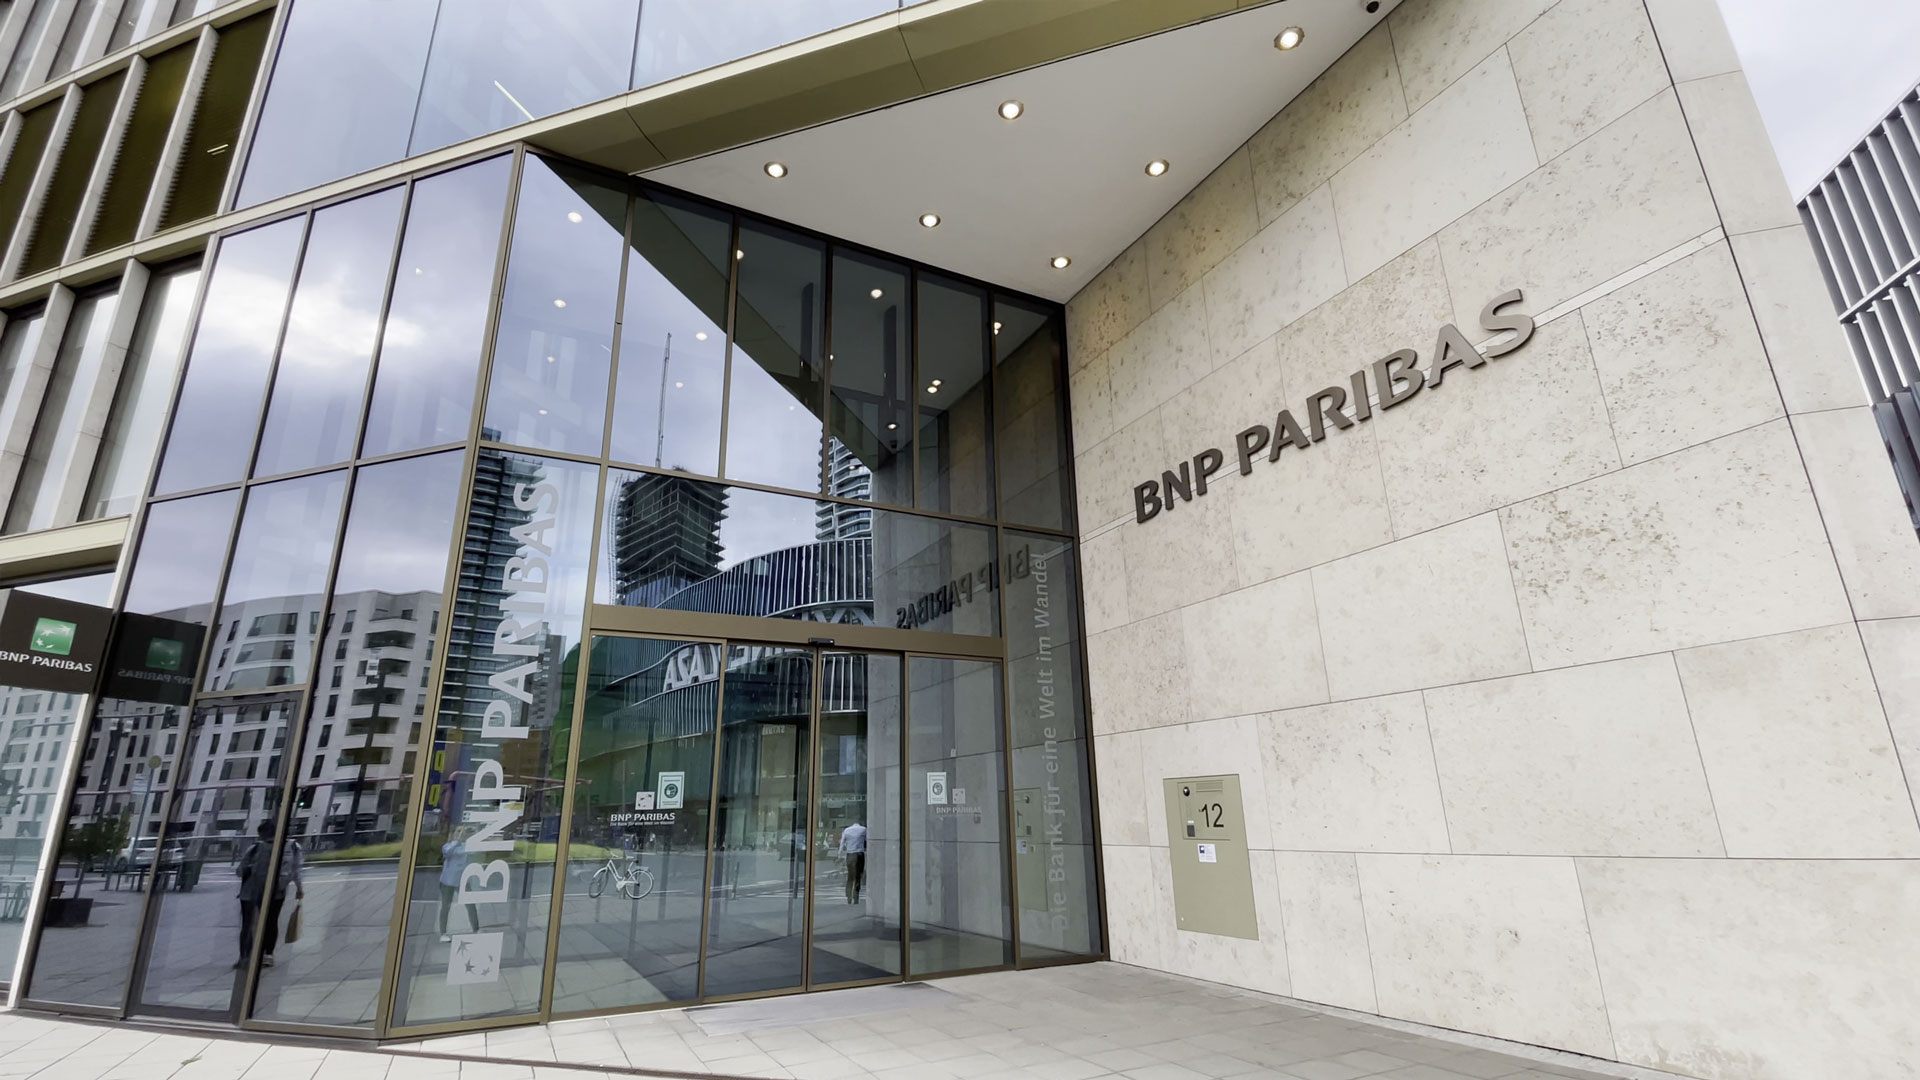
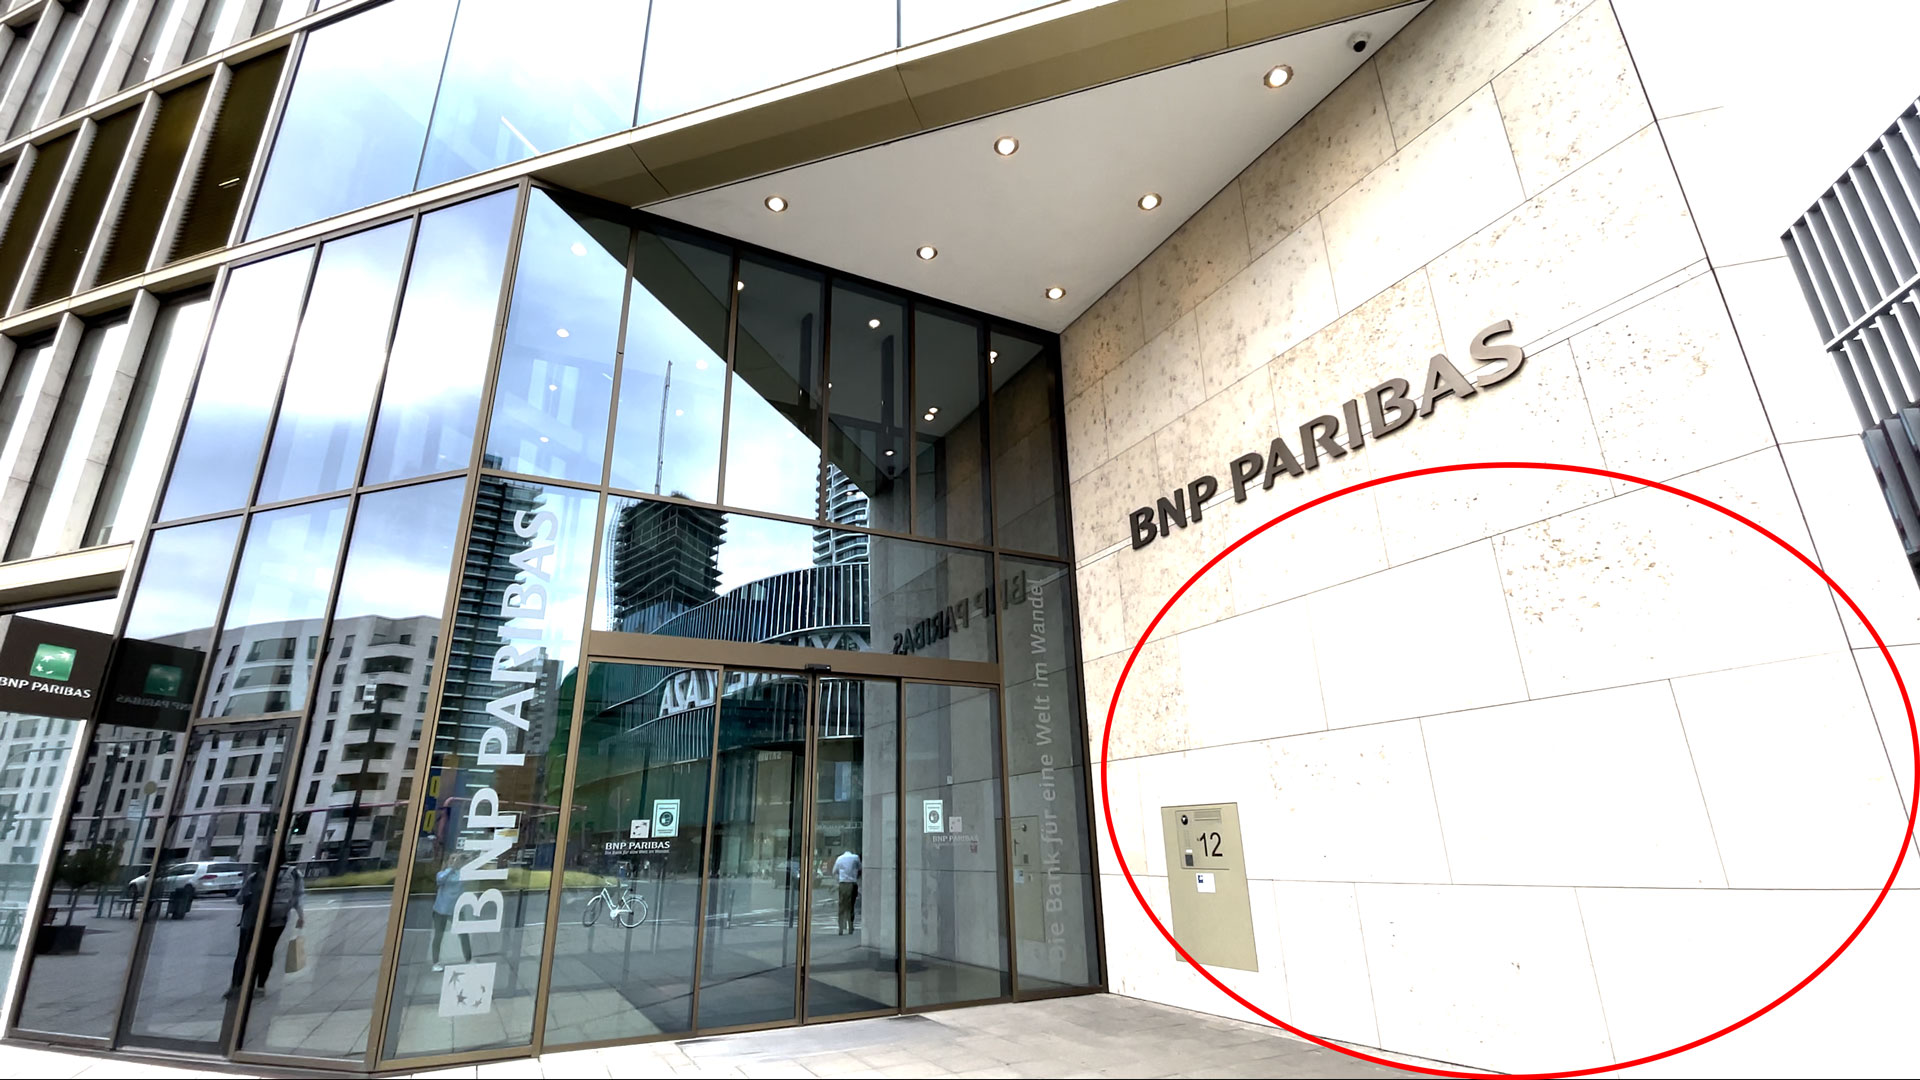
after importing a .MOV file to my premiere project it gets overexposed right away. When I playback the native file in the finder, everything looks alright. Picture one: File on harddrive. Picture two: File in premiere.
No filters are applied on the clip or timeline. I tried importing the footage to a brand new project. Nothing changed. I even get the same results, when rendering the clip to my hardrive. I'm using MacOS 12.0.1 (21A559). Premiere is version 22.0.0 Build 169. Working on a MacBook Pro 16" 2019. No external screens are connected. You can download the sample file here https://we.tl/t-8Zy0IQCRzO
I can't edit the video because everything looks burned out.
Thank you all for the support.


 38
Replies
38
38
Replies
38

Copy link to clipboard
Copied
I'm seeing the same thing, with the same specs. Tried a bunch of things with no success.

Copy link to clipboard
Copied
had the same issue and was able to troubleshoot it. It's because you are on an intel mac and that and newer versions of Premiere are written for the m1 chip. It's messed up on Adobe's part that they have not fixed this issue. Import that same footage into Premiere 2021 and see if that fixes it. It will.

Copy link to clipboard
Copied

Copy link to clipboard
Copied
They added both new color management settings for clips in a bin and for sequences plus new default behavior with recognized DSLR log types from some Canon, Sony, and Panasonic cameras especially.
So you have to check what color space the clip is 'seen' as by Pr in the clip properties. And you need to check what color space settings are used on the timeline in the Seqeunce settings dialog.
And as they used the manufacturer's log data as their model, some users (especiallly depending on how they exposed the media in-cam) can get rather bright images to start with from the default normalization.
Neil
Copy link to clipboard
Copied
Hello Neil, the problem seems to be deeper. The footage is even overexposed when I play it back in the queue monitor before dragging the clip into a sequence.

Copy link to clipboard
Copied
The footage is even overexposed when I play it back in the queue monitor before dragging the clip into a sequence.
By @Pavelito
- Right-click on the media file in the Project panel.
- Select Modify > Interpret Footage.
- Under Color Management, set Color Space Override to Rec. 709 & click OK.
FAQ: How to fix saturated/over-exposed HLG clips i... - Adobe Support Community - 12489252
Copy link to clipboard
Copied
That doesn't work. My footage looks very greenish and desaturated now. It has nothing to do with the original look of the raw file. I need the exact same look from the raw file in premiere. Overwriting to Rec 709 changes the footage again.

Copy link to clipboard
Copied
Same. Did you ever figure this out?
Copy link to clipboard
Copied
You have to make sure the color space of the file matches your timeline. Have you done that?
Check the properties for the clip ... if it's HLG or other HDR then if you want to work it in an SDR/Rec.709 timeline, you need to use the new color management controls in Modify/Interpret Footage.
So ... what's the color space of the clip? What device ... camera, phone, whatever, produced the file?
And what is your sequence CM set to? Without that information, it's all guessing.
Neil
Copy link to clipboard
Copied
this is actually worked in my case not sure why the system does that? but thanks!
Copy link to clipboard
Copied
this is actually worked in my case not sure why the system does that? but thanks!
By @christopherr57409466
Everything is explained in this video by Carl Soule at Adobe: Premiere Pro V22 - Understanding Color Spaces, HDR, and what that might mean to you - YouTube

Copy link to clipboard
Copied
this fixed my issue thank you so much!
Copy link to clipboard
Copied
The 24.x series puts all of the color management (CM) controls in one place ... Color Workspace, Lumetri panel, the new Settings tab.
There are a lot of behavioral changes in this version. Some of the things we had to do before, like setting ALL HLG or PQ HDR clips to Override-to-Rec.709 prior to use on an SDR/Rec.709 sequence ... aren't necessarily necessary now.
With the new behaviours for combined Project setting "auto-detectlog" and sequence setting for "auto-tonemapping" much HDR media can be remapped for SDR work simply by having those two settings 'on'.
But not all clips seem to behave correctly, even for media types Pr is supposed to recognize. And some mediat types aren't yet given a built-in setup. So ... manual control of clip, sequence, and export CM things can still be useful if not at times necessary.
Something we all seem to need to know these days.
Copy link to clipboard
Copied
The issue is actually that version of Premiere is written for the m1 chip and not intel chips. If the same footage was imported into Premiere 2021 or older versions it would display correctly. It's a bug with Premiere 2022 running on intel macs.

Copy link to clipboard
Copied
Same issue here on an M1 chip…
Copy link to clipboard
Copied
"Same here on an M1 chip..."
Describe exactly what you're seeing ... with what media, created by what, in what color space? Is it log-encoded?
And have you gone to the Project panel and done due diligence with the new user color management controls for those clips?
Neil
Copy link to clipboard
Copied
Wrong.
The 2021 version has the old color system and defaults, based on hard-codec Rec.709. The 2022 version for all platforms has a completely rebuilt color system and defaults and controls.
That's the reason for the difference between 2021 and 2022 ... not that it's not coded for your chip.
And note, the devs are a heavily Mac-based crowd running all era of Macs possible. And passionate eiditors personally using the app. So if it was on "all" chips like yours, they'd have been getting that behavior on all their personal work and their work as a dev.
Is there an issue on some rigs? Yup. Not nearly universal though. And that of course is always the fun part of troubleshooting.
Neil
Copy link to clipboard
Copied
Okay, maybe different issue, but the same problem.
I didn't say it was on "all" chips, just said I have the problem on an M1(as the guy above suggested Intel was the issue)
Copy link to clipboard
Copied
But most M1's aren't having the issue ... it is useful to know for troubleshooting that you are having it on an M1 for certain, but guaranteed that is not the only thing causing this behavior.
There's something else going on that may only affect some M1 chips ... or maybe just a very small subset of overall-chips. That's the thing 'we' need to puzzle out.
So "we" need information. First, when there's a bunch of posts in a thread, simply saying "same here" is not very descriptive.
So ... describe exactly what you're seeing. With what media, created by what, in what color space. And what if any steps you've taken for user color management.
And of course, what happens when you do.
Neil
Copy link to clipboard
Copied
What is the clip? Made or captured by what, and what format?
Neil
Copy link to clipboard
Copied
It is footage from a Samsung smartphone.
Codec: HEVC
CbCr-Matrix: ITU-R BT.2020
Copy link to clipboard
Copied
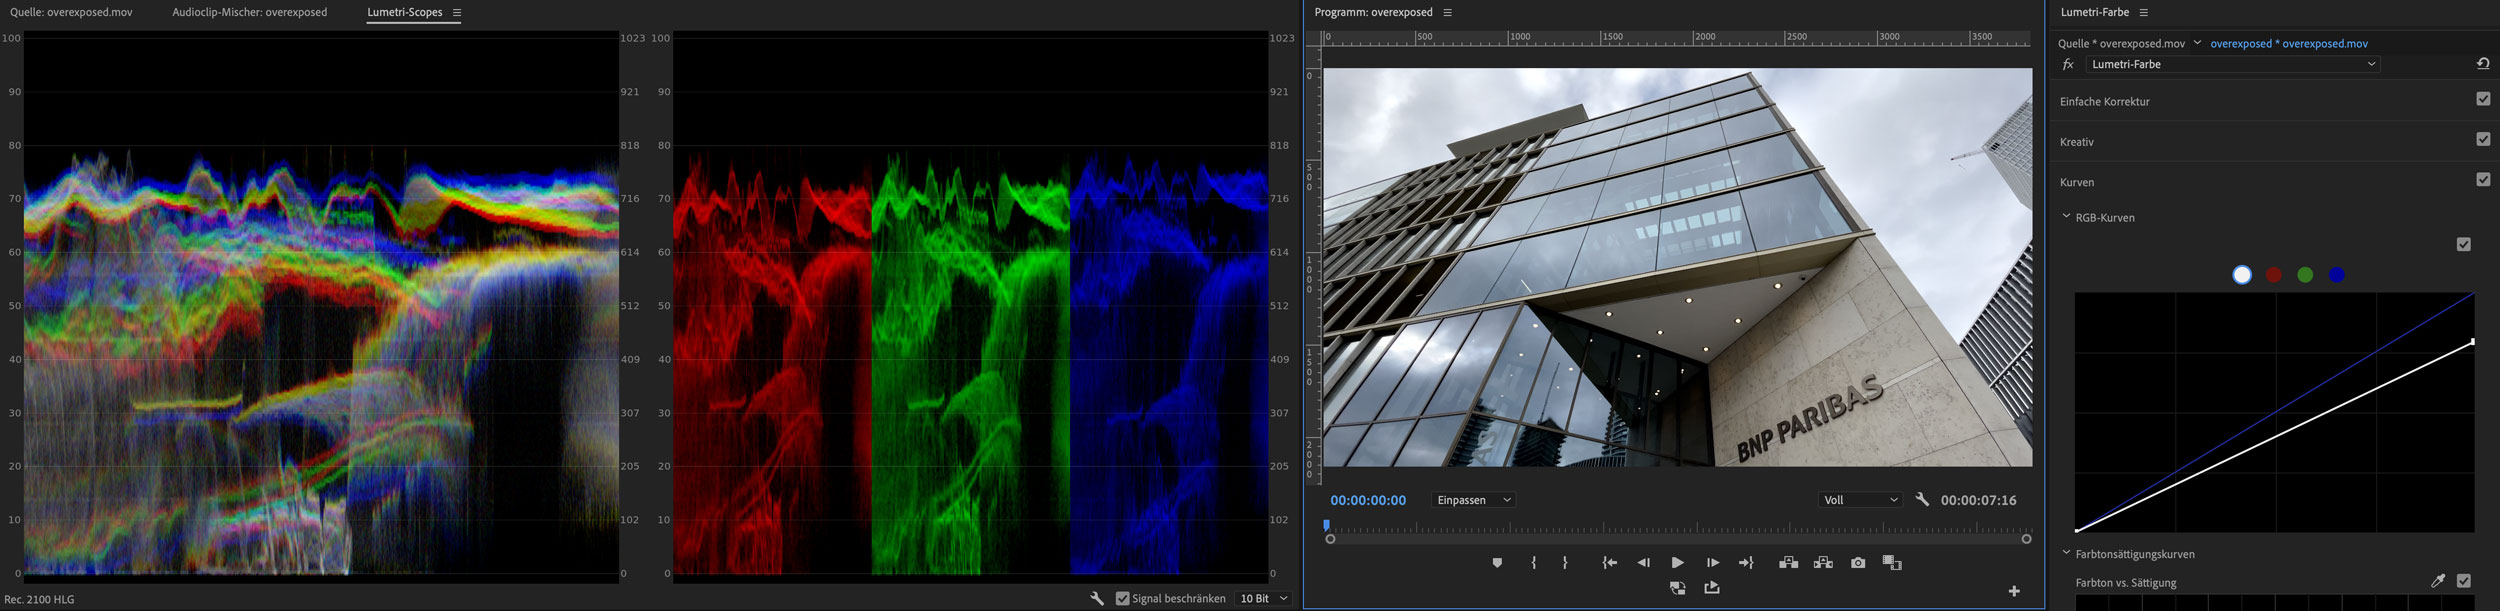
If you go into the color workspace, it would be useful if you could do a screen-grab of the scopes either RGB Parade or Waveform, that would be useful to see. I want to see if the data at the top is showing as clipped.
Then in the Lumetri panel Curves tab, and pull down the top of the RGB curves on the right side. What does that do to the image?
Neil
Copy link to clipboard
Copied
Copy link to clipboard
Copied
Thanks, yes, that's great clarification of the issue. There's a display problem here, not an image problem.
And yes, you can quickly and easily change every clip ... do this process, dropping the end of the RGB curve, just once to a clip on a sequence. Go to the Effects Control Panel (ECP) and select that Lumetri instance, save as a preset. Name and describe it clearly.
Now delete the effect from that clip.
Go to your bin of such clips. Select all of them. Drag/drop that preset from your Effects panel. Done.
It is now applied to the Source 'tab' of those clips, and will be in effect for any use of any part of those clips on any sequence in the project. And if you want to trim that on any clip on a sequence, you go to the Source tab in the Lumetri panel, that instance will be there, and you can adjust it to taste and need.
Alternative process
Or ... make the change to the curve as noted above. Then from the three-bar menu at the top of the Lumetri panel, select "save as a .cube". This saves the work of that Curves adjustment as a .cube form of LUT. I would suggest saving it to the Creative tab location in the following chart ... and NEVER to the program/package files location. You'll need to make the final two folders, the Technical and Creative.

You can apply that LUT in a couple ways. First by setting that LUT in the Creative tab's drop-down slot, and saving that Lumetri as a preset exactly as mentioned above. In this manner you can adjust the strength of the LUT and can also 'trim' the tonal and saturation values prior to the LUT so you never get clipping.
This Lumetri preset could then be applied from the Effects panel either to clips in the bin, where it goes as noted above to the Source settings/tab, or to selected clips on a timeline.
Next, simply apply the LUT in the Creative tab of Lumetri when you have such clips that need it.
I routinely apply bulk correction to clips in bins. It's a very normal part of the color correction/grading process, and speed things along marvelously.
Neil
-
- 1
- 2

 AdChoices