 Adobe Community
- Home
- Premiere Pro
- Discussions
- How to make the borders of a video look like a TV ...
- How to make the borders of a video look like a TV ...
How to make the borders of a video look like a TV screen...

Copy link to clipboard
Copied
Greetings. About a month ago, I was inspired to take up video editing as a hobby. My intentions remain resolute, but I have found the technical difficulties to be rather frsutrating.
I have spent a grand total of 20+ hours creating my first video, which is merely a seqeunce of still paintings with some text and a replica VHS effect added on top. Editing the contents of the video has proven to be fairly easy, yet I have attempted to export it several times, and each time the video has come out with an unsatifactory resolution.
I desire for the video to appear exactly like this: https://www.youtube.com/watch?v=h8L4nzVmijs
Where the perspective imitates a TV screen. For the life of me, however, I have not the slightest clue how I would achieve this. To make matters worse, the few times I have tried to upload drafts of my video to Youtube, they don't come close to even fitting the 1920 x 1080 resolution. If anyone could help, I would be immensely grateful.


 3
Replies
3
3
Replies
3

Copy link to clipboard
Copied
There are a few things going on here!
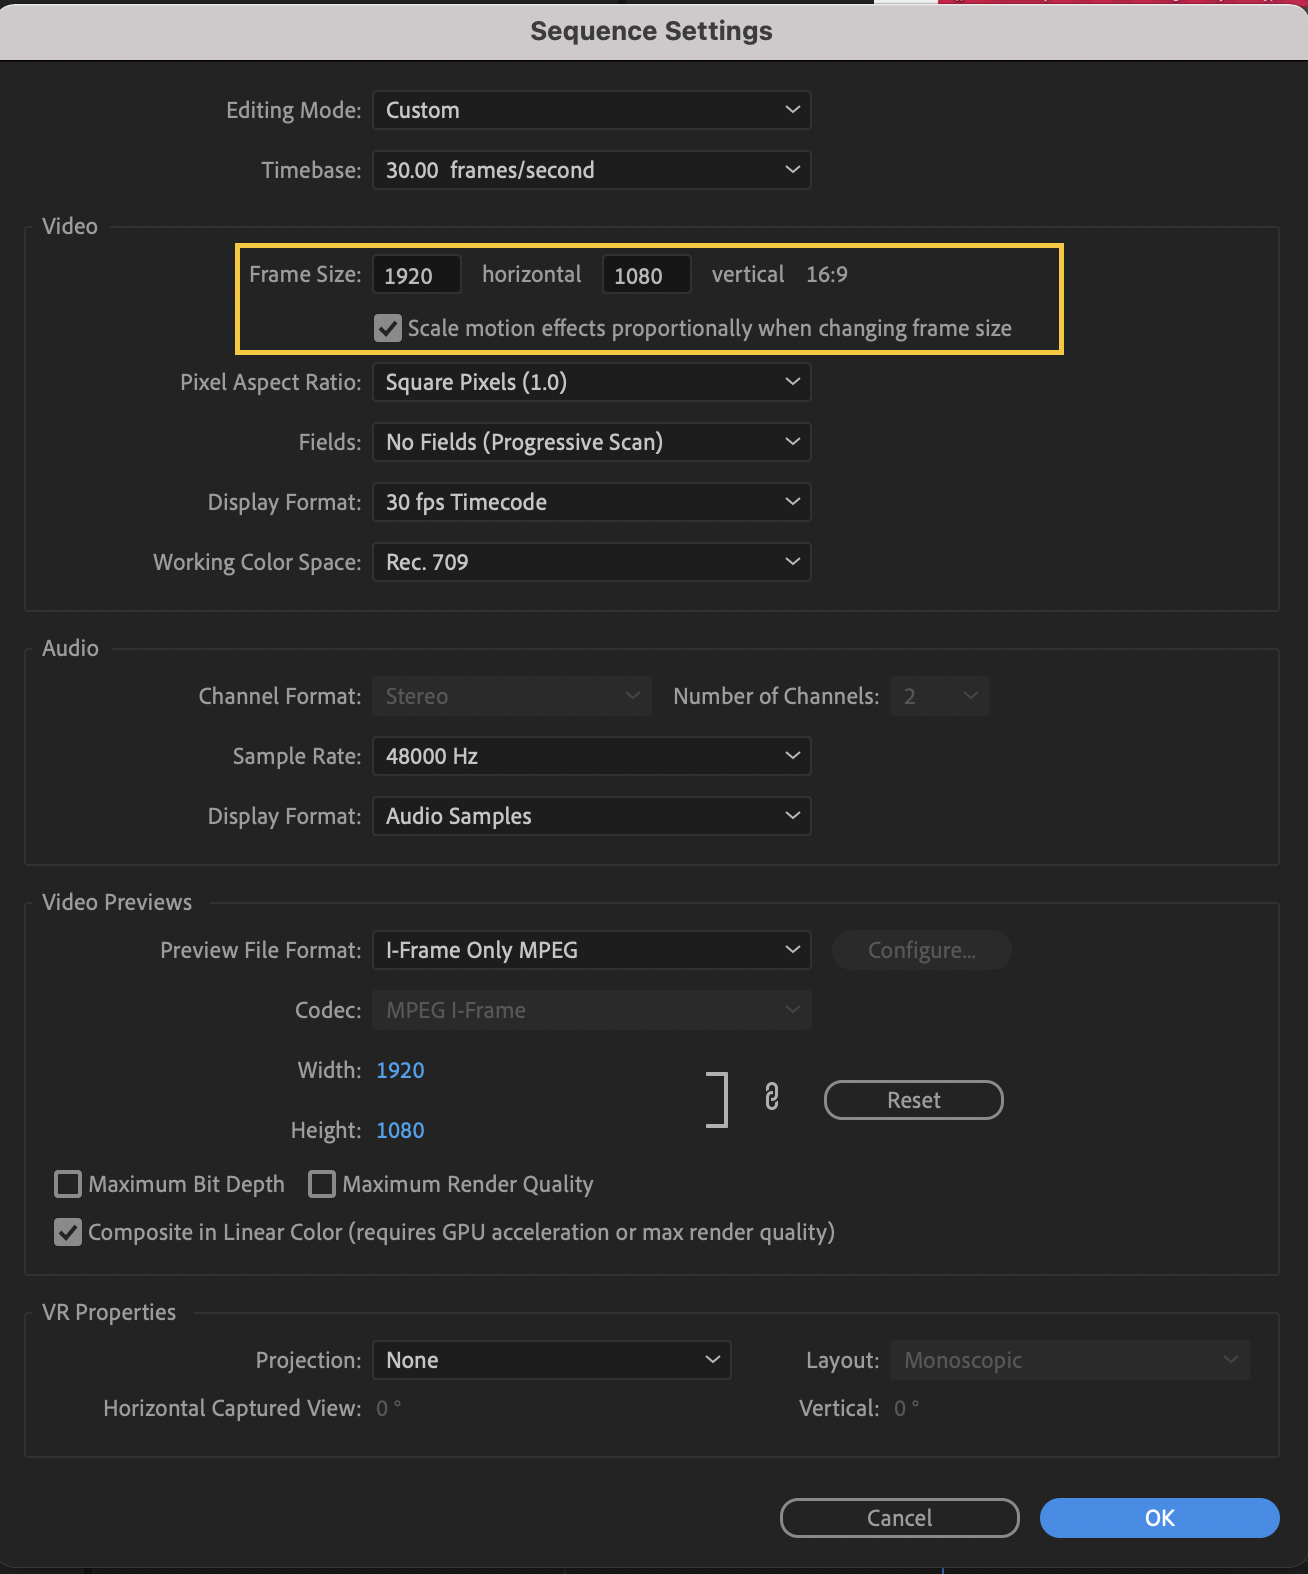
First let's address the 1920x1080 resolution issue. Click anywhere in your timeline so that the panel is highlighted blue. Then use the toolbar at the top of your screen to go to Sequence>Sequence Settings. Next to "Frame Size" you can set the image to 1920x1080.
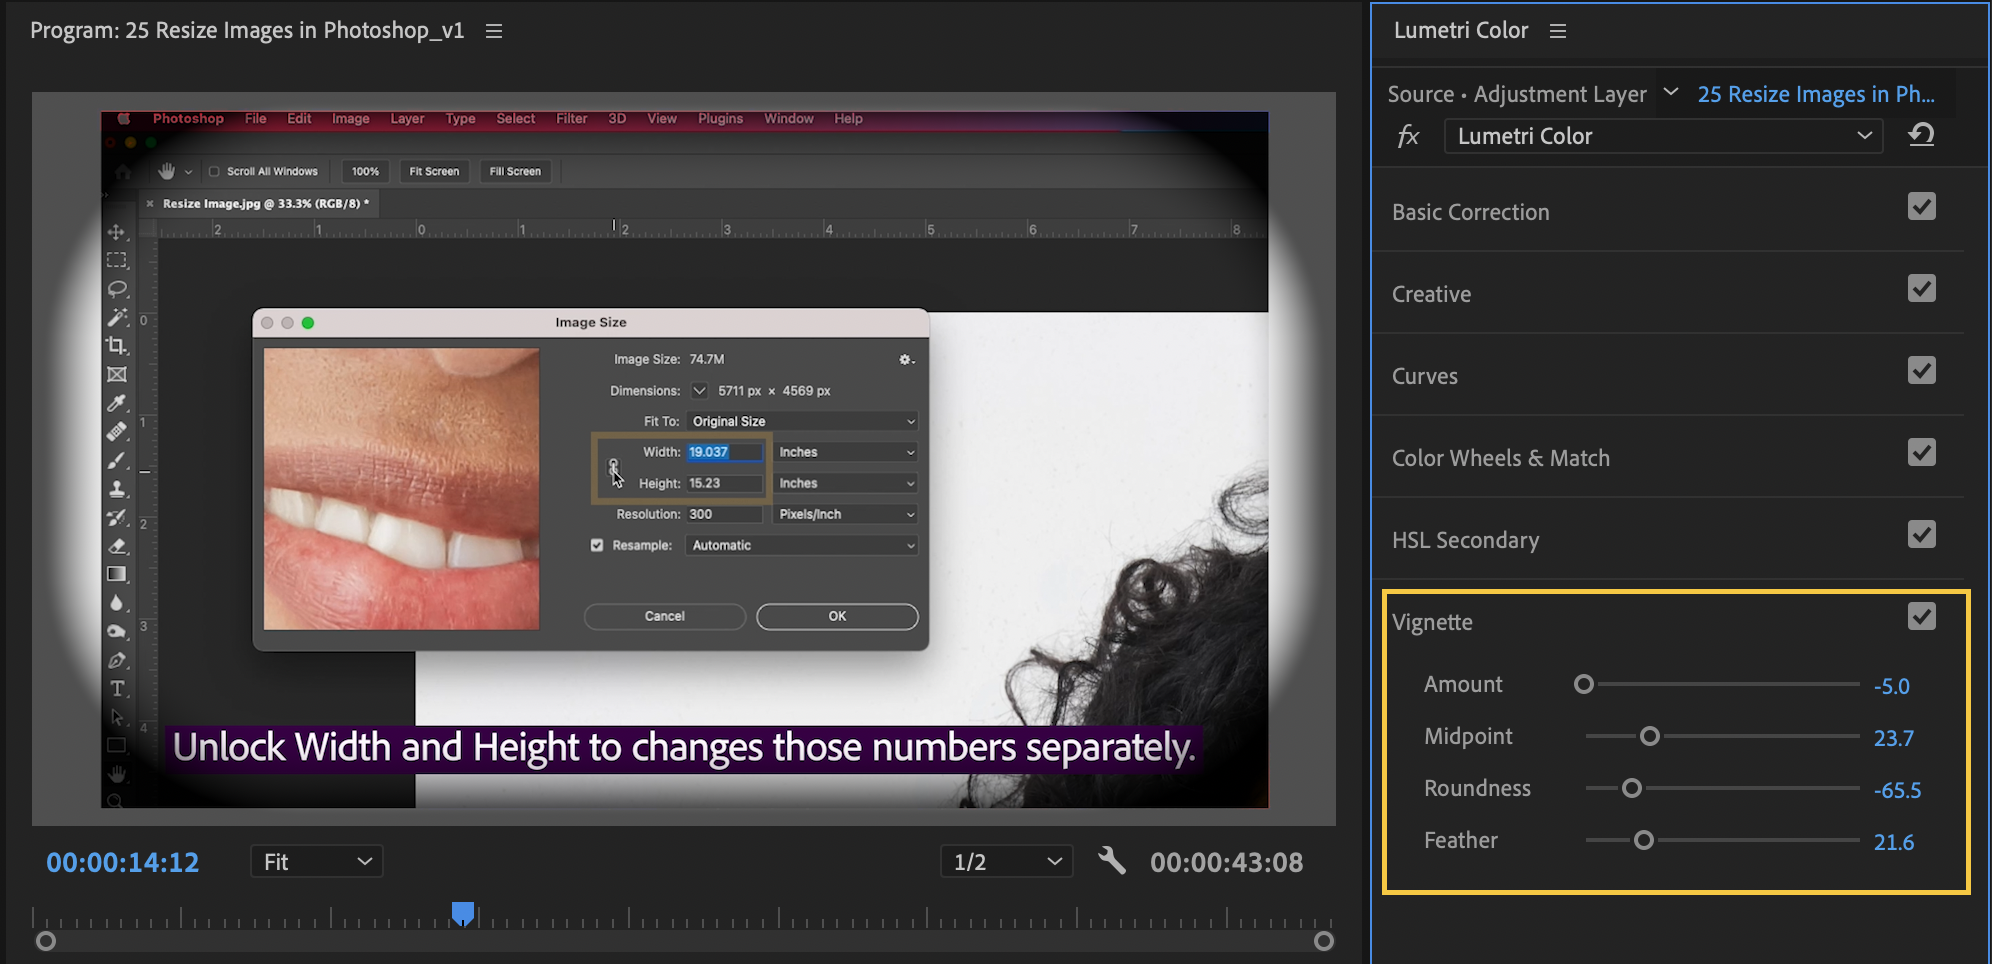
Then, we can create a vignette effect that mirrors the one in the video you linked. Create an adjustment layer to go across all of your timeline! You can see how to do that in the first 20 seconds of this video tutorial.
Switch to the color workspace to open the Lumetri panel, which is where most of the color correction tools live in Premiere Pro. Select the adjustment layer in your timeline and apply a vignette to it by opening the Vignette section of the panel. These are the vignette settings I would recommend.
That's the easiest way I can think of to get this effect! If you want the borders to be more opaque like in the video you shared, let us know and we can share a more complicated tutorial. About the resolution, what is it that you're needing? Is the video exporting too clean, and you want to see more VHS-type static in it?
Copy link to clipboard
Copied
Thank you kindly for the response.
Firstly, in regards to the resolution, I was simply refering to the space the video takes up on the screen, and I believe the first part of your response addresses that issue. The actually quality of the video has been satisfactory.
Regarding the opacity of the borders, I would indeed like them to be exactly like the linked video, so I would appreciate any tutorial that could help me achieve this, regardless of how complicated.

Copy link to clipboard
Copied
You can also do this with the Roughen Edges effect. It will take a bit of fooling around with the settings.
Start with this setting (change the red color to black or dark gray and adjust the edge sharpness):


 AdChoices