 Adobe Community
- Home
- Premiere Pro
- Discussions
- Re: Possible Bug encoding video from ProRes 422 an...
- Re: Possible Bug encoding video from ProRes 422 an...
Possible Bug encoding video from ProRes 422 and "lower" in Premiere Pro 13.1 on Windows PC

Copy link to clipboard
Copied
There might be a bug in the rendering engine, or the color management in the rendering engine in Premiere Pro 13.1, regarding ProRes.
I tested this with a colleague, I am still on the old version 13.0 on my main machine, he had updated his machine to 13.1. I have a second machine, so I verified the behaviour with an updated Premiere Pro on my second machine. All three are Windows 10 PCs. 2x AMD Graphics cards with different driver versions, 1x Nvidia.
Using Software encoding or GPU accelerated did change nothing on these machines.
Here is what we tested: Whenever we encode using maximum bit depth from ProRes 422 HQ on PP 13.1. there is a "gamma shift", making the newly encoded file looking washed out/too bright. It's reproducable, at least for our 3 machines. However, the new file had to be rendered, apparently if you just make a 1:1 copy from ProRes 422 HQ to 422 HQ or even to ProRes 4444, Premiere just "copies" the frame information without encoding. If you change the resolution, put a watermark or TC in the picture or change the codec, all while having the hook in "Use maximum bit depth", the gamma shift occured.
It did not happen, if the source file was H264, DNxHD, or even ProRes 4444. It id not happen, if we hadn't marked "Use maximum bit depth" in the export window.
It did not happen on PP 13.0.
It did happen, if the source was ProRes 422 HQ or Prores LT, Prores 422 or Proxy, and we had marked "Use maximum bit depth".
If anyone could test and confirm this, that would be great. We also tested it on a rather old Mac Mini, but couldn't reproduce it there.


 31
Replies
31
31
Replies
31

Copy link to clipboard
Copied
Verified!
Same thing happened to me with my 4:2:2 ProRes files today. Downgraded back to 13.0 and the problem went away. I'm on a Mac though, so it's a broad problem.
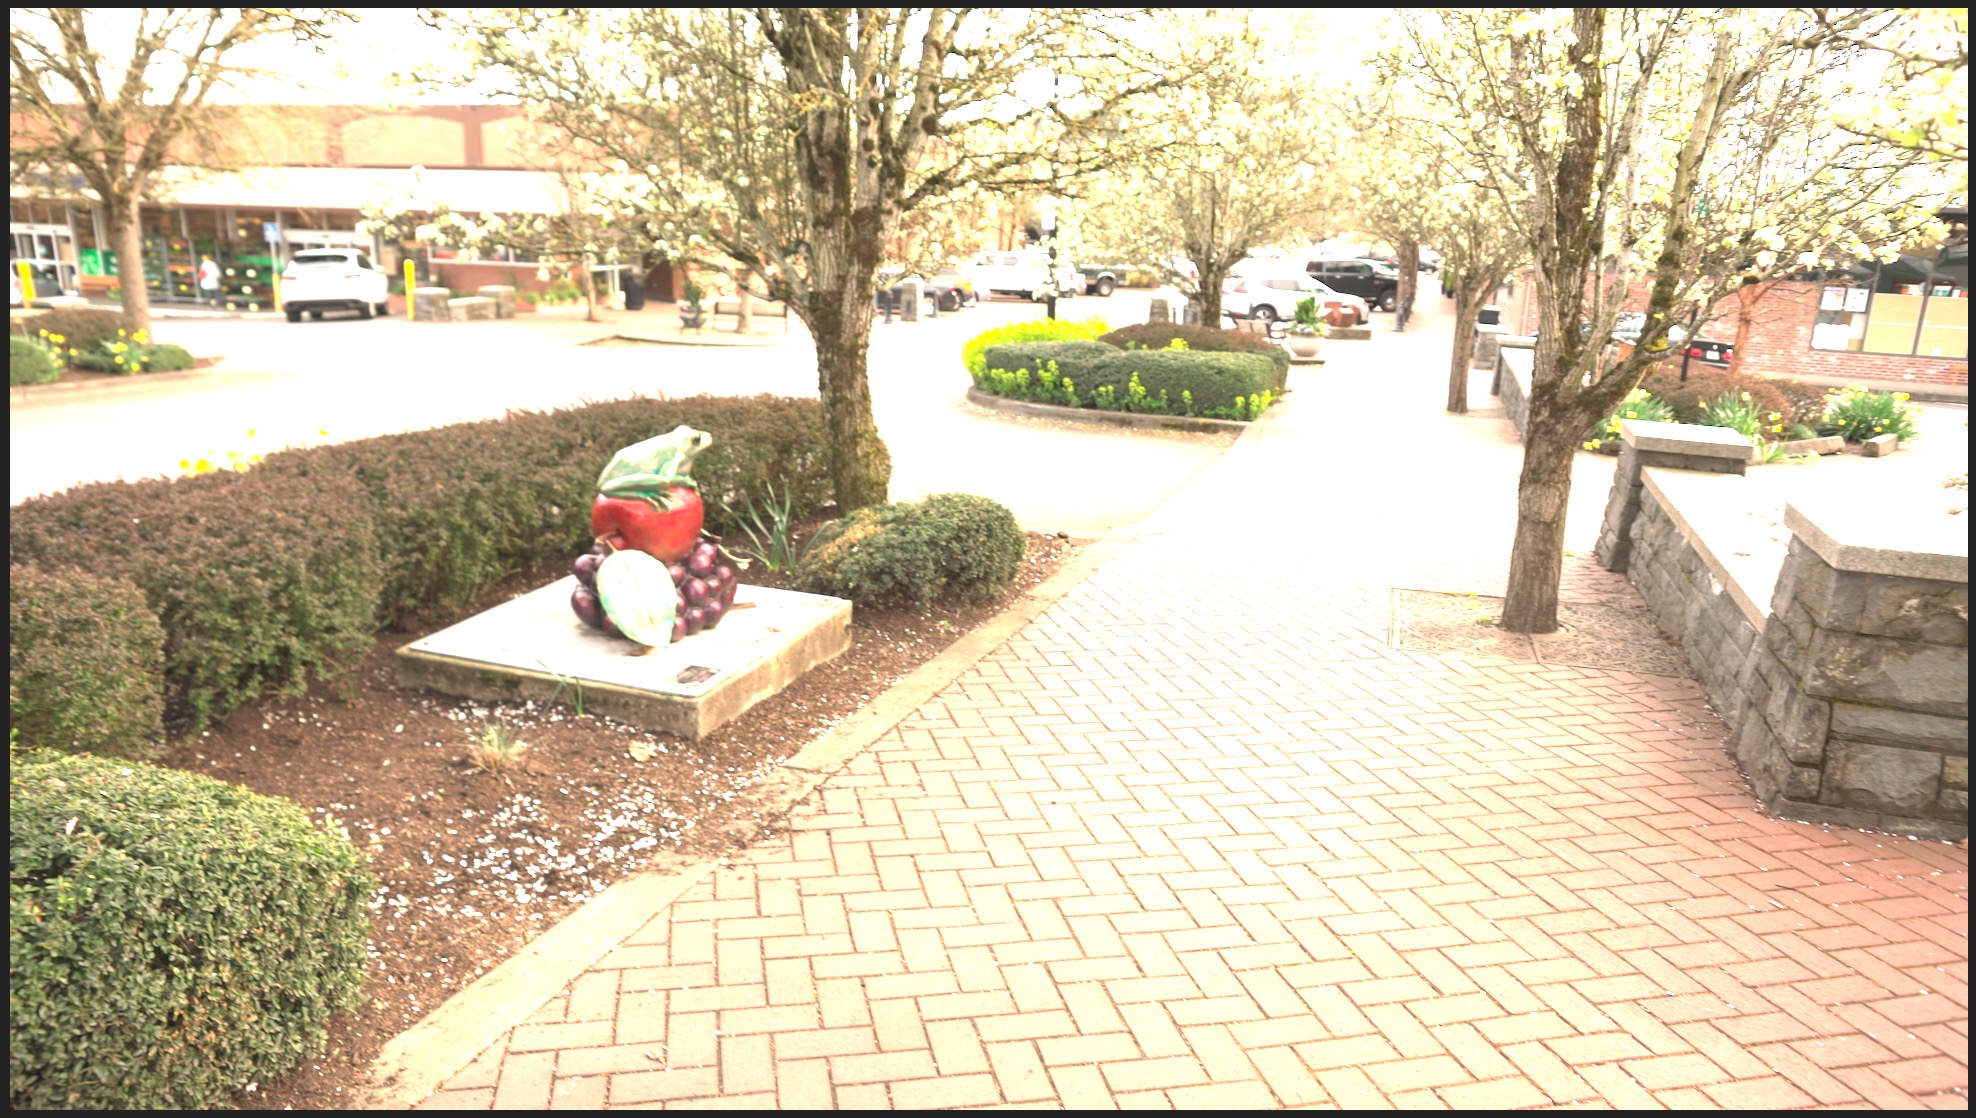
Actual footage:


Copy link to clipboard
Copied
I suggest ONLY using max bit depth if you have no GPU, as if you do, it's already computing in max bit depth ... and can occasionally cause wonkiness like this. Just leave it off.
Max Render Q is also something that can help if you're doing major resizing within the sequence. If not ... leave off.
Neil
Copy link to clipboard
Copied
While it is good to know, that Premiere might always render in max bit depth with GPU acceleration, this problem also occurs if we encode without GPU acceleration, using software only. It also did not happen before PP 13.1, not even in 12.x, which, I know, had no support for encoding ProRes on Windows PC, but you could always import ProRes, and it seems to be more of a "import to render" problem, as the source file, not the destination file, defines if there will be a gamma shift.
Encoding ProRes 422 HQ from H264 for example, works like a charm. Encoding H264 from ProRes 422 HQ does not.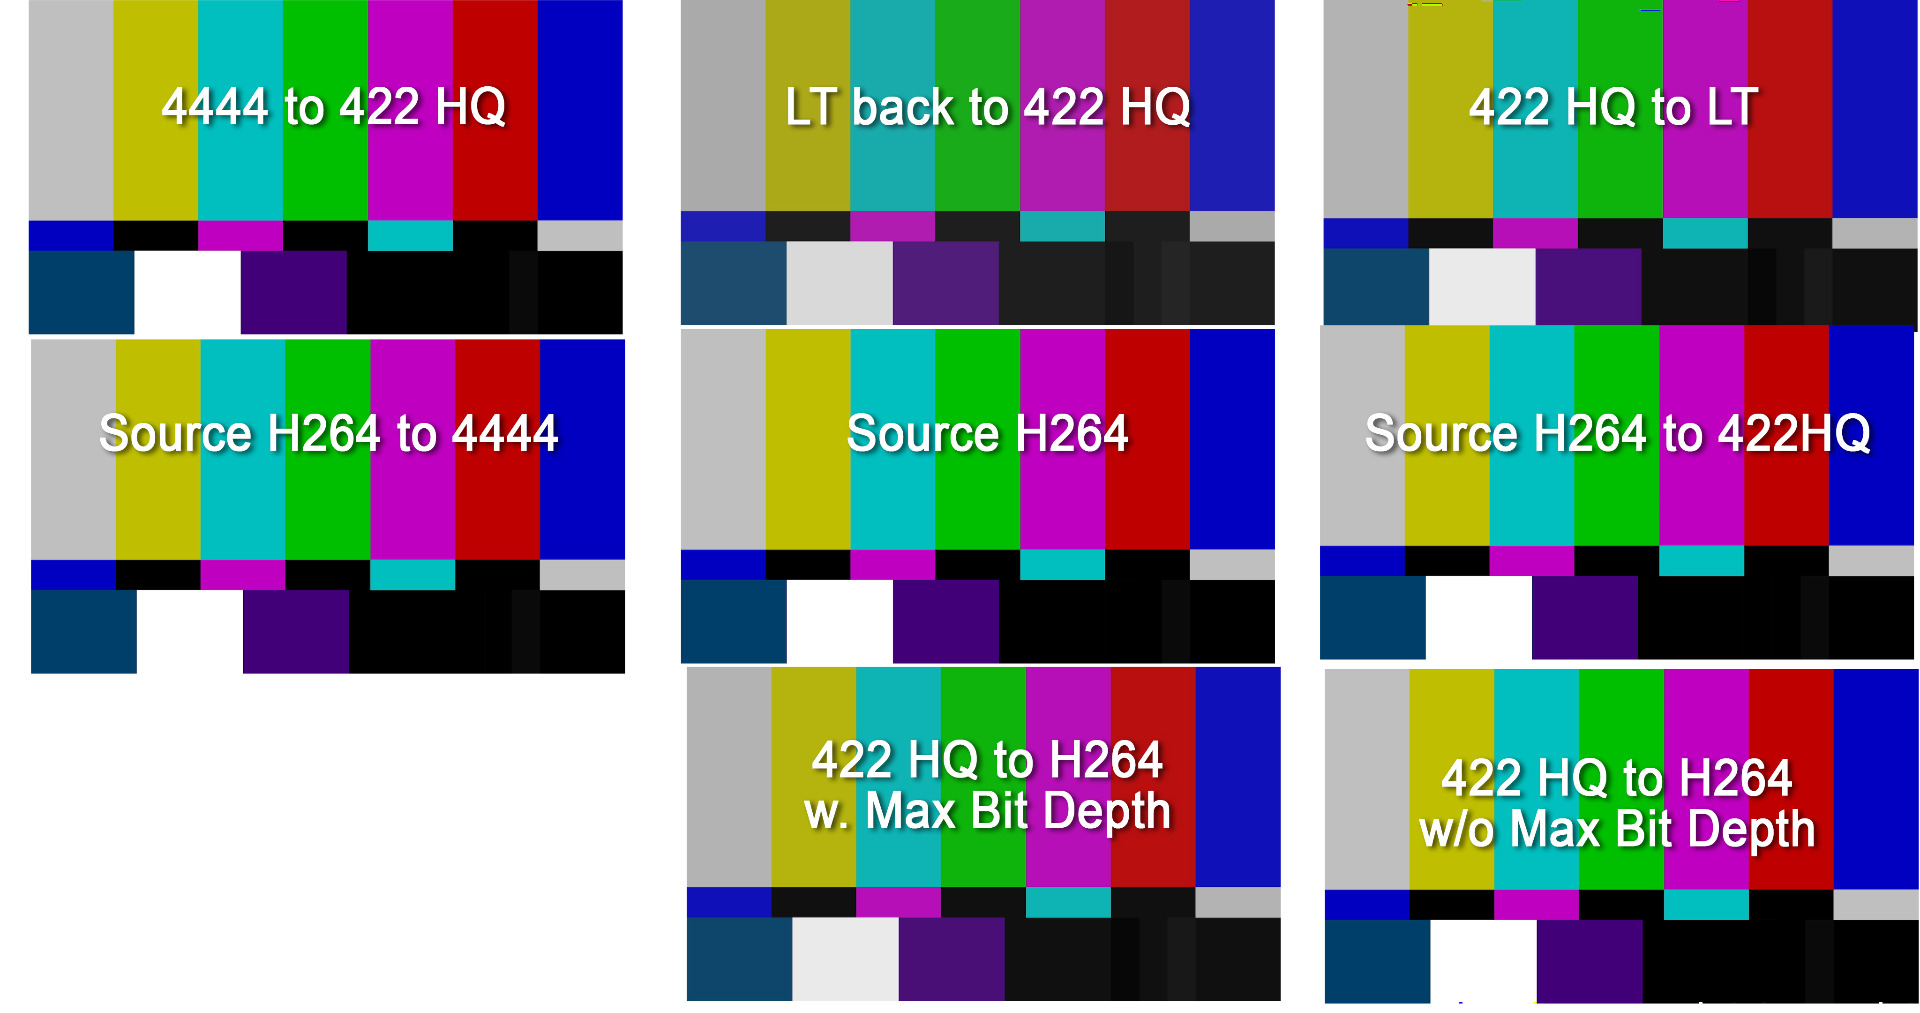

Copy link to clipboard
Copied
I suggest ONLY using max bit depth if you have no GPU, as if you do, it's already computing in max bit depth
I don't believe that's correct. I believe the MBD setting is required to get greater than 8 bit exports, even for 10 and 12 bit formats.
Copy link to clipboard
Copied
I just exported a ProRes 4444 from Pr, going down to the Video tab and scrolling down to the option to export in max depth, but instead of checking that, I used the drop-down to select 16bit.
Brought the clip into Resolve, went to the Inspector ... and yes, it's a 6k ProRes 4444 in 16 bit.
So ... no, that option isn't actually necessary to check.
Neil
Copy link to clipboard
Copied
yes, it's a 6k ProRes 4444 in 16 bit.
I'm not convinced that's a valid test. It's very possible to hold an 8 bit processed signal in a 10 bit (or higher) container. You're just looking at the container there.
Looking at the tech explanation from Adobe:
"4. A DPX file with a blur and a color corrector exported to DPX without the max bit depth flag. We will clamp 10-bit DPX file to 8-bits, apply the blur to get an 8-bit frame, apply the color corrector to the 8-bit frame to get another 8-bit frame, then write 10-bit DPX from 8-bit data."
The Video Road – Understanding Color Processing: 8-bit, 10-bit, 32-bit, and more
Now that info may well be out of date. But if so, it'd be worth finding the most up to date info from Adobe directly.
Copy link to clipboard
Copied
That's when introducing an 8-bit step in the process. The only blur that is 32-bit is the Gaussian blur.
Which is why we all need to make sure when we apply an effect ... that it's an effect that will not harm our pixels.
Neil
Copy link to clipboard
Copied
That's when introducing an 8-bit step in the process.
I don't believe that's correct. The engineer is saying it's processed as 8 bit in the export phase if MBD is not checked. To process the export at higher bit depths required MBD to be checked.
Copy link to clipboard
Copied
From my testing, and previous conversations with the engineers, I do not feel it necessary to check Max depth.
But I'll be meeting with the folks running the program in a few hours at the first NAB related event on my schedule. I should have a definitive answer.
Neil
Copy link to clipboard
Copied
I should have a definitive answer.
Perfect. Thanks Neil.
Copy link to clipboard
Copied
I've spent hours with Premiere engineers, and within a few days I'll have a full video post up on Mixinglight.com on exactly what Premiere does with our pixels. And as much of my information to be included in that is NOT currently posted anywhere on any Adobe site, MixingLight is going to have it outside the paywall as a service to the industry.
And yes, I gave a couple presentations on the topic of what Premiere does to our pixels in the Flanders/Mixinglight booth here at NAB. Well attended, and I got numerous comments on how much of this was news to professional colorists. Yeah.
Premiere is hardwired to be used on systems set for "proper" broadcast standards which for many years have been video sRGB, Rec.709, and a white-point of D65.
There have been three "proper" choices for gamma: 2.2 for general computer/web and "bright room" TV viewing; 2.4 for controlled-brightness viewing especially for evening TV broadcast at typical home room brightness while watching TV; and 2.6 for dark or theater viewing.
As they were going to set one only one gamma into the program they chose the intermediate one, 2.4.
So ... the internal monitors and transmit out are hardwired to be viewed on monitors set and calibrated to video sRGB/Rec.709/gamma 2.4/100 nits or IRE with white-point of D65.
That is VIEWING data, NOT file-level or export data.
All media coming in is recognized by format/codec for "appropriate" color management. Most "general" video especially H.264, mp4/mov, and the host of specific ones used by video cameras are by format/codec standards defined as video sRGB/Rec.709 and handled accordingly in the app. Bit depth is both noted and processed in/out according to those standards.
All internal processing for Lumetri is handled in 32 bit float. All exports are defined by the standards for the chosen export format/codec.
If you have a 12-bit original file, and you export to a format/codec that by standard is capable of 12-bit, your export will be 12-bit. Period. UNLESS you have used a non-32 bit effect, at which point in the chain of processing you will have lost full 12-bit information.
So make sure any effects used have either the 32 bit or YUV Lego blocks by them in the Effects panel.
Max Render Depth ONLY tells the system to process at full depth for the format/codec chosen, which it will anyway IF a suitable GPU is involved. Ergo, IF you have a GPU recognized by Pr, your export will be at full bit depth period.
IF you do not have a discrete GPU in use, in certain cases for speed of operation the CPU could choose to reduce bit depth. In those cases, checking Max Depth forces the CPU to use GPU processing rules.
So ... Max Bit Depth IS ONLY useful IF you do not have a useful GPU involved.
There's a lot more, including the only way to view HDR in either PQ or HLG while working in Pr, and the four choices for exports that will carry full PQ/HLG HDR data through to the exported file in my tutorial next week on Mixinglight.com.
Neil
Copy link to clipboard
Copied
Okay. So now we have established that if you have a GPU installed and I am guessing if you use it to render, Premiere will always
render at Max Bit Depth. That is valuable info, thank you for that.
Now back to the original topic, because from what I understood of the Info you posted, while Premiere may show material with a different gamma than what it is stored with, as it is calibrated to 2.4 for viewing purposes, it should not change any values on the import/export side of things, right?
Yet it does, if Render at Max Depth is on, and it does so if I switch to Software Render only too. It does so only with ProRes outside of ProRes 444,
This is still a bug in my world and it would just be nice if someone could confirm this bug, if only for Windows machines and with a setting that I need not use, if I use GPU rendering, because I don't feel comfortable using a software with neglected bugs and a confirmed bug has a higher probability of getting fixed.

Copy link to clipboard
Copied
To be clear, a change in gamma will affect gray levels much more than blacks or whites, so I don't believe what you or creophoto are experiencing is a shift in gamma.
Both of you seem to have clearly demonstrated a problem and even isolated it to a specific codec and settings. Interestingly, creophoto on a Mac seems to not be compressing dynamic range (0-255 to 16-235) like you, but instead seems to be stretching the dynamic range into a clipped range.
Initially I would have suspected an error in the re-write of the codec for Windows, but if there are (similar yet opposite) problems on a Mac, then I would have to lean towards a mistake on the Adobe side.
Since you are unlikely to get a solution to this through the forum, you might be better served filing a bug report and/or contacting support directly.
It is helpful to know that those using a GPU for rendering can work around this problem without sacrificing quality.
Thank you for bringing this to the attention of forum users.
Copy link to clipboard
Copied
One of my acquaintances at NAB was telling me he takes all PC encoded ProRes into his Mac and re-encodes to ProRes in Resolve on his rig.
So he says he thinks there's something about the PC setup for encoding ProRes that is different than Macs. As he has the same problem from other apps.
Neil

Copy link to clipboard
Copied
Thank you very much, I was having an issue with the export of adjusted 422 prores file to 422 prores file, I'm on a Windows and I have a quadro graphic card. Turning off Max Bit Depth solved my problem.
I did some export from Prores 4444 to ProRes 422 with the Max Bit Depth turned on and apparently, there wasn't any issue, but from now on I'll keep it unchecked just in case.

Copy link to clipboard
Copied
I'm having the same issue. Brought the same "problem" footage into DaVinici and it was fine. Something is interpreting the footage in premiere. The problem is I have new projects that I can't downgrade to Premiere 13.0. I can make it "work" but it takes a serious amount of grading and if the bug is fixed then all my grades will be way off.
I hope they are working on a fix. Hate these bugs.
Copy link to clipboard
Copied
Please file this on the bug/feature UserVoice system, as that way that you are having this problem will go both directly into the engineer's system and to the upper managers who decide budgets for bug fixes.
Neil
Adobe UserVoice Bug /Feature form: https://adobe-video.uservoice.com/forums/911233-premiere-pro

Copy link to clipboard
Copied
Bug confirmed. Exporting ProRes 422 footage with 'Render at Maximum Depth' activated results in too high brightness levels.
Copy link to clipboard
Copied
How you view the exports matters. So...how are you viewing the exports?
Copy link to clipboard
Copied
For comparison reasons, in Premiere Pro on a timeline, switching between the layers. So same player, same Display, same sequence.
If I take a video, which is half a black screen and half a white screen, black becomes dark gray through exporting from ProRes 422 and lower to another format, white becomes light grey. And it is cumulative. If I encoded the video from ProRes 422 HQ, to 422 to LT to Proxy, these 4 steps would make the black really a lot lighter and the white a lot darker.
It is not the "actual color representation", the problem is the degredation through encoding, and only from ProRes 422 HQ and below.
I could encode 10 steps in DNxHD or H264 and black would stay black, white would stay white.
Not so with ProRes on Windows, and ONLY in PP 13.1. In 13.0 everything is fine.
Copy link to clipboard
Copied
Got it.
Copy link to clipboard
Copied
Getting back to the original topic - it sure looks similar to the old Rec 601/709 vs RGB color space issue where the encoder converts 0-255 levels to 16-235 levels. As I recall that would only occur with a 8 bit conversion/file, but someone may have missed something in writing this codec/software update. Just a thought.
Copy link to clipboard
Copied
Thanks for getting back to the original topic. 
It does look like that.
I am not sure, how the max depth option works, but up until 13.1. I also didn't have issues with it. It worked fine before 13.0, it worked fine with 13.0, but now it is broken, and that at least on 3 Windows machines I know. Even if that option changes nothing when the GPU is used, it still shouldn't be broken, because maybe, for some reason, I would want to do a software only render, and if it does change the quality of the render when the GPU is used, then it is a serious issue, because then I cannot leave that option off, even if it is only a workaround, so I will have to stick with 13.0.
Maybe, someone who can get in touch in with the developers could ask them to have a look at this issue, while having a discussion about the max bit depth option.

Copy link to clipboard
Copied
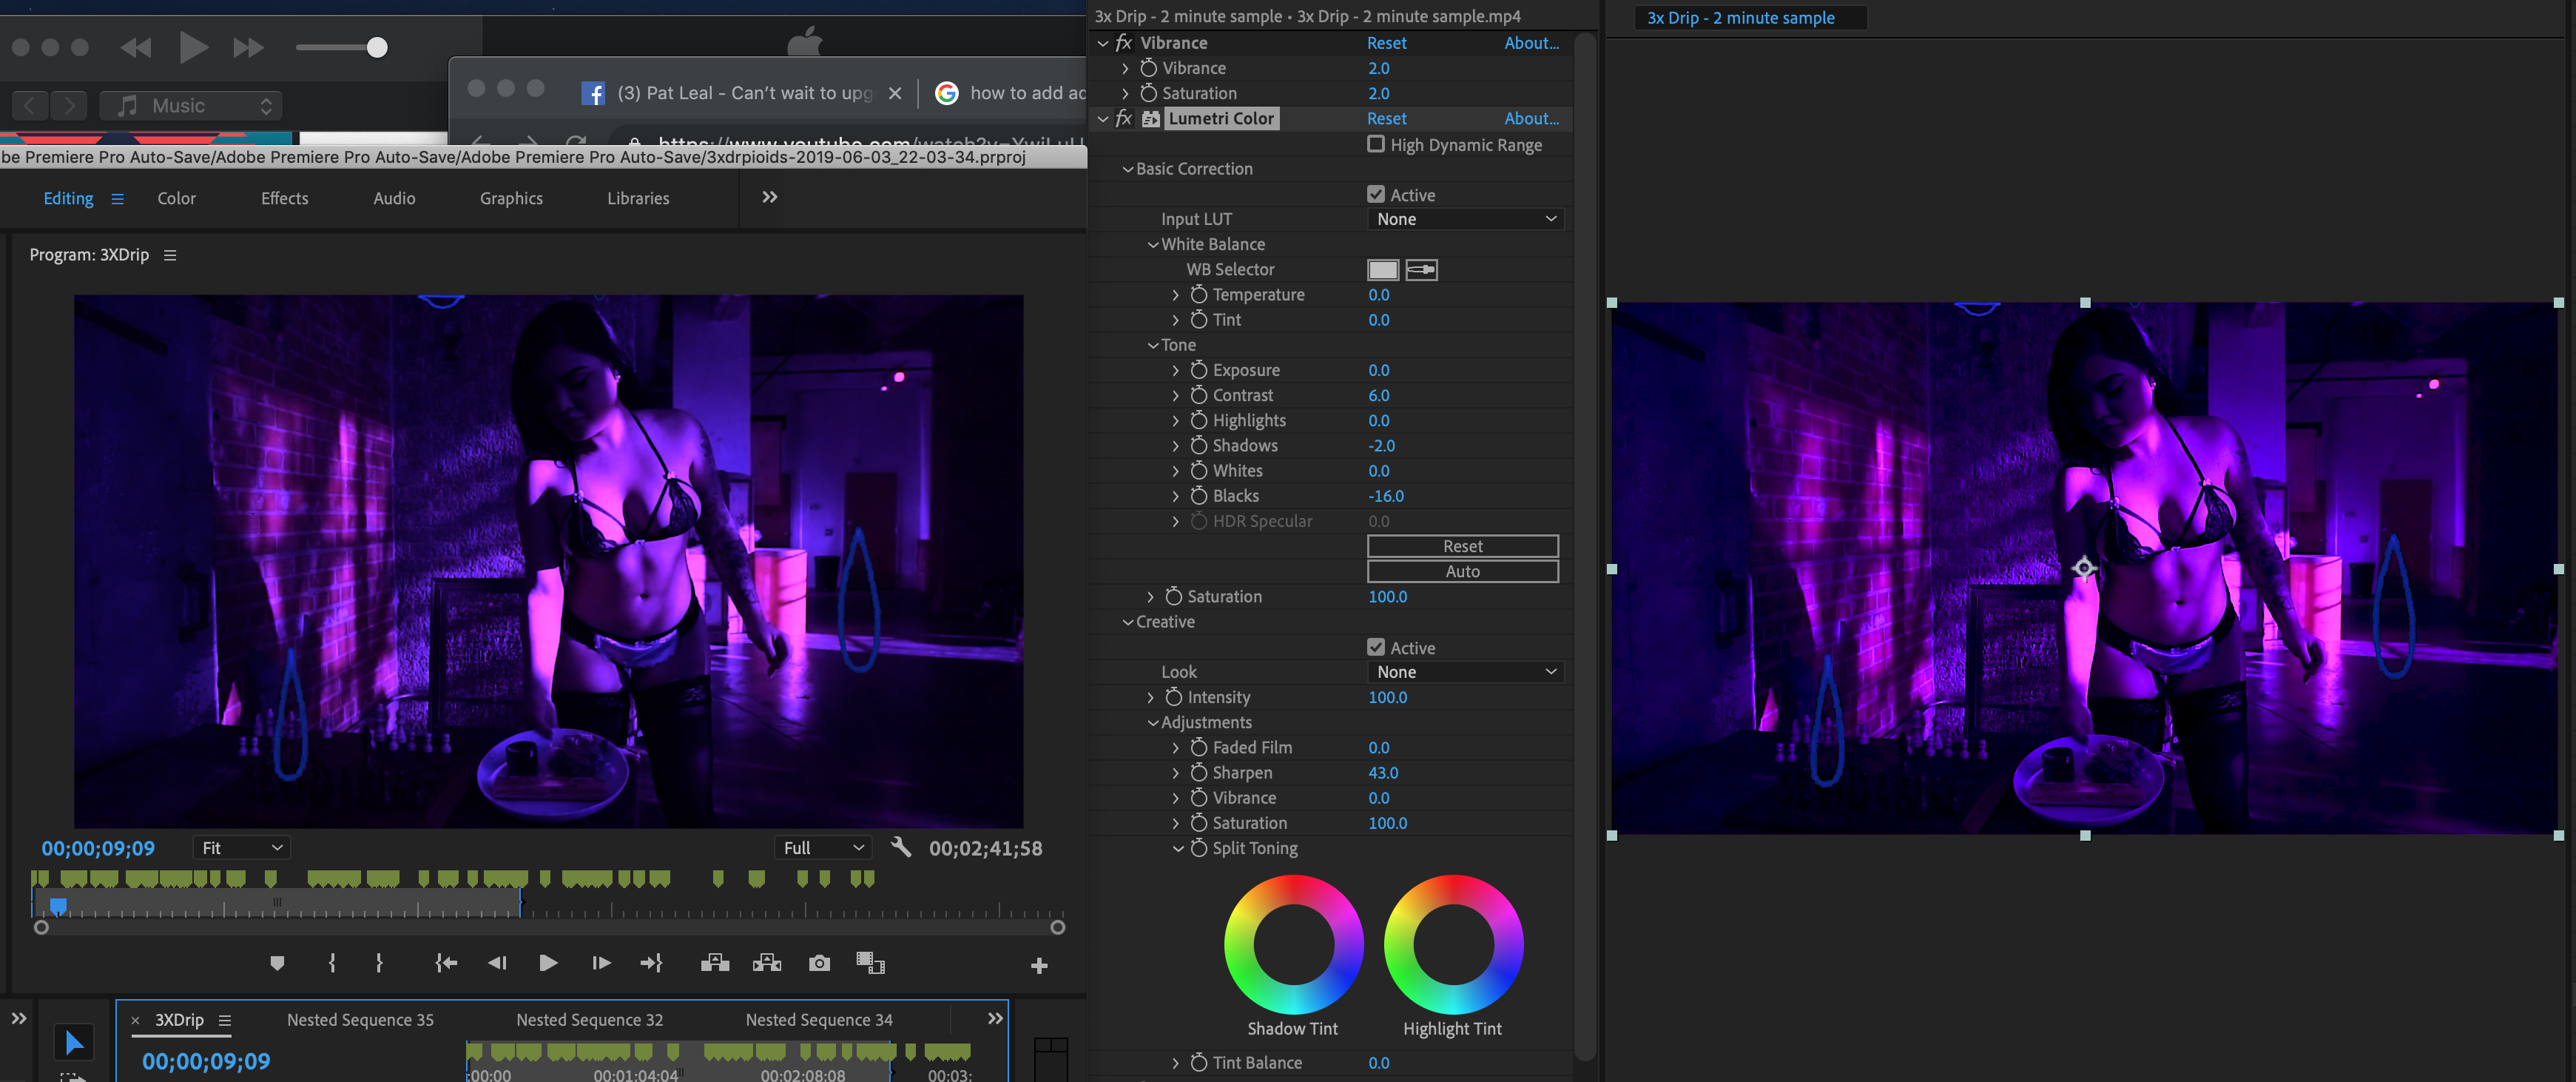
Premiere Program Monitor Original Color Grade (Left) Vs. Quicktime App playing Premiere Export with Colors ~25-50% Washed Out (Right)

My Solution Down Below: Use AEFX to retweak Lumetri Settings/Vibrance FX with Original Full Quality Premiere Export aka Bring in the Premiere Export into AEFX and use Lumetri again to match the color values as close to possible... [Premiere Program Monitor pictured on left side; AEFX retweaked settings pictured on right side with OG Premiere Export... aka ~75-90% accurate or better compared to ~25-50% loss of colors w/ Premiere Export]. I didn't look at exact color values, just eyeD everything... Proceed to next step->
This guy (Pic down below) found a solution on AEFX Export Settings to keep the colors looking the SAME & not washed out!Color Fix For Adobe Premiere Pro Exports - YouTube 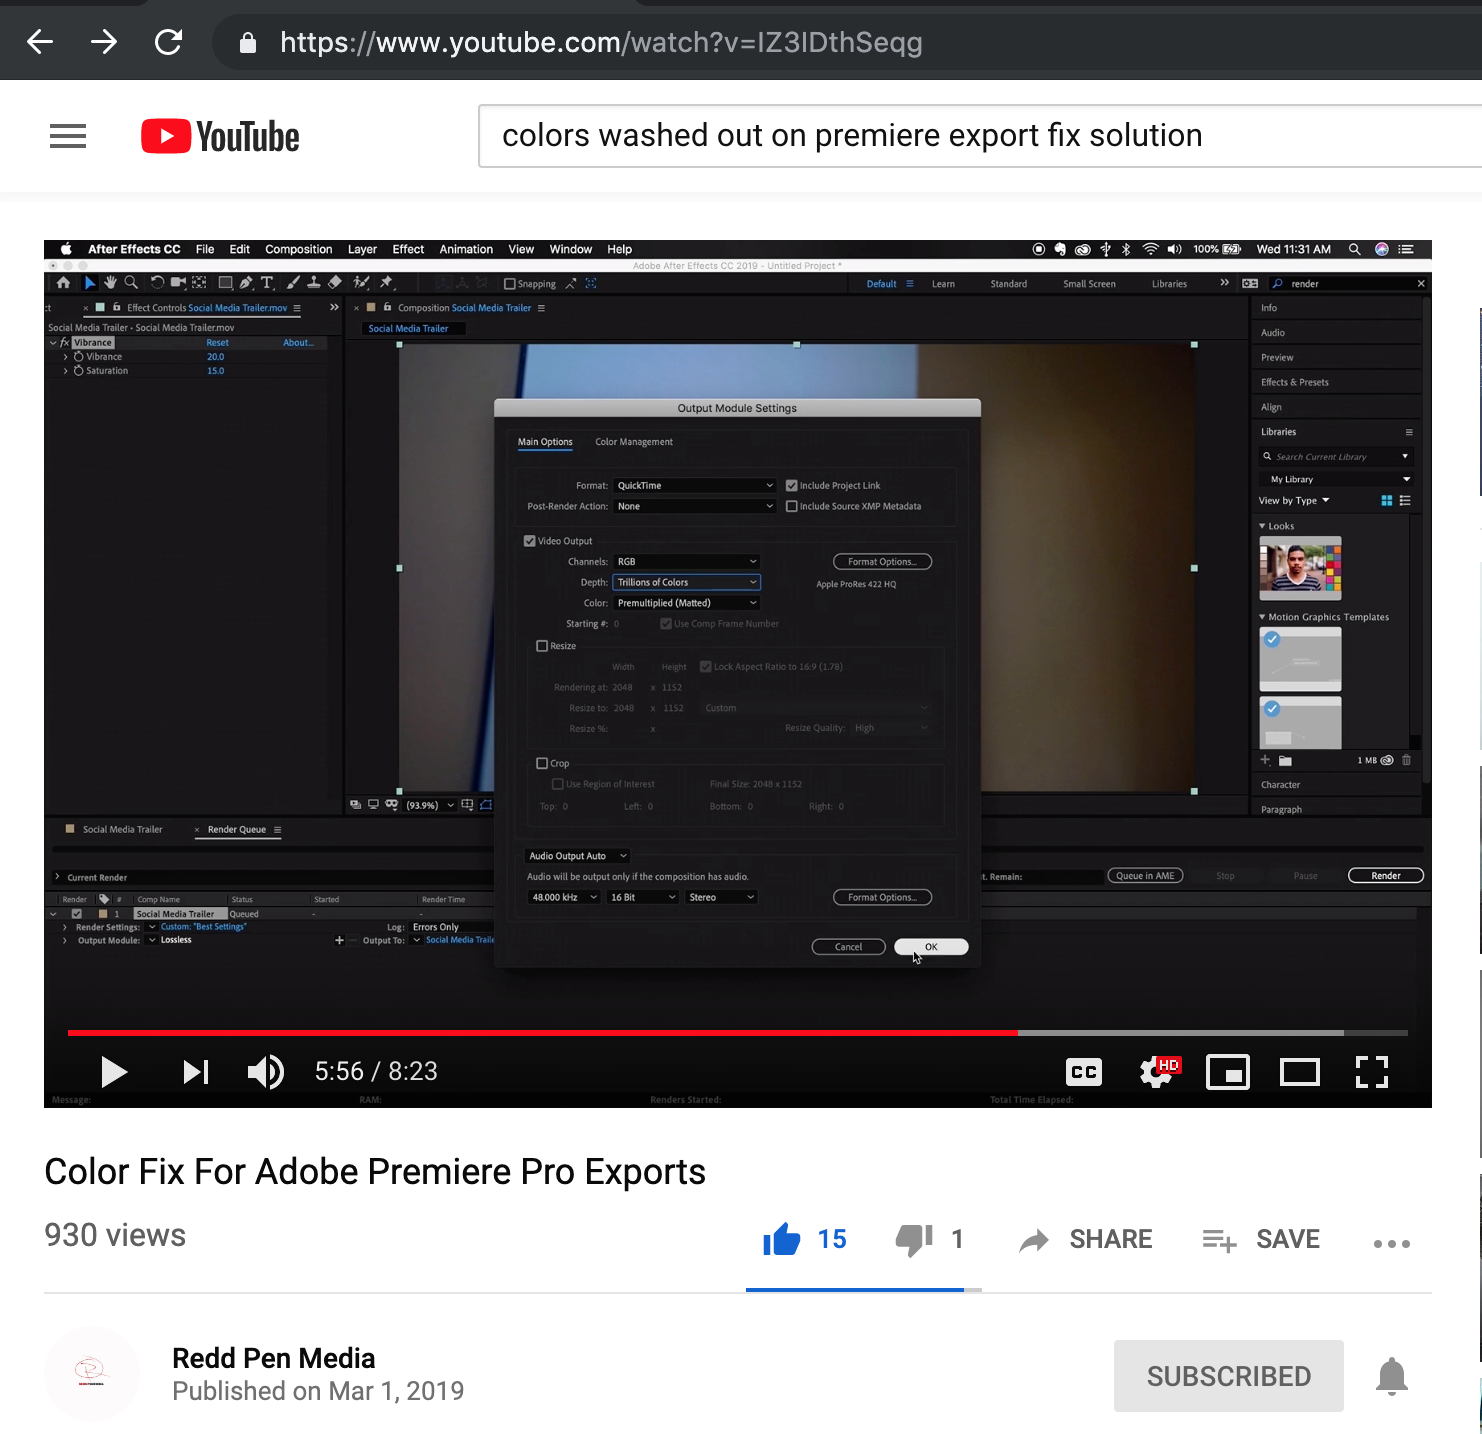
Hope this helps someone.
IG:patlealfilms
-
- 1
- 2

 AdChoices