 Adobe Community
- Home
- Premiere Pro
- Discussions
- Re: Premiere Project won't color translate to newe...
- Re: Premiere Project won't color translate to newe...
Premiere Project won't color translate to newer version of Premiere

Copy link to clipboard
Copied
Hello,
I had an older version of PP (2020) and I colored my entire film with that version using Lumetri and a couple LUT plugins.
I updated my software and now all of the color is completely changed and altered and looks nothing like the previous version, even after I put the LUT plugins in the new version.
Is there ANY WAY to get this correctly back?
Thank you,
Steven


 15
Replies
15
15
Replies
15

Copy link to clipboard
Copied
In short ... not likely. And clearly, you aren't putting LUTs where you ought to be or they would have showed up in a new version. That's two things to work on here. The first is the new color management the user has to do, the second is proper LUT storage.
User Color Management in Pr2023 with older version projects
Pr 2020 was still a total hardwired Rec.709 app. All math was based on Rec.709, and any HDR that it did was done by an odd code-hack of using "over-range Rec.709 values" as their chief color scientist described it.
In the Pr 2022 version they completely scrapped and rebuilt the entire color processing/handling system. Including all default behaviors. And added a few new user-settable color management tools in several places.
Pr2022 and forward are "color space agnostic" in the underlying math. For all past projects, this is a problem. As it auto-applied a Rec.709 transform-ish treatment mathematically to all images before. Now, it doesn't.
Especially with log-encoded media this can be very problematic, besides of course with anything shot/tagged as HLG.
So you have to break down that project into its assets in the bin, and check.
- Do you have any HLG or PQ color space clips? If so, and you wish to work with an SDR/Rec.709 sequence and export (a wise choice btw) ... then you need to go to those clips in the Project panel/bins, right-click/Modify/Interpret Footage, and set the Override-to option to Rec.709.
- Do you have log-encoded clips that are showing up as blown out on Rec.709 sequence? That is because it sees log encoding and may defer to this as being HLG... hybrid log-gamma ... HDR. The fix is like the above, set the Override-to option to Rec.709.
- Then make sure your sequence settings CM is set to Rec.709.
- Use only 'standard' export presets that do NOT have HLG or PQ in the preset name.
The above will get you as close as you can back to a 'normal' looking project. Now to the LUT storage problem.
Proper placement on disc for storing USER LUTs for the Adobe video system
You mentioned your LUTs not applying in the new version until you put them in different folders. That indicates you are doing AN ABSOLUTE NO-NO!!!!
Users should never, ever add LUTs to the same folders that Premiere, AfterEffects, and MediaEncoder store the built-in LUTs. There are several problems, all fixed by putting your LUTs in the proper place. The problems are:
- The Program (Package) Files/Adobe/Premiere Pro XX.xxx/Lumetri/LUTs folders are assumed by all three Adobe video apps to be exactly the same in contents.
- All contents of those folders are accessed only by relative place in the file after alpha-numeric sorting. As in, the fifth LUT down, NOT by the LUT name.
- Apply a LUT from those folders in Premiere, MediaEncoder and AfterEffects will only see "fifth LUT down" and grab the one from their own storage. Making any cross-app work wrong.
- The LUTs in those folders are only seen by that version of whichever app's folder you change.
All this is handled properly, and as you expect, IF you follow the proper procedures for adding your LUTs into the apps.
They have two locations listed for users to use. The easiest for me, and the one I recommend is:
Program (Package) Files/Adobe/Common/LUTs
Inside that LUTs folder, if you don't already, add folders for:
- Input (used by the Color Managment Inpu LUT dropdown)
- Technical (used by the Lumetri Basic Tab LUT dropdown)
- Creative (used by the Lumetri Creative tab LOOK dropdown)
Any LUTs you place in those folders will be scanned by all three apps for their contents on launch. And will be visible and usable across the apps and across versions.
Neil
Copy link to clipboard
Copied
Copy link to clipboard
Copied
NO.
Do NOT add any LUTs into the Premiere Pro Lumetri LUTs folders ... ever!
LUTs should be in the folder location I listed ... for the Mac, that is
Package Files/Adobe/Common/LUTs
Never use the actual Premiere Pro folders for your user-added LUTs.
Neil
Copy link to clipboard
Copied
Do you mean in Premiere Pro? Under Package Files?
There is no folder for "Adobe" in Premiere Pro that I see.
Copy link to clipboard
Copied
NO. I keep saying not in the Premiere Pro folders because I mean never in the Premiere Pro folders. Period. Not in any Premiere Pro folder.
Package files/Adobe/Common ... there is NO Premiere Pro in that folder tree ...
Neil
Copy link to clipboard
Copied
Sorry Neil I still don't follow.
If I don't right click Premiere to show Package Contents, what folder do I so?
Once I drop these LUTs in, will they show up in Premiere?
Thanks again Neil
Copy link to clipboard
Copied
Hi Neil,
Ok I figured it out and dropped the LUTs in the folders you suggested.
When I apply the LUTs now tho it does not do anything to the image at all.
I right clicked a clip and udner Modify, Interpret Footage, it was indeed reading the Media Color Space from the existing LUT. So I changed the Color Space to Rec 709.
The sequence is under Rec 709.
Any idea of why the LUT isn't doing anything?
Thanks again

Copy link to clipboard
Copied
Hey Steven,
Let me see if I can help. I'm on macOS.
You first have to create new folders at the OS level. Create two folders: one for Creative LUTs and one for Technical LUTs, then place them in a folder called LUTs. Then place the LUTs folder in the User Library or the System Library, depending on your workflow. More here: FAQ: Premiere Pro Lumetri Color Custom LUT directory and location
To have LUTs available to only your User, access the User Library.
Open a Finder, then press the Option Key, then press Go > Library
Place folders here:
/Users/<user_name>/Library/Application Support/Adobe/Common/LUTs/Creative
/Users/<user_name>/Library/Application Support/Adobe/Common/LUTs/Technical
If you want the LUTs to be available to all users on the computer, place the folders at the root level of your Mac.
/Library/Application Support/Adobe/Common/LUTs/Creative
/Library/Application Support/Adobe/Common/LUTs/Technical
After the folders are created and placed in either Library, drag the LUTs into the appropriate folders. Restart Premiere Pro. These LUTs will now be available in Premiere Pro, Media Encoder, and After Effects. They should also perpetuate across versions, so this issue won't happen to you again since the LUTs are no longer in the app package.
Your confusion is understood, as there is spotty info on properly installing LUTs for Premiere Pro floating around the internet.
Hope the info helps. Let me know if you have questions.
Thanks,
Kevin
Copy link to clipboard
Copied
Hi Kevin,
Thanks I figured it out I think how to drop the LUTs in.
My issue now is getting back my original image from the 2020 project file using the 2023 premiere.
Using Neil's method I...
1. Went to Lumetri and changed the default LUT to NONE (which it defaulted to the second LUT in Creative folder, the Fuji cool blue).
2. Right clicked the file to get to Reveal in Project. Then Modify to Interpret Footage.
3. Changed the Color Management to Color Space Override Rec 709
4. In Color Management I went and went to ADD LUT and used the Sony SLOG 3 plugin I was using for my former project in 2020.
The image isn't the exact same when I do this though. It looks cooler and some stuff is blown out.
What am I doing wrong?
Thank you!
Copy link to clipboard
Copied
The way they're handling log-encoded media has changed, and it's very different from what we are used to. Quite the opposite in fact.
Log media has always just been brought in looking ... log, right? The grayish, low-sat image. Because the log-encoded data was encoded on that logarithmic curve, and the apps just applied that curve to the image.
And we expanded the image contrast and saturation to get a "normalized" image, right?
What they are doing in Premiere now, is putting the log-encoded data directly into a linear-math presentation when used in a Rec.709/SDR sequence. Which gives an image that seems the opposite as far as tonality, from a previous 'log' image.
Because their new de-logged image is presented with the full dynamic value range of the original clip. That's why the initial appearance on a sequence is too bright in the highlights.
Where it was too gray before.
So now, for log-encoded media that is transformed by Pr, you need to apply a contraction to the image data range, to apply the sort of curve you want to see. Rather than expand the image out as before.
For example, by bringing down the Exposure tool while adjusting the Contrast tool in the Basic tab. Remember ... Exposure is processed first, and the Contrast tool always works expanding or shrinking contrast centered on the image from the 50IRE center line.
So adjust the Exposure control until the middle values of the image are around that 50IRE mark, then use the Contrast control to set the range dark to bright. Trim in with the Shadow and Highlight controls.
It's odd, but works as well as the old way after you figure it out. And will take making a couple Lumetri presets to drop onto clips in the bin for many of us.
Neil
Copy link to clipboard
Copied
Ok thank you for this.
So in Lehman’s terms I am screwed and cannot get the same replica image as
my original timeline without fiddling with each individual clip? My hope
was to just drop the appropriate LUT and all would look the same.
Lastly, if I am able to get my hands on a 2020 version, how could I get
this same look back in that version using these LUT’s? Would I have to
install the luts the wrong as I had done before?
Thank you,
Steven
--
Steven Hoffner
Founder, 383 Pictures
416-559-4788
steven@383pictures.com
www.383pictures.com
Sent from my iPhone
Copy link to clipboard
Copied
Welcome to the New World, eh?
In 2020 or 2021 you should pretty much get the old look. And ... if you applied the LUTs from where they were before, then it would be faster for you. But not necessarily ... wiser.
I would still suggest putting the LUTs where Kevin worked with you on. Apply from there.
And if the same thing works on several clips, apply it to all of them at once. Bulk operations always save time. And you can do them a number of ways.
Right-click a clip in the timeline, copy ... select several other clips, right-click/Paste Attributes, and paste only the Lumetri instance onto them.
Or say you have worked a new correction on a clip, and think it will work on a lot of others. Like the LUT did, you know?
Save that Lumetri instance as a preset. One slick way to work is to select a bunch of similar clips in a Project panel bin. Then from the Effects panel, you can drag/drop that preset onto the whole lot of them at once.
And realistically, if you get pretty close, no one will ever know. Think of the film movies. All displayed in the theater from physical rolls of projected film, right?
The bulbs from one theater in a complex could be different brightnesses or color. The 'prints' from one to another would be different ... you couldn't make several hundred identical prints to begin with. And then four years later, they re-release the film using a completely different print stock, with different people doing the work of making the dupes.
The contrast & color would be notably different ... and no one in the audience ever noted it.
No two screens viewing your exports will ever show exactly the same image anyway. So do good, solid work, don't worry about perfection. Get it done, move on.
Neil
Copy link to clipboard
Copied
If I did use the older software, and I did drop the LUTs into the Premiere
folders, would you suggest I delete the existing Premiere LUTs to ensure
the hierarchy is correct in terms of how Premiere reads the correct LUTs?
Not sure if what I’m saying makes sense?
Thank you!
--
Steven Hoffner
Founder, 383 Pictures
416-559-4788
steven@383pictures.com
www.383pictures.com
Sent from my iPhone
Copy link to clipboard
Copied
If you use the older version, with an older project file that's not been messed with, I'd do as you did before for the first try.
Neil
Copy link to clipboard
Copied
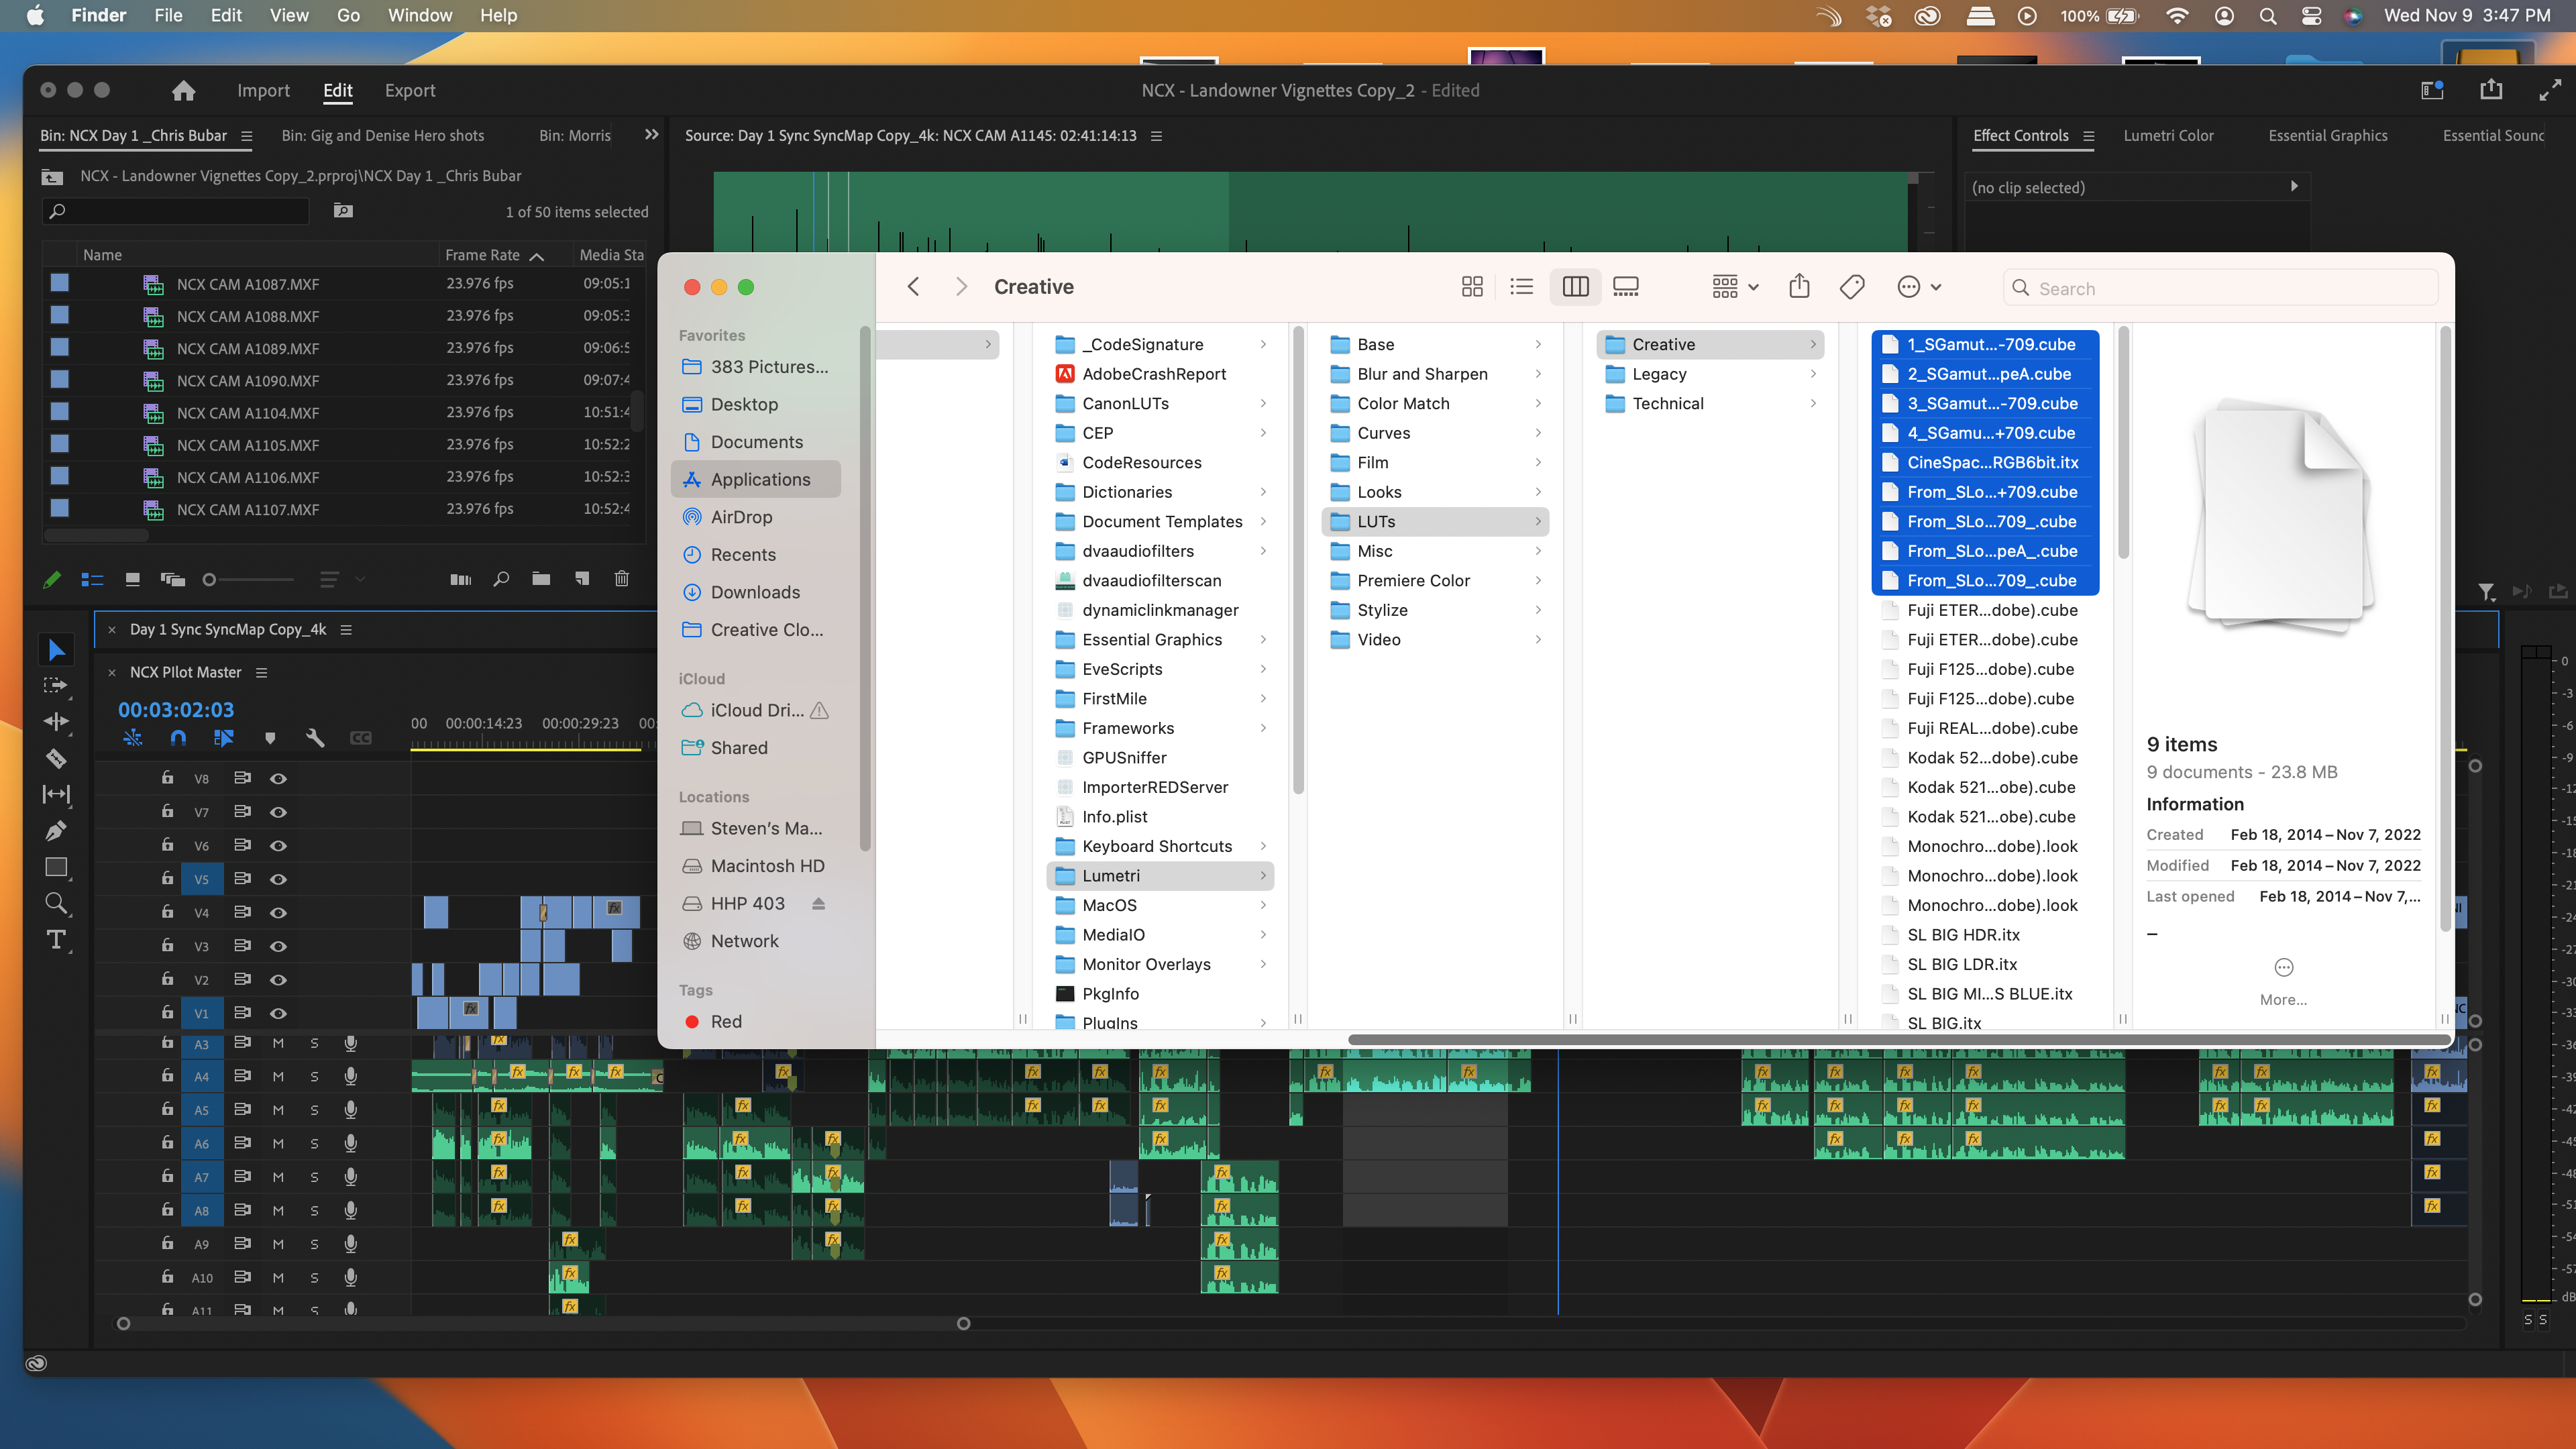
Hi Neil/Kevin,
Is there a reason the LUTs I installed don't work in Lumetri? I see them (see screengrab) but when applied it does nothing.
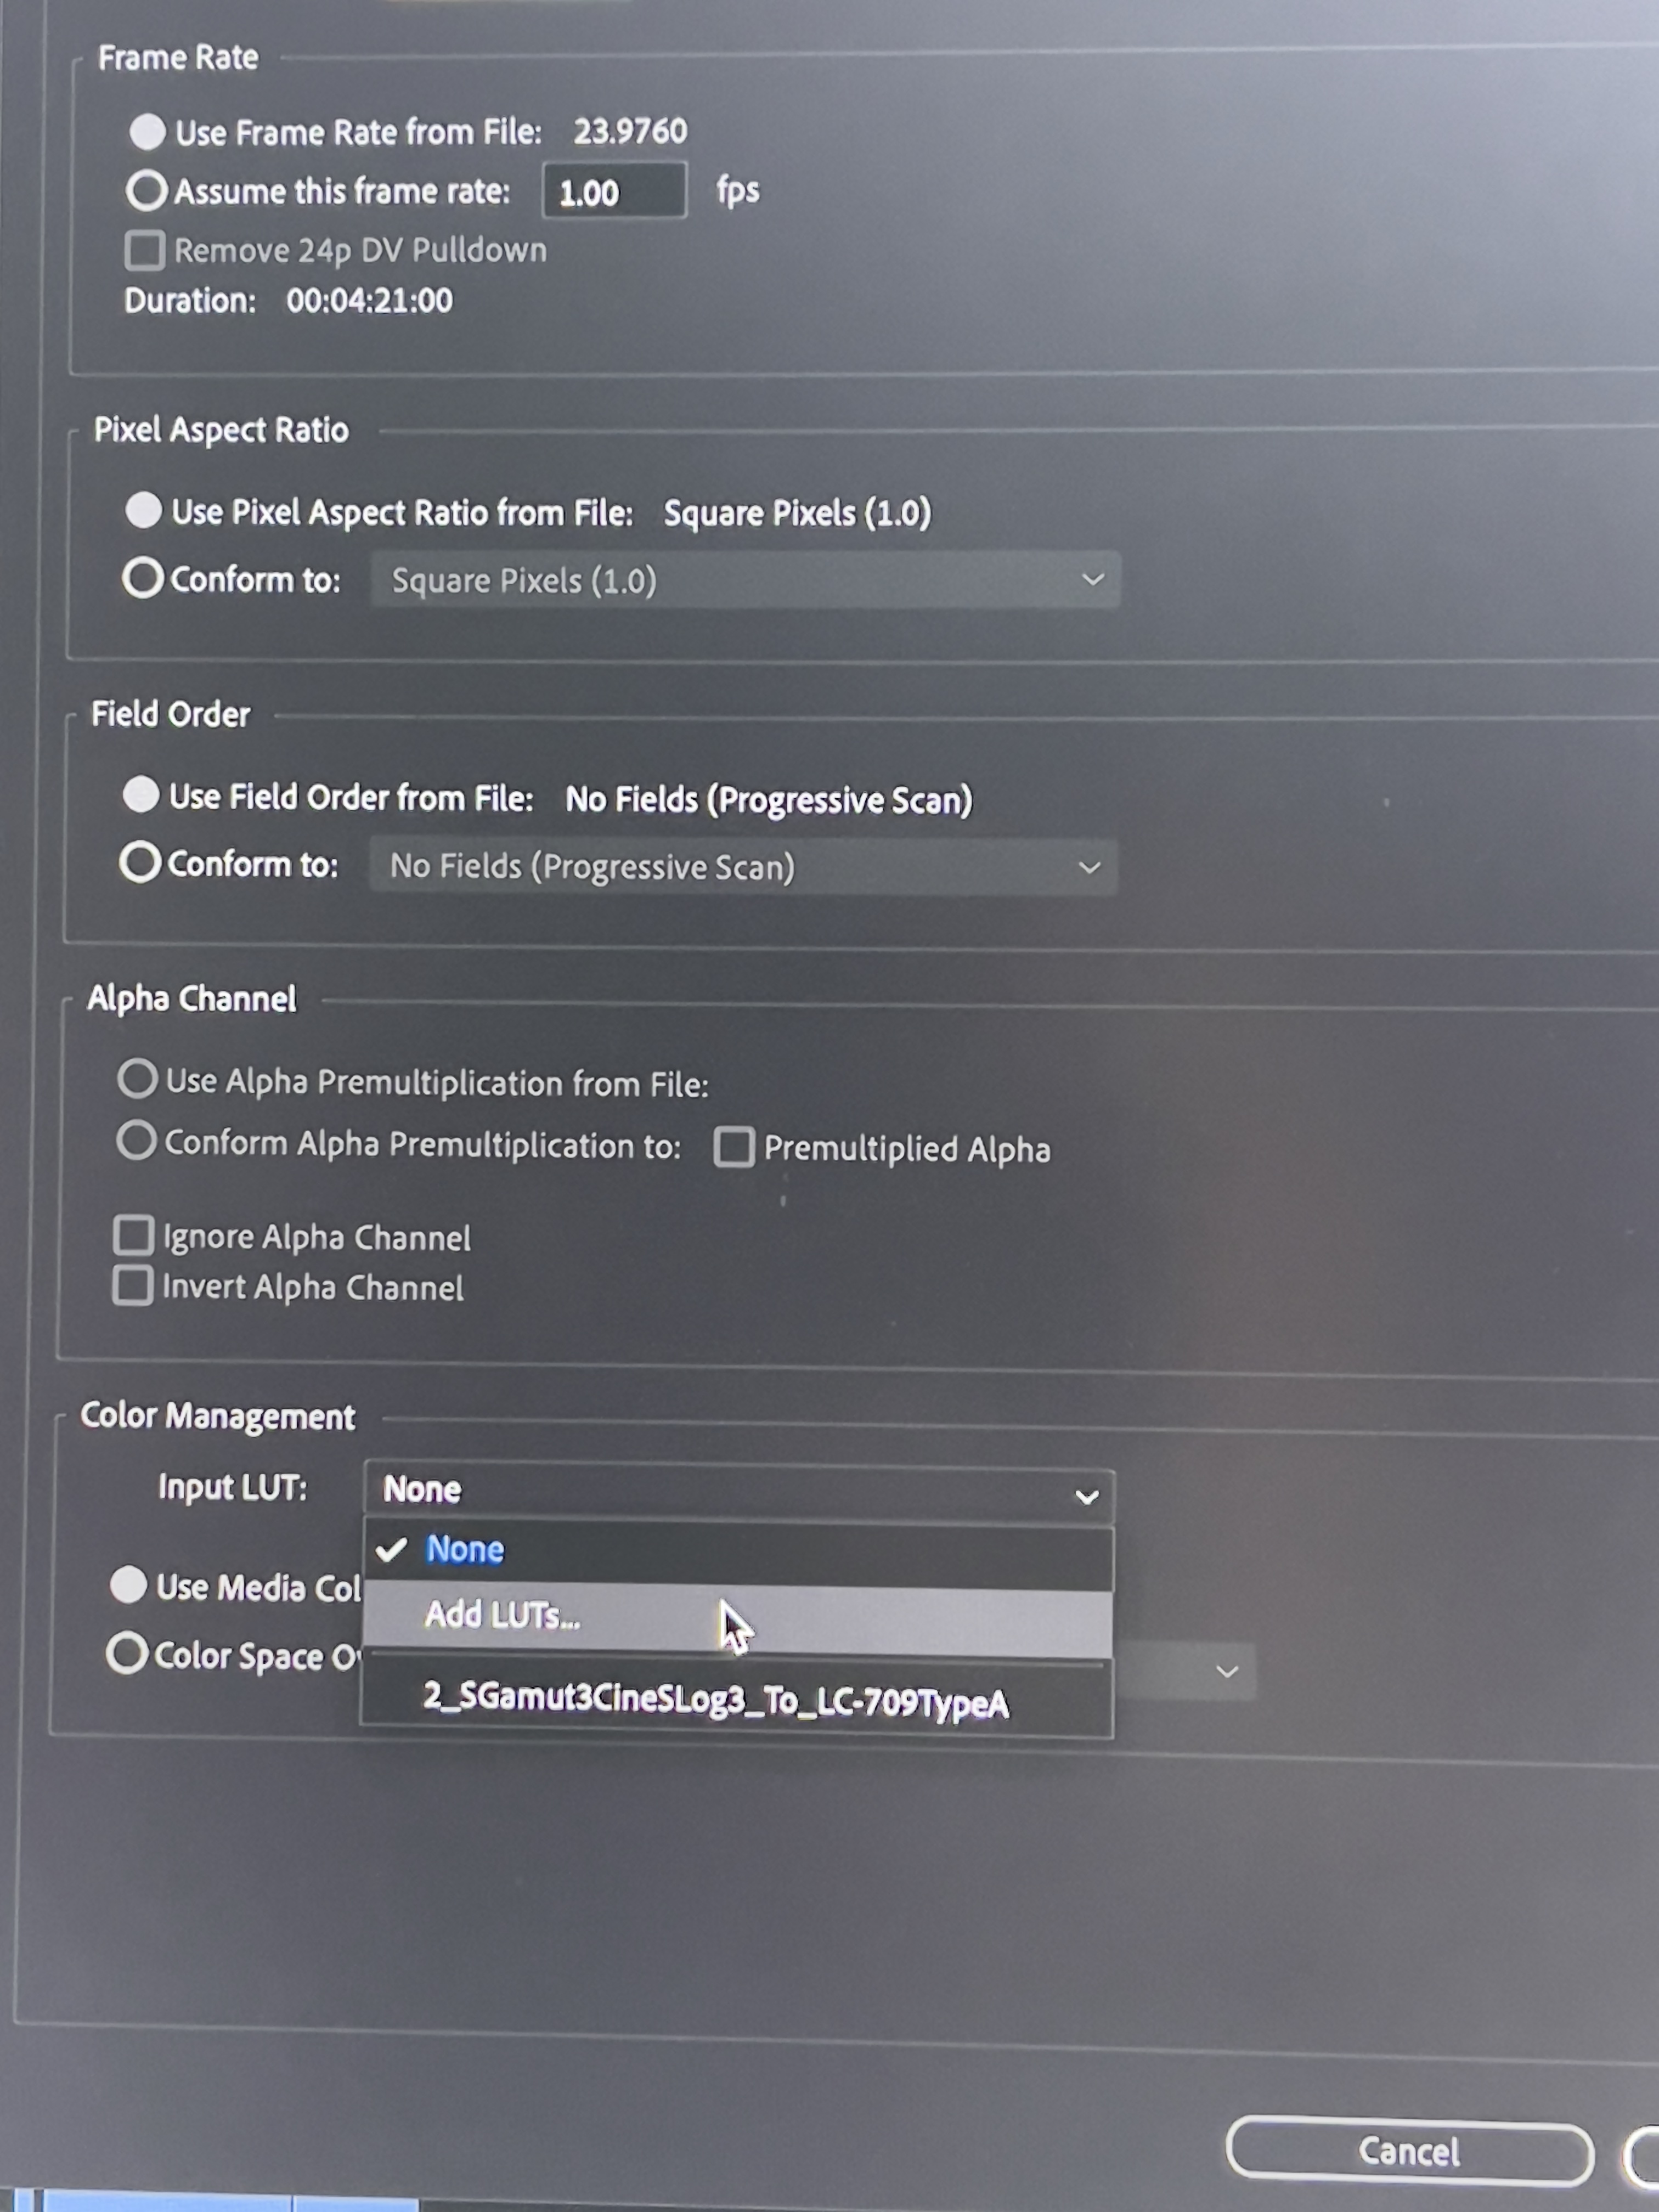
They only work when I try and assign it through Color Management in the Intrepret Footage section. And even then, it only allows me this one as (seen in my 2nd screenshot.) It keeps giving me an error otherwise. Maybe the LUTs are corrupt?
Thanks!

 AdChoices