 Adobe Community
- Home
- Premiere Pro
- Discussions
- Brightness change on export, especially when zoome...
- Brightness change on export, especially when zoome...
Copy link to clipboard
Copied
Hey guys! I'm a Premiere Pro newbie. I just noticed that the colouring/brightness changes a lot after exporting to H.264. In Premiere it looks the way I wanted it to (I haven't done any colour grading at all though), but the resulting MP4 looks too bright. What's even more annoying, I'm editing a VLOG where I use cut&zoom a lot, to cover up any bloopers. Now the brightness is actually very different depending on the zoom level. This is not the case when looking at it in Premiere itself.
Can someone explain what might cause this, and any ideas how I could improve it?
In Premiere Pro (same brightness regardless of zoom level):
In VLC, zoomed-in fragment:
In VLC, zoomed-out fragment:
PS: I'm using Premiere Pro v14.3 (build 38) on a PC. The source files are MP4 in Full HD 30 FPS from an EOS M50.
 1 Correct answer
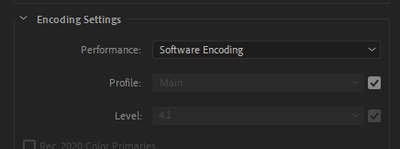
Sooooo I just tried something else which worked! In the encoding settings, I simply changed it from Hardware to Software:
Because clearly this export problem was only happening on my PC so I figured it might be a hardware problem. And indeed, there is no change in exposure when exporting via software encoding!
Looking at the Premiere documentation, this Hardware encoding uses Intel Quick Sync. I'm wondering if there are any Intel settings that I could amend to fix this problem and still use Harwa
...Copy link to clipboard
Copied
Every media player is going to display differently, so the best thing you can do is reimport the file into Premiere and see if it matches the original (if you haven't done that already.)
Copy link to clipboard
Copied
Good idea to check that! But unfortunately, the re-imported file looks the same in Premiere as in VLC. The colouring is totally different compared to before exporting. And the colouring changes with the zoom level whereas it used to stay the same when editing the original project.
Copy link to clipboard
Copied
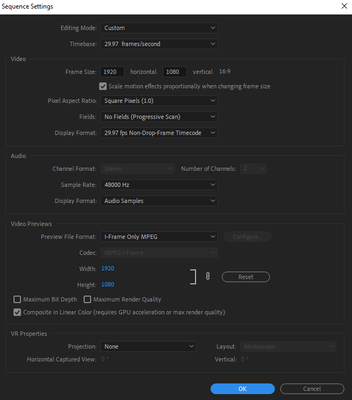
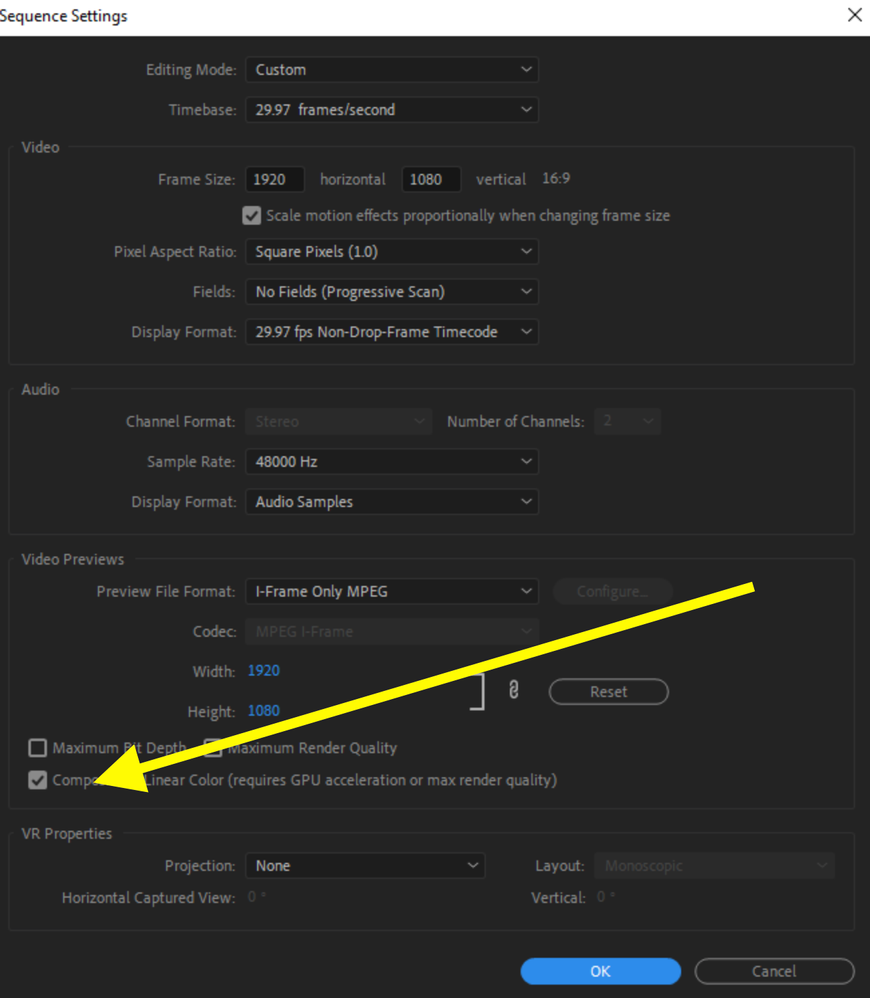
Click anywhere in the timeline then go to Sequence > Sequence Settings and post a screen shot of your sequence settings.
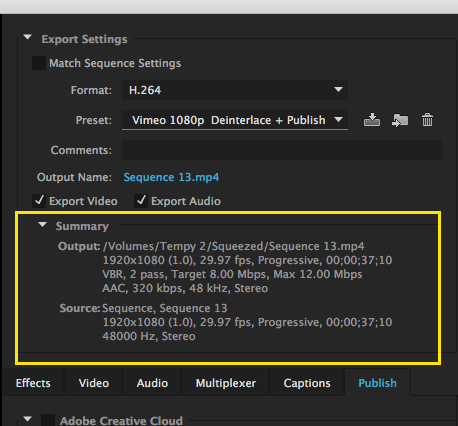
Also, post a screen shot of your export settings summary from the Export Settings Pane, like this example below:
MtD
Copy link to clipboard
Copied
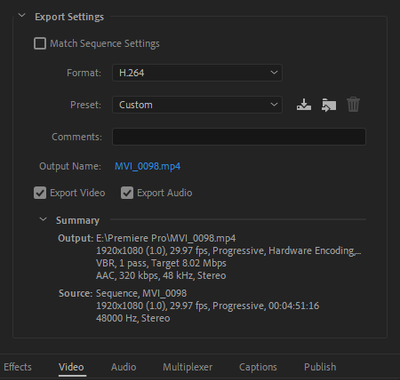
Here you go:
In the sequence settings I didn't intentionally change anything, so if anything is non-default it would have been by accident. In the export menu, the only change I made was Mbps from 10 to 8.
Copy link to clipboard
Copied
On your sequence settings, uncheck Composite in Linear Color and do a test export.
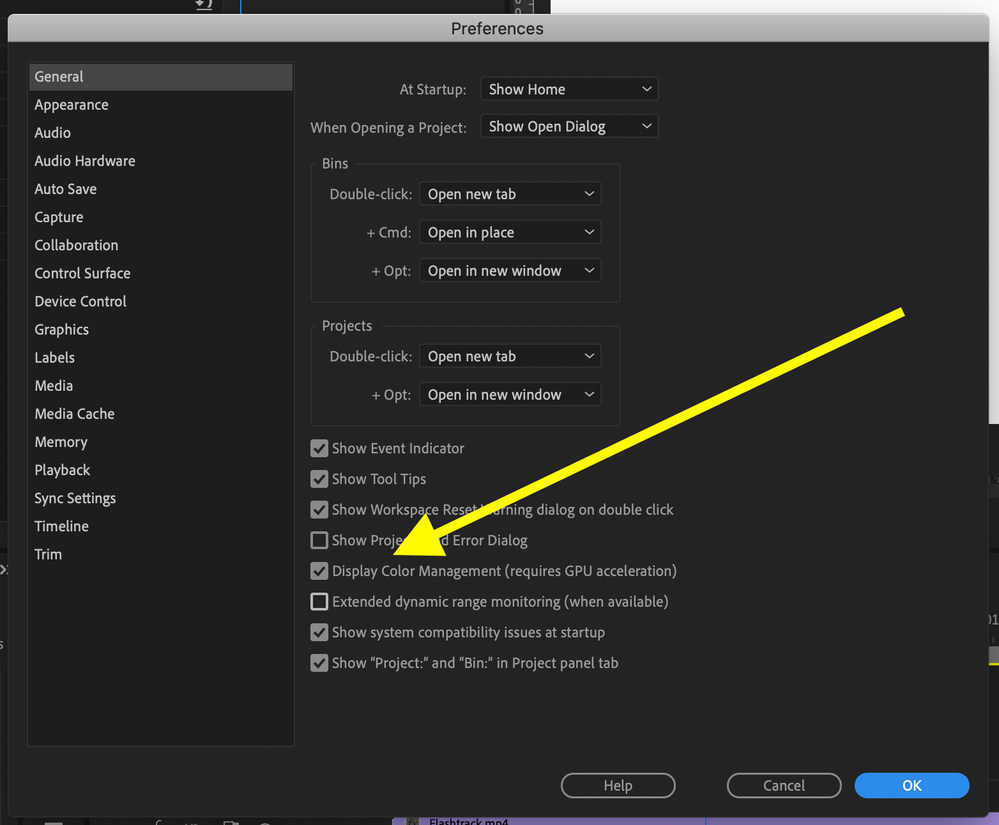
Also, go to Preferences > General and toggle off if on and on if off Display Color Management:
and see if that changes anything.
MtD
MtD
Copy link to clipboard
Copied
I tried both, but unfortunately neither of these seems to change the brightness of the exported file. It's still brighter than the source, and the brightness still varies with every cut&zoom.
Thanks for helping though! Any other ideas? 😕
Copy link to clipboard
Copied
Turning off "Display Color Management" in preferences made the brightness exactly the same as exported one! Thanks a lot!
Copy link to clipboard
Copied
Can you upload a clip of the source video that is exhibiting this behavior somewhere public so that it can be downloaded?
MtD
Copy link to clipboard
Copied
Of course, let me see what I can do. But you mean the exported video, no? The source video, as in the originally recorded file from the camera, behaves normally.
Copy link to clipboard
Copied
Ok @MtD, here we go. I took a short section of my project and exported it twice: once using the cut&zoom as before, once after resetting the zoom levels. I also trimmed a short clip from the original source file using the Windows Photos App. Let me know if this brings you any insights to what might be causing my problem!
All of the attached MP4s look the same regardless of Media Player (including re-import into Premiere). Something is going wrong during the export. You can clearly see that the exported files are brighter than the original source file, and that the zoom level has a big influence on the brightness (only change between the two export files is Effects\Video\Motion, everything else unchanged yet the brightness goes crazy).
http://steenfatt.me/premiere_export_problem_example_with_zooms.mp4 <-- look how brightness jumps!
http://steenfatt.me/premiere_export_problem_example_without_zooms.mp4 <-- no zoom = constant brightness
http://steenfatt.me/source_example_trimmed.mp4 <-- original = much less bright
PS: I meant to cut the exported files down to be much shorter. I accidentally left the in-out markers unchanged so there's just a lot of black and waste of file size. Sorry, noob mistake!
Copy link to clipboard
Copied
OK, questions -
1) Is the camera exposure locked down? Are you shooting both framings with the same camera settings?
Many zoom lenses will stop down (lower the exposure) when zoomed in, regardless of what the exposure setting was in the wide shot.
2) Looking at your "Source Example Trimmed" shot, the basic exposure seems high. You normally want to see skin tones in the 70 to 80% range, your scene has them approaching 100% and clipping on the red channel:
is that the look you are going for?
MtD
Copy link to clipboard
Copied
Regarding your changing exposure because of exporting, I placed the three source clips on the timeline, then exported that sequence.
I imported the file I just exported back into Premiere, placed the video on a track directly above the three clips you provided so that it is in sync, and did a 1/2 screen wipe so that the exported file is on the left of screen and your source clips are on the right of screen and can see no meaningful exposure difference between the source clips and the my export - on my system.
MtD
Copy link to clipboard
Copied
Hey MtD! So to be very clear, there is only one source file. I only have one camera, I never changed any camera settings and I shot everything in one sitting. All I have as source is one Mp4 from the camera.
The first two Mp4s I posted are the result of exporting in Premiere Pro. In the second Mp4 I just made some cuts and exported. In the first Mp4 I additionally did this on every other segment:
Basically I'm exactly following this tutorial: https://youtu.be/CKd16zrW7f8?t=201
Now I understand you're saying that my exposure is already too high in the source file. That may be true and it just shows that I'm a recording noob, too. I probably nee to fix my EOS settings. However, that doesn't explain why it changes when I zoom in (in Premiere).
You aren't seeing the difference because you aren't having the problem on your PC. But you clearly see the difference between the three files, no? And you see in the first file, how the brightness changes with every cut? So the question is, why does Premiere on my PC produce these brightness changes when exporting?
Copy link to clipboard
Copied
Sooooo I just tried something else which worked! In the encoding settings, I simply changed it from Hardware to Software:
Because clearly this export problem was only happening on my PC so I figured it might be a hardware problem. And indeed, there is no change in exposure when exporting via software encoding!
Looking at the Premiere documentation, this Hardware encoding uses Intel Quick Sync. I'm wondering if there are any Intel settings that I could amend to fix this problem and still use Harware Encoding?
Copy link to clipboard
Copied
I could be wrong, but I think Intel Quick Sync is primarily for decoding (playback), whereas the Hardware option on export is utilizing your GPU. Even so, thanks for the update. Since 14.2 is relatively new it's good to know about these types of things!
Copy link to clipboard
Copied
At first I also thought that this would be using the GPU, but this quite explicitly says that it's using Intel Quick Sync: https://helpx.adobe.com/uk/x-productkb/multi/gpu-acceleration-and-hardware-encoding.html
Copy link to clipboard
Copied
I see. Quicksync must work for both. I don't have an Intel CPU but I can still use Hardware Encoding with my GPU. If you have an intel CPU then you probably have access to hardware decoding and encoding with that.
Copy link to clipboard
Copied
That makes sense. Unfortunately though, for some reason the hardware encoding completely screws up the colouring for me. 😄
Copy link to clipboard
Copied
Yes I was going to suggest you try software encoding. In general it's more accurate than hardware encoders which are all about speed. Most times, for me, it's pretty indistinguishable, but I'm not using QuickSync.
Copy link to clipboard
Copied
I had a similar issue just now, and found that scrolling down the Video options in the Export dialog screen, there is a setting "HDR Graphics White (Nits)" with a check mark. Disabling the checkmark and choosing 300 instead of the default 100 gave me the export that matched the preview window in Premier Pro 2022.
Copy link to clipboard
Copied
Thank you so much for taking the time for commenting your solution! This worked for me after I tried a bunch of other stuff
Copy link to clipboard
Copied
Thank you so so much! This is exactly the answer I'm looking for, it worked for me after months of trying to figure it out.
Copy link to clipboard
Copied
Thank you as well @DavidH1765 for posting your solution. I was about to try the suggested 'correct answer' with the software encoding, not realising it was dated back to 2020 and which would have taken 5+ hours to run,. But |I cancelled it when I scrolled further down and saw your post. Changing the HDR Graphics White (Nits) setting to 300 did the trick, WITH hardware encoding.
Thanks again!
Copy link to clipboard
Copied
Is this for an HLG or PQ HDR sequence and export, or an SDR Rec.709 export?
As that shouldn't be involved in any way, shape, or form for an SDR export, that's only an HDR setting. So if that's affecting an SDR/Rec.709 sequence and export, yea, something ain't right.
And for most pro HDR work, the recommended setting is the 203 nits one btw.
Neil
-
- 1
- 2


