 Adobe Community
Footage out of sync after export
Copy link to clipboard
Copied
I've been editing in Premiere for over 6 years, edited footage from a multitude of recording platforms and I've never seen something like this.
Background info:
A few days ago I recorded some Watch Dogs gameplay for a youtube video. I recorded my camera through a software called Manycam. Normally seen I record in OBS but for some reason, OBS has a huge impact on the FPS of the game.
I load the footage into Premiere and the first thing I noticed; the audio was out of sync.
I quickly found the problem. For some strange reason, the footage would ' jump' back in time at random parts while the audio continued which made it go out of sync. Strangly enough, this 'jump' would be visible with an export but everytime I open the project, these jumps would be at a different point.
I tried converting the footage through Media Encoder, no succes. Than through VLC and it seemed to work, no more jumping.
But now the real problem starts:
Replaced the footage with the VLC one, edited the entire video and synced everything again (I was syncing it before because of the jumps) and all seemed fine.
So I export it with the same settings I always use for my youtube videos.
I check the export and... The audio is 100% correct but the footage itself is completely out of sync. I'm not speaking of a few frames but over 5 entire seconds ahead of the audio!
So I went back into the project, and deleted all rendered files (sequence - delete rendered files) and after doing that, it shows what I rendered.
I sync the footage again and export. But the export came out exactly the same as the previous one!
As a test, I offset the footage by 5 seconds and exported it again. The exact same! Even with a 5 seconds offset within premiere, the exported video was exactly the same as the previous 2 exports! I was atleast expecting it to move but it is the exact same footage.
I tried everything, including clearing my cache, but all exports come out the same and everytime I do "delete rendered files", it shows the footage as it was exported. When I sync it, it seems fine in premiere but when exported, it's back to what it was before syncing.
Best part: today I recorded another video, of the same game with exactly the same workflow and this one is exporting perfectly. It seems limited to this specific project
Copy link to clipboard
Copied
Your original footage has Variable Framerate: https://www.reddit.com/r/VideoEditing/wiki/faq/vfr
You'll want to convert it to a constant framerate.
If you have a separate issue with the audio desync you may also want to try exporting with Software Encoding and not Hardware Encoding. Try that first if you have it where it seems sync'd inside of Premiere.
Copy link to clipboard
Copied
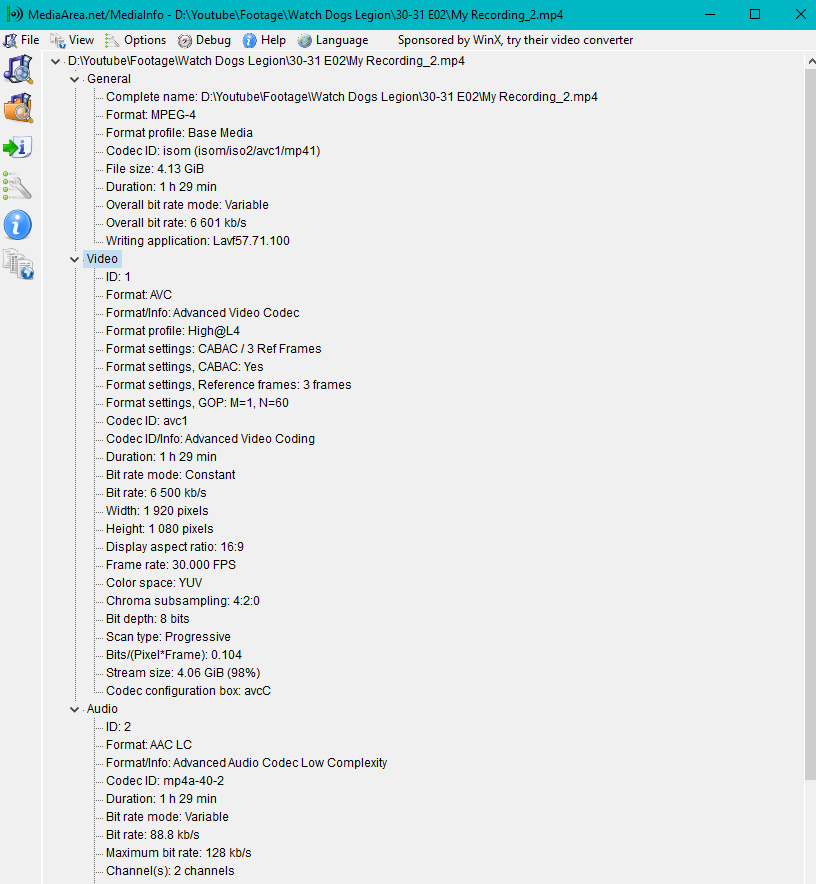
The original footage is recorded at 1080p 30 fps. I checked with MediaInfo and it confirmed this.
I tried Software Encoding and no luck.
One of the things I just noticed:
If I go to Sequence -> Render in and out, the renderpreview bar at the top of the timeline will turn green, as expected.
This is also the version that seems to get exported, which is the out of sync version.
If I slip a fragment by just one frame, it will turn yellow (as expected) but it will also instantly jump back to the footage as it was before I rendered in and out. Which is not the behaviour I expect. If I slip 1 frame, I expect it to slip 1 frame from the rendered version it is showing at the moment. Which it isn't.
One example here: I had a rendered bit that I tried to sync and I tried to use the slip tool on the footage but failed to notice it was still linked to it's audio. So I also dragged the audio with the slip tool. Which is not useful when syncing of course.
But while the audio only slipped for 1 frame, the footage slipped for 34 frames. Which is what I synced it to before I rendered the preview. Odd, since the audio and footage were linked together and should slip the same amount.
Usually, Premiere will render the yellow bits as is. But it doesn't seem to do that now
Copy link to clipboard
Copied
It does look like constant from Media Info. You can try Neil's suggestions with the Media Cache. I'd also just try turning your renderer to Software Only and see if that helps (sort of a next step to the Software Encoding suggestion). I'm only curious about that because I've seen Hardware Encoding cause sync issues for people, which suggests a potential relationship to a video card.
Another thing worth at least trying is a different Premiere version.
It's odd.. It really seems like it would be a VFR thing. Is the Media Info tree that you posted from after the Handbrake conversion? If so, when you converted with Handbrake did you check the constant framerate checkbox? A transcode of any kind can actually get you a constant FPS file, but that doesn't necessarily mean that the desync would be fixed, only that it would be burned into the video.
Copy link to clipboard
Copied
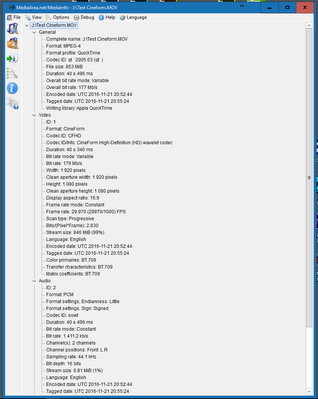
The crucial data in MediaInfo is not the frame-rate, but whether the frame-rate is VFR or CFR. So the frame-rate mode is the data you needed to check. Your project is behaving dead-on to expectations with VFR media.
Look in my example, note that down in the Video 1 information, it has a line for Frame Rate Mode.
Neil
Copy link to clipboard
Copied
It doesn´t show on my clip
But I have converted the file with HandBrake, set it to constant (which MediaInfo confirmed) and the issue persists.
Copy link to clipboard
Copied
I would try two things.
First, in that project, delete the clip from the project. Save, exit. Relaunch after clearing the cache/database files.
Re-import the clip, see if it's still problematic.
And if it persists, create a new project file, and import the clip into that, see if it works normally.
Neil


