 Adobe Community

Copy link to clipboard
Copied
Hi all,
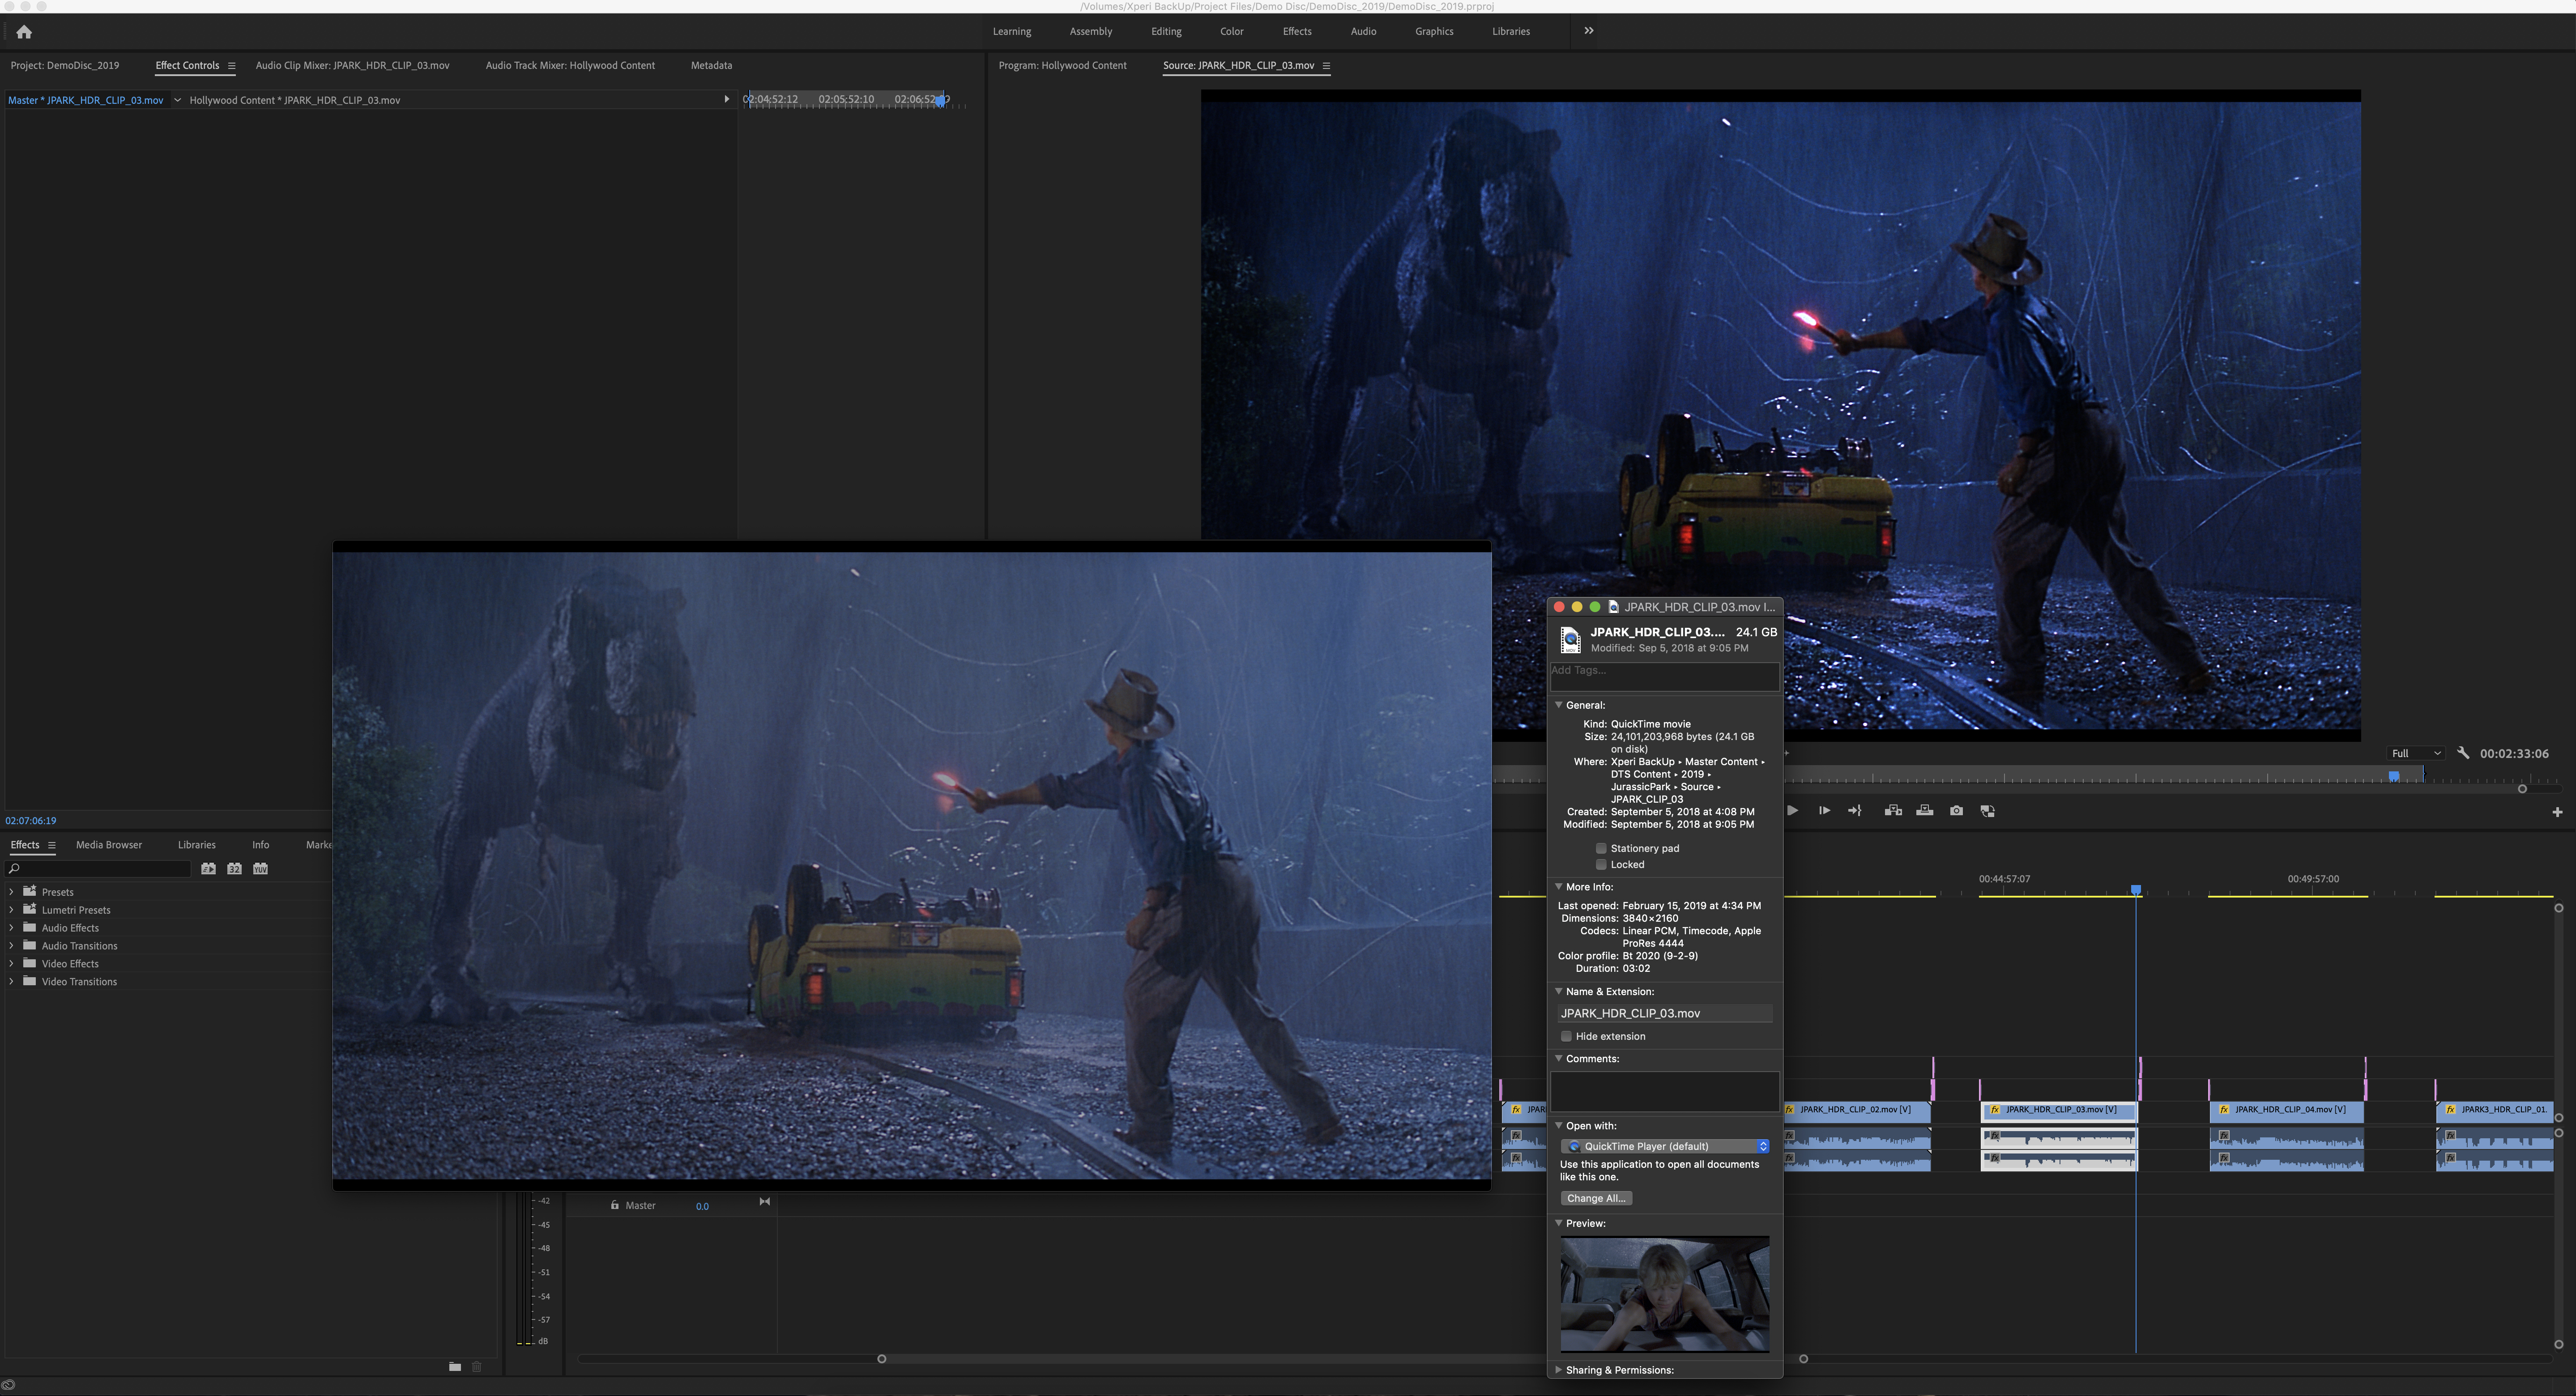
I have recently updated Premiere CC and after recieving HDR footage from a studio, Premiere seems to be auto adding a lut or color profile that I cannot find or turn off. It doesn't exist in the Master Clip section. I have included a screenshot of the video in Quicktime vs in Premiere. The color profile in the source is BT Rec 2020. But I cannot seem to control the colors that are being auto applied.
Any ideas?
I am using Adobe Premiere Version 13.0.2


 1 Correct answer

Right off I see several potential issues here. Let's start with these three:
First, you're on a Mac ... how do you have your monitor set, which color-space/profile are you using?
Second, QuickTime Player is notoriously color-stuuupid, so comparing that to something in Pr is pretty much a waste of time. How does that clip look in a decent color-aware player like Potplayer or VLC?
Third ... what's it look like in Lumetri with HDR turned on?
Neil
 22
Replies
22
22
Replies
22
Copy link to clipboard
Copied
Right off I see several potential issues here. Let's start with these three:
First, you're on a Mac ... how do you have your monitor set, which color-space/profile are you using?
Second, QuickTime Player is notoriously color-stuuupid, so comparing that to something in Pr is pretty much a waste of time. How does that clip look in a decent color-aware player like Potplayer or VLC?
Third ... what's it look like in Lumetri with HDR turned on?
Neil
Copy link to clipboard
Copied
Thanks for the response Neil,
When I put it in lumentri color panal and select HDR, nothing happens, the colors appear to be baked in. When I play the video in VLC the colors look correct. The thing is, before I updated Premiere, in the timeline the videos looked the same as quicktime with "muted" colors that can be adjusted in HDR. And now it seems to be auto detecting the source color profile and reading it wrong. Is there a way to set the Color Profile in Premiere? To tell it what the source is?
I have included another screenshot. The Top Left is in Quicktime, the Bottom Left is in VLC, and the Top Right is the Premiere Sequence. The way Premiere is reading it is obviously wrong.

Copy link to clipboard
Copied
Wrong ... right ... or not, there's a number of things that need to be aligned. In the last example, QuickTime is being obviously QuickTime which is to say clueless. VLC looks to have simply brought the brightness into SDR range more or less.
And in Pr, you're using the Source monitor not the Program monitor ... so it doesn't tell me much. The Program monitor with Color Workspace and Lumetri set with HDR turned on in the hamburger menu would be the place to see what's what in Pr. And you need to adjust the HDR Specular/White point in Lumetri to match the clip into the current monitor space.
Neil
Copy link to clipboard
Copied
I am not sure what premiere is doing.
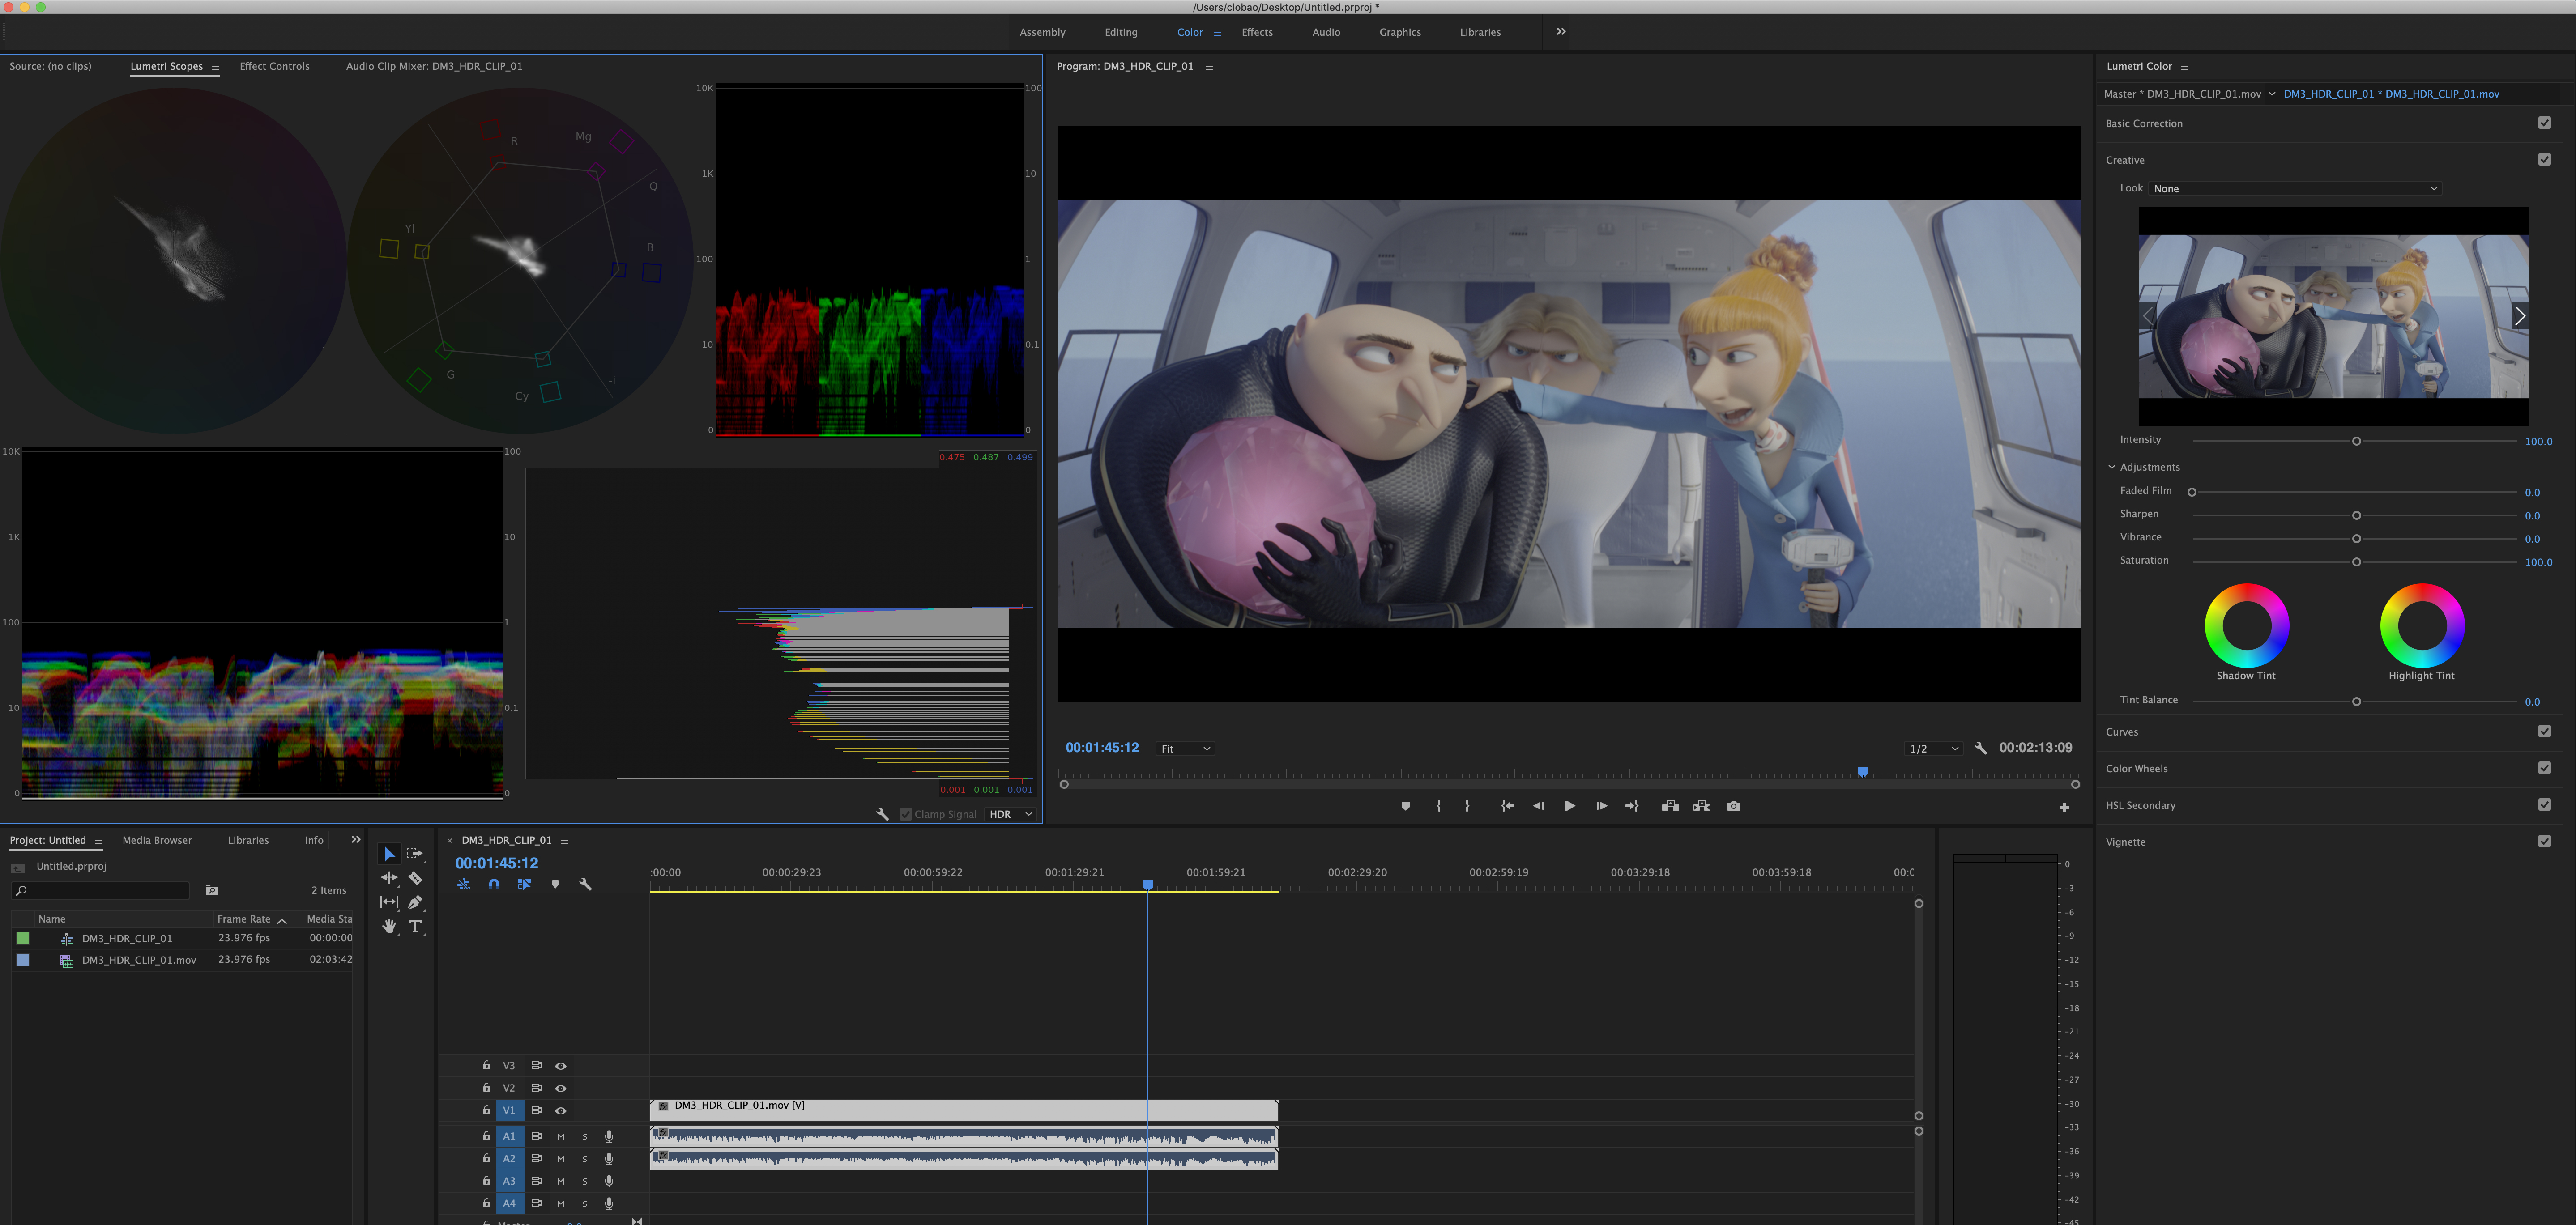
The clip looks the same in the program monitor. And when I turn on HDR in the lumentri color, and adjust the HDR white, nothing changes. The starting point in the color is not correct.
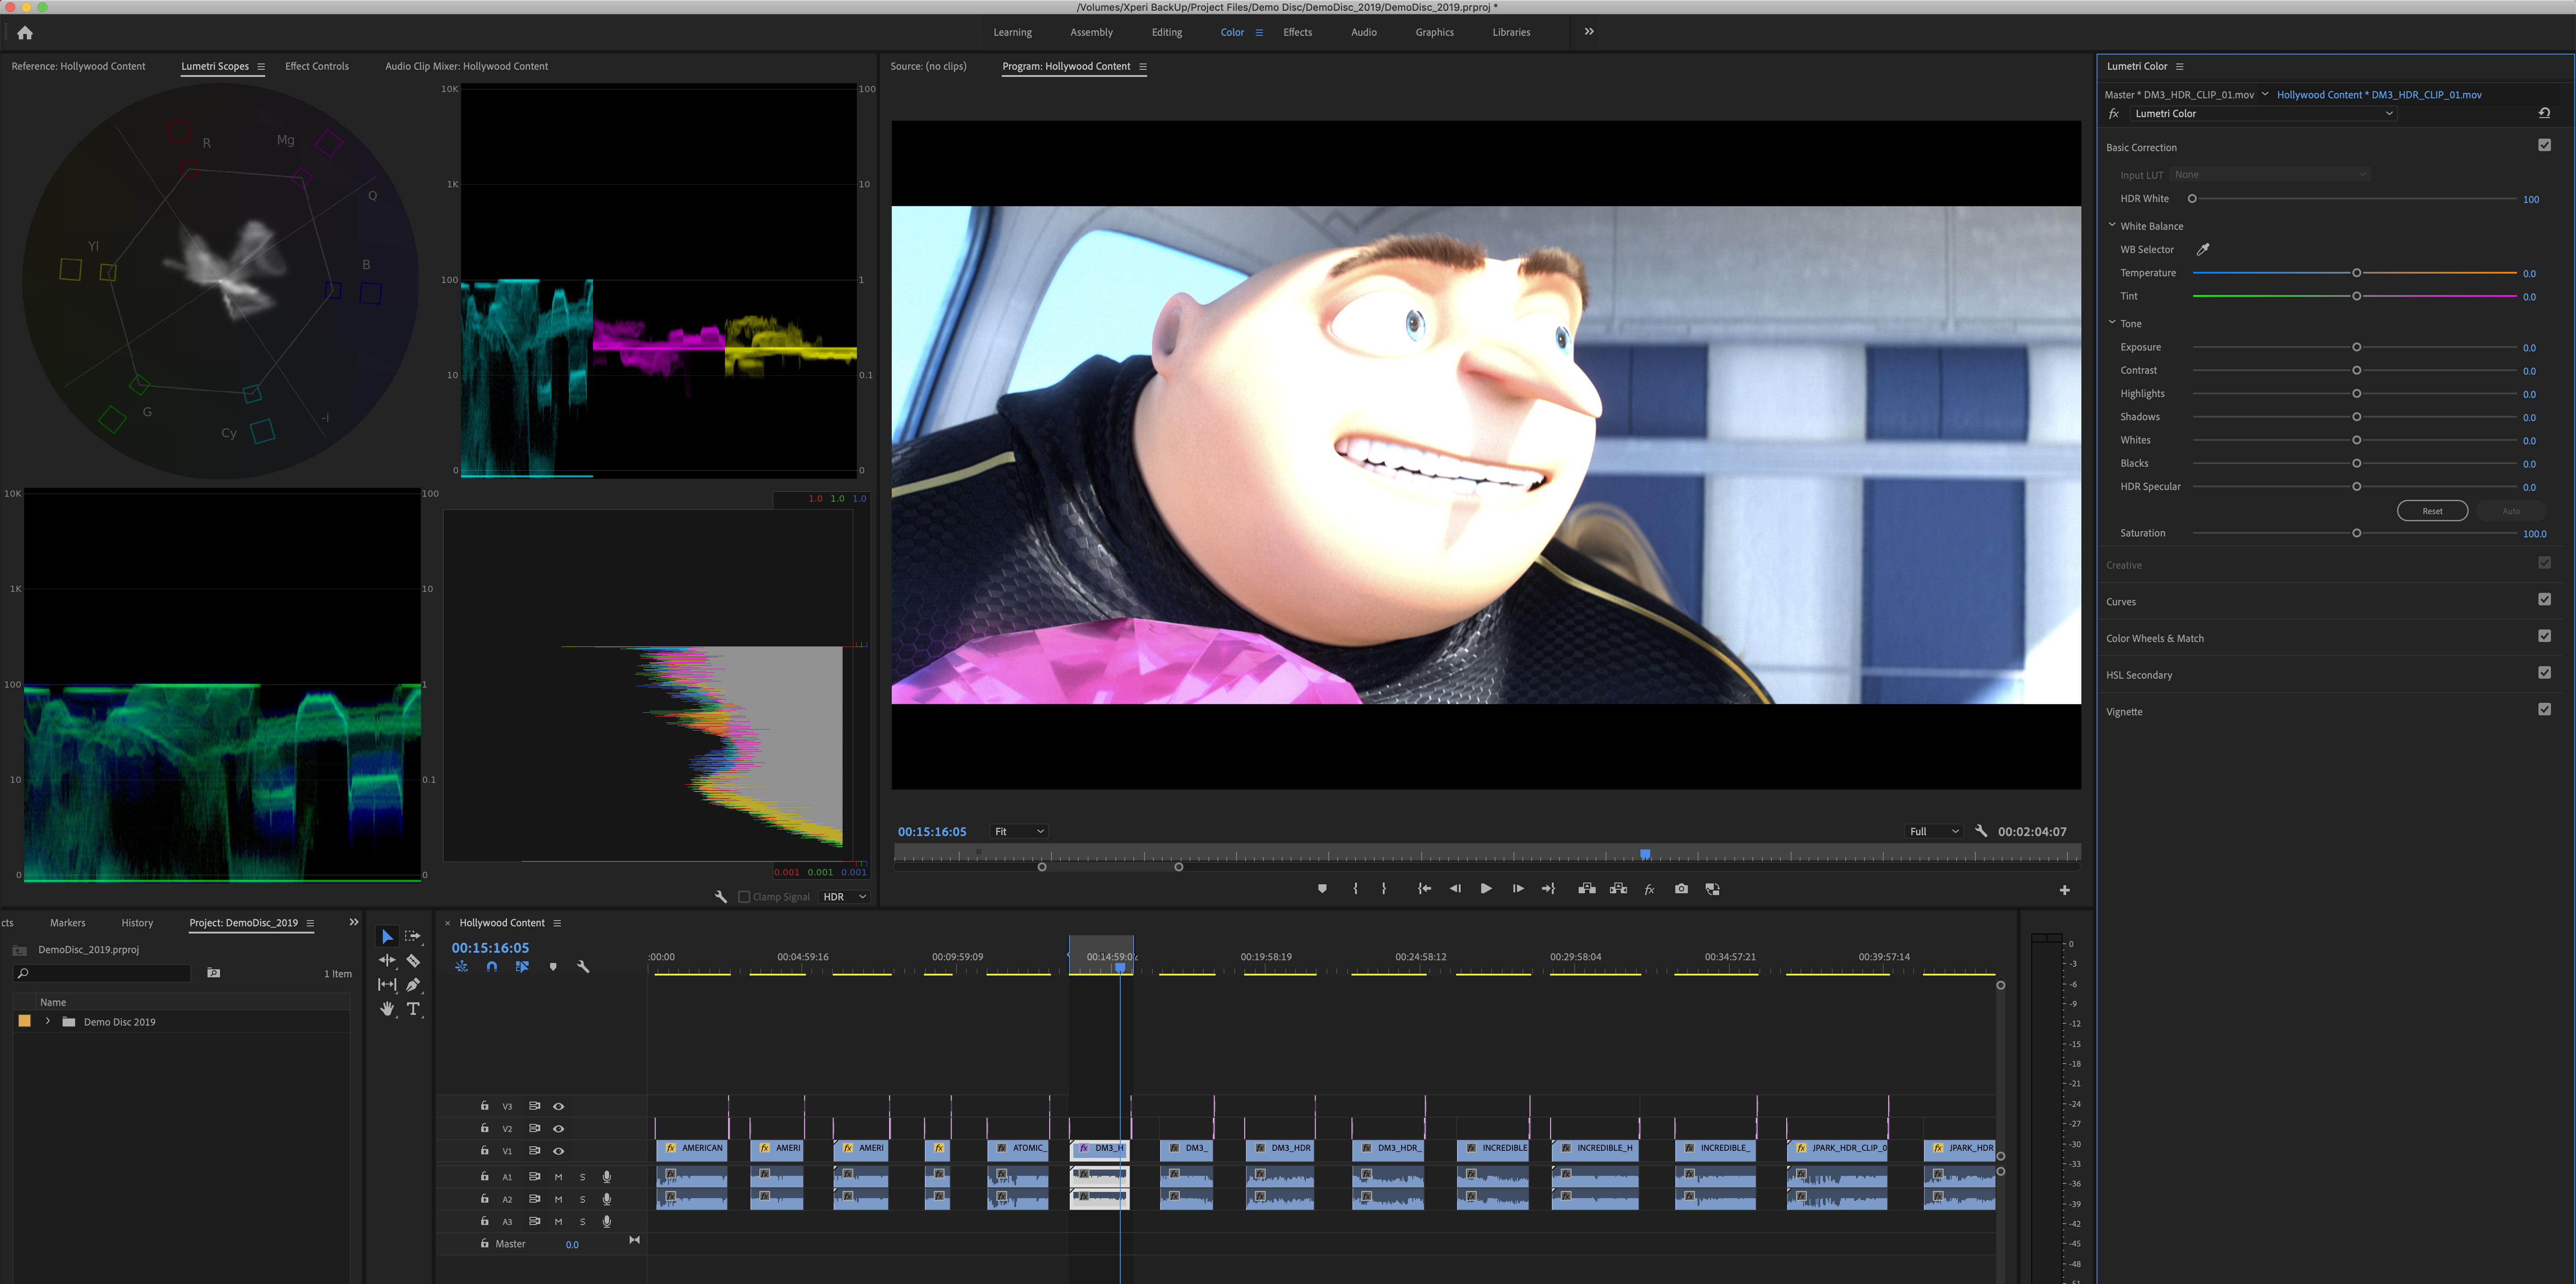
The color profile in this clip (DespicableMe) is HD 1-1-1. What is interesting, is when I import another clip with the same profile (guy with rake), for some reason, Premiere doesn't seem to be interpreting the colors the same way. It looks the same as the source in quicktime and VLC.
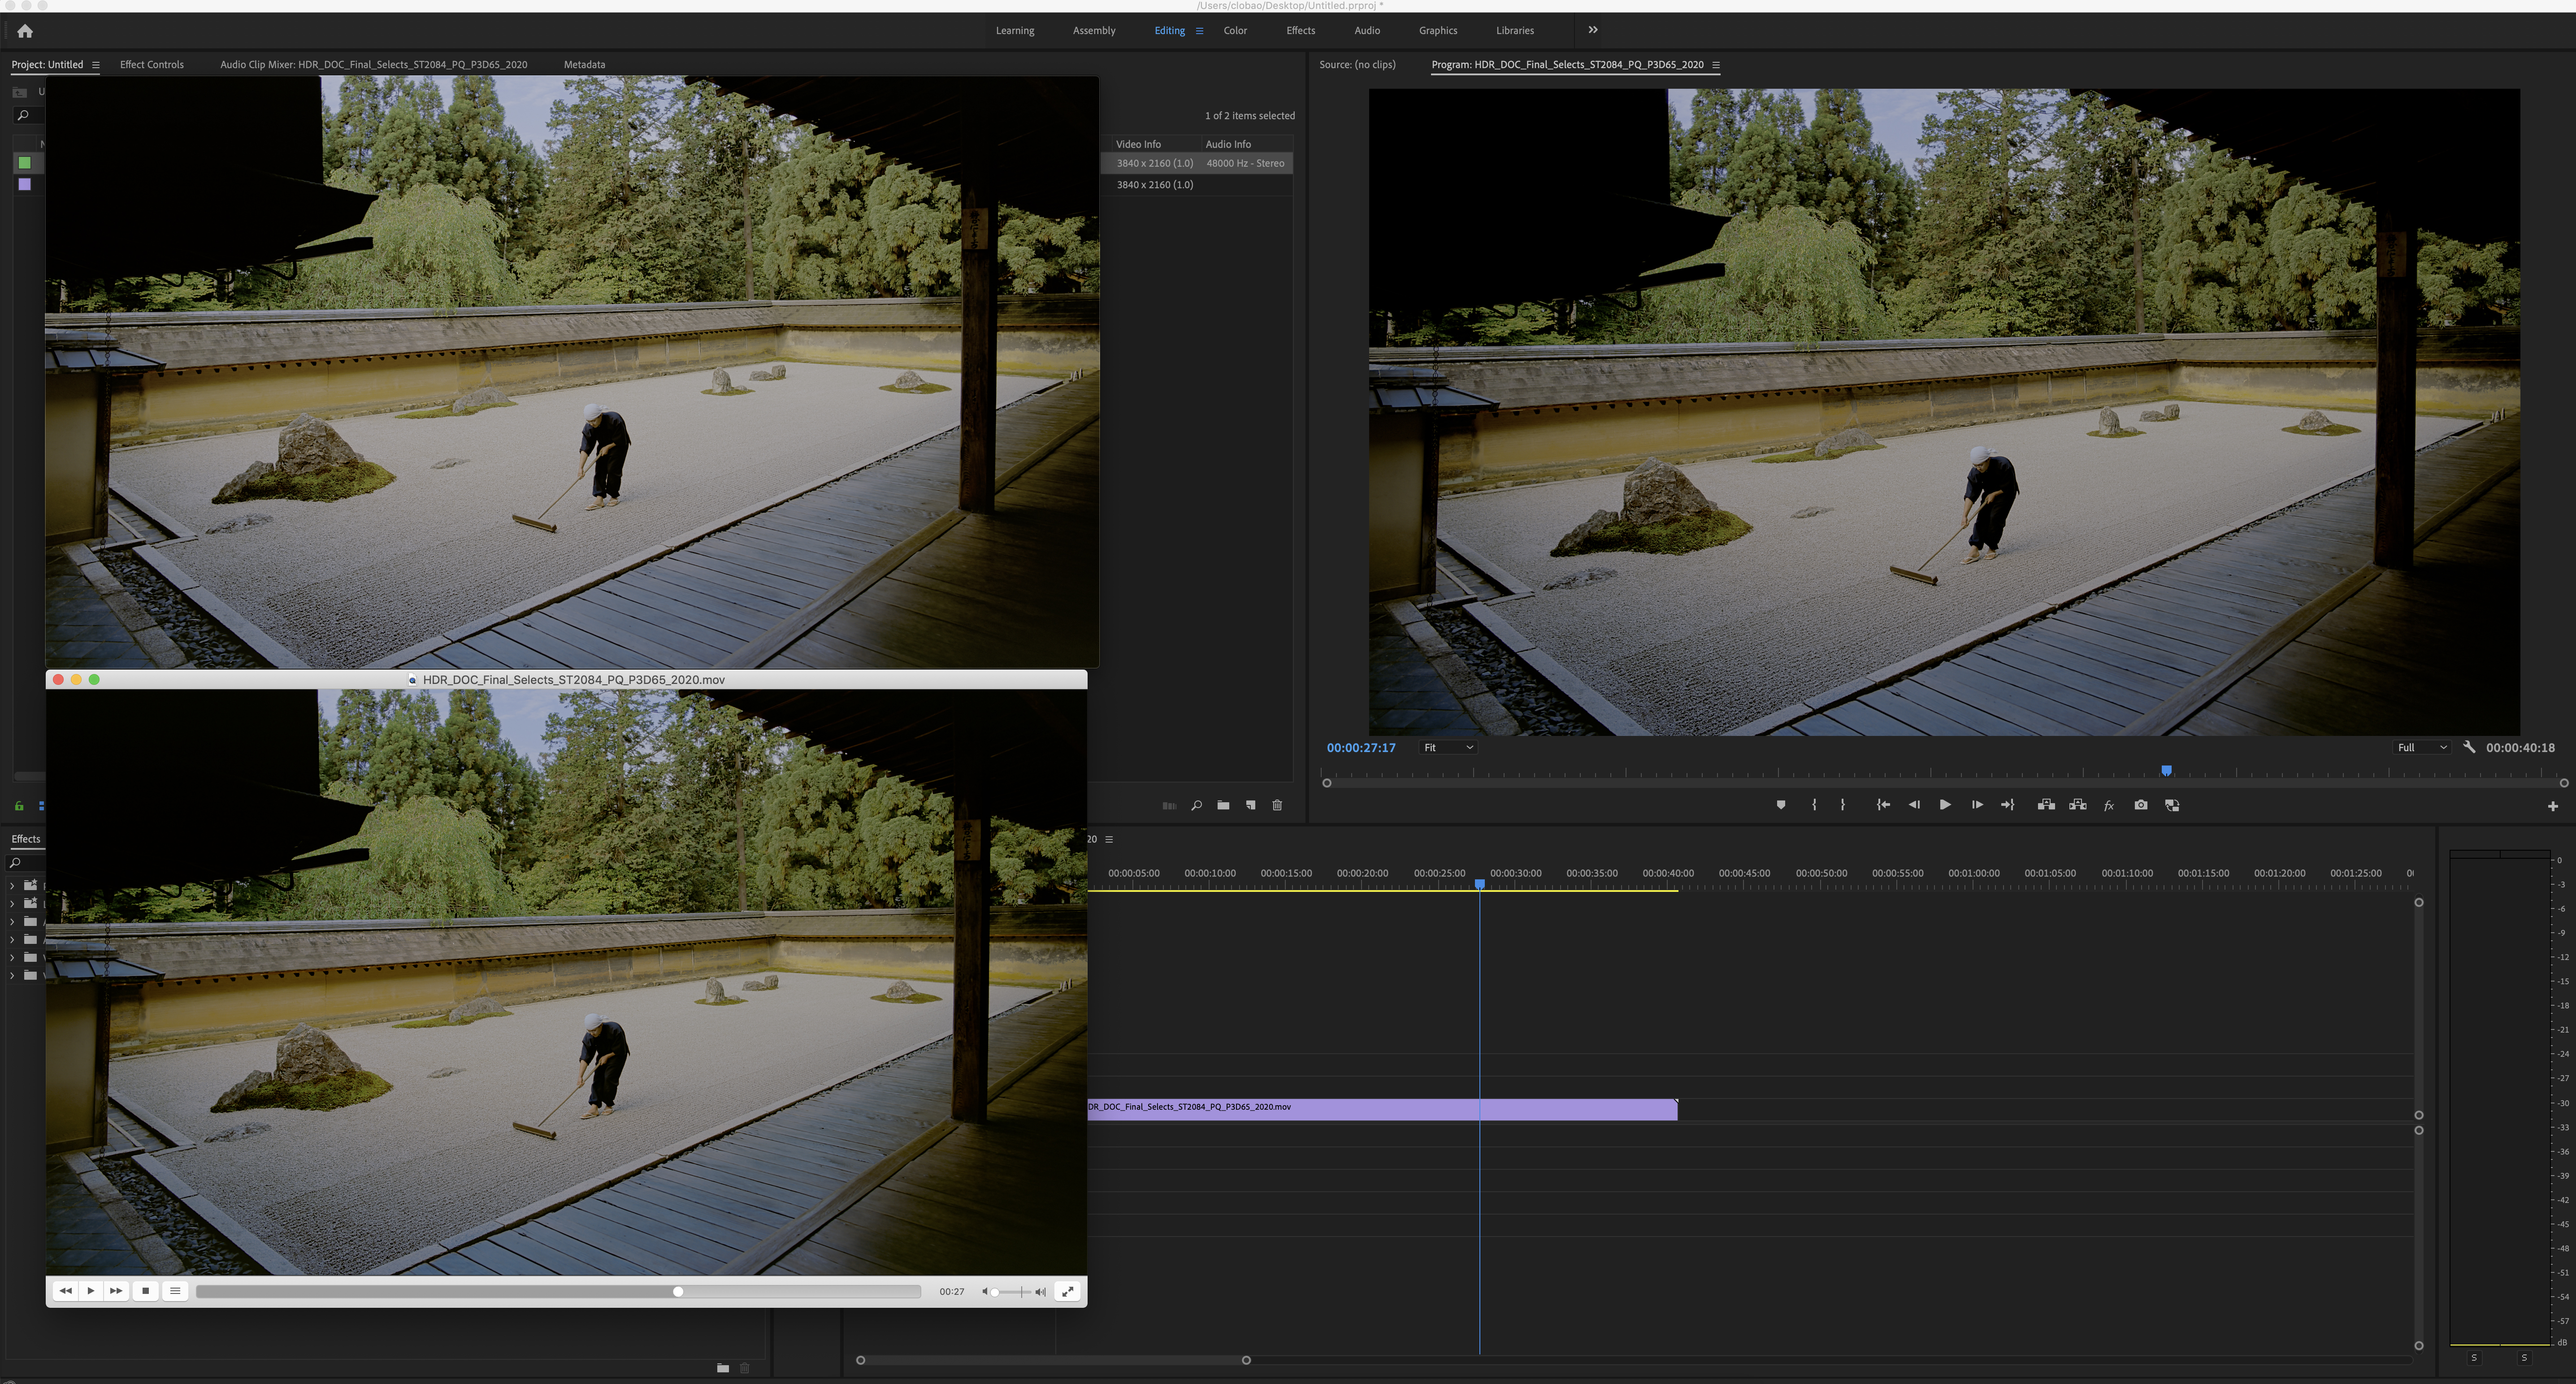
I have attached screenshots of each of these things.
Copy link to clipboard
Copied
Also,
When I import the same clip in a previous version of Premiere (2017 11.1.4) the color effect goes away and looks raw.
Copy link to clipboard
Copied
Well, this is frustrating ... and one of my complaints to the developing team is the lack of current good controls for the user to work with either color spaces internally or for export.
franbot ... ideas?
Neil
Copy link to clipboard
Copied
I think I may have found the culprit Neil,
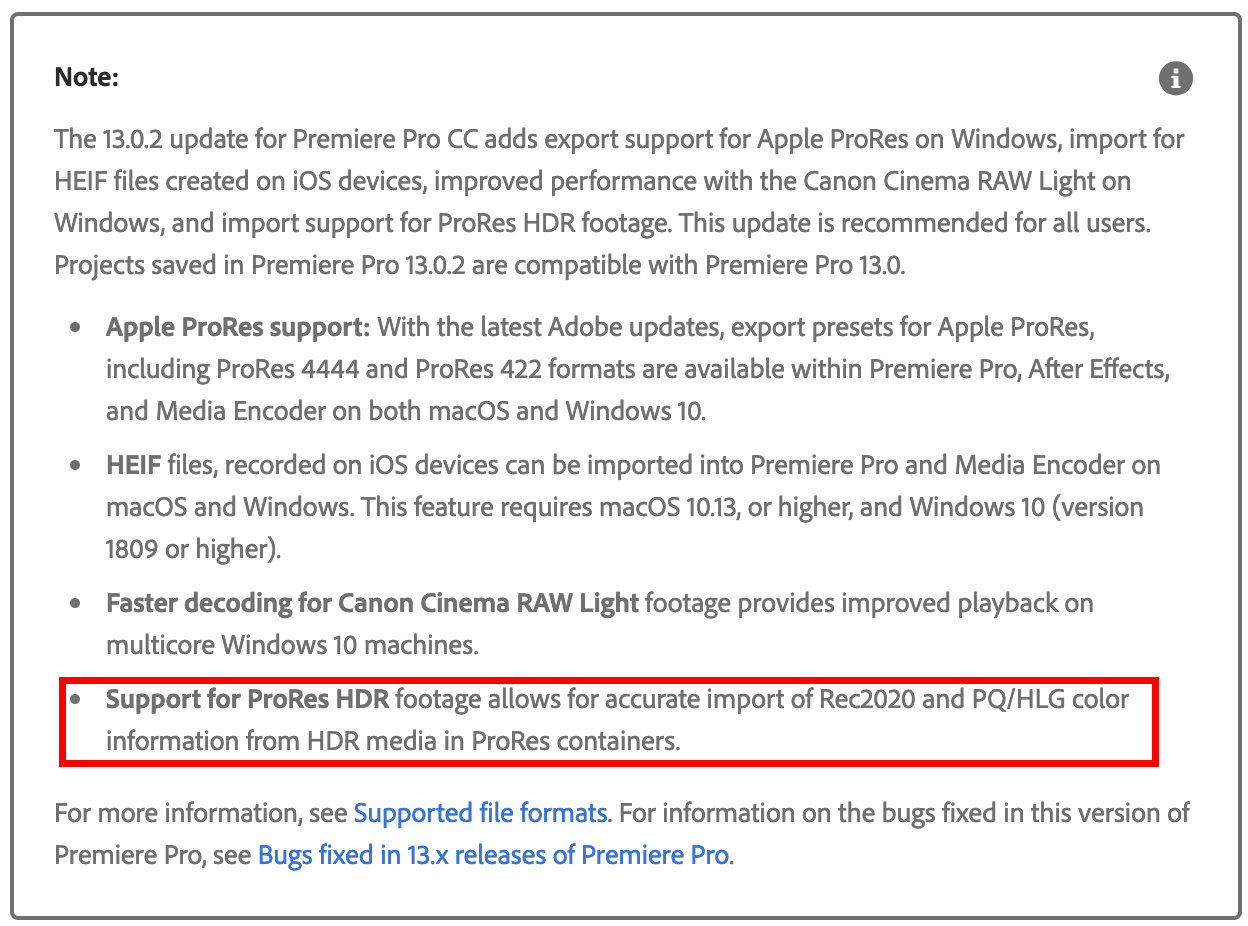
It appears that with the most recent update on Premiere, there is HDR import support for ProRes Files. But, in my case, it doesn't seem to be reading correctly across the board-
I wonder if there is a way to deactivate this feature.
Copy link to clipboard
Copied
No idea ...

Copy link to clipboard
Copied
HDR is a very complicated mind-bending thing to wrap your head around. Here are some bullet point info.
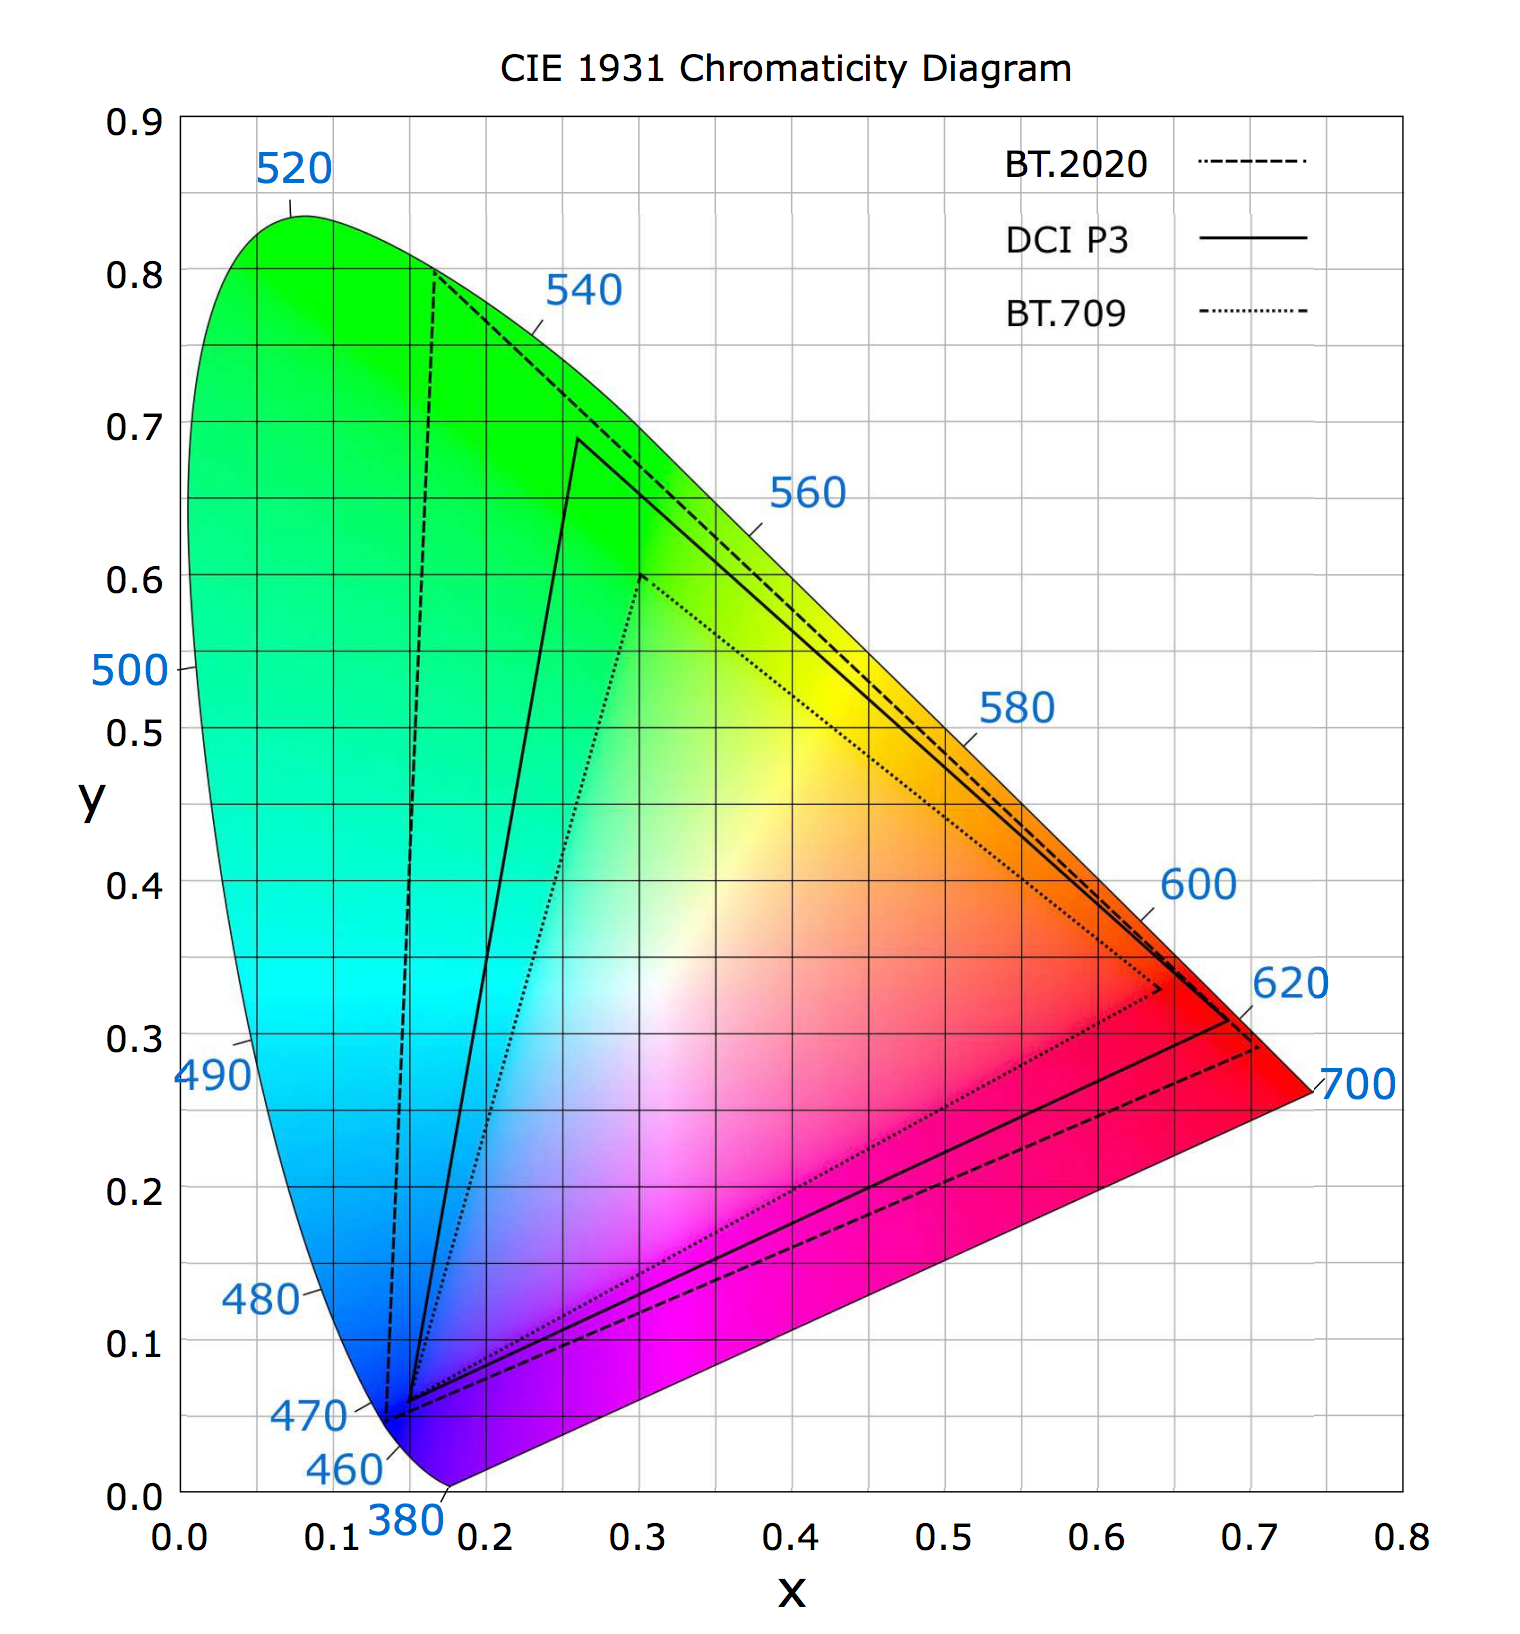
- Premiere Pro's internal working color space is hard-coded at Rec709 SDR - this is not user-configurable (yet)
- When HDR material is brought in the data is converted into over-range Rec709. Data outside the Rec709 gamut is stored in floating point values internally. - again, not user-configurable
- Viewing HDR footage in PPro on your computer monitor (which is P3 at best, but probably only sRGB) will look blown out, because the over-range is being clipped by your display. Even if you have an HDR desktop monitor, PPRo is only capable of delivering Rec709 to the internal display. Imagine you take a Rec709-shapped cookie cutter out of the middle of a Rec2020 gamut.
- To view HDR footage correctly, you need hardware from AJA such as the Io4K Plus or Kona4/5 and an HDR monitor connected over HDMI. Blackmagic currently does not offer support with their UltraStudio of Decklink lines.
- The support we added for ProRes HDR was to enable the footage to be correctly converted to over-range Rec709. This does not actually make it look "correct" on the internal display - it will look blown out. The previous functionality was that the HDR data was assumed to be Rec709 with no conversion, and the appearance was low contrast and low saturation, kinda like Log footage. Some users found this useful - you could grade your way to a nice looking (SDR) result. This workflow was not HDR at all though.
- Premiere Pro will be supporting a better HDR user experience in the future.
Copy link to clipboard
Copied
Thanks a ton for all that info, Francis ... that is very informative.
Not necessarily charming if one is needing HDR at the moment, but still, very informative.
Neil
Copy link to clipboard
Copied
Hi Francis,
Thanks so much for this response. It is very helpful and cleared up a lot for me. I do only have one final question:
When I export the footage out of Premiere, the export has this blown out color baked into it. In the previous versions of premiere it retained the low contrast look. Is there any way to prevent the export from including this conversion of color? So that I may color in HDR in a different software?
Thanks again.

Copy link to clipboard
Copied
Any updates on this? i am having the same problem of premiere converting my HDR sourcematerial to SDR (very poorly i might add) Can we still not control the input color spaces for our timelines?
Copy link to clipboard
Copied
Christian s....
In the shipping Premiere, you can set the Lumetri scopes to Rec.2020 to show HDR media correctly in the Scopes panel, and you can set the Lumetri panel to HDR for proper modification.
However ... none of the monitors in Premiere can currently work with HDR media, so you need the hardware kit covered elsewhere to send a correct video stream to a proper HDR monitor. I cover this in this FAQ here:
FAQ: Setting up for HDR work in Premiere 2020
That FAQ not only includes the setting up needed to monitor HDR, and work color correction in Lumetri, but also the exporting option for the various current exports ... I'll post that pdf below.
Note, the public beta version has more options available ... here's the HLG options explained ...
DISCUSS: Rec. 2100 HLG HDR workflow
They are working on getting us full color management controls but are rolling out parts of it as they get it tested. The public beta program will of course have the latest possible options.
Neil

[Moderator note: link to public beta forum discussion fixed.]
Copy link to clipboard
Copied
Oddly enough I do not need to view HDR correctly, I simply need for Premiere to stop "helping" me by auto converting my rec2020 source to whatever it is they make it now. I wish they would just leave it alone.
To get around this I take my rec2020 source and run it through ffmpeg and encode it with rec709 parameters so that when i import it into Premiere Premiere is tricked into thinking it's a rec 709 source and doesn't convert it so you get a nice flat greenish looking image 🙂
I along with others have requested for years now for Adobe to make your input color space user selectable. Shame it still hasn't happened. Resolve looks more appealing every day.
I tried to click on your link Neil but it doesn't seem to go anywhere. If you have an alternate method to check out I would love to see it. Thanks!
Copy link to clipboard
Copied
The link is fixed.
As noted often, including in the links I provided above, they've added a few user-selectable options for color space and exports, and are working on more.
Understand the basic underlying code for Premiere was totally built on stock-standard pro Rec.709 all the way through. So any change of the color space options means completely rewriting vast sections of code throughout the application.
Premiere currently (unless you have the HDR turned on in Lumetri) will simply handle the material as appropriate for if it were Rec.709 media. There is the 'extended dynamic range' option which I still don't fully understand the use of but is there in the preferences along with the Display Color Management option, and I think is more designed towards the display being over-bright than the media itself.
The beta version has a few more options involved than the shipping one, and given they turn the public beta into shipping in what ... about every 3-4 months now? ... means the options there will be in the shipping regular version in not too long.
Neil
Copy link to clipboard
Copied
Thanks for making me aware of the Beta. I went and downloaded that and it looks like they are slowly moving in the right direction. Still no PQ option however and the ability to conform color space seems limited to only prores and sony clips none of which helps my workflow but it is a positive step in the right direction. Maybe one day. I'll just have to stick to my method of tricking premiere for now with a wasteful intermediate file.
Copy link to clipboard
Copied
Check the "what's new" information for the Public Beta. That's found in clicking on the beaker icon in the upper righ of any of the public beta apps. Here's the relevant section:

See where I've highlighted "Other HDR ... " ... which I believe is still processed as it has been. Which is using the HDR 'switch' in the Lumetri panel, setting the scopes to Rec.2020, and of course ... having the proper outboard kit for viewing the media as you can't properly 'see' HDR within the Program monitor or Transmit Out either.
Which is the same whether you're using the new HLG options for the XAVC and ProRes files or the older HDR setup. You have to have the BlackMagic or AJA gear between your computer OS and the HDR monitor to see your HDR media correctly.
Neil
Copy link to clipboard
Copied
Yes that portion you have underlined is precisely my problem. What I would love is for me to be able to select the intermediate container it's stored in instead of premiere doing it automatically for me. I know it sounds weird but what i desire is to get the rec2020 clip into premiere without this conversion at all so to the eye it would be dull and greenish. I do this now by re-encoding an intermediate file and embedding rec709 metadata onto a rec2020 file so that upon import to Premiere, Premiere does not convert it to the rec709 intermediate as you underlined above and leaves it alone which is what I want. I merely perform edits and no color correction so it doesnt matter to me to be able to see it properly. I then export using the Voukoder plugin and re-embed my rec2020 metadata upon export and then my video files tonemap beautifully on the devices I need it to. It's an odd workflow for sure I realize that. If only Premiere didn't make that conversion to rec709 then it would save me so much time by not having to create my own rec2020 with rec709 metadata intermediate files.
Copy link to clipboard
Copied
Ahh ... how Premeire "views" the file, and how it processes and exports it are quite different things. That actually is covered in the FAQ I created, linked above.
Premeire's pipelines for processing and for monitors are of course different. Have you tried not worrying about the viewing then, and simply used the export options in my chart to get the media out of Premiere correctly?
There are four PQ/2020 export options currently. H.264, H.265/HEVC, JPEG2000, and the XAVC-Intra.
Neil

Copy link to clipboard
Copied
The first thing to try is a simple pass-through test to make sure things are coming out the other end the same way they went in. Simply import the file and create a new sequence from it. Don't worry about what it looks like inside Premiere (it will almost certainly look wrong to your eye). Don't bother with Lumetri or the scopes. Simply export the sequence using the settings in the document Neil attached above "Encoding HDR video with Premiere Pro or Media Encoder". I recommend H264 or HEVC - and make sure you get the right encoding settings so the file is flagged propperly. Now compare the source file to the one you exported. Do they look the same in whatever app you choose to trust? Play them back on a propper HDR device like your smart TV. Do all the highlights look intact? Also, make sure they have the same key pieces of metadata. The important ones are these – Color primaries : BT.2020, Transfer characteristics : PQ, Matrix coefficients : BT.2020 non-constant. If you are able to get a passthrough working, which I think you should, you can start to work out the rest of your workflow, like proper monitoring.
Copy link to clipboard
Copied
FYI - I use Media Info to inspect metadata, but there are others out there, like Invisor, or even ffmpeg. https://mediaarea.net/en/MediaInfo
Copy link to clipboard
Copied
Hey Frances thanks for the reply it looks like I am able to succesfully get a pass-through as you described and thank you Neal for your export settings, that helped. I also use MediaInfo and I was able to get my max content light level and avg frame light level numbers from my source that way and selected the HDR metadata box to be able to input custom numbers for those. The only difference between my source and export that I cannot reconcile now is Color range. My source is LIMITED but my exports always seem to be FULL and I'm not quite sure where to change that.
Also I should mention after doing 12 total test exports of the same scenes I hate to say but my Premiere exports just don't look as good as when I use the Voukoder plugin. Only when I increase bitrate much higher than the Voukoder (ffmpeg) equivalent does the quality seem to matchup. I tried production and beta versions of premiere and all different kinds of quality levels. I realize there isn't much scientific about a claim like that and it's not really possible to prove or disprove. The descrepancy is minor. Now I have to decide if the descrepancy is enough to warrant going through the hassle of intermediate files or not. Decisions, decisions. Thanks for your help.

 AdChoices