 Adobe Community
- Home
- Premiere Pro
- Discussions
- Video Quality Degrades after Export, Gamma Shift, ...
- Video Quality Degrades after Export, Gamma Shift, ...
Video Quality Degrades after Export, Gamma Shift, Contrast Loss
Copy link to clipboard
Copied
Hi there,
I am having this problem of quality lost after I export my gameplays for YouTube via Premiere. I am not experienced in this field and not quite actually know everything. I have made my intro and outro which I put before and after my gameplays and add default transitions and then export. Thats pretty much it.. I also let premiere pro choose the setting for the sequence automatically wheen I import my media.
OK so here is the original ScreenShot from the gameplay,
And here is the image after export,
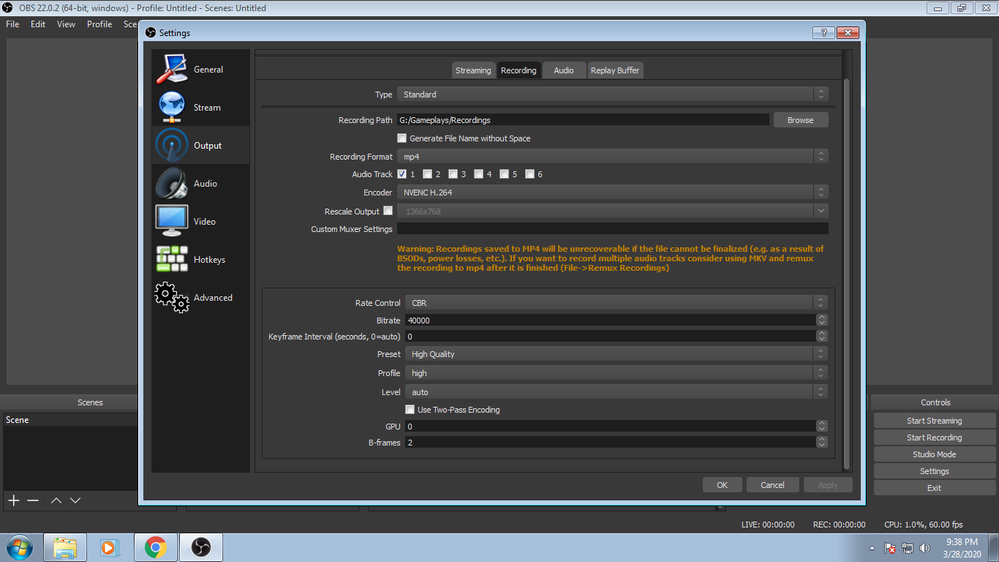
The Software I am using for recording my gameplay is OBS (Open Broadcaster Software) and here are the settings I am using,
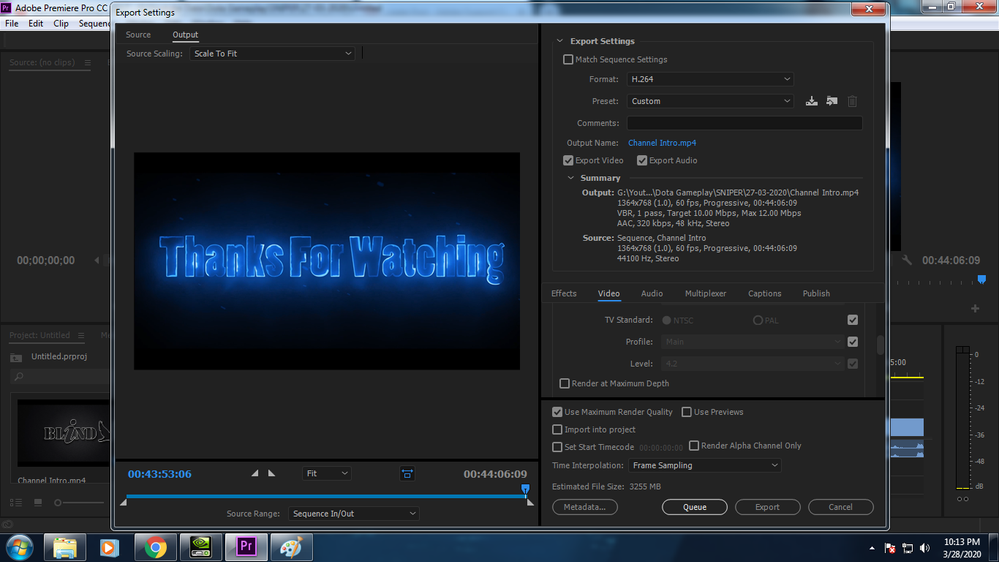
Also I changed my Dynamic Range to Full (0-255) from Limited (16-235) in the Adjust color settings category of the nVIDIA control panel but that didn't help. My screen resolution 1366x768 so the original size of the raw file for a 45 min+ gameplay is approx. 13Gb which after being encoded from premiere reduced to 3 Gb then I tried exporting with other settings and it became 4.
I had like to keep the file size under 4 Gb but I would prefer quality first.
The settings at which I exported the first time were these when the encoded file came out to be 3 Gb.
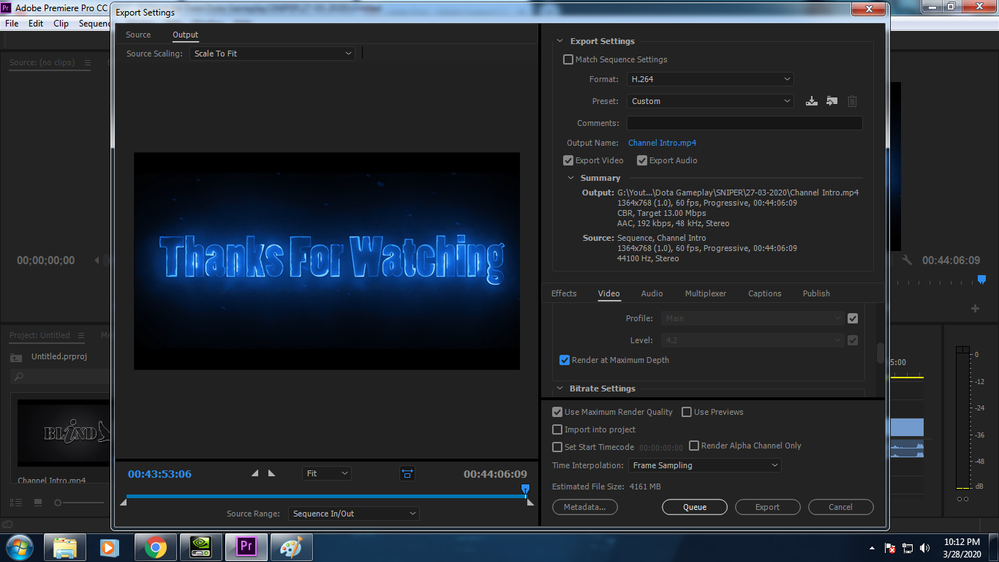
And the Second time these settings were used, 4 Gb file size
Also you can see that I tried using Render at Maximum Depth the second time, but no difference though the sharpness was slightly better which I think might be the result of increasing the Bit Rate but idk, a slight quality enhance with the 2nd settings, noticible for a keen eye. But it added up 1 whole Gb to the file which did not seem to be a great deal.
I apologize if this has been long but I wanted to put everything I was doing with details since I don't know what am I doing wrong.
It takes approx. 1 hr to export one single time so it is costing me a lot of time. Anyone with the knowledge please guide me through this.
Your help will be highly appreciated.
Regards.
Copy link to clipboard
Copied
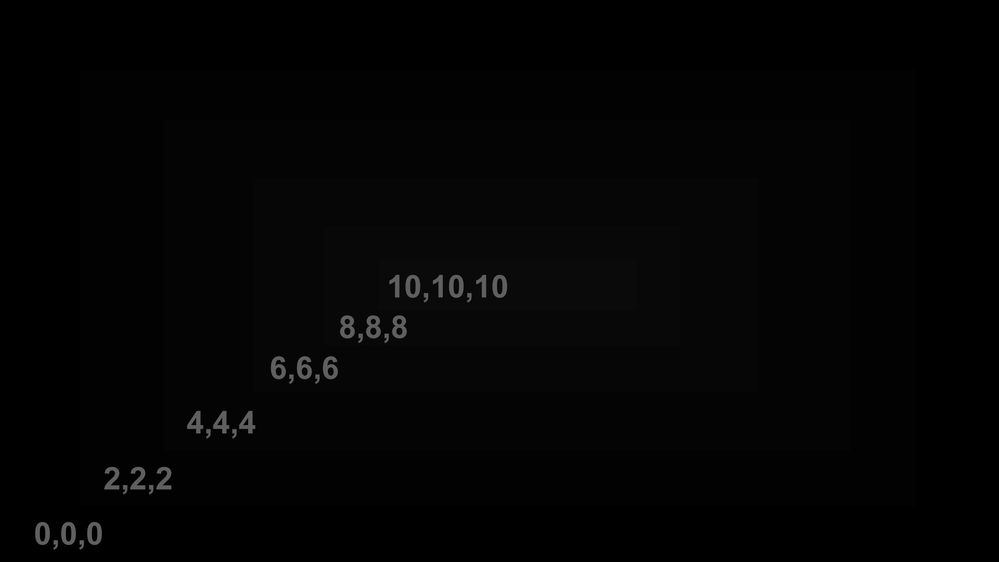
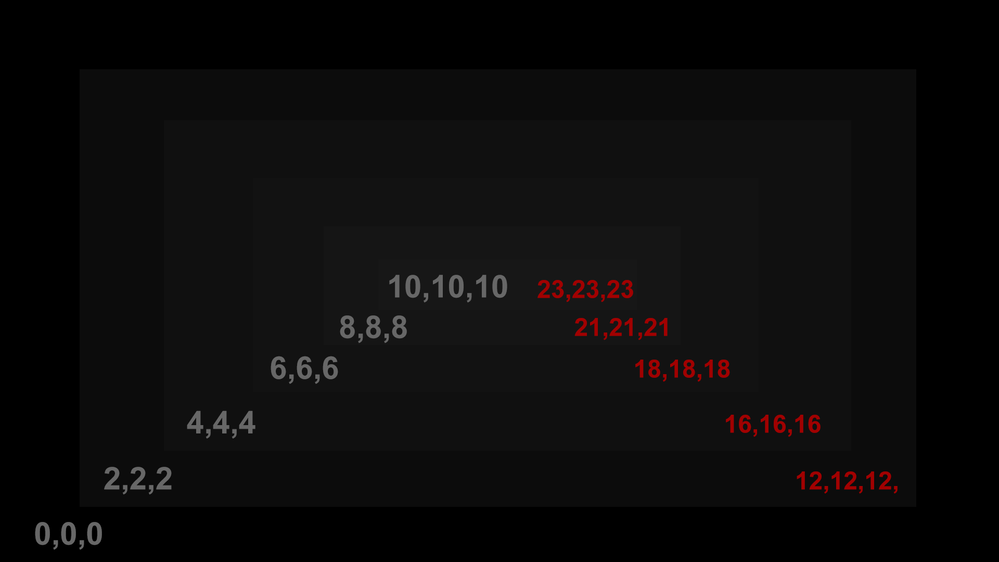
They're probably not ever going to give you answers, they'll just preach to you about either having a professional monitor, or that you need to change your monitor's settings so the color 8,8,8 looks the same as 0,0,0 and like magic, you won't notice the problem anymore, and if you don't notice it anymore, the problem has actually disappeared, or so that's the logic people are using. There's clearly a problem, and it wasn't there in v12 2018.
I'll attach a couple images really putting on full display what happens to images/video when Premiere renders/exports a video. The first image shows what the colors are supposed to look like and the numbers for them are written on the bottom left of each section. The second image shows what that same image looks like after it's rendered/exported in Premiere, and I list what the new colors actually are in red. Sure, 0,0,0 black stays black, but everything else gets pushed up.
I doubt this will ever get resolved. There are some deep-seated bugs that they'll probably never fix. There are workarounds for this, however. First off, you want to be able to see what the rendered/exported video will look like in the monitoring window: Go to Preferences, General, and uncheck the option "Display Color Management". Now it will look the way it will actually render.
To put a bandaid on the problem, you can create an adjustment layer and add a gamma adjustment to it. Go to the Project Panel (the place where you see icons for the files you've imported), click on the option to the left of the trashcan, it looks like a new page icon, and select "Adjustment Layer", and then click OK on the window that follows. Now take that and drag it onto the timeline above the rest of your video and stretch it to the entirety of the video. Now, with the Adjustment Layer selected, go to your effects and type "gamma" into the search box, and double-click "Gamma Correction". Now, in Effect Controls, find Gamma Correction and change 10 to 14.
It's a bandaid, and it doesn't work that great, but it's the only good option available at this time. Again, I doubt they'll ever fix this problem, they'll not consider it a real problem because "professionals" don't notice anything wrong. That's how this forum and Adobe works. We're nobodies, our concerns don't matter.


