 Adobe Community
Creating a Skin

Copy link to clipboard
Copied
I've just downloaded RoboHelp 2019 after using RoboHelp 11. I am a novice, for sure, but needing and willing to learn!
I need to create a skin with a graphic that I've created. How do I do that? Where can I go to learn how to create a skin that I can import into RoboHelp 2019?


 3
Replies
3
3
Replies
3
Copy link to clipboard
Copied
Hi there
You are on some pretty unstable ground at the moment. 2019 isn't "feature complete" and things are in a constant state of flux until it becomes feature complete.
But I'll play along here. The first thing you need to determine is your output type. (WebHelp, Responsive HTML 5, Microsoft HTML Help, etc.)
Once you determine that, you can decide on what "skin" and the capabilities you have available for skinning.
So what is your output type?
Cheers... Rick 
Copy link to clipboard
Copied
WebHelp
Copy link to clipboard
Copied
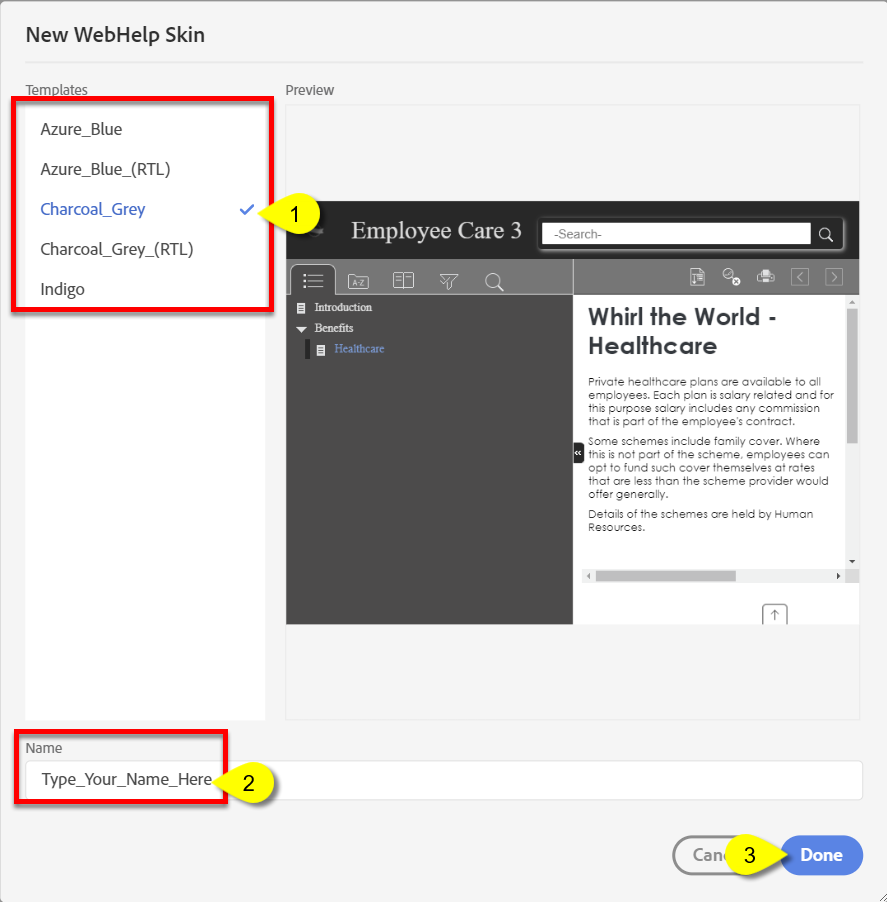
So in 2019 it's going to be a bit of a crap shoot. You begin by clicking the Output tab, then the Skins button, then the plus symbol and finally New WebHelp Skin.

You then choose the base layout, give it a name and click Done.
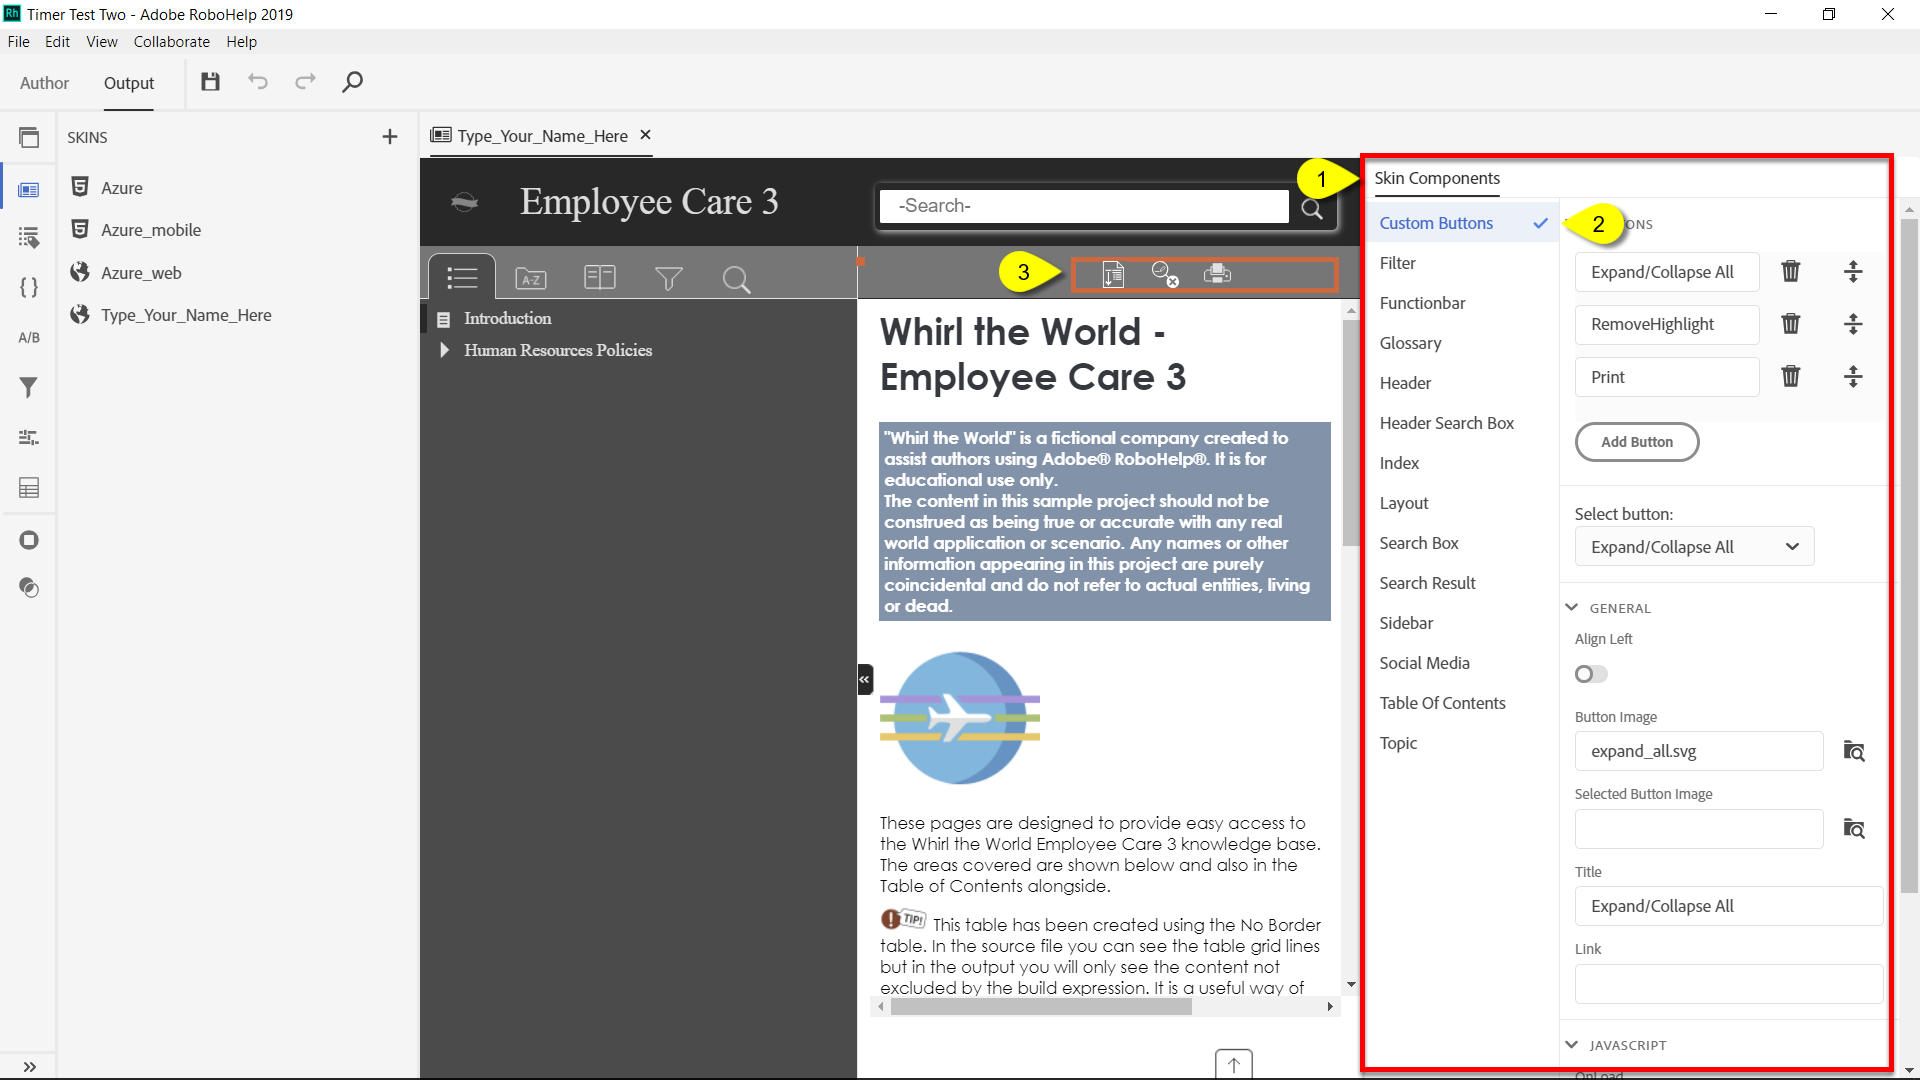
Once you have done this, it's a matter of clicking the area you want to modify, then noting where the red selection appears in the middle panel, then interacting with all the things in the right panel to change the items you want to change.
Hopefully that's enough to get you started.
Cheers... Rick

 AdChoices