 Adobe Community
- Home
- Substance 3D Designer
- Discussions
- Height v Normal Map in displacement workflow
- Height v Normal Map in displacement workflow

Copy link to clipboard
Copied
When working with displacement in mind, is it still a good idea to generate normal maps from the height map? It seems like when that is done, the normal map does weird things on top of the displaced geometry at render time. Looking for some gidance where this is concerned, thanks in advanced.


 1 Correct answer

Hello Patrick,
If the height map has high frequency detail, it is likely that the mesh will not have a dense enough geometry to properly model the finer detail in the texture.
To mitigate this issue, you may use a higher Tessellation factor: this will subdivide the base mesh by a greater amount, resulting in finer geometry at the cost of some performance.
In Designer, you can find this setting in the 3D View panel: open the Material menu, then select the Default > Edit to display the shader pr
... 5
Replies
5
5
Replies
5
Copy link to clipboard
Copied
Hello Patrick,
The Tessellation displacement technique only subdivides the mesh and moves its vertices along the direction of their normal vector. It does not recompute the vertex normals to account for the displaced geometry. Indeed, these normals need to be generated out of the height map and passed to the shader as a normal map.
Feel free to share a screenshot of the unexpected results you mentioned, I am happy to help!
Best regards.
Copy link to clipboard
Copied
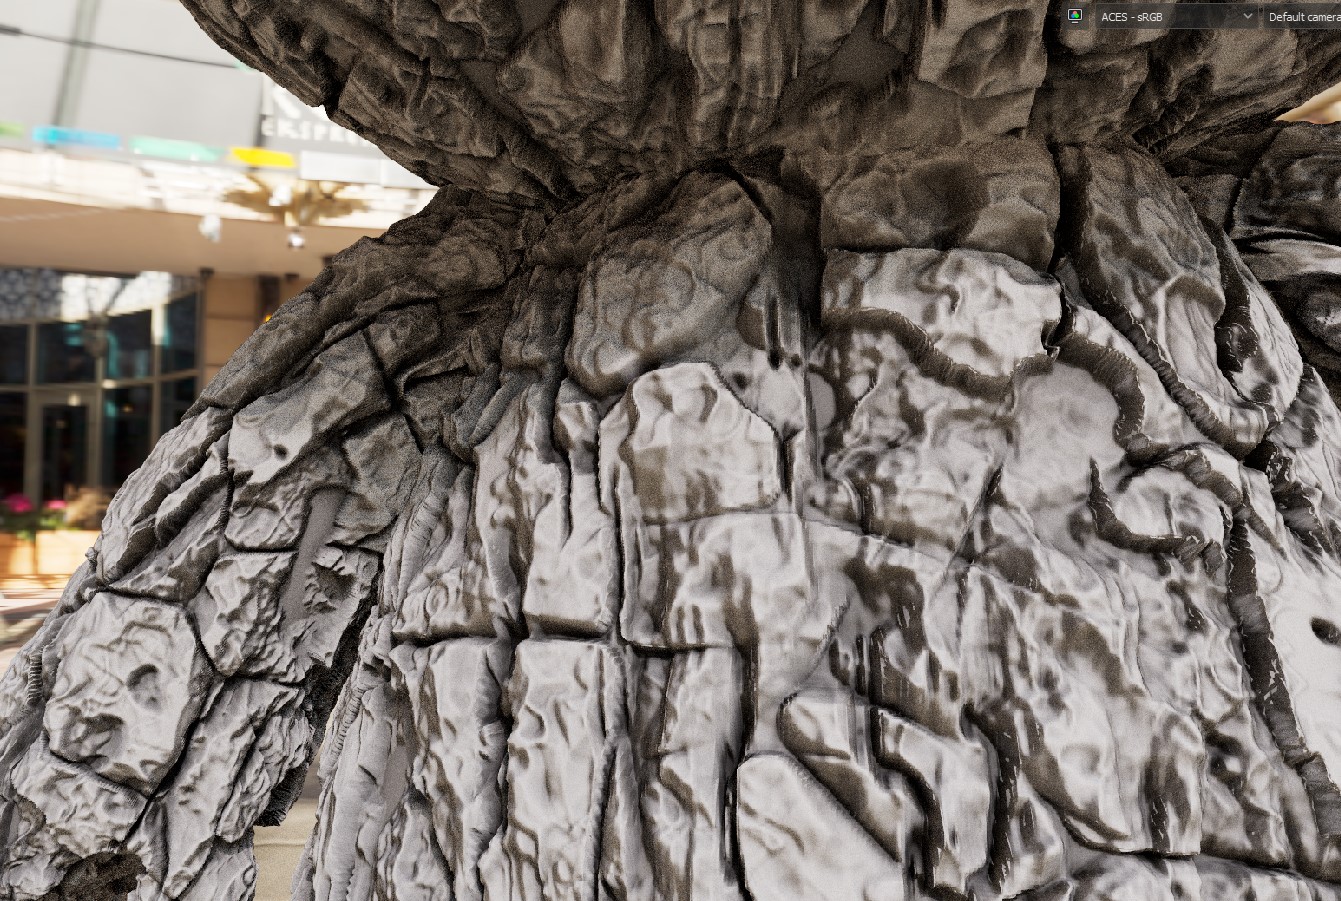
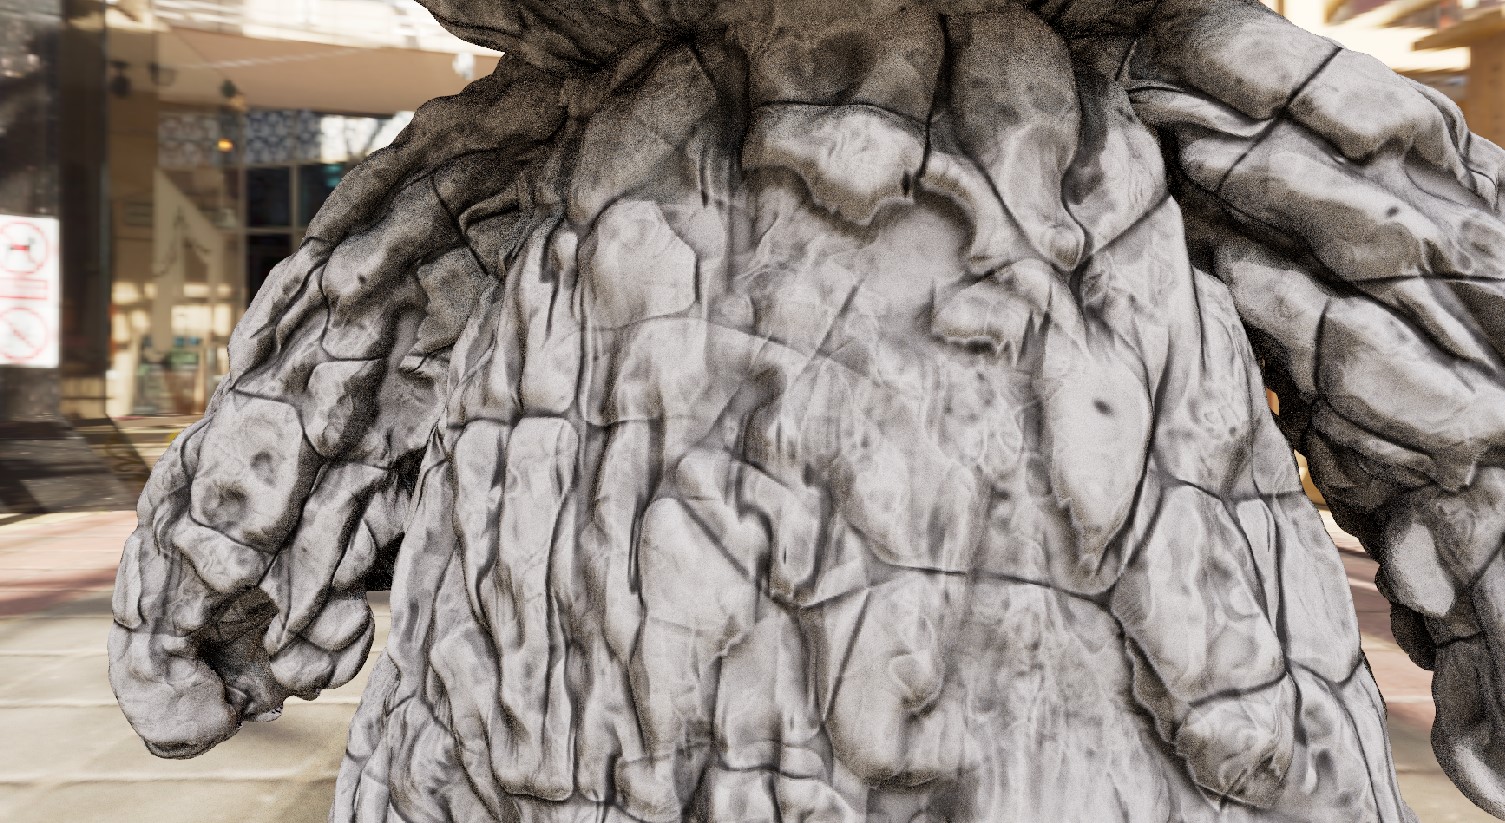
Many thanks for responding Luca, So, after doing lots of experiments and looking at some well done materials by other artists, then reading the substance PBR guide I've realized that maybe my height map was a bit too high frequency and high in value (I'm still not fully if that's the issue) so I applied some blur and toned it down a bit; That did give me more favorable results. Thoughts? Also, how would I generate the normal from displaced geo and pass it back to shader in painter?
Copy link to clipboard
Copied
Hello Patrick,
If the height map has high frequency detail, it is likely that the mesh will not have a dense enough geometry to properly model the finer detail in the texture.
To mitigate this issue, you may use a higher Tessellation factor: this will subdivide the base mesh by a greater amount, resulting in finer geometry at the cost of some performance.
In Designer, you can find this setting in the 3D View panel: open the Material menu, then select the Default > Edit to display the shader properties in the Properties panel. The Tessellation factor property should be in the Height section. In Painter, this is managed in the Shader settings (see below).
That being said, my recommendation is using the Height output for the main features of the shape/silhouette (i.e. low to mid frequency detail), and add surface micro details (i.e. high frequency detail) in the Normal output only
Keep in mind some texture stretching is to be expected where Height changes abruptly and the displaced geometry is thus stretched. Therefore, keep the transitions in the height map smooth/beveled enough to keep a clean result when using displacement.
To learn more about managing this technique in Painter, take a look at the Displacement and tessellation section of the Shader settings page in Painter's documentation. The page also includes a mention of the Height to normal filter which may prove useful.
This short tutorial from Xolotl Studios (shout out for the great content!) is also relevant.
Best regards.
Copy link to clipboard
Copied
Thanks alot Luca, fully understood!
Copy link to clipboard
Copied
I am glad Patrick!

 AdChoices