 Adobe Community
- Home
- InDesign
- Discussions
- Re: can i make word-wrap lines line up?
- Re: can i make word-wrap lines line up?

Copy link to clipboard
Copied
Is there a style or something that would allow me to make word-wrap lines line up? I imported 40 pages of endnotes from a WORD table and had to convert it to text due to all the mess. And so I lost all the italics in book titles. sigh...
Now I am hoping there is an easy way to avoid manually dealing with the following:
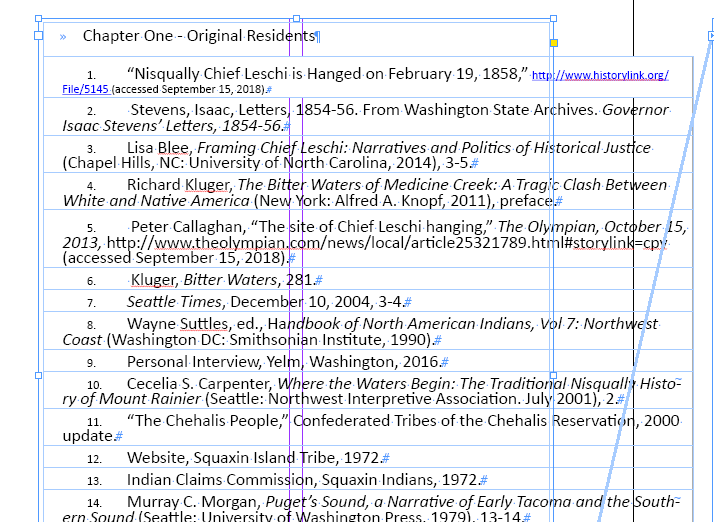
Here is what it looks like now and I want the word wrapped text to line up beneath the text above it.:


 1 Correct answer

Yeah that does look ugly. That's out of your control unfortunately. I'm curious though… Try selecting the table using the Type tool and choosing Table > Convert Table to Text. This normally will remove the table and covert it to raw text. My only concern is that there's a tab within the text of the table. Give it a shot though. It might be a quick solution to get rid of that table.
 11
Replies
11
11
Replies
11

Copy link to clipboard
Copied
Do you mean, for example, that you want the “T” in Territory lined up with the “J” in James?
If yes, you need what is sometimes called an outdent. The left indent for the paragraph, as an example, might be 1p0 and the first line indent would be -1p0.
You can set this in the Paragraph panel, Control panel, or Tabs panel. Then update your style for Endnotes so it applies to all.
Please ask again if you meant something else.
Copy link to clipboard
Copied
Your dealing with a multitude of issues and I think you're just looking for a quick answer. To learn more about retaining formatting from word check out this article. Although it applies to InCopy, it works the same in InDesign.
Jane's recommendation is the way to go but if you're looking for a quick way to address your problem, place your cursor after the tab where you want the second line to indent and press cmd + \ (backslash) or ctrl + \ (Windows). This will insert an indent to here character and should achieve the result you're looking for. Again this is not my generally recommended solution, but it will fix your issue short term.
Copy link to clipboard
Copied
1. As a quick fix I was able to get the outdent to work with: Ctrl + \ on my pc in conjunction with using the tab key and a soft return: Shift-Enter. Hurray!
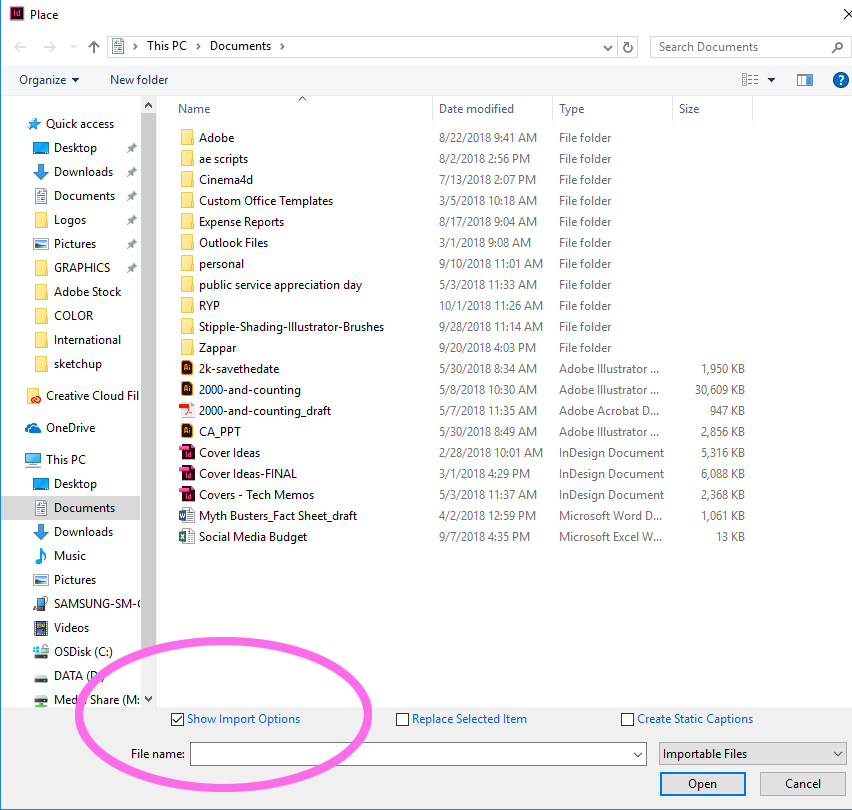
2. Regarding the article you kindly provided: I had already tried: File > Place on my pc but I cannot seem to figure out how to access the "Show import options" because when I do File > Place the cursor loads and there seems to be no way to get to the InDesign import options.
3. About the suggestion from Jane-e: I do not see the option within InDesign for outdent but I went on my pc to Window > Type/Table > Paragraph > Left Indent, but I do not know what to do from there. The field does not accept negative numbers. I am such a novice that I just don't get it.
Copy link to clipboard
Copied
Oh I finally saw "show import options" at the bottom of the file screen, right above where I type in the file name. This will only be an option for me if I can turn OFF the table while retaining the ITALICS. This is because the document I am importing has table formatting that is bewildering me. The first problem follows. There seems to be no way to get that WORD table selected so that it can be narrowed to fit the page.
Copy link to clipboard
Copied
Yeah that does look ugly. That's out of your control unfortunately. I'm curious though… Try selecting the table using the Type tool and choosing Table > Convert Table to Text. This normally will remove the table and covert it to raw text. My only concern is that there's a tab within the text of the table. Give it a shot though. It might be a quick solution to get rid of that table.
Copy link to clipboard
Copied
The table cannot be selected and so I just imported the plain text and did the hard job of reformatting.
Copy link to clipboard
Copied
sivey@pdx wrote
The table cannot be selected
You need to have the Type tool and click inside the table. One way is go to the Table menu > Select > Entire table
Copy link to clipboard
Copied
Wow, this worked like a charm! Thanks!
Copy link to clipboard
Copied
sivey@pdx wrote
There seems to be no way to get that WORD table selected so that it can be narrowed to fit the page.
InDesign tables are not required to fit inside the frames. To resize the table, which appears to be in one column, use the Type tool, click inside the table, and grab the right edge and drag it to the left to fit the frame.
I see that you have a tab before the title “Chapter 1”. Remove it.
I’m not sure how the spacing was inserted with Footnotes. 1, 3, and 4, as nothing is showing.
Footnotes 2, 5, and 6 show dots revealing a space.
The formatting I suggested earlier works best with a tab character, which is what usually ports over from Word. You do not have tabs following the numbers.
I agree with Chad that there is no reason to have this in a one-column table. Follow his steps to convert it. If there are any issues, take a screen shot, post it, then Undo and we’ll tell you the next step.

Copy link to clipboard
Copied
What jane-e was suggesting was to create a paragraph style that you can apply to all paragraphs that share the same formatting. Any changes you make to the paragraph style will apply to all paragraphs sharing that style.
To do this, use the following steps:
- Go to Window > Styles > Paragraph Styles
- Place your cursor inside the paragraph you want to format
- In the Paragraph Styles window, click the flyout/hamburger icon and from the context menu that opens select "Create new paragraph style"
- In the window that opens, select Bullets and Numbering in the sidebar
- Set the list type to "numbers"
- Set the left indent to 1p0
- Set the first line indent to -1p0
- Click OK.
Now, that's just for turning your footnotes into an ordered/numbered list hanging indents (where all the lines line up at at the left). You can set other paragraph options via the different sections on the sidebar.

Copy link to clipboard
Copied
sivey@pdx wrote
2. Regarding the article you kindly provided: I had already tried: File > Place on my pc but I cannot seem to figure out how to access the "Show import options" because when I do File > Place the cursor loads and there seems to be no way to get to the InDesign import options.
So when you File > Place the "Show Import Options" box is not visible?

 AdChoices