Setting up digital signature validation in Acrobat/ Reader
How to set up digital signature validation in Acrobat/ Reader?
When you receive a signed document, you may want to validate its signature(s) to verify the signer and the signed content. Depending on how you have configured your application, validation may occur automatically. Signature validity is determined by checking the authenticity of the signature’s digital ID certificate status and document integrity:
- Authenticity verification confirms that the signer's certificate or its parent certificates exist in the validator’s list of trusted identities. It also confirms whether the signing certificate is valid based on the user's Acrobat or Reader configuration.
- Document integrity verification confirms whether the signed content changed after it was signed. If content changes, document integrity verification confirms whether the content changed in a manner permitted by the signer.
Set your verification preferences in advance. This helps ensure that Digital Signatures are valid when you open a PDF and verification details appear with the signature.
Set signature verification preferences
1. Open the Preferences dialog box.
2. Under Categories, select Signatures.
3. For Verification, click More.
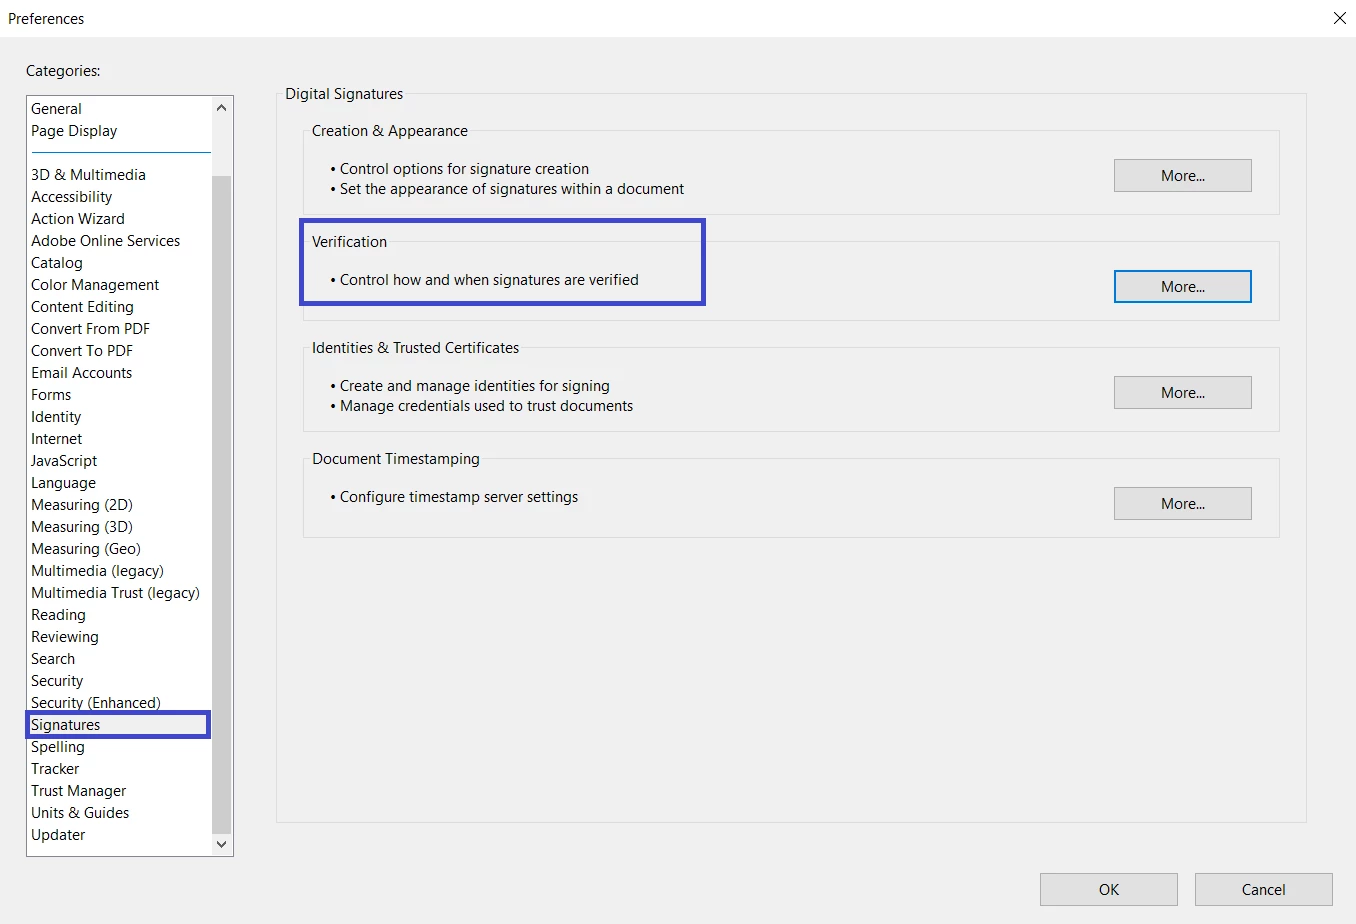
4. To automatically validate all signatures in a PDF when you open the document, select Verify Signatures
When The Document Is Opened. This option is selected by default.
5. Select verification options as needed and click OK.
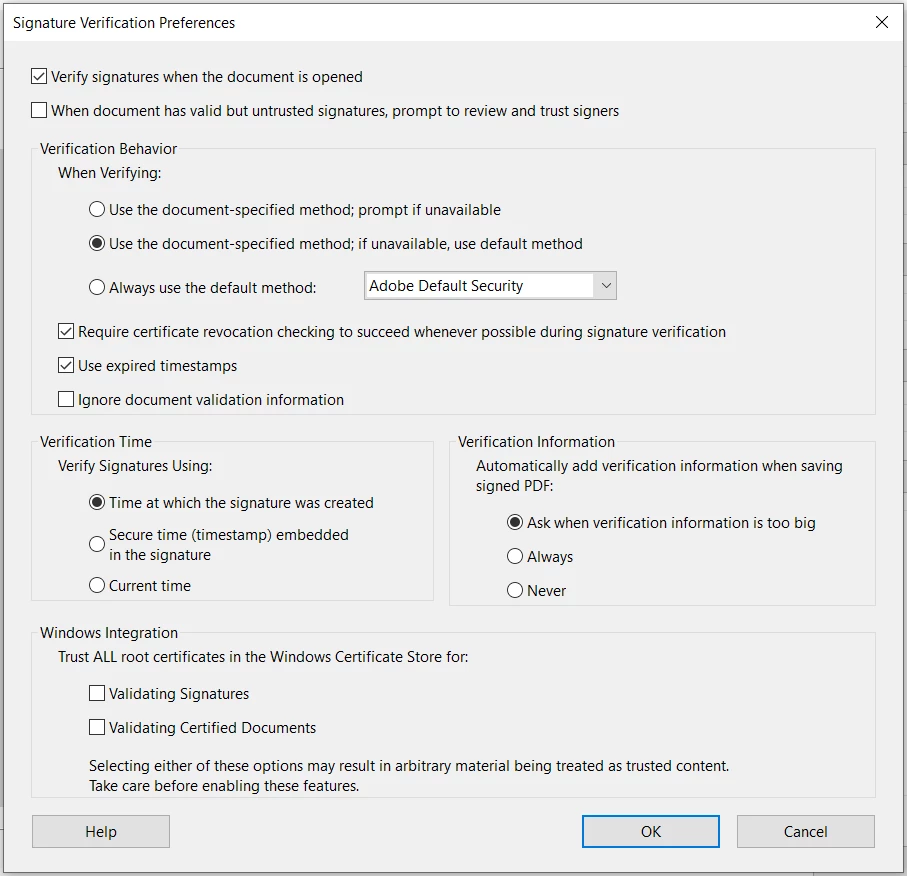
Verification Behavior
When Verifying - These options specify methods that determine which plug-in to choose when verifying a signature. The appropriate plug-in is often selected automatically. Contact your system administrator about specific plug-in requirements for validating signatures.
Require Certificate Revocation Checking To Succeed Whenever Possible ... - Checks certificates against a list of excluded certificates during validation. This option is selected by default. If you deselect this option, the revocation status for approval signatures is ignored. The revocation status is always checked for certifying signatures.
Verification Time
Verify Signatures Using - Select an option to specify how to check the digital signature for validity. By default, you can check the time based on when the signature was created. Alternatively, check based on the current time or the time set by a timestamp server when the document was signed.
Use Expired Timestamps - Uses the secure time provided by the timestamp or embedded in the signature, even if the signature’s certificate has expired. This option is selected by default. Deselecting this option allows the discarding of expired timestamps.
Verification Information - Specifies whether to add verification information to the signed PDF. Default is to alert the user when verification information is too large.
Windows Integration - Specify whether to trust all root certificates in the Windows Certificates feature when validating signatures and certified documents. Selecting these options can compromise security.
Note: It is not recommended to trust all root certificates in the Windows Certificate feature. Many certificates that are distributed with Windows are designed for purposes other than establishing trusted identities.
Set the trust level of a certificate
In Acrobat or Reader, the signature of a certified or signed document is valid if you and the signer have a trust relationship. The trust level of the certificate indicates the actions for which you trust the signer.
You can change the trust settings of certificates to allow specific actions. For example, you can change the settings to enable the dynamic content and embedded JavaScript within the certified document.
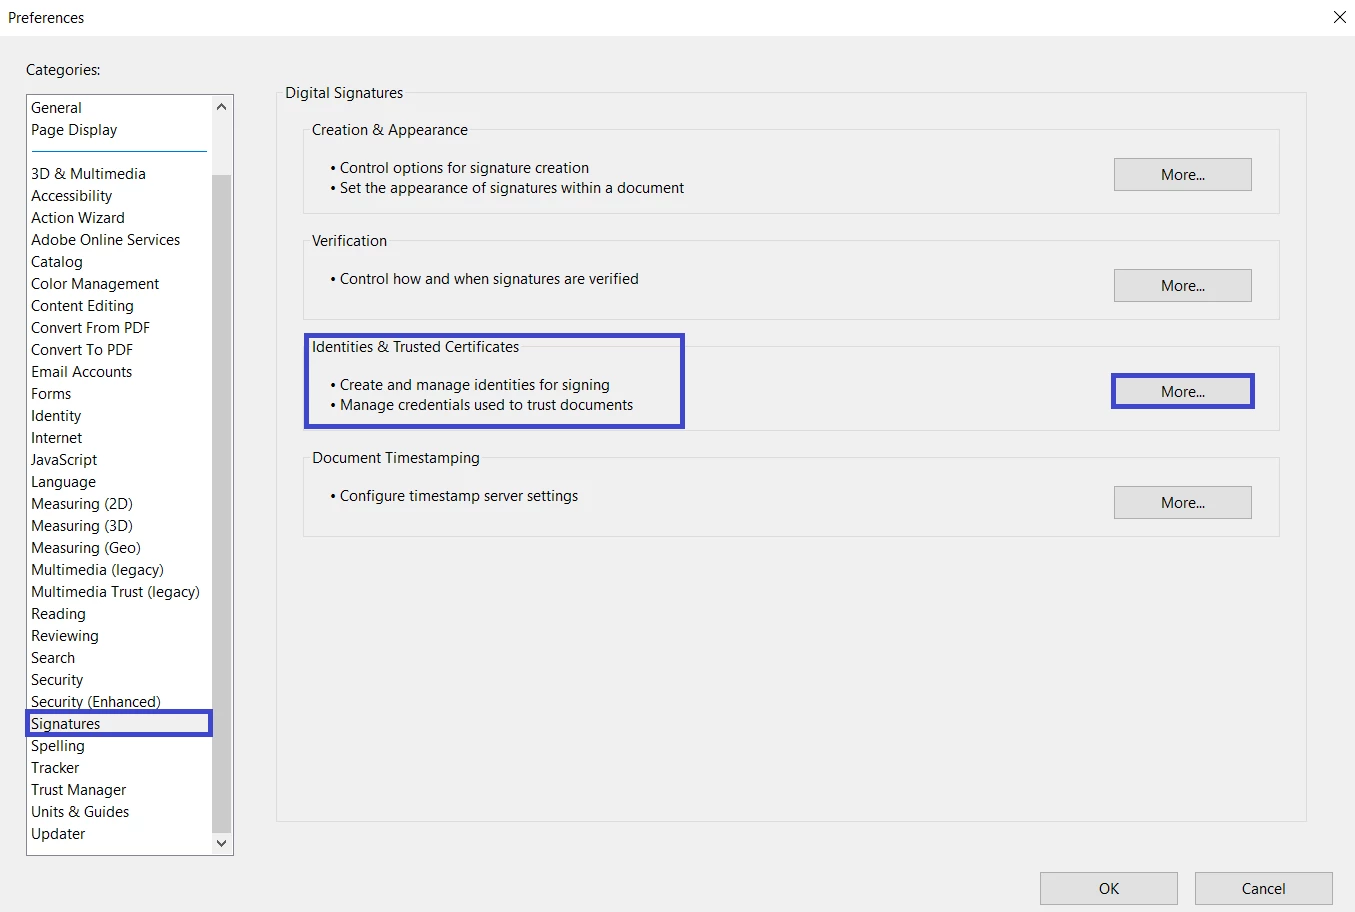
1. Open the Preferences dialog box.
2. Under Categories, select Signatures.
3. For Identities & Trusted Certificates, click More.
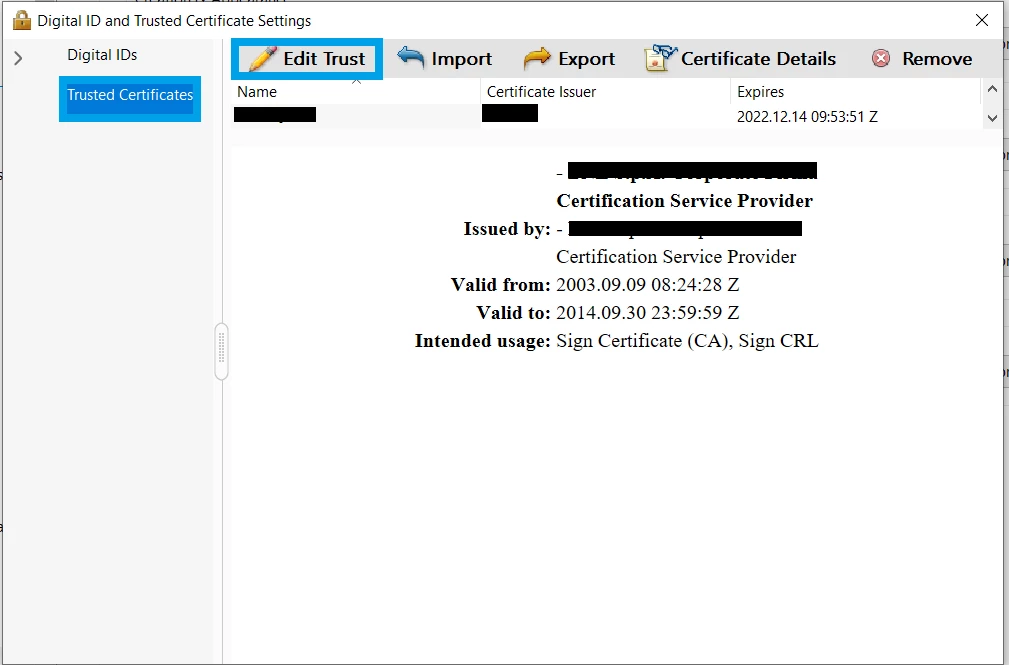
4. Select Trusted Certificates on the left.
5. Select a certificate from the list and click Edit Trust.
6. In the Trust tab, select any of the following items to trust this certificate:
Use This Certificate As A Trusted Root - A root certificate is an originating authority in a chain of certificate authorities that issued the certificate. By trusting the root certificate, you trust all certificates issued by that certificate authority.
Signed Documents Or Data - Acknowledges the identity of the signer.
Certified Documents - Trusts documents in which the author has certified the document with a signature. You trust the signer for certifying documents, and you accept actions that the certified document takes. When this option is selected, the following options are available:
- Dynamic content - Allows movies, sound, and other dynamic elements to play in a certified document.
- Embedded High Privilege JavaScript - Allows privileged JavaScript embedded in PDF files to run. JavaScript files can be used in malicious ways. It is prudent to select this option only when necessary on certificates you trust.
- Privileged System Operations - Allows Internet connections, cross-domain scripting, silent printing, external-object references, and import/export methodology operations on certified documents.
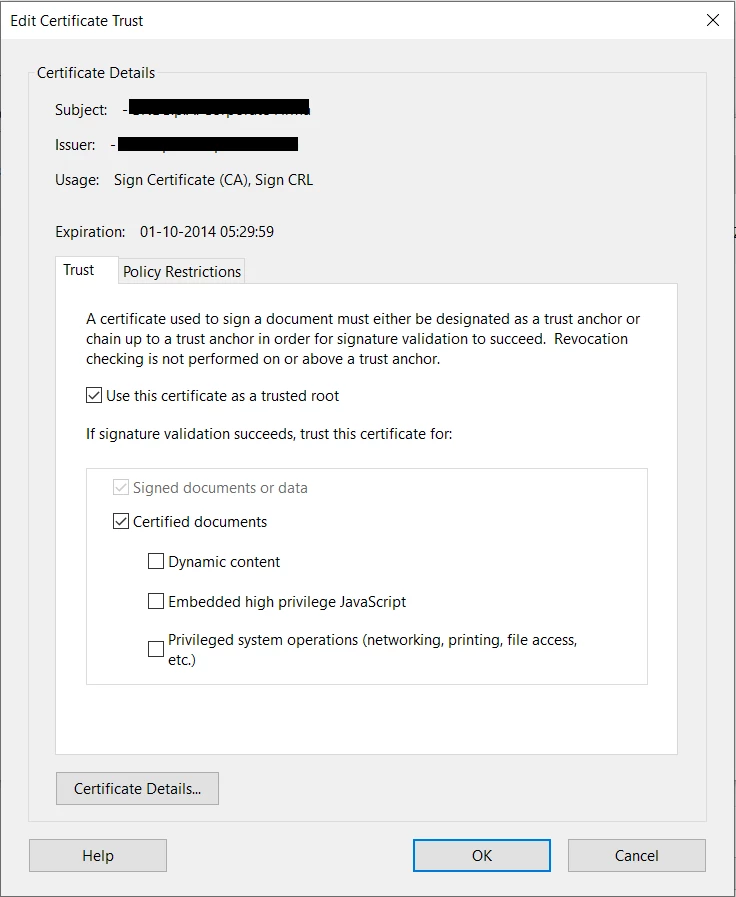
Note: Only allow Embedded High Privilege JavaScript and Privileged System Operations for sources you trust and work with closely. For example, use these options for your employer or service provider.
7. Click OK, close the Digital ID and Trusted Certificate Settings dialog box, and then click OK in the Preferences
dialog box.
For more information, see the Digital Signature Guide at www.adobe.com/go/acrodigsig.
Did you find it helpful? If yes, share your experience with us: Join the conversation here. We are listening!
To discover a host of other great features – Go straight to: Set the default zoom level for bookmarks | New Preference option to use filename as the document title in Acrobat/ Reader


