 Adobe Community
- Home
- Animate
- Discussions
- Re: Issue with exporting transparency embedded wit...
- Re: Issue with exporting transparency embedded wit...
Issue with exporting transparency embedded within a Movie Clip

Copy link to clipboard
Copied
Hello all 🙂
This will be difficult to explain, but I will include images to aid the description of my issue.
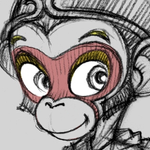
So I have created a rig of an Orangutan cycling a bike which is towing a trailer carrying his dog (this will feature in my upcoming student film, 'Albert').

The style we decided to go for with this film is similar to the Mr Bean animated series (if any of you are familiar), where all the characters and significant objects have a thick outline around them. From what I know, Adobe Animate does not actually have a feature intended for creating this look, but I discovered a hack which allows me to output such an effect:
Put all of your frames of animation into a Movie Clip > Add the "Glow" filter > (the filter allows you to control the blur & strength for your glow line; Put the strength up as high as it goes (25500%) then the glow line will not blur due to the stength overwhelming it; meaning you can control the weight of your outline with the blur adjustment.
This is how I have achieved this effect on my characters and objects so far, and I'm pretty pleased with how it looks -- however it would be great if this feature was added to Adobe Animate.

Now, on this particular rig, my issue with applying this effect is with the wheels. As you can see, the wheels have the thin spokes in the middle of them which the Movie Clip filter picks up as the edges, and the output of which looks pretty terrible:

Ideally.. everything on the rig will have this outline apart from the insides of the wheels.
So, I tried putting a fill with 0% opacity behind the wheels within the Movie Clip, but the fill is not picked up and the same thing still happens. When trying to do a fill with 1% opacity, the fill just outputs as black, for some reason. The latest thing I have tried is a fill behind the wheels with 20% opacity, which so nealry gives the desired effect, but when the Movie Clip (entire rig) is placed infront of the background, the transparency of the fill behind the wheels is only embedded within the Movie Clip, and a grey fill with no opacity surrounds the spokes:

- notice how you can see the the character's arm behind the bicycle wheel, the part of the trailer through its wheel (and so on); but it completely covers the background we should see through the wheel also.
I hope my issue is understanable and I would really appreiciate if someone could help me resolve this!
Cheers and all the best!
Jedd


 13
Replies
13
13
Replies
13

Copy link to clipboard
Copied
When it's animated and the wheels are turning, is it something anyone would notice?
Animator and content creator for Animate CC
Copy link to clipboard
Copied
Hey keyframer,
Yes - that last image is actually a screengrab from the sequence. I have the wheels spinning on a tween, however, I suppose I could just try animating the wheels spinning in a more traditional way.
Copy link to clipboard
Copied
But even if I was to animate the wheels in this way, it would still be good if they had some transparency.
I would also just quite like to learn if this is possible for future reference.
Copy link to clipboard
Copied
It's tricky for me to fully evaluate the solution (if any) based on this - I understand exactly what you are doing as I've done it myself in a limited capacity but what you have here is very specific and detailed and will require a very detailed solution (if any). If there's a way for you to share the FLA with me - I'm happy to take a look. PM me if that's possible.
Animator and content creator for Animate CC
Copy link to clipboard
Copied
Okay I have PM'd you.
Thanks 🙂
Copy link to clipboard
Copied
what if you duplicated the symbol with the nested animation of the bike and characters, then deleted everything but the wheels (and remove the filters). Go back to the original symbol and delete the wheels (or guide their layers out) and have the new symbol with just the wheels on a layer below the symbol containing everything else?
Animator and content creator for Animate CC
Copy link to clipboard
Copied
Another idea is setting up your file with wheels on a separate layer as I described in the previous reply - and instead of filters on the symbol, apply the filters to the layer?
Animator and content creator for Animate CC
Copy link to clipboard
Copied
Good shout. I will try this out and get back to you
Copy link to clipboard
Copied
I got it - hurrah!
But it wasn't so simple as merley duplicating the symbol and deleting everything but the wheels - then visa versa with the original - to have the new symbol with just the wheels on a layer below:
1) Graphic Symbols work in a way that if the same symbol is duplicated, whatever changes you make to the duplicate will happen to the original .. so when I duplicated my rig, any elements i deleted on my duplicate rig were deleted on the original.
2) The animation of the spinning wheel spokes were part of quite complex hierarchy within the rig; infront of some parts and behind others; meaning I couldn't simply just have the spokes seperated and placed to play behind the rig.
Nevertheless, here's what I did:
So I have my entire rig as a Graphic Symbol & a duplicate of that symbol which is nested within a Movie Clip, allowing the outline effect (glow) to be added to it.
- First, I extracted duplicates of all the spokes from within my rig out to the main timeline.
- I then double clicked into my rig and marked all of the spokes as "guide" layers (essentially deleteing them from the export), and returned back to the main timeline.
- I made another duplicate of my rig, but then 'broke it apart' into seperate layers onto the main timeline (right click > break apart symbol to layers).
- With this symbol now broken apart, the following changes I make here won't effect the original rig;
I placed my spinning spoke symbols in the correct hierarchy of the layers that make up the rig, replacing them with the "wheel" symbols, where the spokes originally nested within.
- Finaly, I just had to make sure all the elements that were extracted to the main timeline by 'breaking apart' the rig were alligned with the tweened movement of the entire rig (nested within the symbol).
This explanation is pretty darn complicated and I'm not great with words, so I imagine it won't really be much help to anyone as it's probably way beyond comprehension ...
However I'm glad that my problem is solved! - thanks to Chris (_keyframer) for your help and suggestions 🙂
Copy link to clipboard
Copied
NICE! Glad you solved this! Yeah I should have explained if you make a copy of a symbol and edit it, then both symbols will get updated with the same edits since they are simply instances of the same symbol. If you duplicate it and give a new name, then it's a true copy BUT any symbols contained therein will need to be duplicated as well.
Regardless - you found your solution - best of luck with the project!
Animator and content creator for Animate CC
Copy link to clipboard
Copied
You can use Duplicate Symbol Recursive if you need to clone symbols with lots of nested elements.
https://flash-powertools.com/duplicate-symbol-recursive/
Member of the Flanimate Power Tools team - extensions for character animation
Copy link to clipboard
Copied
Oooh cool extention! Gonna have to remember this!
Animator and content creator for Animate CC
Copy link to clipboard
Copied
Cheers! - that will definitely come in handy.

 AdChoices