So I can do this for individual video objects in a course, but I'm looking for a way to do it for all video objects at once.
I'm using Captivate version 10.0.1.285
The video object has limited style and option editing in the properties panel. When I publish the course I get a slide with a big white box on it and a play button. Note that the play button is the same one that you get at the beginning of the course, as discussed here > Remove The Play button & White Screen that shows on mobile Adobe Captivate 2017
I've already customized the play button and the white screen that show on launch, but I need to do the same for the video objects on slides within the course. Below is my method for doing so one video at a time (I mean, you can do it for all videos in the course by repeating the process, but I'm looking for something more efficient). I would love to find the element within Captivate's installed files that let me modify this there, so that it's there for every project, every publish. Even better, maybe the developers will just add styling functionality to the properties panel for video objects?
In the mean time, here you go:

With the video object added to the Captivate course (Media > Video from the toolbar), publish the Captivate project for viewing in the browser.
View the course in FireFox or a similar browser.
Open the web developer tools and inspect the element that holds the video.


With the developer tools open you can inspect the line of HTML that creates the video player in the web page.
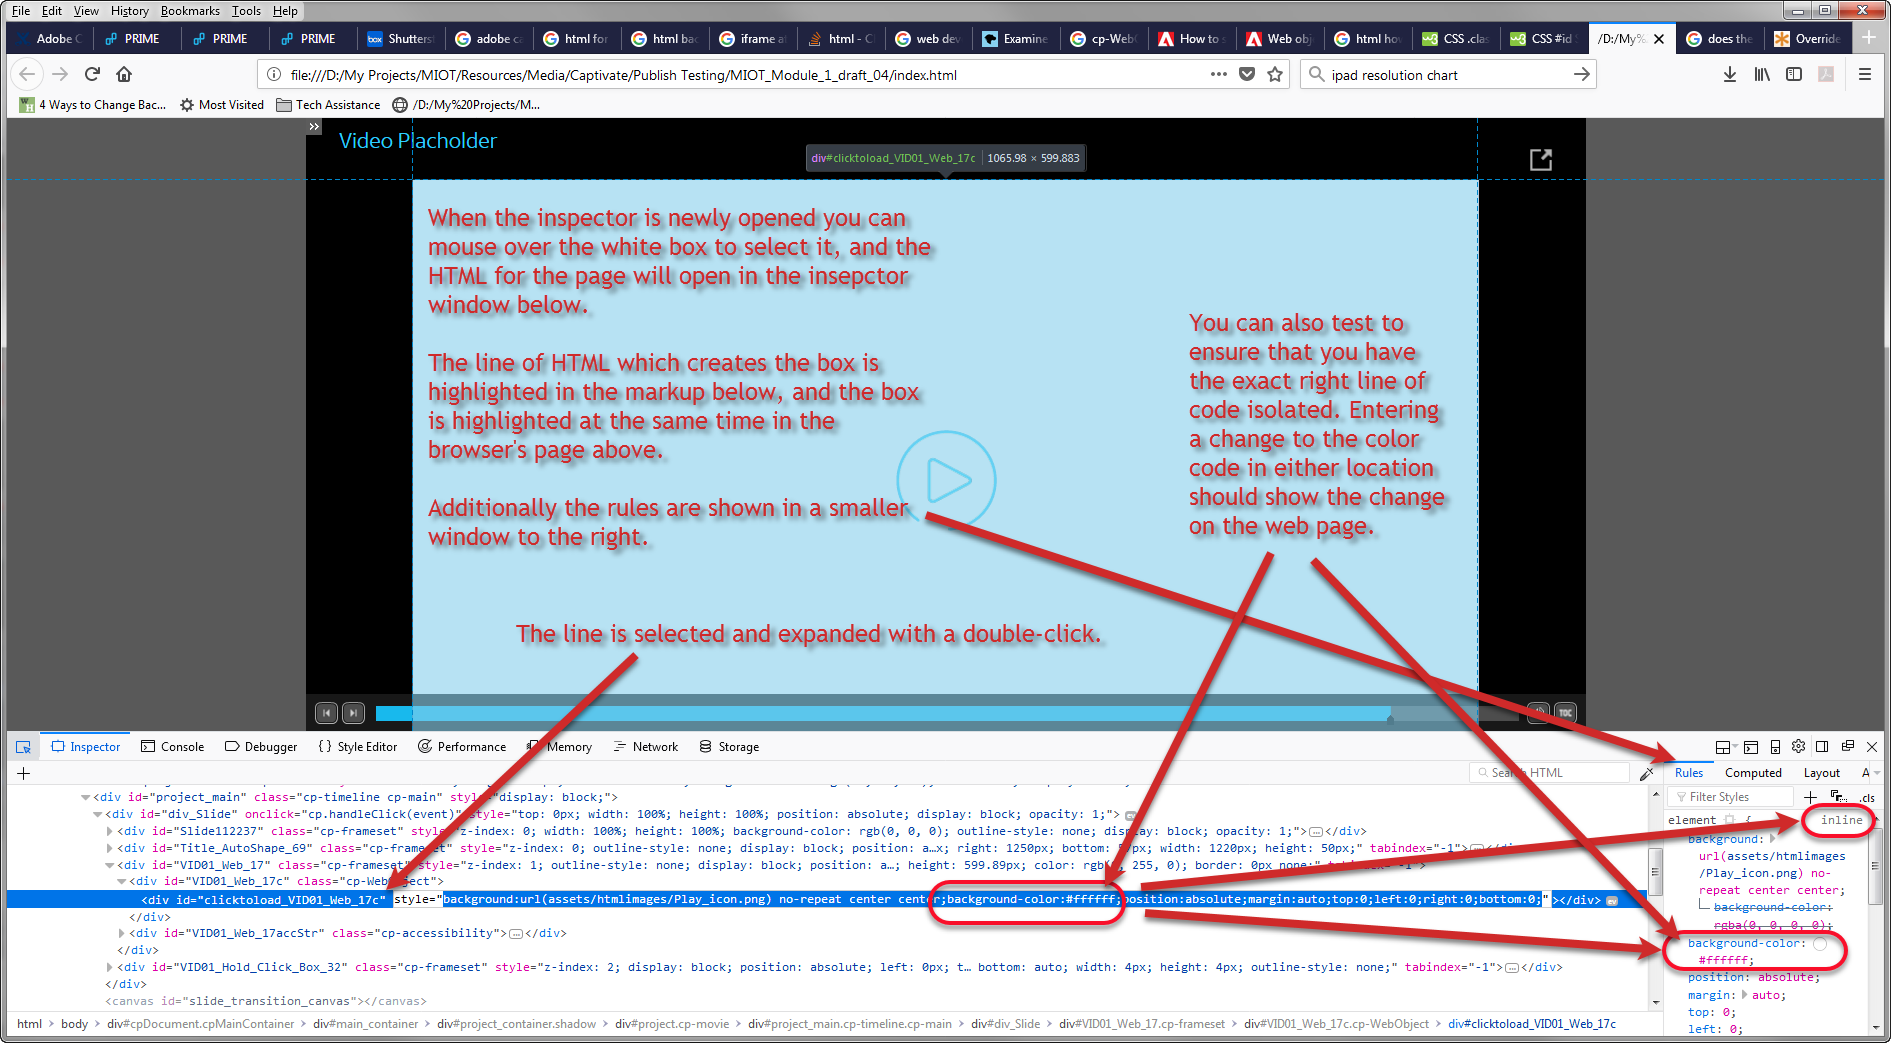
The default background color of “white” (#ffffff) is added by Captivate by default as an inline style element so, by the rules of HTML and CSS, it gets the final treatment by the browser. Any preceding instruction to the browser simply gets overwritten by this one.

Note that the identifier for the video element is based on the name it was given in its properties in Captivate.
Somewhere in Captivate’s bowels is something that says “any time you create a video player on a page create a div for it, name that div clicktoload_whatever, and then make its background color #ffffff (white).” That’s the instruction we want to change, but can’t through Captivate’s interface.
I haven’t found that instruction in Captivate’s bowels (yet), but I easily found it in the published version of the course and it can be changed there. Unfortunately this means that you have to do this for each video in the project, and you have to do it every time you publish.
You can change that inline background-color command with CSS by use of the !important modifier in the CSS, however since Captivate puts the video into a div with an ID, but not a Class, you can only target the ID. There is a class (cp-WebObject), but that’s one division up, it’s not this division. If you target that class the browser will obey and do whatever you ask it to, but the next line says to set the background color to white, and the browser also obeys that command. This is why you’ll have to perform the steps below for every ID that you want to change the background color of, i.e. every video object in the course. If the video objects were classified at this level you could get them all in one shot.
Let's go get the .css file.
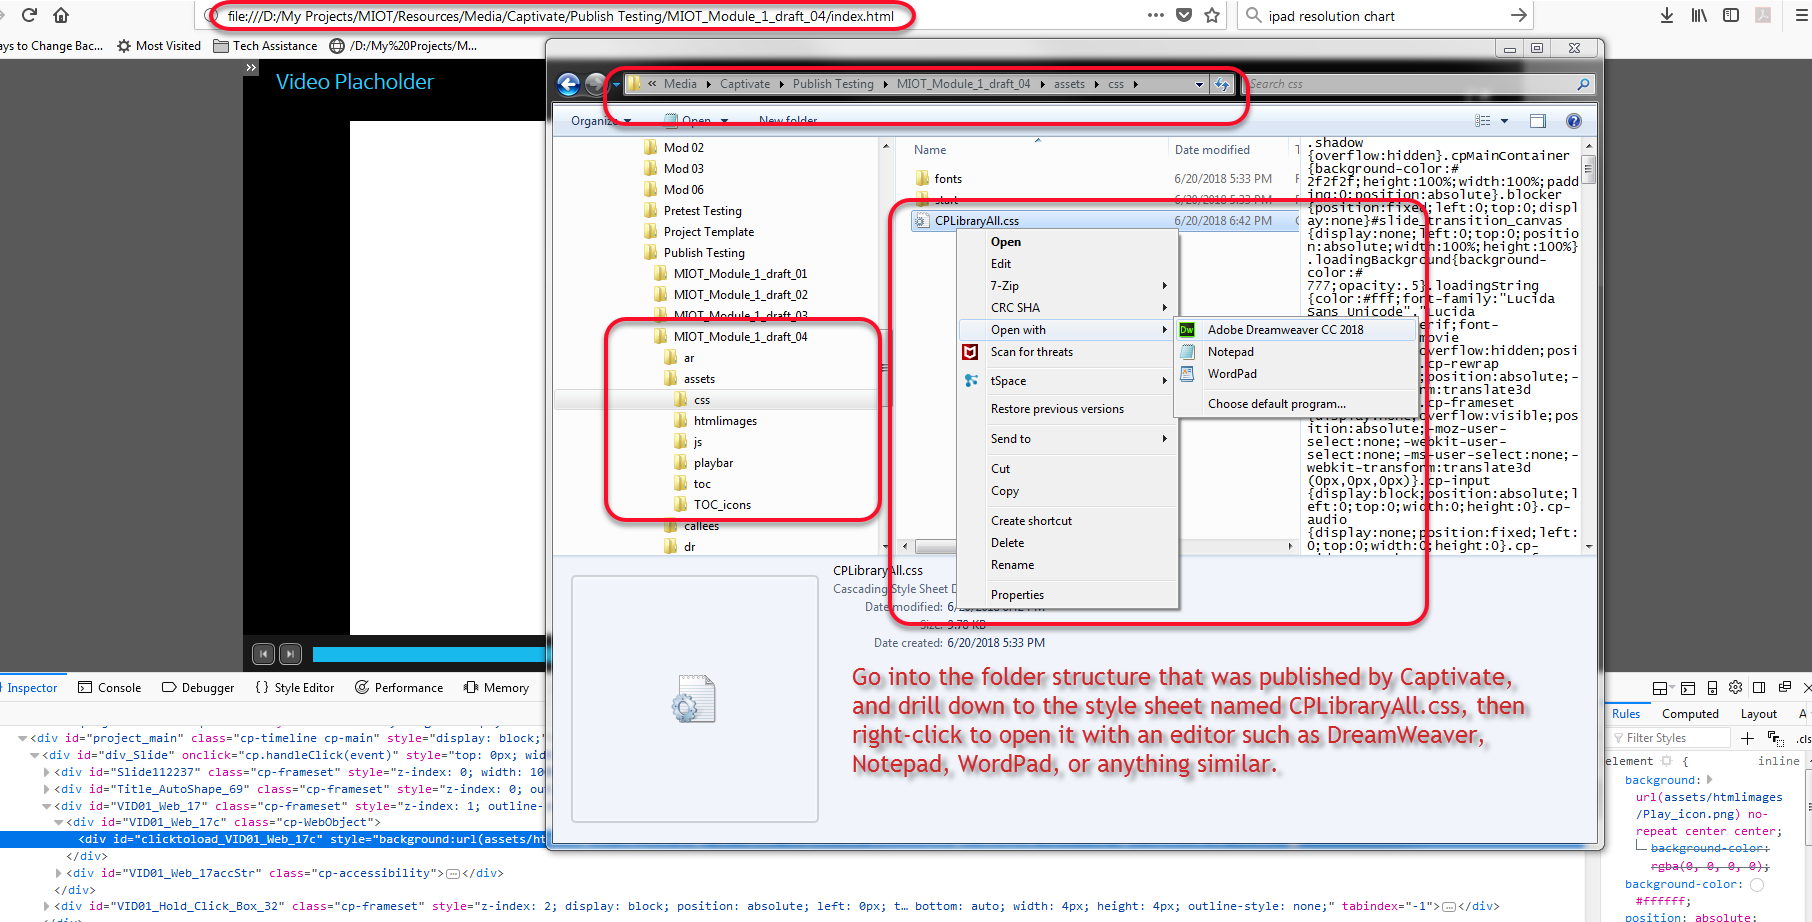
After publishing the project, go to the folder that contains the output and drill down to assets > css > CPLibraryAll.css. Open that with an editor like Adobe DreamWeaver, Microsoft Notepad, or WordPad, or TextEdit for the fanboys.

Scroll to the bottom of the file.
Add the following css:
#specified_ID_from_html {
Background-color: #xxxxxx !important;
}
Some people do it this way, which is fine:
#specified_ID_from_html
{
Background-color: #xxxxxx !important;
}
Incidentally the # means “find the thing on the page with the ID of ….” whatever follows, we’re using clicktoload_VID01_Web_17c in this example.
Specified_ID_from_html = This is the ID. You can’t actually use specified_ID_from_html. That’s just a placeholder for the example. You have to use the actual name of the actual ID you found in your actual project.
Put in the ID of the video box you found when you used the web development tools’ Inspector. It will be based on the name you gave the video object in its properties in Captivate (see the first screen shot, at the beginning of this document).
xxxxxx is the six digit color code for the color you want to use as the background (two digits for red, two for blue, two for green, RGB, get it?). You can use any color you want, #ffffff is white (which is what we’re trying to get rid of here), #000000 is black. Use your preferred search engine to find the code for any color you like.
Syntax is important. You must have the colon, the semi-colon, open and close the curly braces, all of that.
Those three total lines of CSS will change the color of the background box for that one video object. Repeat the process, and add more lines of CSS) as needed, for each individual video in the course.
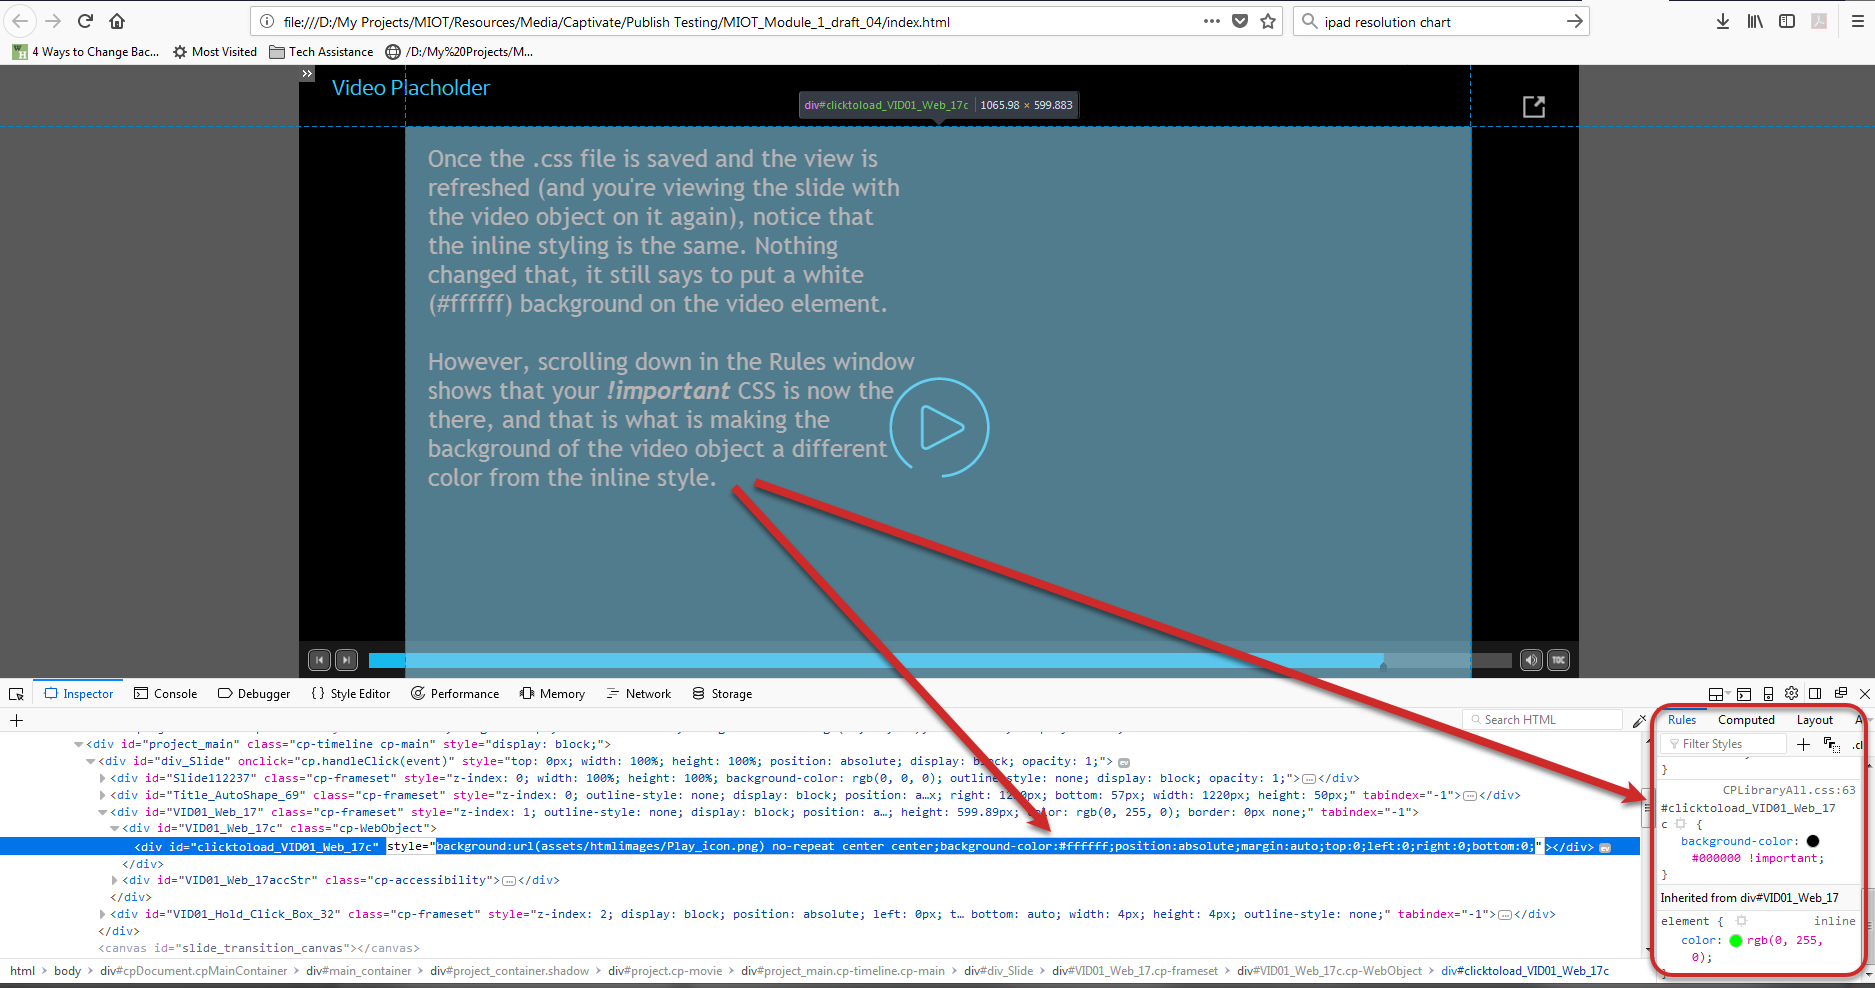
Use File > Save or Ctrl + S to save the CPLibraryAll.css file. Once it is saved the browser should obey it, so refresh your view in the browser and go back to your slide with the video on it.
If you don’t see the change take place, go back and recheck your steps. One common mistake is that you change the .css file for one project, but you’re viewing another in the browser.
As before, this will get you there, but if anyone has a better way then please share. Thanks in advance!


 AdChoices