

- Home
- Dimension
- Discussions
- Dimension doesn't render images as shown.
- Dimension doesn't render images as shown.

Copy link to clipboard
Copied
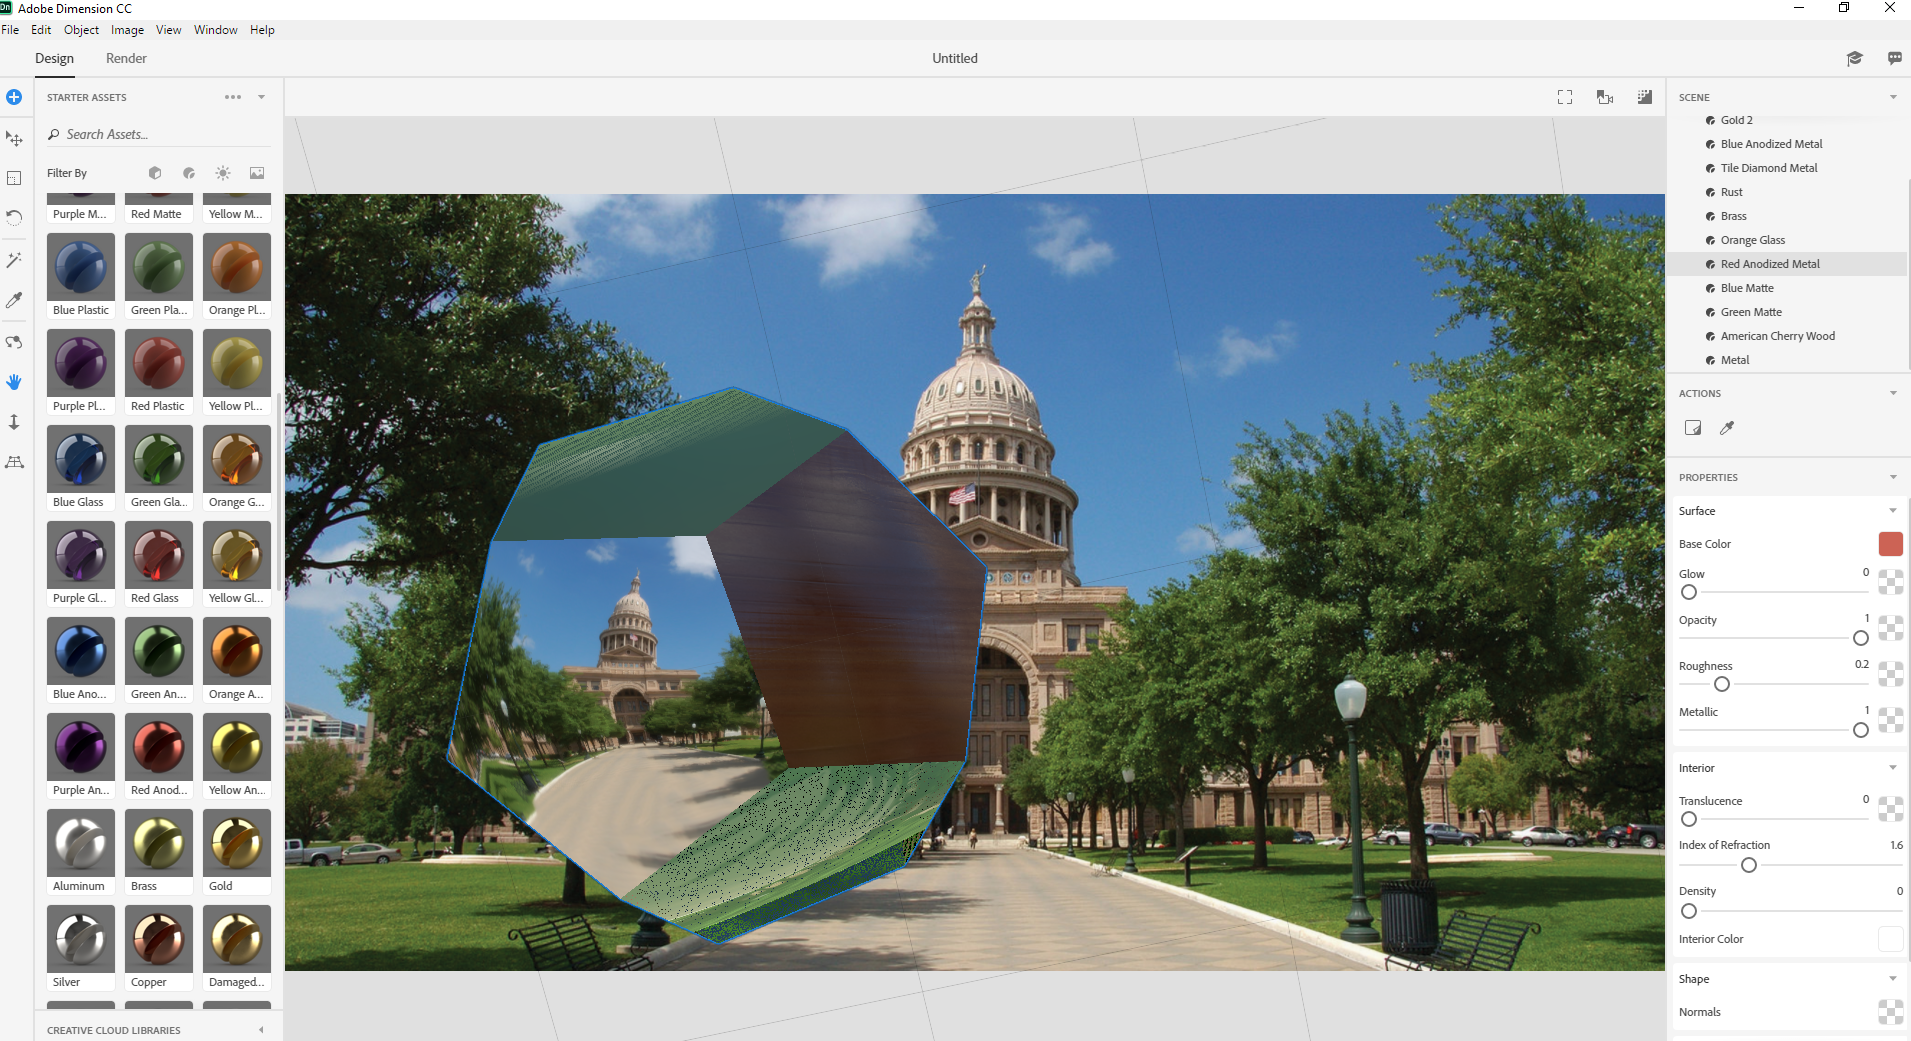
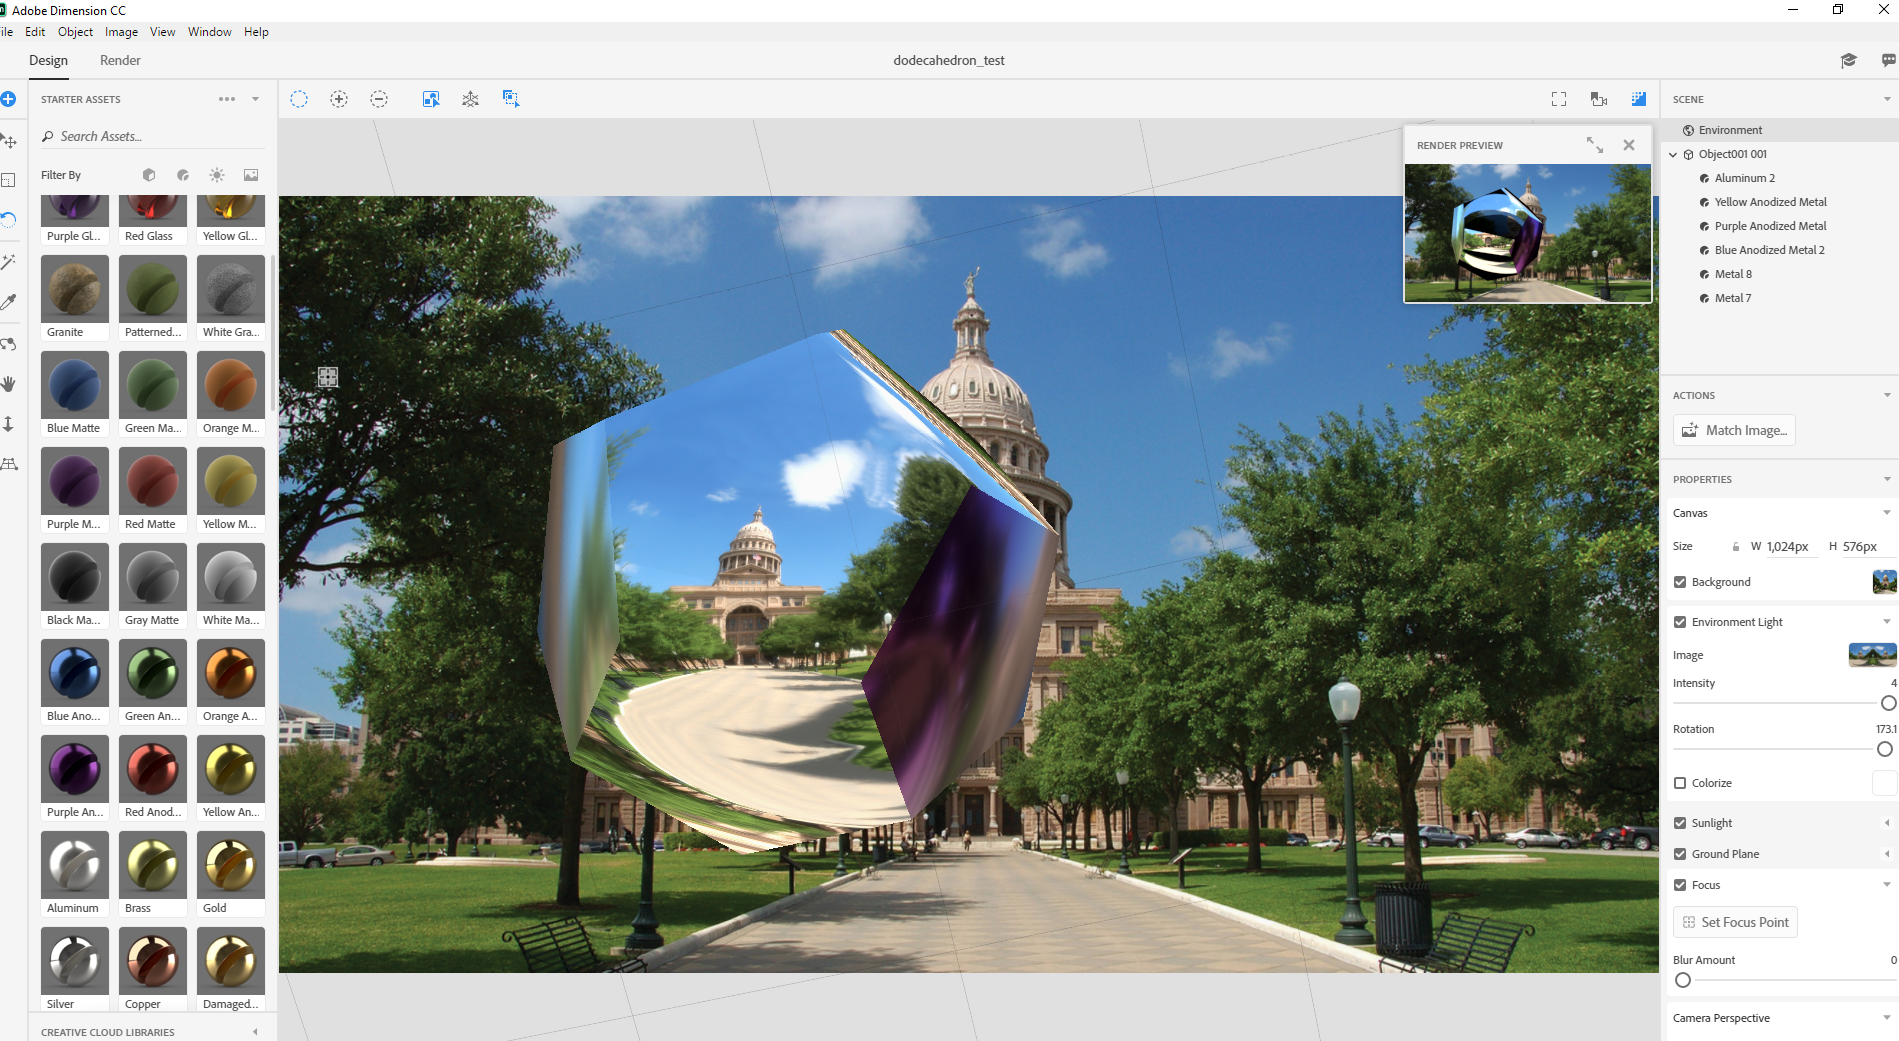
I have been trying to learn dimension. I loaded a dodecahedron .obj file put a different texture on each face of it. Put in a background of the Texas capitol building. This is what it showed in dimension before rendering:
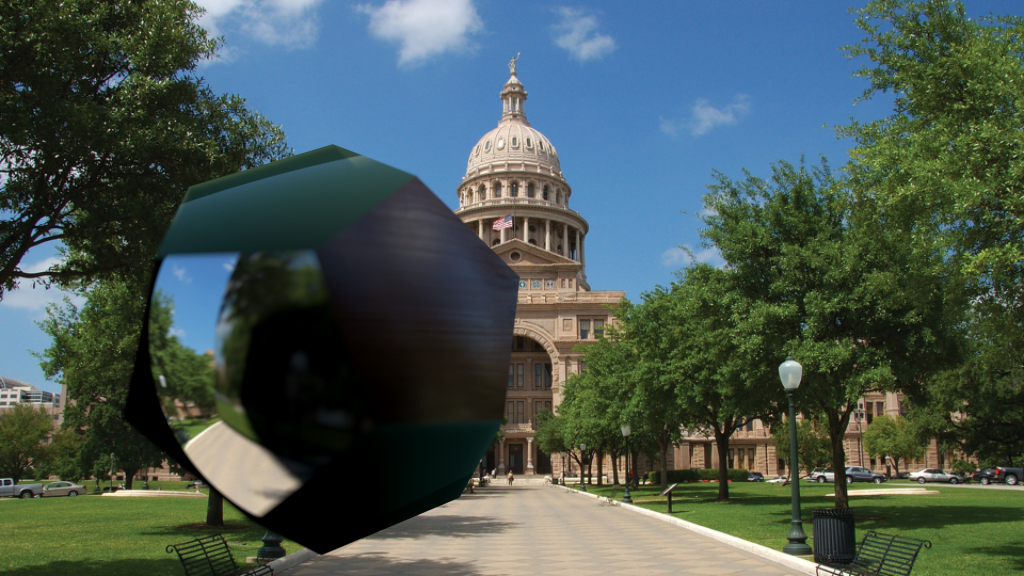
That is what I was expecting it to look like after rendering it to a .png No such luck with that!
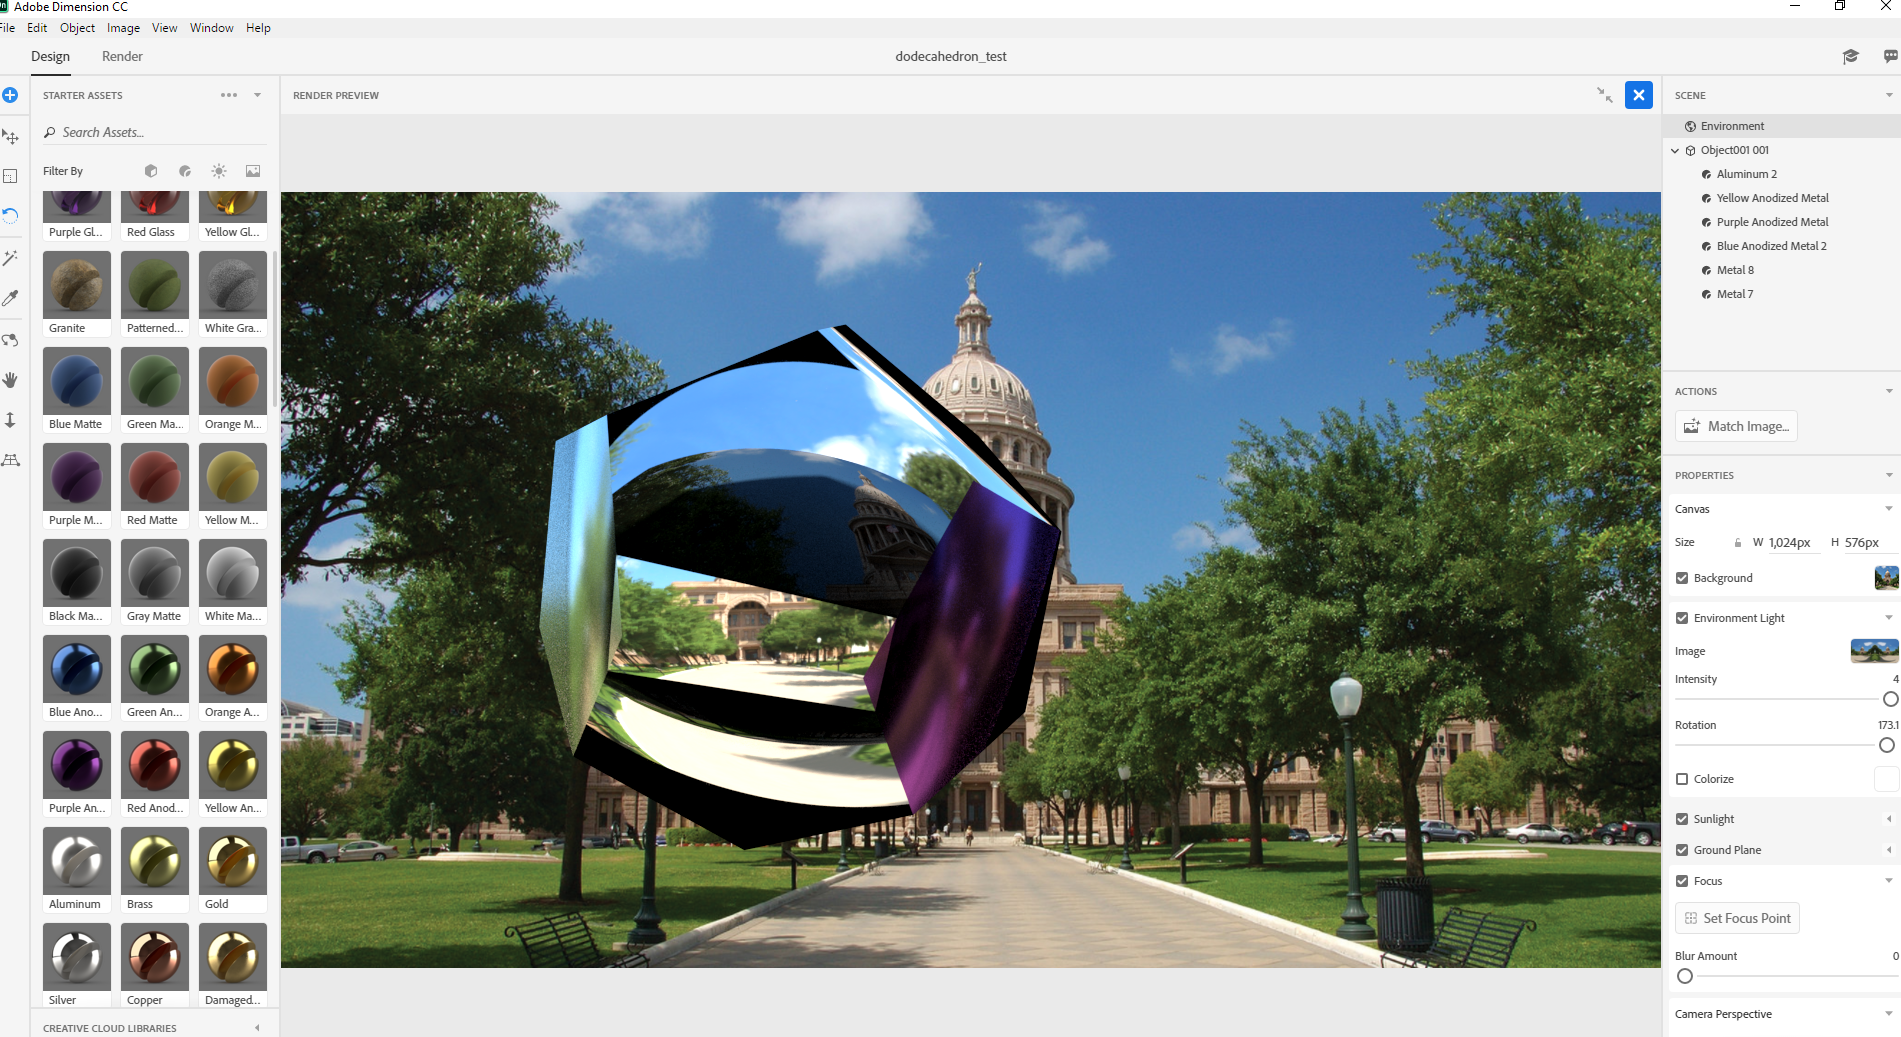
I set the render to high, then rendered it. It took 9 minutes and 20 seconds to render with all 8 cores pegged out 100% on a Ryzen 2700X. 16GB of memory, with only 7.9 GB of memory being utilized. Raised the temp on it too, to 81C... The GTX 1070 with 8GB of memory was hardly utilized, from 2 to 4% occasionally spiking to 14%. And after all that time waiting for it to render, this is what I got:
Not hardly what I was expecting. Doesn't look anything like the one in the screenshot above. And to think I waited 9 minutes and 20 seconds for that blurry blob to render... I was expecting it to look EXACTLY like the screenshot above. Can anyone tell me why? Can anyone shed any light on what to do to make it look EXACTLY like the one in the screenshot?
I'd like to fully learn and use this program, but if rendered results are no better than this then I don't think I'd want to waste any more time with it. Please tell me it is capable of better results than this and point me in the right direction!
Thank you,
Joe


 1 Correct answer
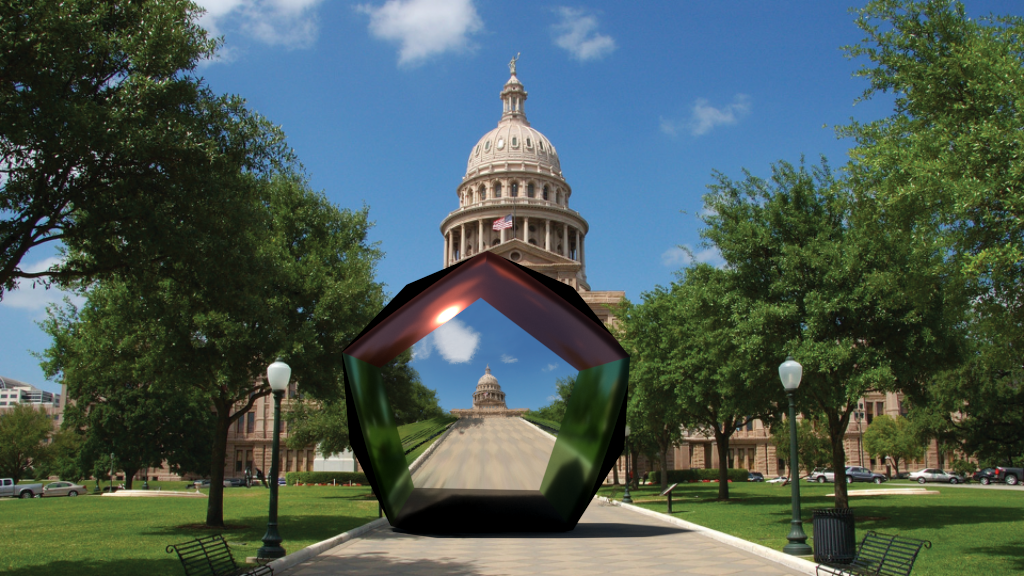
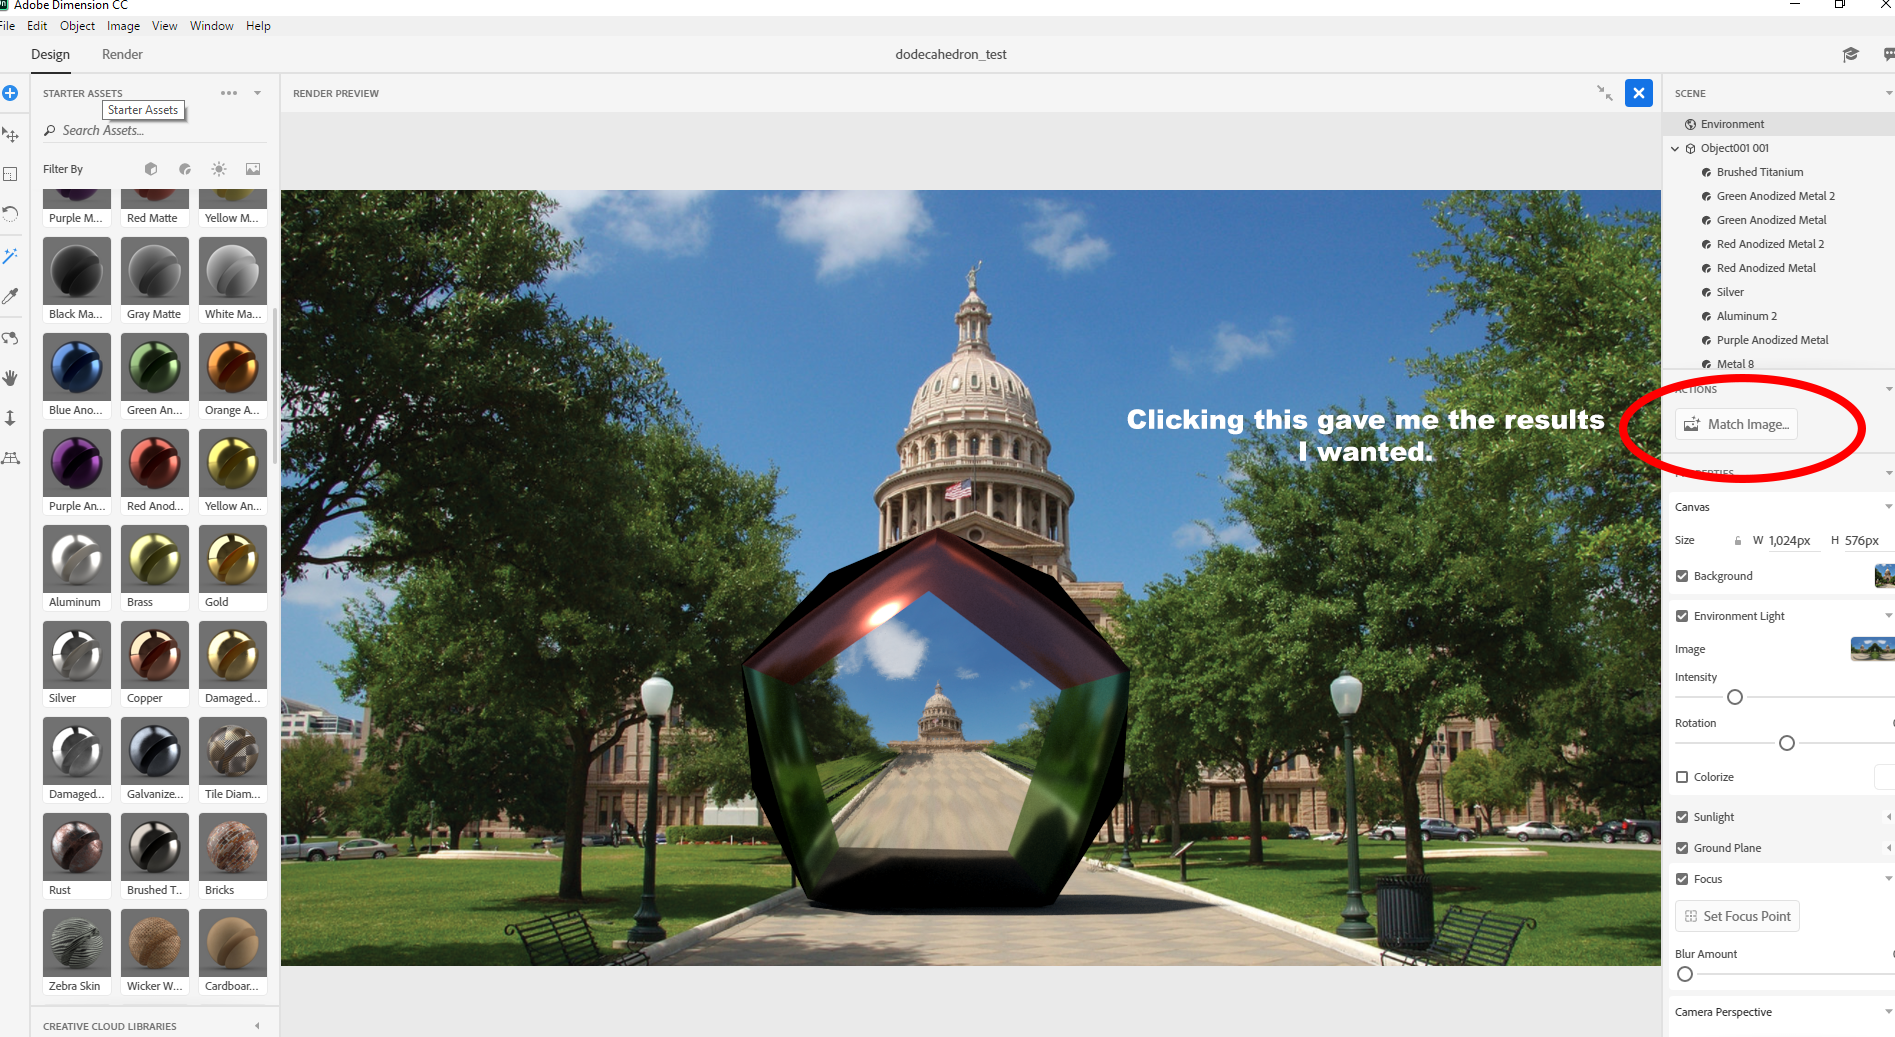
Here is the rendered image. Same file as the first one. The first time I rendered it to png file it took 9 minutes and 20 seconds. This time it took only 1 minute and 11 seconds. Both renders was at the High setting. The only difference is I changed some of the face textures and lowered the blur to 0, then finally figured out that I needed to click the "Match Image" button.
 7
Replies
7
7
Replies
7

Copy link to clipboard
Copied
Please note that the interactive canvas in Design Mode is a rough preview only and can't show some effects like reflections, focus (depth of field), translucency, etc. In design mode, I highly recommend turning on the Render Preview window to get an accurate idea of what your image looks like while designing.
It looks to me like maybe your focus setting is too blurry.
- Turn on the Render Preview window
- In the Scene panel select the environment
- In the Properties panel change the focus blur and set focus point
Here's a screenshot illustrating the focus and how it isn't displayed in the main canvas but is in the render preview.
Copy link to clipboard
Copied
Thank you Jeanette for the reply and tips. I set the blur to 0 and that helped some. But I still can not make it show the same in the render preview as in the design mode. I changed the focus point to several different places with no better results. Here are a couple of screenshots of the test file I'm working on.
Design mode:
Render preview, full size:
How can you make something in design mode and have it render out exactly as it appears in design mode? I understand about it being a rough preview of what your making, but you can see by the comparison of the two screenshots I uploaded that there is a lot more difference between the two than just a rough preview. They look nothing like each other.
Thank you for trying to help! I appreciate it!
Copy link to clipboard
Copied
Okay, I tried several other things. One of which was to "Match Image". When I did that, the render preview was just like in the design mode. I did reposition it and rotate it, then 'matched image' again it worked. Here is a screen shot:
Thank you.
Copy link to clipboard
Copied
Here is the rendered image. Same file as the first one. The first time I rendered it to png file it took 9 minutes and 20 seconds. This time it took only 1 minute and 11 seconds. Both renders was at the High setting. The only difference is I changed some of the face textures and lowered the blur to 0, then finally figured out that I needed to click the "Match Image" button.

Copy link to clipboard
Copied
joeh87907460 wrote
How can you make something in design mode and have it render out exactly as it appears in design mode?
Sorry! I may not have been clear in my first post. What I meant is that design mode canvas will never look like render mode. The render PREVIEW window is showing you what will happen in render mode. You must use the render preview when making decisions like lighting, reflections, etc.
I'm glad you were able to get what you wanted!
Copy link to clipboard
Copied
Thank you. You jogged my thinking with your fist post and helped me get on the right track! I appreciate it. I was about to give up on it. I"m sure I'll have more questions on down the road though!
Thanks again,
Joe

Copy link to clipboard
Copied
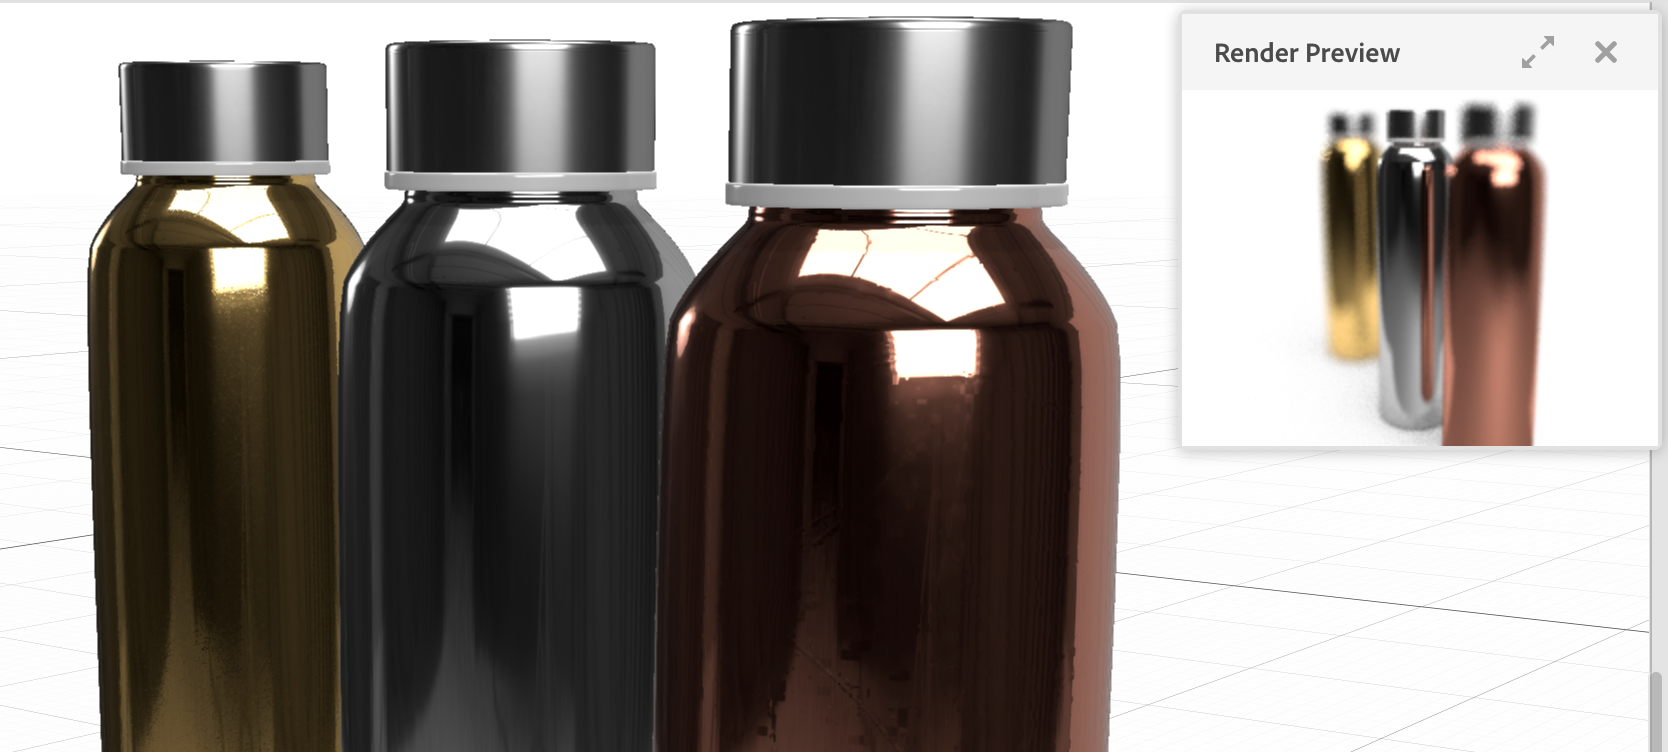
Wow... that’s incredible silly isn’t it? Not to be mean or anything, but I’m working on a mock-up and the colors matter for my client. They don’t want to see thier carefully chosen red Tetra Pak mock up look like a completely different colored decal or item.
My experience is that dimension pre render isn’t even close. The colors are jacked up!
Find more inspiration, events, and resources on the new Adobe Community
Explore Now
 AdChoices