 Adobe Community
- Home
- Illustrator
- Discussions
- Re: blending compound paths with holes, possible?
- Re: blending compound paths with holes, possible?
Copy link to clipboard
Copied
hi fellas. quick question: I am trying to morph a circle to a 6. is it possible in illustrator? it appears you cant blend a compound path with a hole to another without blocking the hole. any ideas?
step 1 - before the blend

step 2 - after the blend

thanks.


 1 Correct answer

Roei,
You may:
1) Select the circle and Object>Path>Offset Path by almost the radius, then Ctrl/Cmd+8 to create a Compound Path, then set a Stroke Weight that is sufficient to close the hole at the centre; you may select the 6 (outlined) and add a Stroke with the same Weight (especially if you wish to have the exact same height, which is different from the screenshot shown), or just leave it as it is;
2) Object>Blend>Blend Options set the desired number of steps;
3) Object>Blend>Make;
4) Enjoy.
Explore related tutorials & articles
 17
Replies
17
17
Replies
17
Copy link to clipboard
Copied
Roei,
You may:
1) Select the circle and Object>Path>Offset Path by almost the radius, then Ctrl/Cmd+8 to create a Compound Path, then set a Stroke Weight that is sufficient to close the hole at the centre; you may select the 6 (outlined) and add a Stroke with the same Weight (especially if you wish to have the exact same height, which is different from the screenshot shown), or just leave it as it is;
2) Object>Blend>Blend Options set the desired number of steps;
3) Object>Blend>Make;
4) Enjoy.
Copy link to clipboard
Copied
thank you Jacob. so you mean the short answer to my question is No, but I can use another shape to correspond with the hole in the 6? can you please speficy in more detail on what you are doing, my knowledge in Ai is somewhat basic, my intention here is to use this as a sequence in After effects to demonstrate morphing through Illustrator instead of After effects
Copy link to clipboard
Copied
Roei,
My suggestion is to turn the filled circle into a Compound Path consisting of the original circle and a tiny one at the centre, by using Offset Path, then apply a Stroke with a (small) Stroke Weight sufficient to close the little hole at the centre.
In this context I forgot to mention that in 1) you can reduce the W and H of the original/outer circle by the Stroke Weight to retain the original appearance, and just leave the 6 as it is in any case.
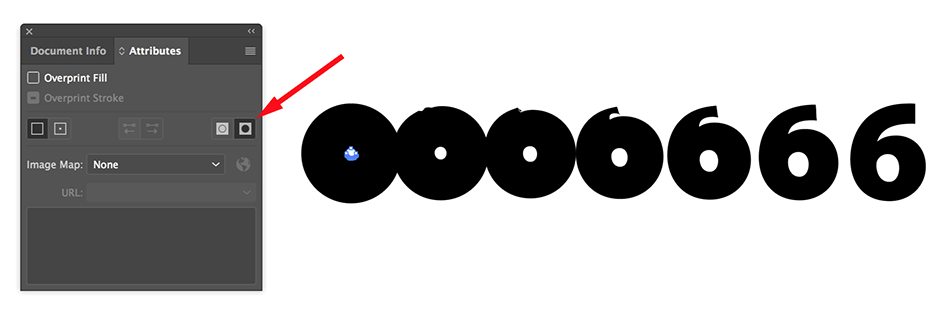
This will result in a Blend where the hole in the middle of the circle gradually grows from nothing (visible) to the counter in the 6, while the upper part of the 6 gradually emerges as the circular shape is withdrawn at the upper right.

Copy link to clipboard
Copied
Similar to jacob's suggestion.
Fake it.
I made a very small copy of the circle (almost invisible) and made a compound path of the 2 circles.

Copy link to clipboard
Copied
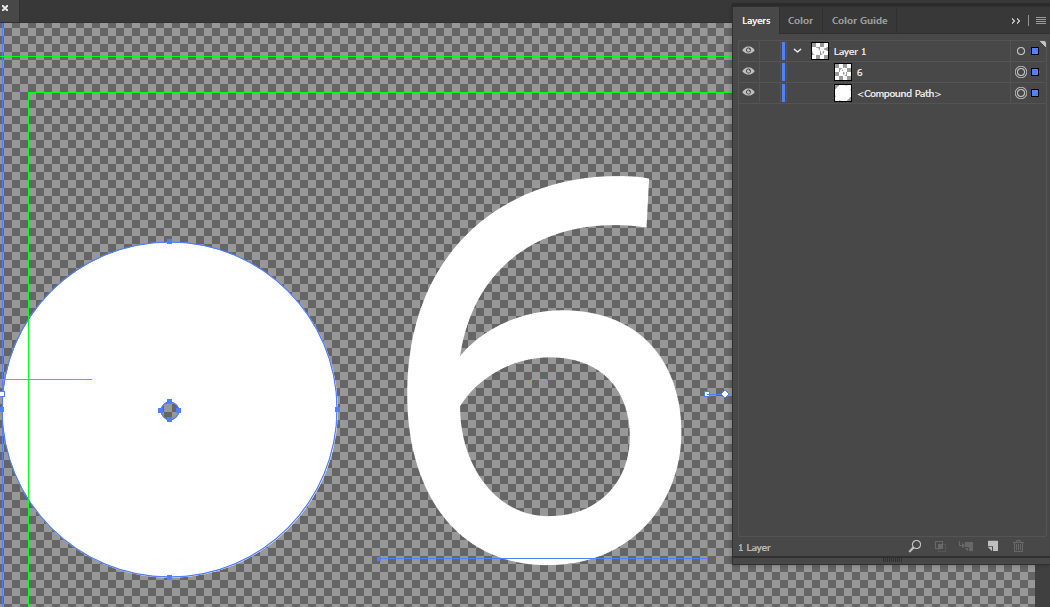
hi Ton thank you. I have tried to make a hole inside the circle and though this would be enough to make the blend work but it didn't for me. here are the steps I took.
1. created a circle on top of the big circle
2. used shape builder to cut it in
3. now I got this
blend still gave me this:

Copy link to clipboard
Copied
Maybe too many steps?
The objects may cover each other.

Copy link to clipboard
Copied
Ton: Maybe too many steps? The objects may cover each other.
Ton you are right they were covering each other  . I thought if I place them side by side it will be more apparent as to what was going on but this actually made it less obvious that it was actually working.
Jacob: My suggestion is to turn the filled circle into a Compound Path consisting of the original circle and a tiny one at the centre, by using Offset Path, then apply a Stroke with a (small) Stroke Weight sufficient to close the little hole at the centre.
thank you. I see now in order to blend 2 shapes and only one has hole, I have to create a corresponding hole. now I see that offset path is used to create an accurate small circle in the middle and a stroke to fill it. (when I say it it's much clearer  )
)
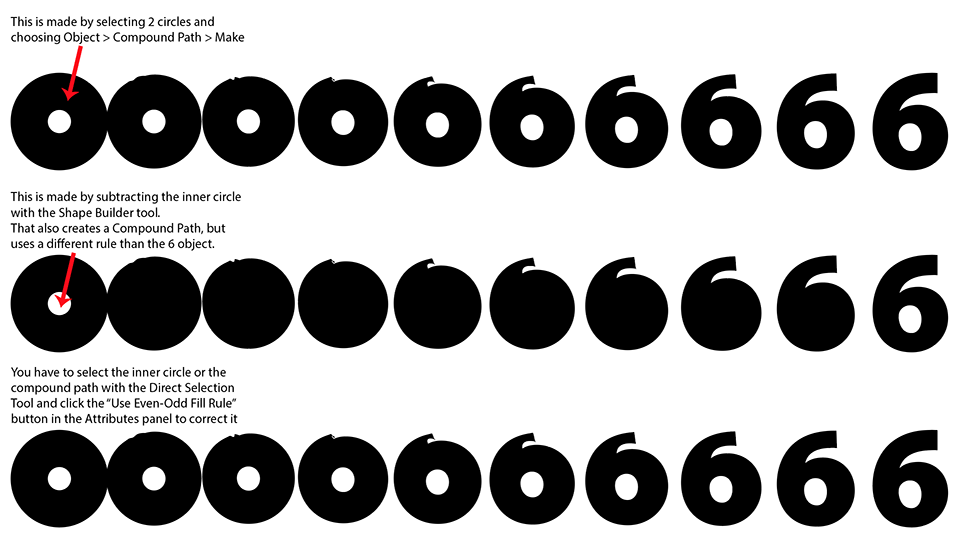
Ton: Although the Shape Builder tool creates a Compound Path, it is not the same as selecting 2 objects and make a Compound path.
You can correct it by selecting middle circle and clicking the "Use Even-Odd Fill Rule" in the Attributes panel.
thanks for that Ton. it still works with the shape builder selecting. (it's o.k now I learned to just press right click instead of reaching for the shape builder) to me it seems the same, look:
here is the compound path selected
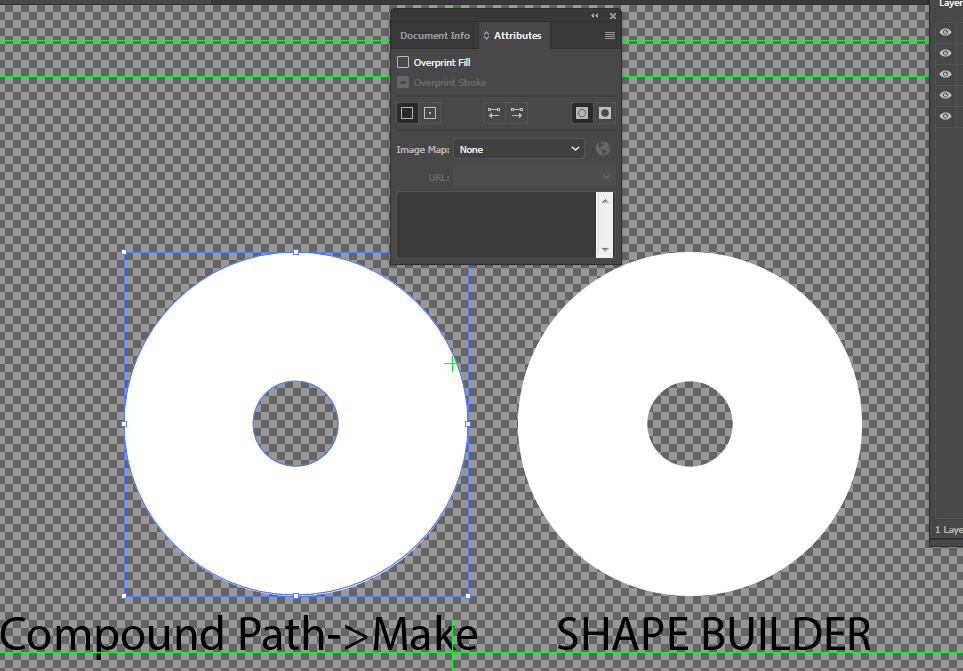
and here is the creating a compound path through the shape builder (selecting both shapes, and use Alt to remove shape with shape builder) now selected
can you please explain how is it different? be gentle I am new to this.
** if any of you guys come by to After Effects forum you have my undivided attention just type RoeiHelp*123 in the headline.
Copy link to clipboard
Copied
For my part you are welcome, Roei.
And thank you for your kind offer of help over there.
Copy link to clipboard
Copied
Hi Roel,
I'll try to explain the differences.
The Attributes panel gives you control over the way a path is filled or not filled in a Compound Path.
There are 2 methods in PostScript to determine if a pixel is drawn or not.
Both start by drawing a line from the pixel out.
The Even-Odd rule counts the number that the line crosses a path in the compound path.
The other one does the same, but also takes into account the direction in which the paths are drawn.
If you really want to know how this works, see page 208 section 4.5.2 from the PostScript language reference manual 3rd Edition
http://www.adobe.com/products/postscript/pdfs/PLRM.pdf
Copy link to clipboard
Copied
Roei,
In addition to what Ton said, there is another (third) way to ensure that you get the counter/hole in the Compound Path, namely to use Pathfinder>Minus front, which works regardless of the path directions and settings. A bit crude maybe, but you can always fall back on that.
Copy link to clipboard
Copied
Roei (sorry i called you Roel) I have another addition to make to explain why both your screendumps look the same.
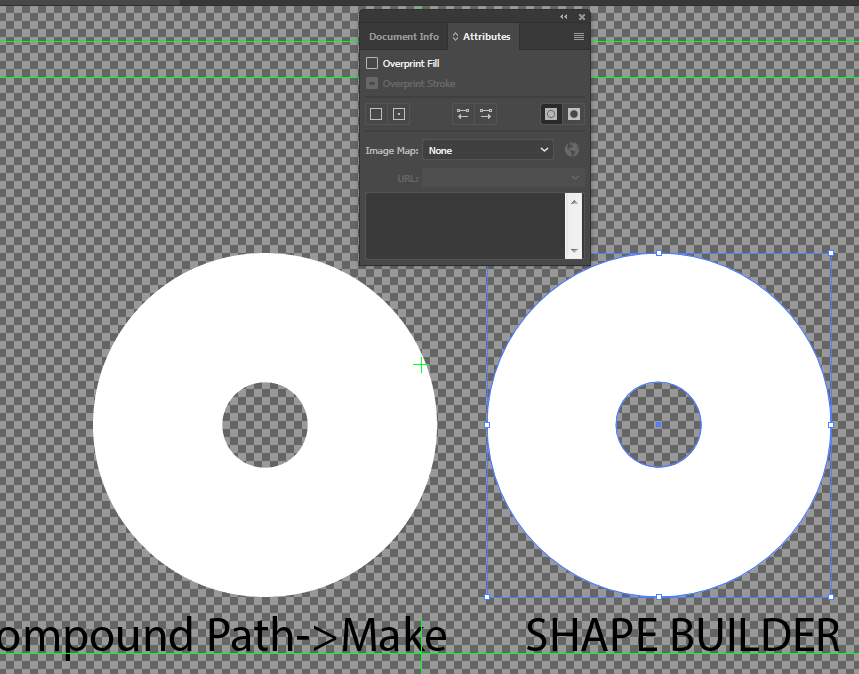
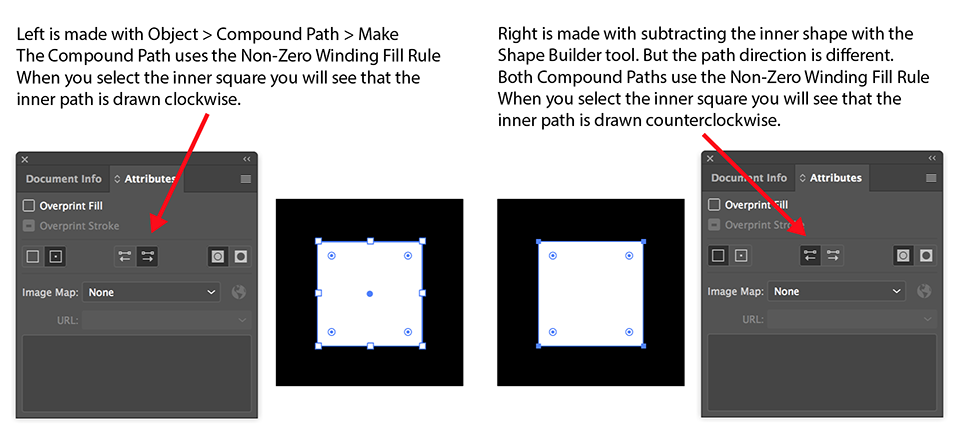
Both compound paths use the same Non-Zero Winding Fill Rule, but the paths in both Compound paths are drawn in different directions.
Jacob, the Compound Paths resulting from the Pathfinder and the Shapebuilder are identical. The different one is the one made with Object > Compound Path > Make.
Copy link to clipboard
Copied
I have another addition to make to explain why both your screendumps look the same.
Yes I see now I have selected the whole shape and not the inner shape where they are in the same rule but in reverse directions. thank you both for this in-depth explanation.
Copy link to clipboard
Copied
Roei,
Just another aspect, which may be(come) relevant in other cases, or just with a different shape of the 6: if it is less than obvious to Illy (job description Adobe Illustrator) which parts of the two object correspond to each other, in other words more exactly how you want the Blend, you may add one or more Anchor Points to either/both objects, and/or you may point out a pair of Anchor Points, one on each object, to form the starting point(s) of the Blend, either/both of which may in some cases improve the Blend.
For your circle to 6 Blend, it is quite simple because the top/end Anchor Point of the 6 is really at the top and thereby corresponds to the top Anchor Point of the circle.
If you switch to a 6 based upon a another (sans serif) font where the top/end bends down from the top so the end Anchor Point is a bit down the right side, such as Helvetica, it makes a real difference in the Blend. You may compare a Blend based upon an unchanged circle and upon one with an added Anchor Point at the top right corresponding to where the 6 ends (in this case pointing out a pair of Anchor Points (in this case, clicking the new Anchor Point on the circle and the end Anchor Point on the 6 with the Blend Tool will probably make no difference).
I believe you will see that with the hint contained in the added Anchor Point, Illy gets more to the point (literally), right from the beginning of the Blend.
Copy link to clipboard
Copied
Thank you Jacob. in Ae we have a concept called "first Vertex" - it's the vertex that will start the numbering of the vertices order so when you morph to another shape, you need to keep this one at the same proximity so that the morph will act as expected and map appropriately to the corresponding vertices in the second shape. this makes a vector morphing predictable.
and/or you may point out a pair of Anchor Points, one on each object, to form the starting point(s) of the Blend, either/both of which may in some cases improve the Blend.
how do you do that? how do you set start (and ending?) anchor point? do you just add anchorpoints and see how the blend reacts? my main question following your post is how do you control the way the shape blends?
in Ae we have mask interpolation panel which is kind of the Illy's Blend options only it has more features. in Ae if what you need is to morph one shape to the other. you actually have much more control over the morph: http://www.provideocoalition.com/managing_moving_masks/
Copy link to clipboard
Copied
Roei,
With both objects selected, with the Blend Tool you may click the Anchor Point on each that you wish to start with.
I can see that this bit in the second last paragraph should have been added to the first one just after the and/or: (in this case, clicking the new Anchor Point on the circle and the end Anchor Point on the 6 with the Blend Tool ...
Was the unintelligibleness (or maybe unintelligibility sounds even better, I always find it hard to choose between the two) of this sufficient?
Copy link to clipboard
Copied
Yes I see now. you can pick corresponding first anchor points same as Ae's first vertex. for some reason this does not work in our example. I tried to mess it up intentionally and pick the first point at the top of the circle, and the lower bottom of the 9 and it's not working. I am seeing it is an astrix key with a white rectangle and a + on the other
when I create a close shape with the pen tool and click on an anchor point it is black and with an astrix key and it works.

when watching a tutorial about it it's also black and with astrix. Fixing problems with the Blend tool
Copy link to clipboard
Copied
Although the Shape Builder tool creates a Compound Path, it is not the same as selecting 2 objects and make a Compound path.
You can correct it by selecting middle circle and clicking the "Use Even-Odd Fill Rule" in the Attributes panel.

 AdChoices