• Global community
    • Language:
      • Deutsch
      • English
      • Español
      • Français
      • Português
  • 日本語コミュニティ
    Dedicated community for Japanese speakers
  • 한국 커뮤니티
    Dedicated community for Korean speakers
Exit
0

Compound Paths Not Filling

New Here ,
Sep 24, 2018 Sep 24, 2018

Copy link to clipboard

Copied

I'm creating a repeating pattern using an individual 'block' that gets duplicated. The original block is built using paths and shapes and then converted into a compound path where I can globally change the stroke and fill. So far so good.

The problem is I'm getting random fills when I duplicate layers and/or cut-and-paste selections, to connect the blocks.

I've kept the layers lean and have been troubleshooting using a minimal number of blocks (3) before moving on to the greater pattern, but even at these small numbers, the fills are not displaying correctly. In some cases, correctly filled blocks change simply by dragging a selection across the artboard. The mis-fills remain even when zoomed in at an extreme level.

I've tried reversing the path direction which occasionally is successful — though at other times it leaves gaps of color where the strokes intersect or makes no change at all.

Finally, I've also tried flattening a correctly filled small group of blocks but when flattened, the once correct fill becomes incorrect.

Is there a screen display setting that's making the art behave this way? Something else? I'd appreciate any suggestions!

Thanks in advance,

Alice

Here are a few pics...

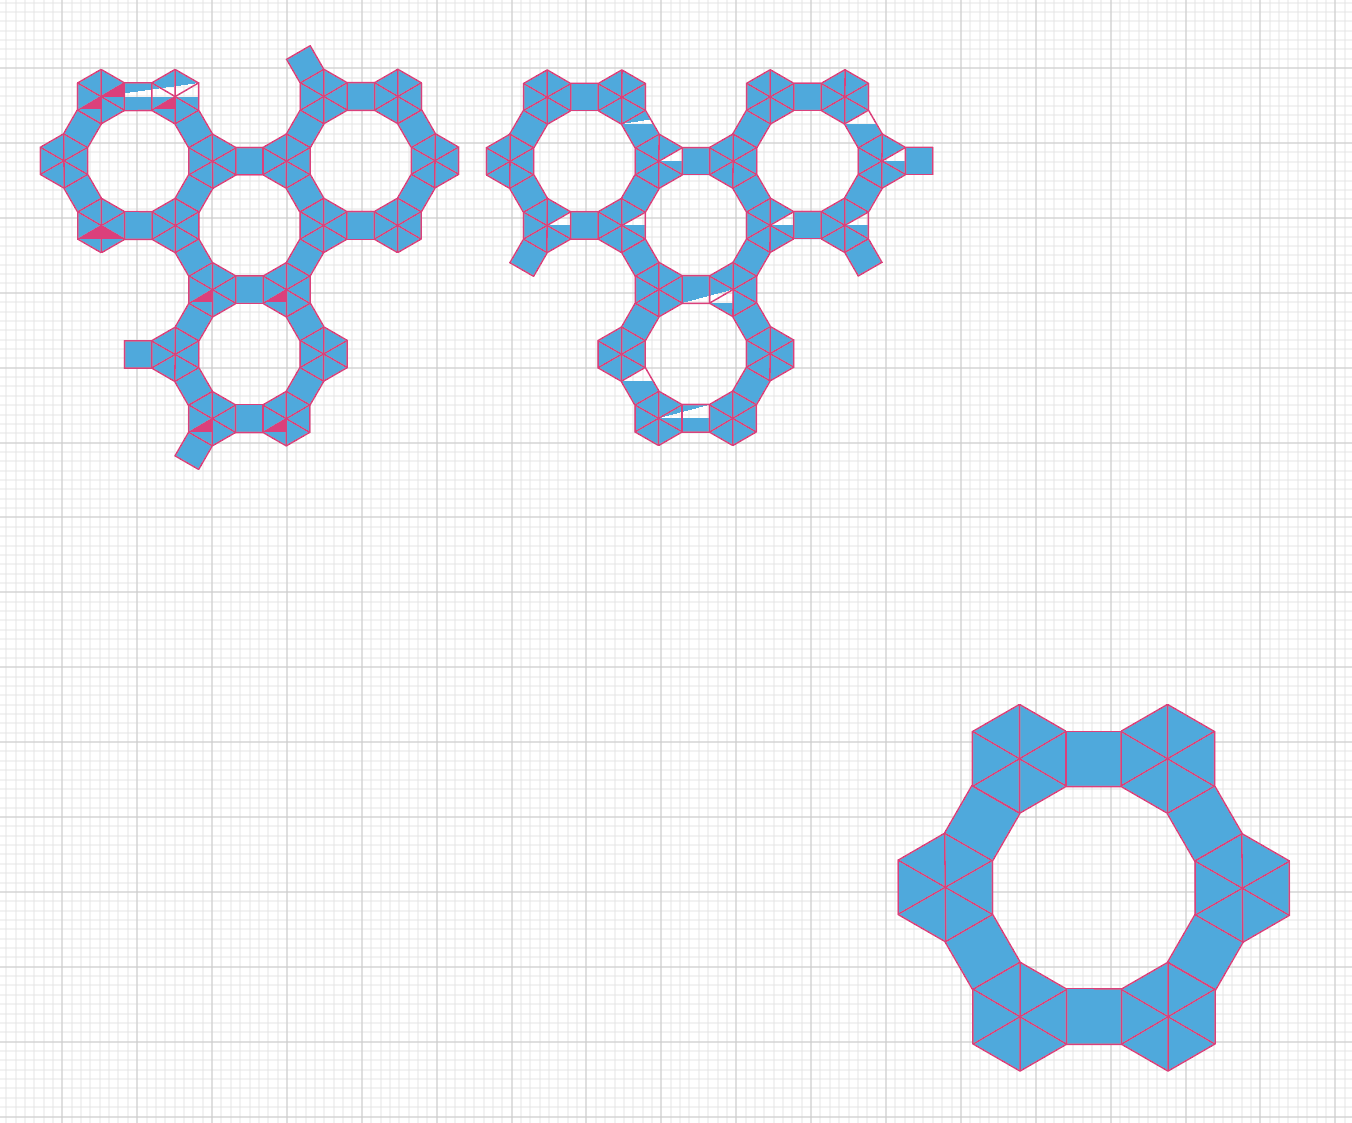
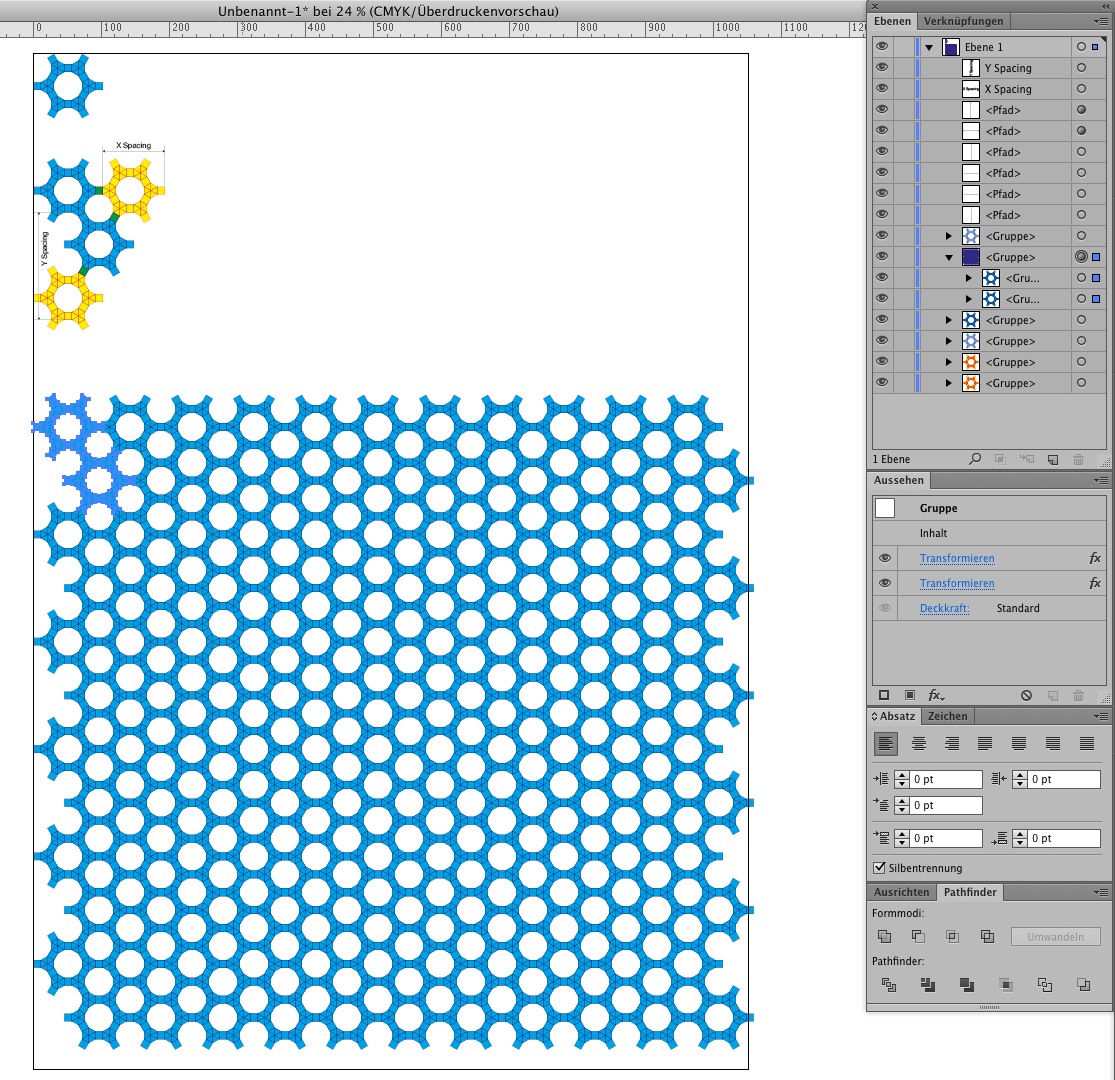
1. The single 'block' is fine but the two composite blocks show mis-fills locating in odd placements

TESS-3 compound.png

2. Using reverse path, leaves color (blue) gaps where the strokes intersect, though not at every intersection

TESS reverse path gaps.png

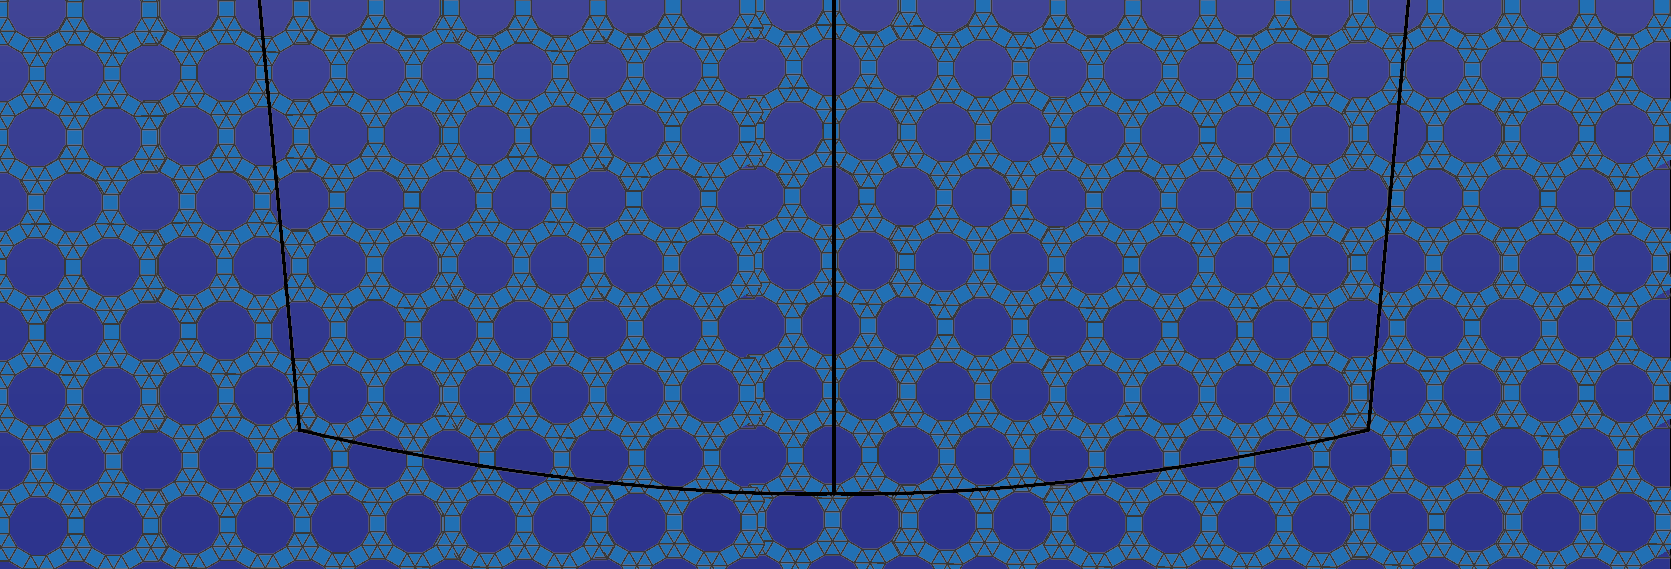
3. The pattern field I am trying to achieve (please ignore the black keylines)

Ai CROP.png

Views

2.9K

Translate

Translate

Report

Report
Community guidelines
Be kind and respectful, give credit to the original source of content, and search for duplicates before posting. Learn more
community guidelines

correct answers 1 Correct answer

Engaged , Sep 25, 2018 Sep 25, 2018

First you have to make sure your base illustration is build up very clean and all points have the same coordinates.

Screenshot 2018-09-25 um 11.22.49.jpg

After constructing this as a base I duplicated it to get a group of two for the effect mentioned later. And again I duplicated it again twice to get the correct x and y coordinates for the effect.

Screenshot 2018-09-25 um 11.23.06.jpg

Screenshot 2018-09-25 um 11.24.06.jpgScreenshot 2018-09-25 um 11.24.22.jpg

You'll need to apply the transform effect twice.

Screenshot 2018-09-25 um 11.22.12.jpg

Votes

Translate

Translate
Adobe
Community Expert ,
Sep 24, 2018 Sep 24, 2018

Copy link to clipboard

Copied

Try Preview on CPU, cmd/ctrl E.

Votes

Translate

Translate

Report

Report
Community guidelines
Be kind and respectful, give credit to the original source of content, and search for duplicates before posting. Learn more
community guidelines
Community Expert ,
Sep 25, 2018 Sep 25, 2018

Copy link to clipboard

Copied

Have you considered turning the strokes to fills and then welding them? This should get rid of your problem.

Best wishes,

Dax

Votes

Translate

Translate

Report

Report
Community guidelines
Be kind and respectful, give credit to the original source of content, and search for duplicates before posting. Learn more
community guidelines
Community Expert ,
Sep 25, 2018 Sep 25, 2018

Copy link to clipboard

Copied

How about rounding the stroke edges and ends...?

How did you build the initial shape?

Votes

Translate

Translate

Report

Report
Community guidelines
Be kind and respectful, give credit to the original source of content, and search for duplicates before posting. Learn more
community guidelines
Community Expert ,
Sep 25, 2018 Sep 25, 2018

Copy link to clipboard

Copied

It does look like a CPU problem though as tromboniator has mentioned.

Votes

Translate

Translate

Report

Report
Community guidelines
Be kind and respectful, give credit to the original source of content, and search for duplicates before posting. Learn more
community guidelines
Engaged ,
Sep 25, 2018 Sep 25, 2018

Copy link to clipboard

Copied

LATEST

First you have to make sure your base illustration is build up very clean and all points have the same coordinates.

Screenshot 2018-09-25 um 11.22.49.jpg

After constructing this as a base I duplicated it to get a group of two for the effect mentioned later. And again I duplicated it again twice to get the correct x and y coordinates for the effect.

Screenshot 2018-09-25 um 11.23.06.jpg

Screenshot 2018-09-25 um 11.24.06.jpgScreenshot 2018-09-25 um 11.24.22.jpg

You'll need to apply the transform effect twice.

Screenshot 2018-09-25 um 11.22.12.jpg

Votes

Translate

Translate

Report

Report
Community guidelines
Be kind and respectful, give credit to the original source of content, and search for duplicates before posting. Learn more
community guidelines