


Copy link to clipboard
Copied
Hi,
i wanna apply a gradient along a path. I searched, but all solutions (gradient as a brush or stroke solutions) did not work for me. My shape is already finished and i wanna apply the gradient from the beginning to the end (the arrowhead) along that "line". How can i do that in AI CS5?
Cheers from Germany
Mario


 1 Correct answer

- Draw some rectangles larger than your shape
- Fill them with progressing tints
- Object >> Blend >> Make
- Send gradient to back, then make mask
Apologies for quick sloppy tracing of your shape
Explore related tutorials & articles
 21
Replies
21
21
Replies
21

Copy link to clipboard
Copied
i wanna apply a gradient along a path. I searched, but all solutions (gradient as a brush or stroke solutions) did not work for me.
They will, once you adapt your thinking. You are too bound on applying the effect directly and that's why you hit the wall. Create the gradient as a brush stroke or blend, apply it to a suitable path, then use the arrow as a clipping path.
Mylenium
Copy link to clipboard
Copied
Hi Mylenium,
thanks for your reply! I created already a brush with the gradient. But the brush works only for the stroke (like expected). I sit here since hours and i'm not moving just one little step ahead ... ;-(

Copy link to clipboard
Copied
- Draw some rectangles larger than your shape
- Fill them with progressing tints
- Object >> Blend >> Make
- Send gradient to back, then make mask
Apologies for quick sloppy tracing of your shape
Copy link to clipboard
Copied
Thanks Mike!
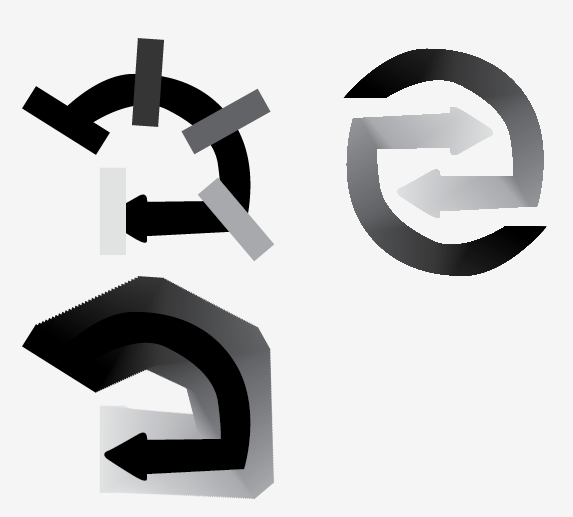
I tried the stroke and brush version. I draw a new 8pt stroke inside the shape, applied the brush, send the stroke back and choose the clipping mask. Just one thing that i don't like. How can i avoid these fuzzy edges that appears now?

Copy link to clipboard
Copied
Very Interesting, not sure why the fuzzy edges are there, must be a screen draw issue, and I doubt this will print. Do a print test to be sure, but I copied and pasted a quick test into photoshop @ 300 dpi and the fuzziness went away.
Another way around the fuzziness, is you could grab your blend, and choose object >> rasterize. I have no problem with the gradient being bitmapped as the mask container is vector and you should get a hard edge from that when you print. I don't like doing that though, because you loose editability, and rotating and recoloring the inbetween steps is important to this technique.
Copy link to clipboard
Copied
Mario, I don't understand your jagged edges either. They don't appear in your grayscale objects, just the color ones. I'll keep digging at it if I have time.
Peter
Copy link to clipboard
Copied
I don't know what to do. I tried also the blend method. The path with the arrow is sharp, but after the the clipping mask command it looks fuzzy:


Copy link to clipboard
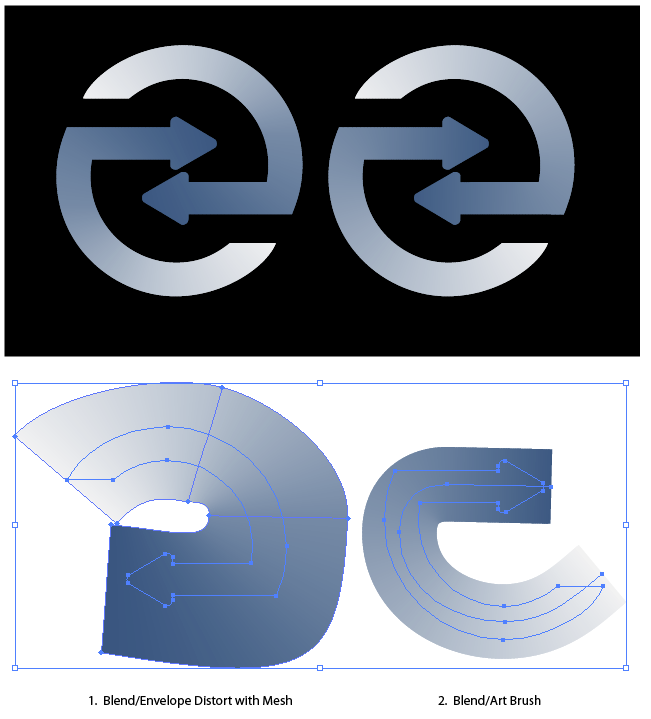
Copied
Mario,
I would also suggest the Blend and Art Brush/Envelope Distort way(s) as described by Peter; you should be aware that Illy gets dizzy at sharp corners in Art Brushes, and then the colouring gets funny as you can see where it turns inward from the curved part in your post #7.
I see no fuzzies making things that way. I believe it is a screen artifact as Mike says.
Have you tried a Save As PDF or printing to see whether it is really there?
In the end, you may not need to do anything.
Copy link to clipboard
Copied
You're right, the print is perfect. But i need the logo (the illustration is a part of) also for screen (website). What can i do to make it looks as "sharp" as when it's printed?
Copy link to clipboard
Copied
Mario,
But i need the logo (the illustration is a part of) also for screen (website). What can i do to make it looks as "sharp" as when it's printed?
What happens if you tick Anti-Alias in the Image Size window when you Save for Web (& Devices)?
Edit: Just to give a new option before Mike repeats an earlier one:
It may be worth ticking Anti-Aliased Artwork in Edit>Preferences>General (or wherever it is in your version) if it is not already.
Copy link to clipboard
Copied
I already gave you a solution how to make this look sharp on the screen, see post #5.
Copy link to clipboard
Copied
Hi Mike,
it worked! Thanks! It seems to be the only solution to avoid the fuzzyness. And like you said, it's not editable anymore. But when Illustrator is not able to do it in another way, i'll keep in mind this workaround for future works.
Every time i'm wondering how many tricks you have to know when working with Adobe products.  I really searched in books and online for a way to solve the problem and i found nothing.
Cheers
Mario

Copy link to clipboard
Copied
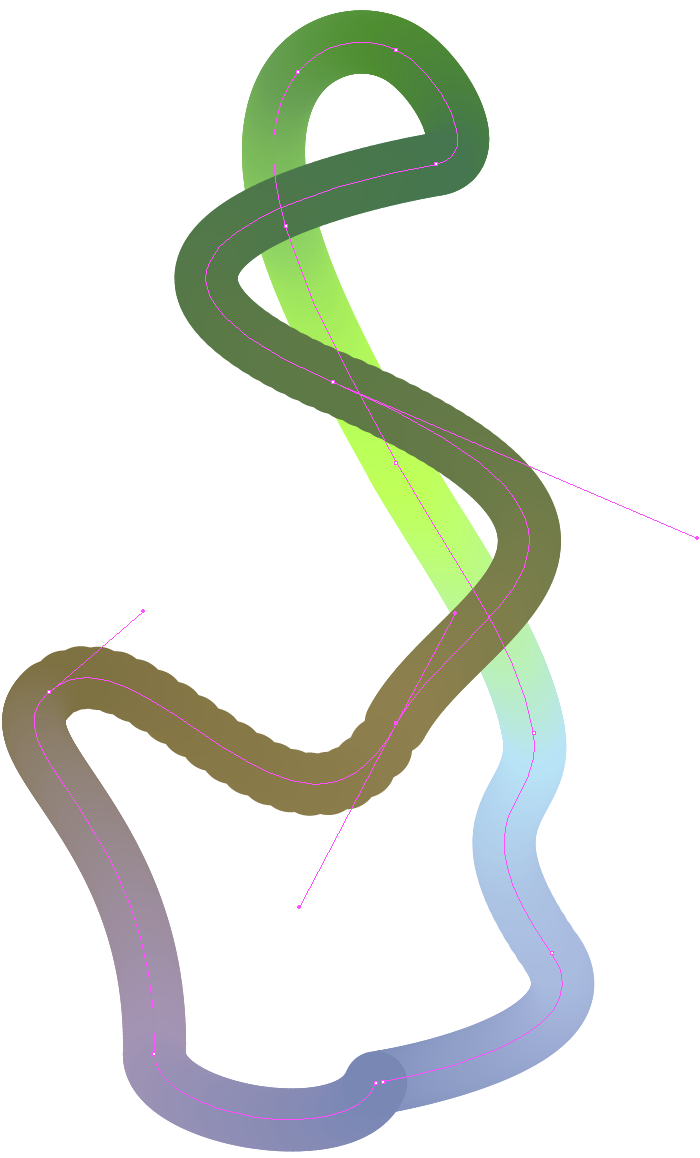
I suggest this as a far better alternative then an Art Brush at least.
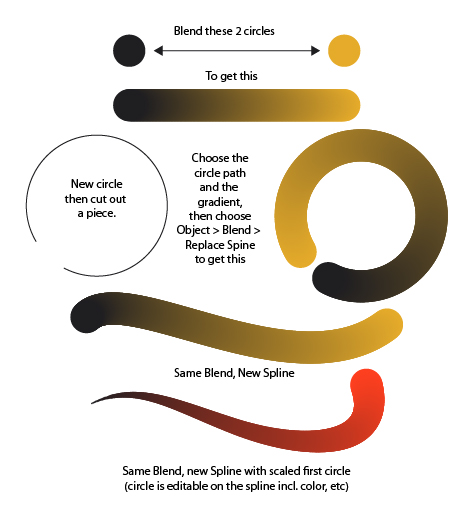
In general for a blend that needs to go in a circle... well, use a circle in your blend. Else you'll get odd blending with squares, lines etc. without multiple rotated steps. Below is far easier to edit, and use again.
Note: Jaggies are due to a simple Screen Cap. Use a Clipping Mask to fit within any other shape you want.
Copy link to clipboard
Copied
@ DocPixel-BMW - This is a wonderful tip; thank you very much!
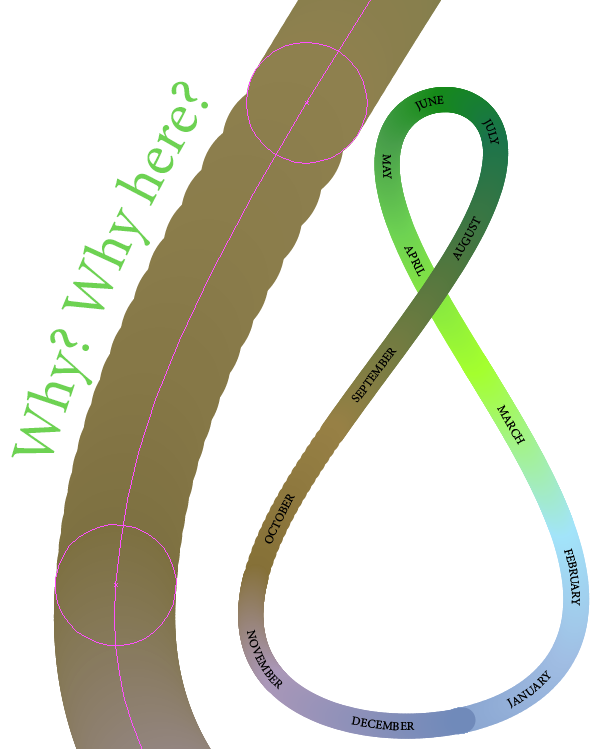
The issue of the scalloping (jaggies of a sort) in the example below in just one area (along October) are perplexing... any ideas why? The screen cap explanation doesn't seem applicable to me.

Copy link to clipboard
Copied
The anchors might not be distributed evenly on your blend spine. You need to check if you can improve that.
Copy link to clipboard
Copied
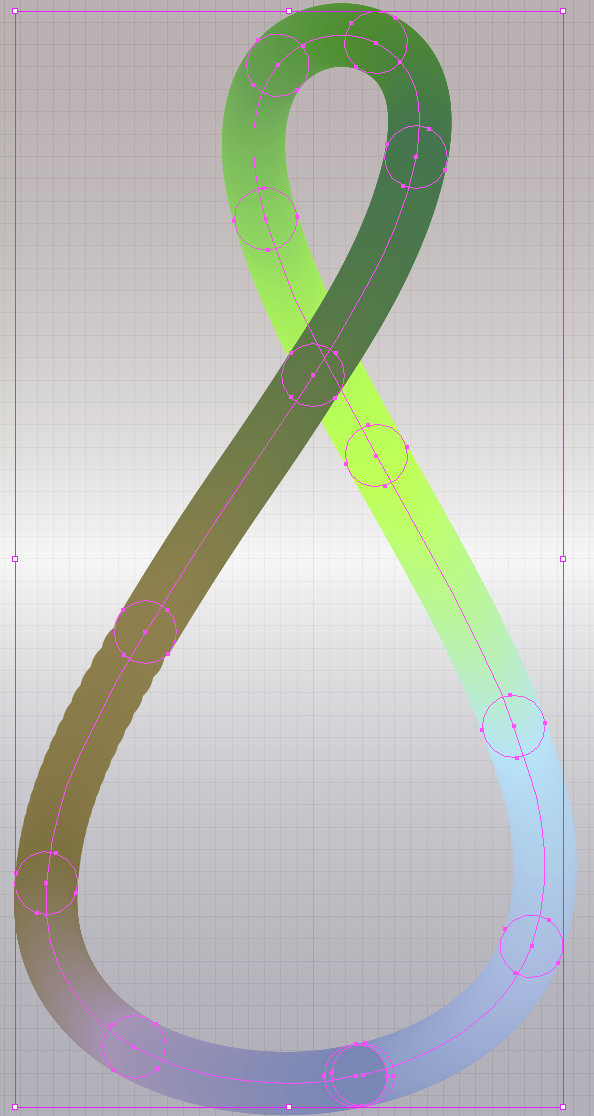
The anchors occur at/ coincident with the center of the circles. Each circle (placed at the first of the month) has its own color. There is also a color circle at the end of December and the end of the path. The path is not closed and has a small gap between December 31 and January 1.
Copy link to clipboard
Copied
Try and adjust the handles of your spine path.
A lot of surprising things happen with blends. So there's trial and error involved and someimes it doesn't work at all. You could still work with a mask that hides the error.
Copy link to clipboard
Copied
Thank you Monica for replies and for the ideas. I'll probably go the mask route as a work around.
Jiggling the handles didn't do much in alleviating October's scallop.
Copy link to clipboard
Copied
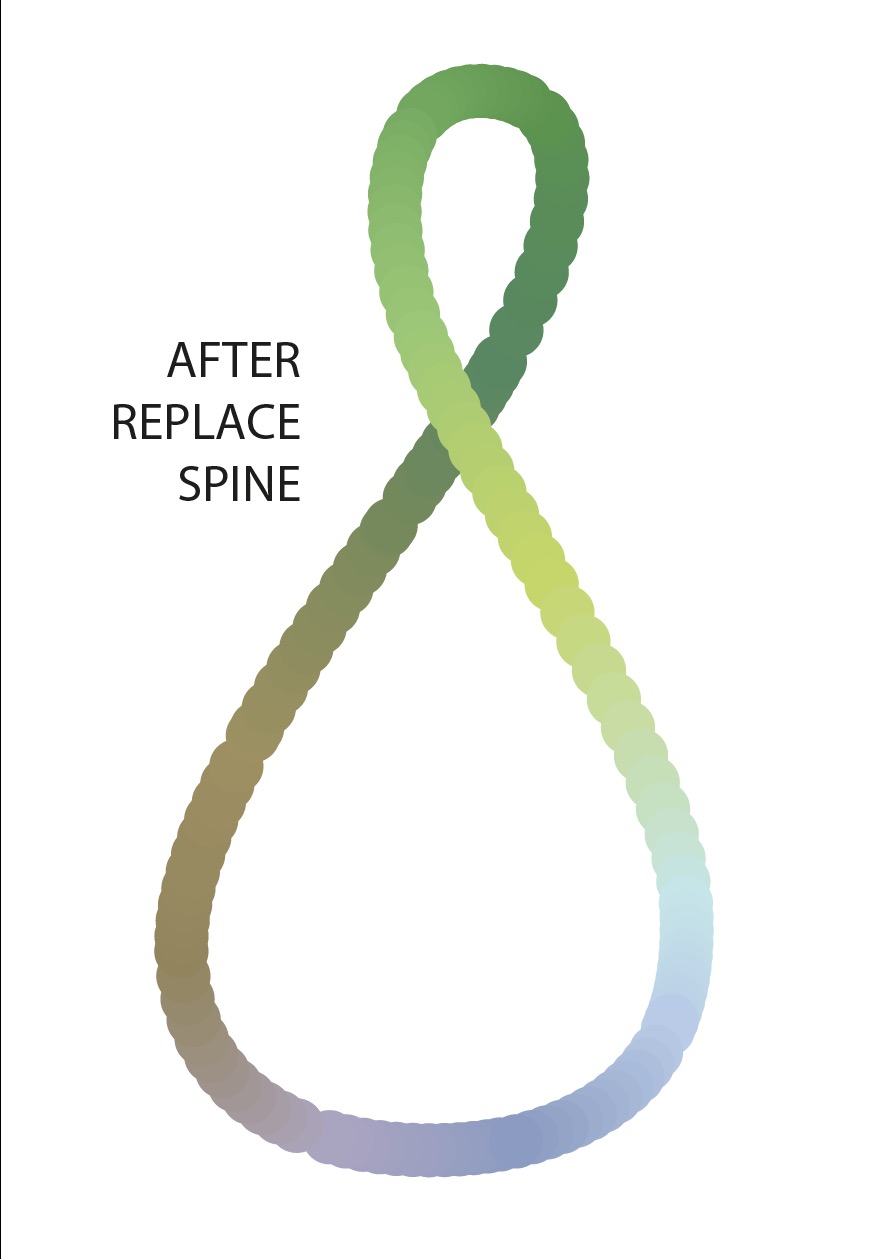
I would say its a silly bug.
I recreated your first Spline (red) and Blend above and then "replaced the spline"... with similar if not worse odd artifacts.
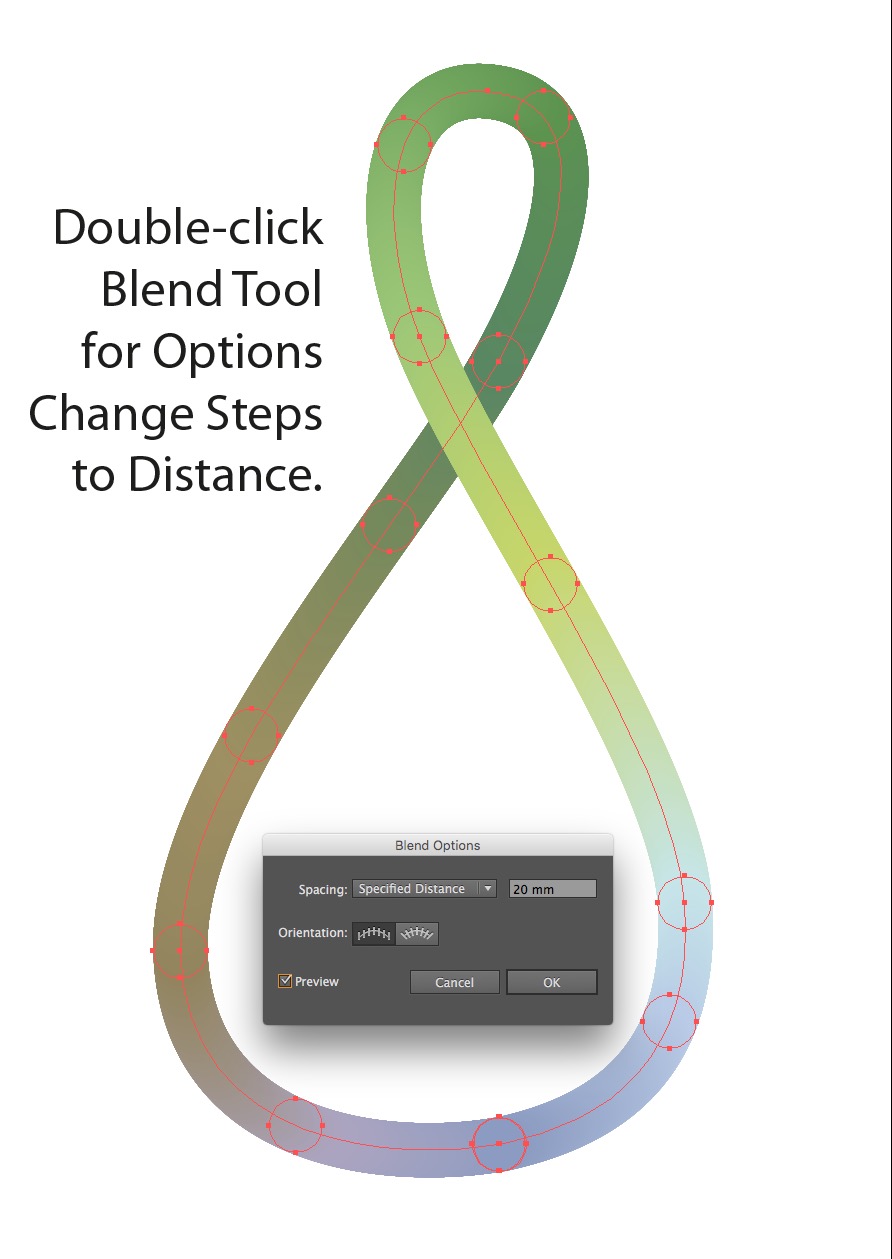
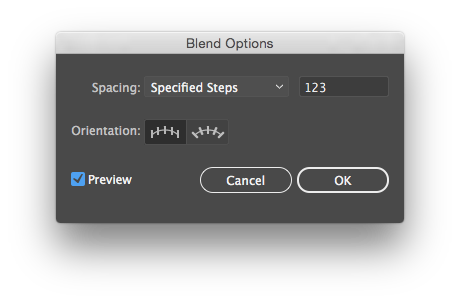
To alleviate the artifacts/distance discrepancies, double-click the Blend Tool or choose from the menu Object > Blend > Blend Options and then change the step pull down menu to "Specified Distance".... where at least on my side another bug is apparent: changing the distance does absolutely nothing (in my example 1mm, 20mm, or 100mm didn't change a thing).
But hey... we got rid of the odd stair steps... so Mission Accomplished
Copy link to clipboard
Copied
Thank you!
Changing the number of (radially oriented) steps also proved successful in this illustration of the analemma.
Copy link to clipboard
Copied
How many Steps do you have?
Object >> Blend >> Blend Options
Change to specified and increase the number.
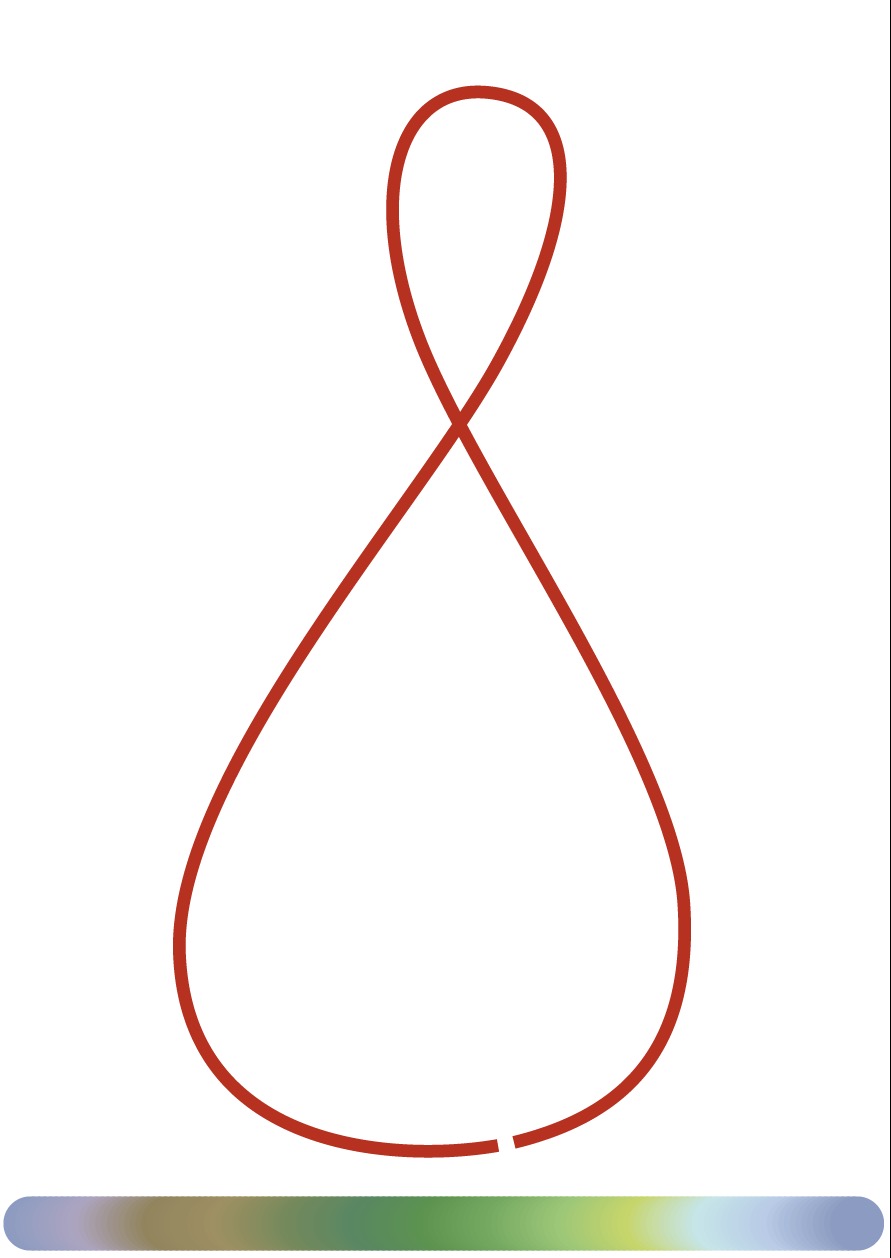
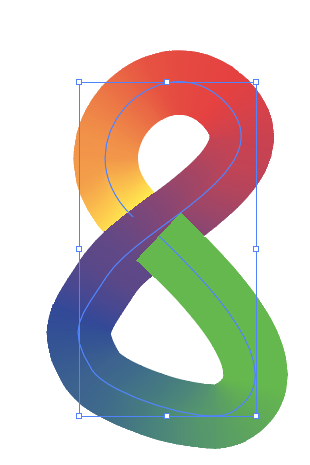
This post is quite old you can now use radiant long a stroke. Just do not use gradient along a stroke for a (figure 8, pretzelz, knot or similar) as you will have problem such as:

Find more inspiration, events, and resources on the new Adobe Community
Explore Now
 AdChoices