- Home
- Illustrator
- Discussions
- How can I get the Bevel & Emboss effect for text i...
- How can I get the Bevel & Emboss effect for text i...
How can I get the Bevel & Emboss effect for text in Illustrator?
Copy link to clipboard
Copied
Hey Guys,
Is there a way to give Bevel & Emboss effect to text in Illustrator, the same way like in Photoshop ???
Explore related tutorials & articles
Copy link to clipboard
Copied
Effect --> 3D --> Extrude&Bevel. Set the view to Front and choose the More Options.... Define a bevel shape add more lights when needed to the little sphere, define a custom shading color. It's not the cleanest solution, though, as it will produce objects overlapping each otehr in the same place. A better way would be to duplicate the source, use Offset Paths and blends between inner and outer contour.
Mylenium

Copy link to clipboard
Copied
Unfortunately that won't work on text objects (as asked) because they can't be offset.
Neither 3d Extrude & Bevel solves the problem. The effect adds bevel to the extruded surfaces only, not the front surface.
I can't find a way to add Bevel effect on text like in PhotoShop.
Copy link to clipboard
Copied
Not sure what you mean by "they can't be offset".
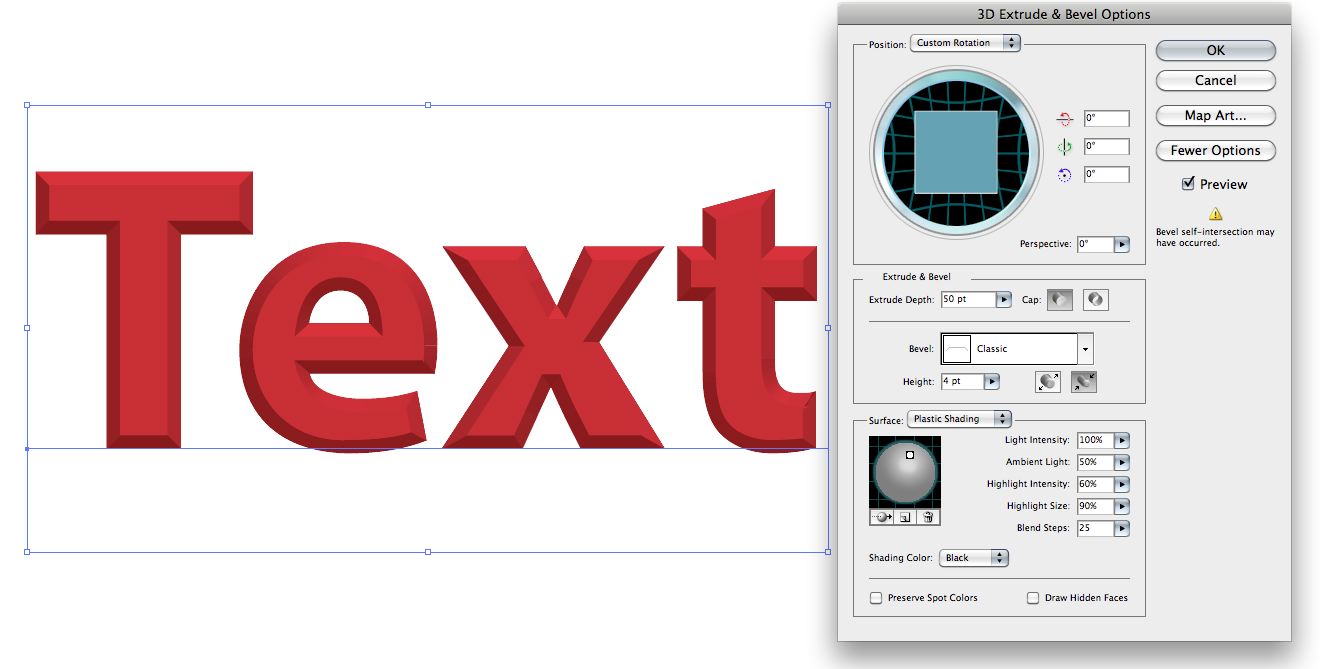
The 3D effect works great here....

Copy link to clipboard
Copied
Sorry for not explaining what i actually had meant... (and for my English as well)
I was wondering how to achieve Photoshop-like looking of smooth bevel.
Rounded & Tall-round Bevel shapes in AI's Bevel & Emboss effect do not look as smooth as can be achieved in Photoshop, neither with diffuse nor plastic shading... And even with the maximum of 256 blend steps.
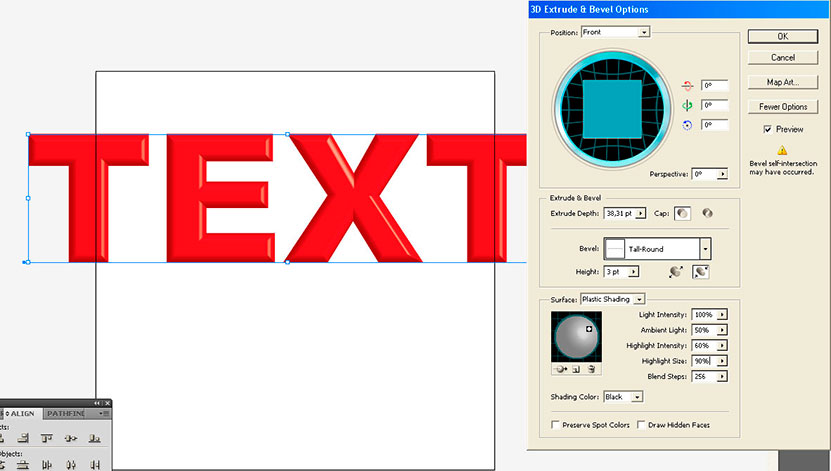
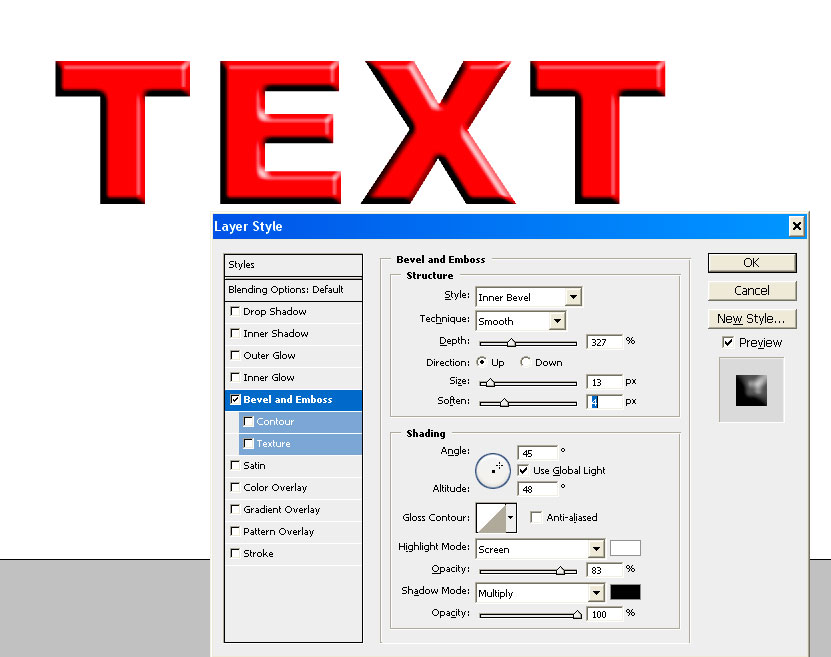
Blends of the offset paths do look much smoother, but "Offset path" can only be applied on paths, not text.
Copy link to clipboard
Copied
You can apply Effect>Path>Offset Path and blend that.
Peter


Copy link to clipboard
Copied
Thanks for help.
Since i first read this thread i have been sure that the question was How to make a Photoshop-like Bevel on text, meaning that Type object would still remain Type object after applying the bevel.
At least that is the question I have been looking for the answer to.
When I apply Effect>Path>Offset Path on text, that shows only the offset path without the original text, but it is still a single Type object.
And that's not enough to make blend.
To make blend i need at least two objects.
I found two ways to do that:
1. I Expand the Appearance of the text and it would become a group of compound paths, that represent both original text and the offset one and that can be then blended between, but they are no longer editable as text after expanding the Appearance.
2. The second way is to duplicate the text object before offsetting it's path and put the copy above the original. Then Apply Effect>Path>Offset Path on the topmost text, change its color and then blend both types. This way partially solves the problem, because as a result I have a Blend of two Types, which are separately editable.
Copy link to clipboard
Copied
Your method 2. was what I meant. I'm sorry, I was interrupted and did not make it a complete answer. I'm glad you figured it out.
Peter
Copy link to clipboard
Copied
All of my options under Effects are greyed out. I need to add a bevel effect to my font.
Copy link to clipboard
Copied
Hey, can you tell me why do my shapes pixelate after applying the same effect? ![]()
Here have a look![]()
Copy link to clipboard
Copied
Do you have an Intel graphic card? With the zoom in/out should be back ok, anyway, that weird "pixelating" doesn´t come out on png or jpeg file.
Copy link to clipboard
Copied
literally saved my life! Thank you
Copy link to clipboard
Copied
thanks!!!!! ![]()
Copy link to clipboard
Copied
Hi ko4keen ,
Can you tell me, how to design this images ( LEAGUE AND 1963). i will re-grateful to you.
regards
Copy link to clipboard
Copied
Its the envelope feature, there are tuts out there for this exact same design style
Copy link to clipboard
Copied
I'm not sure if you can get the exact same affect that you are looking for, but when I want to do bevel/embossing/cutout text styling while maintaining text editablitility, I apply transformations to the textblock object and store those transformations as a style.
So, for embossing, etc, I select the textblock with the object point (black arrow) and under the Appearance tab, I duplicate the main text's fill property, then change the color to white, the blend method to screen and opacity to 40%. I apply the offsetPath transform to it and offest the path by 2px. Finally I use the "tranform" transformation filter to translate the new fill -2px vertically -1px horixontally (this gives the outerbevel-highlight appearance when positioned behind the original fill in your appearance panel. Finally, I do the same thing in reverse with the initial fill: Color:black,opacity:darken 40%, FX: offsetPath +2px, transform:y:2px, x:1px. This gives the lower shadown outerbevel.
Here is a sample of this method in Illustrator in comparison to the bevel layer style in Phtooshop.
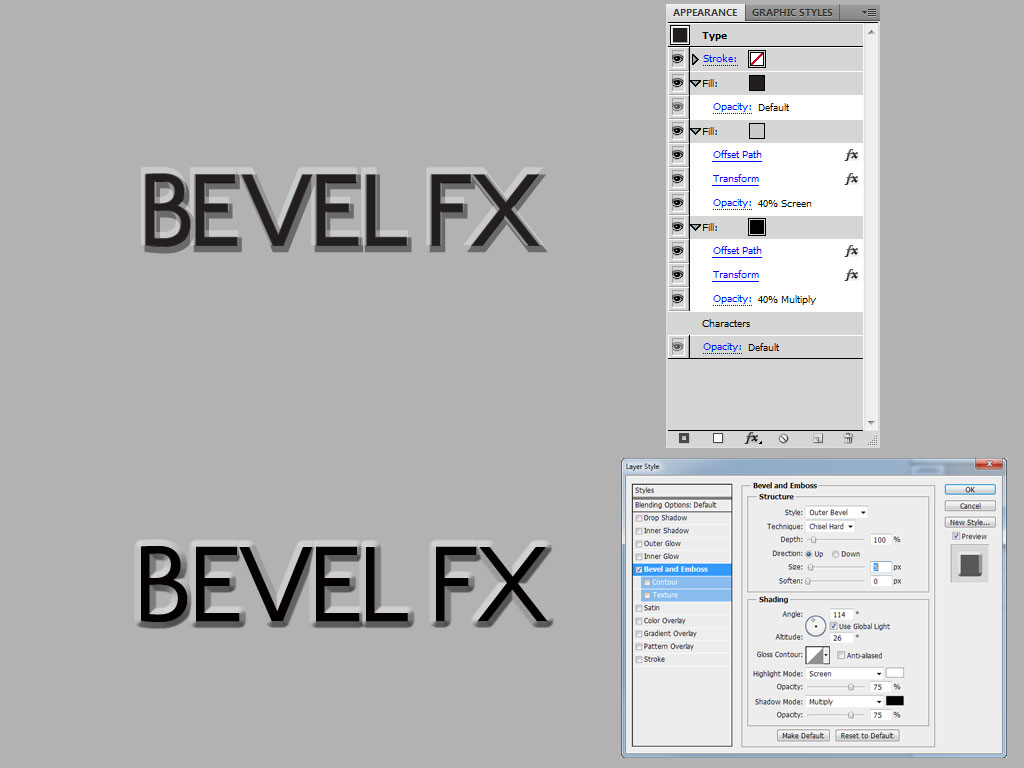
Photoshop is clearly better, but in Illustrator, this method still looks pretty good. It at least looks good enough to get your type set the way you want it before converting to parths and tweaking your final image.
Don't forget, once you get your style setup in appearance, you need to create a new graphic style and then you can easily apply it to any text object.
Also, play with adding svgblur transformations to the two fx layers for smoother beveling.
Not sure if this answers your question or if this helps or not.
Best wishes,
Jase
Copy link to clipboard
Copied
Several years back, I wrote up this technique to create embossed text in Illustrator: http://rwillustrator.blogspot.com/2008/07/technique-emboss-text-effect.html
![]() Mordy
Mordy
Copy link to clipboard
Copied
I love this blog and your book thank you for sharing so much knowledge. Do you know anything about the error codes that happen with Ill 5?

Copy link to clipboard
Copied
Respect for your effort on this, but it is this kind of thing that gets by back up about Illstr. It is far to over-complicated, even the drop-shadow in CS6 is twice the job as in PShop, and you just don't get the options/flexibility.
Copy link to clipboard
Copied
Del_Boy I have also always felt like it was a pain to create shadows in Illustrator, of course Photoshop is easier but then I don't have the versatility of vector art, Astute Graphics a British company has developed a whole collection of tools for Illustrator that make special effects easy, A plugin called Stylism for drop shadows, its just one click and then its easy to modify your shadow. Another feature I love is the Phantasm plugin which allows you to modify color either by individual element, layer or the entire image just as you can in Illustrator. I love their plugins.

Copy link to clipboard
Copied
The first thing that comes to mind is to apply the 3D Extrude & Bevel effect to create a bevel on the editable text. Type the text, select it, then go to Effect > 3D > Extrude & Bevel…. In the dialog box, select the Front for Position preset, Classic Bevel, set the height and tick Preview option.
Now you can click on More Options button, to gain access to the management of light sources.
The effect has a lot of options, but, unfortunately, this way to create a bevel effect is not ideal. We can get a number of artifacts that are not editable, as well as self-intersections of bevels and step color transitions.
The only thing that we can fix is to make smooth transitions of color, increasing the amount of Blend Steps, although such action will increase the file size in several times.
Artifacts will be stronger, the more complex the font letter shapes are. Therefore, this method is more or less applicable for simple sans-serif fonts. Besides that we can only do one kind of bevel. For example, you will not be able to achieve the rounded edge of the letters using the Extrude & Bevel effect.
Create Emboss effect using the Appearance Panel
The Appearance panel is undoubtedly one of the most powerful of Adobe Illustrator tools. And you will now see why it is like that.
Emboss effects
Type the text that we will work with.
Disable the fill in the Tools panel and open the Appearance panel (Window > Appearance).
Create new fill by pressing the corresponding button in the Appearance panel.
Replace black color with gray and apply the Screen blending mode to this fill.
Apply the Gaussian Blur effect to the fill (Effect > Blur > Gaussian Blur…).
Duplicate the fill.
Replace the color of the top fill with a darker shade of the base color and apply the Multiply blending mode to this fill.
Keeping the top fill selected, go to Effect > Distort & Transform > Transform… and set the horizontal and vertical Move value.
Add a new fill which color matches the color of the background.
Select this fill, then go to Effect > Distort & Transform > Transform … and set the horizontal and vertical Move values that are half than in the previous Transform effect.
The Emboss text effect is ready. This method works best with rounded fonts.
Hope the above helps you.
Dustin
Copy link to clipboard
Copied
HI dustinmitchell ,
 Can you tell me, how to design this images ( LEAGUE AND 1963). i will re-grateful to you.
regards
mahabub
Copy link to clipboard
Copied
Hi @mahabub14
Please create a new thread with your question.
Please tell us what you have already tried and what is your experience in Illustrator.
This thread is 8 years old. The people you are tagging have probably left the forum and won't answer anymore.
Copy link to clipboard
Copied
ANTBODY KNOW HOW I CAN GET MT TEXT TOOL TO WORK
Copy link to clipboard
Copied
I dnt knw why i m getting this, even if i used the same number's
-
- 1
- 2


