- Home
- Illustrator
- Discussions
- Re: How do I make a diagonal lines fill?
- Re: How do I make a diagonal lines fill?
Copy link to clipboard
Copied
I want to fill a simple box with diagonal lines. How do I make a fill style with varying line width?
 1 Correct answer
ok. so what you want to do is create a pattern fill. i'll try my best to explain this in cs5 terms as patterns have changed since then.
first you need to create the lines. draw two vertical lines 1" tall andv 1" apart. select both lines and click Object > Blend > Make. after you've made the blend, click Object > Blend > Blend Options. check the "preview" checkbox in the lower left corner. click the flyout menu (i believe the default value is "smooth color"). select "specified steps" and enter dif
...Explore related tutorials & articles
Copy link to clipboard
Copied
in what way do you want the lines to vary?
are you looking for a seamless pattern fill? or do you just want an object to contain somewhat of a gradient of lines like this??:

Copy link to clipboard
Copied
Thanks William,
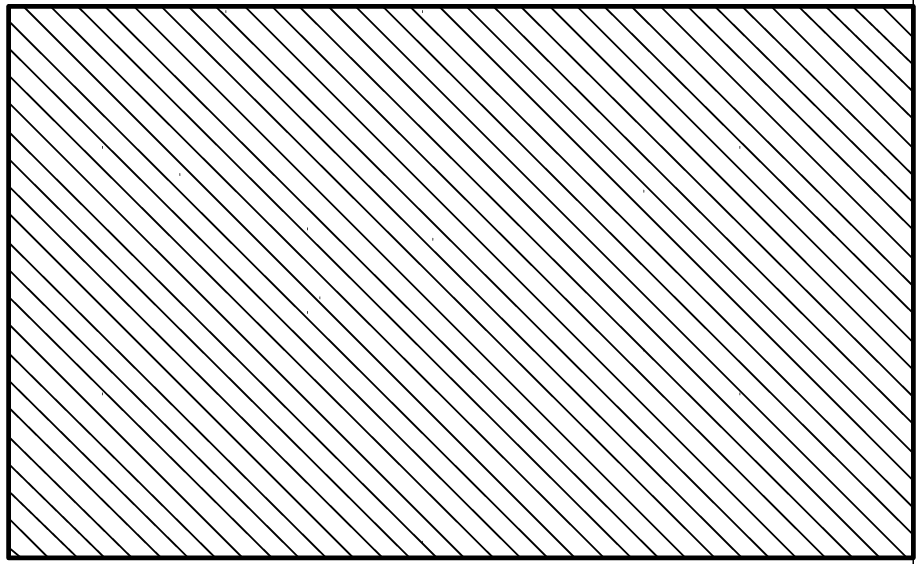
I want to fill boxes with simple lines and control the line stroke. They can be just like what you demo, but uniform. See below.
Copy link to clipboard
Copied
what version of illustrator are you using?
Copy link to clipboard
Copied
I am on CC.
JOSE PEREZ
Gibbons | Peck Marketing Communication
7 South Laurens St. Suite 200
Greenville, SC 29601
Phone: 864.232.0927 x110 • Fax: 864.232.2213
jperez@gibbonspeck.com • http://www.gibbonspeck.com
http://www.facebook.com/gibbonspeck
Copy link to clipboard
Copied
Sorry, on this particular project I am on CS5.
JOSE PEREZ
Gibbons | Peck Marketing Communication
7 South Laurens St. Suite 200
Greenville, SC 29601
Phone: 864.232.0927 x110 • Fax: 864.232.2213
jperez@gibbonspeck.com • http://www.gibbonspeck.com
http://www.facebook.com/gibbonspeck
Copy link to clipboard
Copied
do you need the diagonal lines just for one box? or do you want to add the same lines to many different boxes?
Copy link to clipboard
Copied
I need to fill many different boxes.
Thanks.
JOSE PEREZ
Gibbons | Peck Marketing Communication
7 South Laurens St. Suite 200
Greenville, SC 29601
Phone: 864.232.0927 x110 • Fax: 864.232.2213
jperez@gibbonspeck.com • http://www.gibbonspeck.com
http://www.facebook.com/gibbonspeck
Copy link to clipboard
Copied
ok. so what you want to do is create a pattern fill. i'll try my best to explain this in cs5 terms as patterns have changed since then.
first you need to create the lines. draw two vertical lines 1" tall andv 1" apart. select both lines and click Object > Blend > Make. after you've made the blend, click Object > Blend > Blend Options. check the "preview" checkbox in the lower left corner. click the flyout menu (i believe the default value is "smooth color"). select "specified steps" and enter different values in the dialog until the lines look the appropriate distance from one another. click ok when finished.
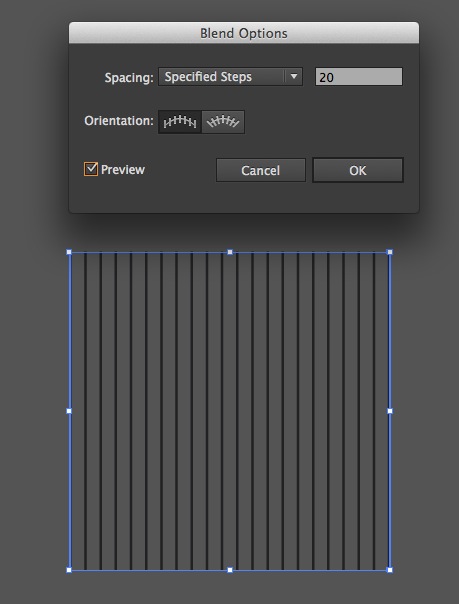
select the blend object and click Object > Expand. In the dialog make sure that only the "Object" tick box is selected. Click Expand.
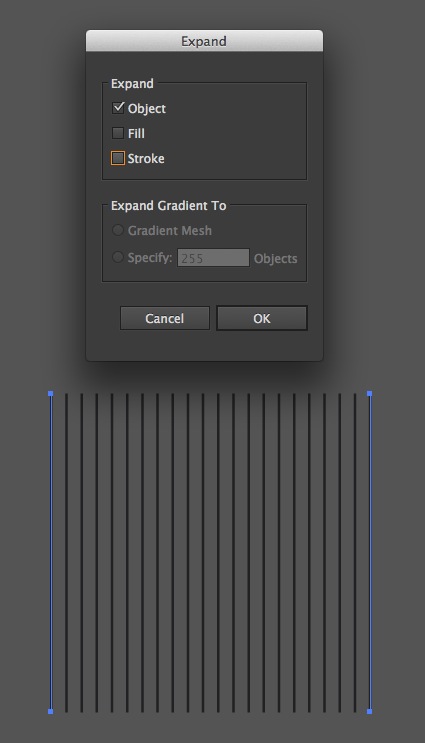
at this point you have a group of vertical lines selected. rotate the group by 45* draw a box around the outside edges of the diagonal lines.
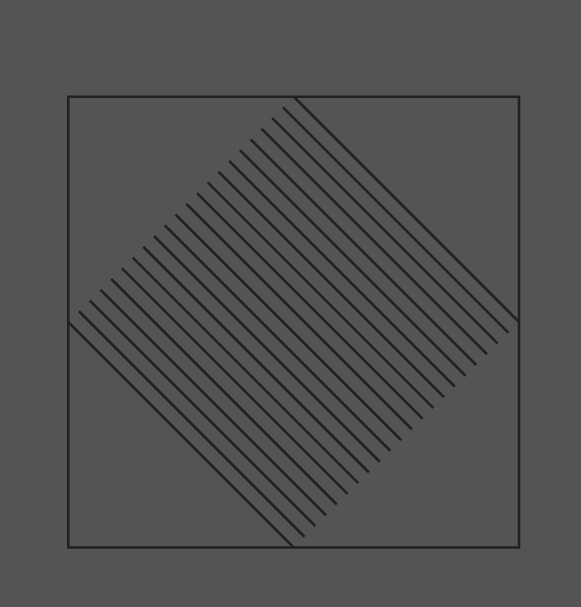
now scale that down so that the entire box is inside of the diagonal lines.
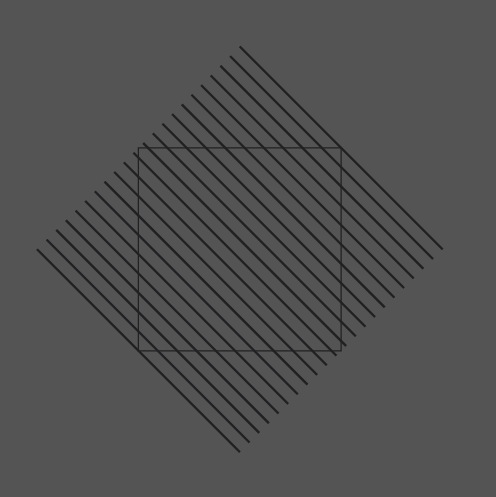
select both objects and click Object > Clipping Mask > Make
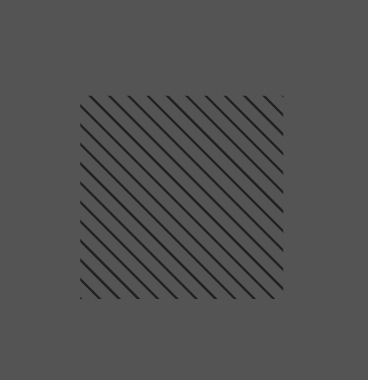
duplicate this object and keep it off to the side (because if you need to adjust stroke width in the future, you'll need this). now select the original one and go to your Pathfinder palette and click "Crop". this gets rid of the clipping mask so you're just left with the expanded diagonal lines.
now drag the expanded/cropped object into your swatches panel and voila. make sure to name the new pattern fill so you can identify it (you don't want to have several different patterns called "New Pattern Swatch 1" and "New Pattern Swatch 2" etc etc.)
if you need to adjust the stroke width for a different pattern, refer to the duplicate you made before and isolate the strokes to adjust the stroke width and repeat the above steps to crop.
Copy link to clipboard
Copied
You would do better to make the pattern with vertical or horizontal lines. Then rotate the pattern fill with the Rotate tool.
Copy link to clipboard
Copied
perhaps we have different workflows.. but i avoid rotating/scaling instances of a pattern like the plague.
if i my ask, why do you see that as a better solution? how might it be easier/cleaner/better?
Copy link to clipboard
Copied
There are a multitude of reasons:
- It makes ALL your patterns much more versitile.
- One pattern can be rotated to any degree (instead of creating a unique pattern for each variation
- It saves time
- It's much easier
- I can change my mind and try different options much faster
- The program is designed to do it
If I might ask, why do you avoid it like the plague?
Copy link to clipboard
Copied
Because in my workflow we build a pattern right the first time and rely on that pattern being consistent every time thereafter. If you alter a pattern fill by scaling, moving or rotating the object that contains the pattern, the only way to reproduce the appearance of that pattern in a separate object is to replicate those transformations exactly. Pattern transformations are local. I need global solutions.
the instructions I gave above were only because the OP was using cs5. I use cc which allows for artwork to extend outside the bounds of the pattern tile and overlap which negates the need for a clipping mask and the pattern editor lets me make global changes (and save a new copy if I want). In production applications it just makes more sense.
but again.. Obviously our workflows are different.
Copy link to clipboard
Copied
It is easy to pick up the pattern transformations with the Eyedropper tool. So it's easy to reproduce them.
Copy link to clipboard
Copied
in my experience a local change cannot be picked up by the eyedropper because the eyedropper simply applies the global instance. perhaps we have some settings differences. anyway, i refer back to my answer about how my workflow demands contiunity. if any of my staff is changing a pattern because they don't like the way it looks, they are not properly doing their job.
so again.. i go back to what i've said several times. different workflows demand different procedures. in my environment, we could be producing 1000 pieces and every one needs to be the same pattern. so for me, making changes globally makes more sense.
Copy link to clipboard
Copied
The default settings for the Eyedropper will pick up the pattern transformations.
I can also imagine workflows with restrictions to what can and cannot be done.
Copy link to clipboard
Copied
William's method is very logical and the way we all do this at first.
Have to support Steve Fairbairns excellent suggestion to rotate a pattern of straight lines instead. Doubleclick the rotate tool and turn OFF objects, now only the pattern will rotate. (Set this back to the default, to not drive yourself crazy later).
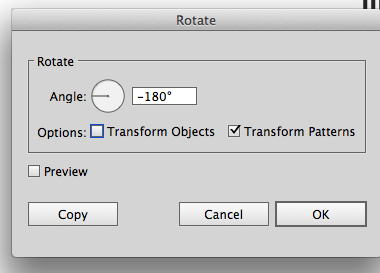
Reason why is there is too much room for error, antialiasing, stroke caps, and other reasons can leave a seam.

When you do lower resolution web work you will see this more especially on more complex patterns than straight lines.
Copy link to clipboard
Copied
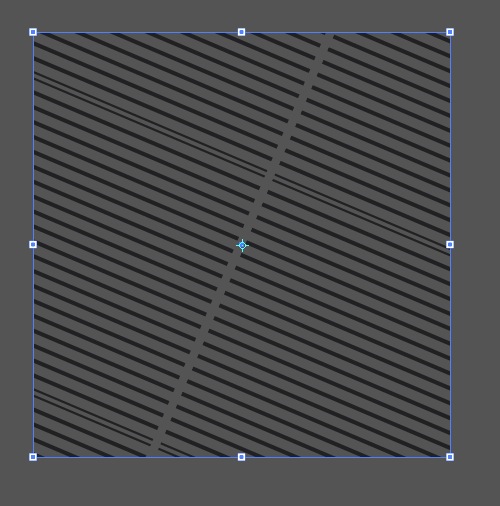
there is exactly as much room for error when making straight lines... if you carelessly make your clipping mask.. it doesn't matter what angle the lines are at, you're going to end up with a crappy pattern. i see exactly what you did in your example with the notches missing from the pattern.. you made your clipping mask around 1 line from endpoint to endpoint, which was not how i instructed OP to do it. if my instructions were followed, that wouldn't be a problem. so if your argument is that someone shouldn't use my method because they could make a mistake... then i can't accept it as a reason that one method is better than another. here's a pattern i made with your method.. but i did it poorly.. surely that's not proof that your method is faulty..?
Copy link to clipboard
Copied
I wanna know how you created the lines... somewhat of a gradient of lines
Copy link to clipboard
Copied
If you want to know how to create diagonal line patterns the hard way, see Teri Petit's document
It also shows how to do it the easy way (like rcraighead also suggested) by rotating the pattern fill.
Copy link to clipboard
Copied
Maybe you meen the lines going from thin to thick?
Object > Blend > Make between a thin and a thick line
Copy link to clipboard
Copied
I've been looking everywhere for how to make this gradient of lines! I'd be very grateful if you could let me know.
Copy link to clipboard
Copied
Can you perhaps embed a photo in your post of what you want to create?
Copy link to clipboard
Copied
Regardless of what version, simply fill with a standard line pattern and rotate the pattern within the object. You can either use the "~" key to affect only the fill while using any of the modifier tools (rotate, scale, shear or reflect) or Option-Click with one of the tools, type in an angle, etc., and uncheck "Object". Once you have the angle needed, save it as a style and reuse on any object.
If you want to maintain stroke attributes when assigning the fill style, build the style without a stroke attribute then hold "Option" when assigning the style. AI will layer the new style BELOW any current object appearances.
Copy link to clipboard
Copied
Thanks everyone, I have my task set out for this morning.
I have CC but the users that will be accessing this rendering is on CS5 therefore I have to generate it on CS5 first.


