Copy link to clipboard
Copied
Hello.
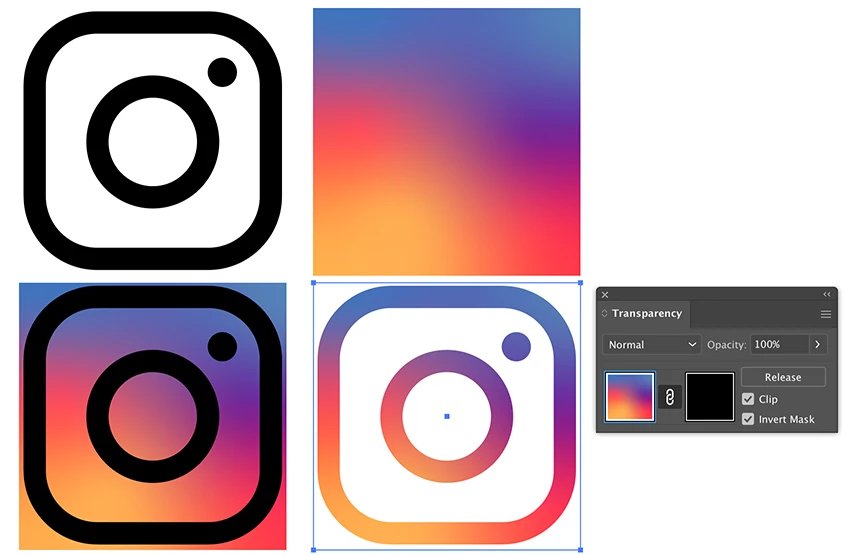
I created an icon with Adobe Illustrator that is similar to the instagram icon that is shown on the left side.
What would be the easiest way to transform that icon to the outline version that is shown on the right side?
In other words, how to take the background color from left and put it as the actual color of the icon on the right side?
Thanks!
 
I would draw the parts in black, create the gradient and use the Mask option in the Transparency panel.
Copy link to clipboard
Copied
The easiest way is just to redraw this simple icon with strokes instead of filled shapes.
Copy link to clipboard
Copied
Thanks for your comment.
I can redraw the small white parts again, but how do I fill them all with that background gradient on the same position?
If you can point me with a tutorial link or the actual steps for doing each part it would be very helpful!
Thanks.
Copy link to clipboard
Copied
I would draw the parts in black, create the gradient and use the Mask option in the Transparency panel.
Copy link to clipboard
Copied
It did work.
Thanks a lot!
Copy link to clipboard
Copied
Good to hear that.
Copy link to clipboard
Copied
T,
If you have created the full icon with white stroked parts on a colour transition background, I believe you can select the white paths and scale up as desired with Scale Strokes & Effects unticked, then adjust the Stroke Weights if/as desired (you could increase it for the dot and make it the same for the outer and inner paths to make it correspond to the image on the right), then Ctrl/Cmd+8 to turn them into a Compounsd path, then also select the background and Ctrl/Cmd+7 to create a Clipping Mask.