
My method for converting a segmented CAD cutter guide to a solid layer with correct bleed
Having worked in repro and packaging design for many years, I used to create droplets and scripts to help speed up production workflows. I thought I'd share a very simple step by step method for converting a cutter guide provided by CAD from packaging manufacturers into a solid 3mm bleed shape.
Step 1
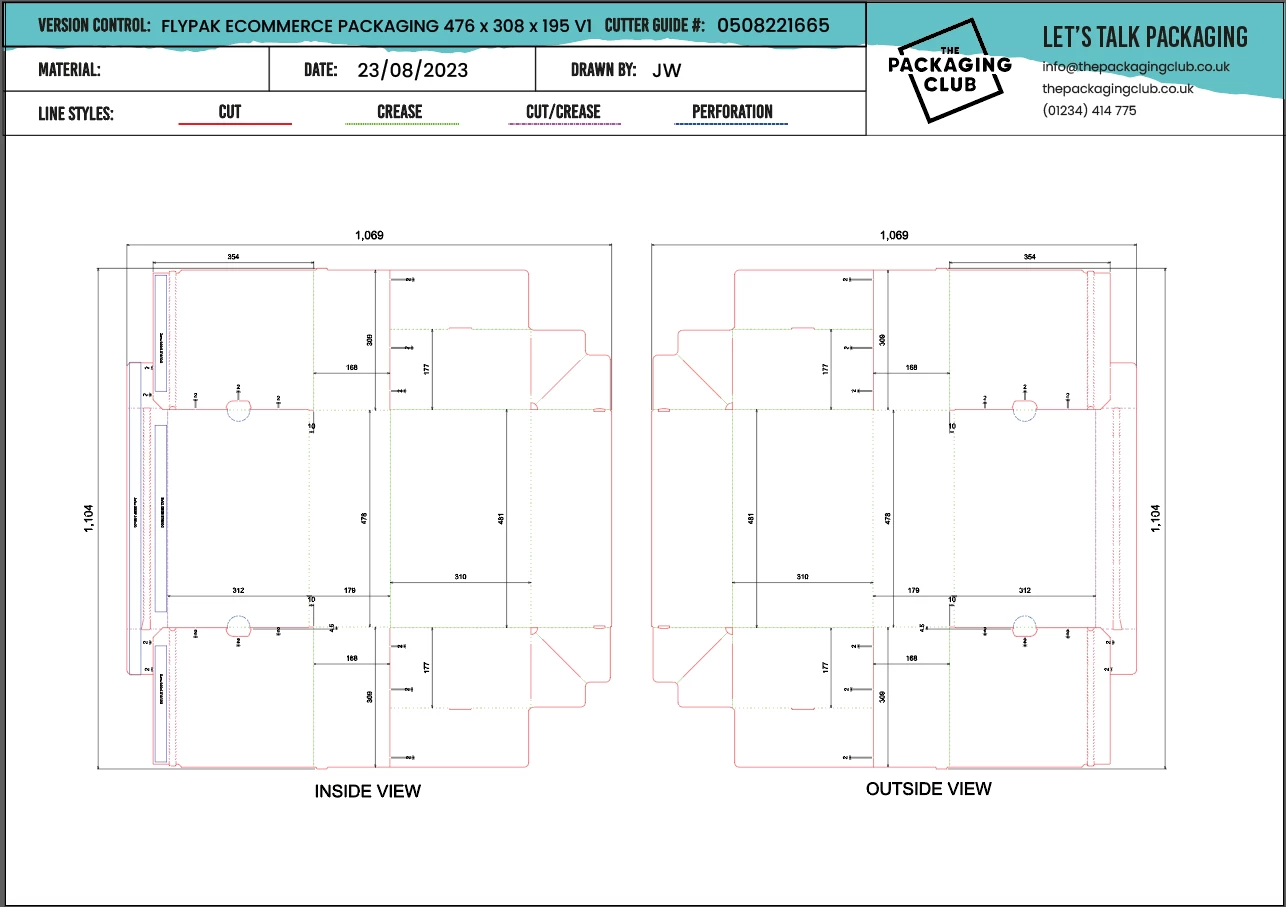
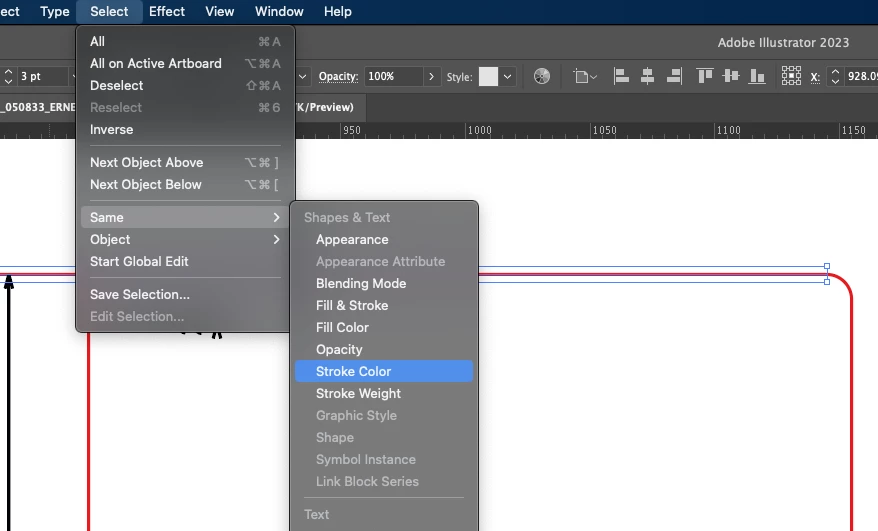
The supplied cutter guide usually comes with spot or unique colours to differentiate between which line is cut, crease, perforation, etc - you'll want to select the cut line - in this example it is coloured in a CMYK red.
Select the cut line (CAD programs usually create segmented cutters, not compound paths that you can select), now go to Select > Same > Stroke Colour to select the entire cut path.
Step 2
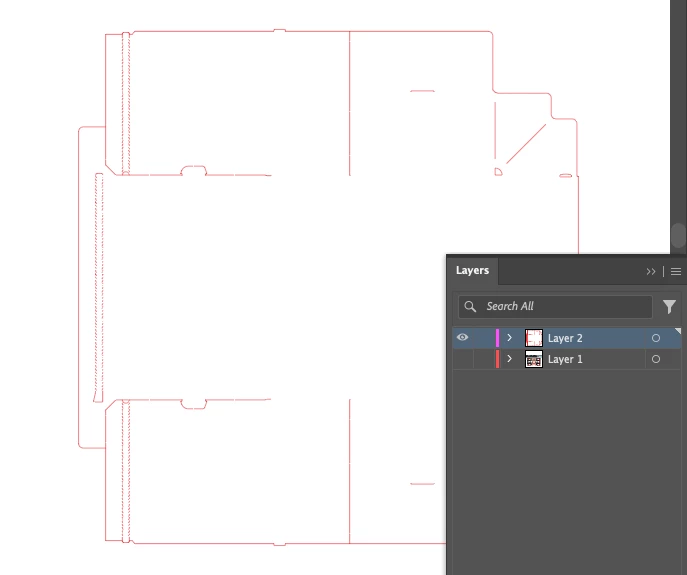
Once the cut line has been select, copy it CTRL/CMD + C, create a new layer in the layer menu, select that layer, then paste in place CMD/CTRL + SHIFT + V
Now you can hide the main cutter layer and you should be left with just the cut path outline on a single layer as per below.
Step 3
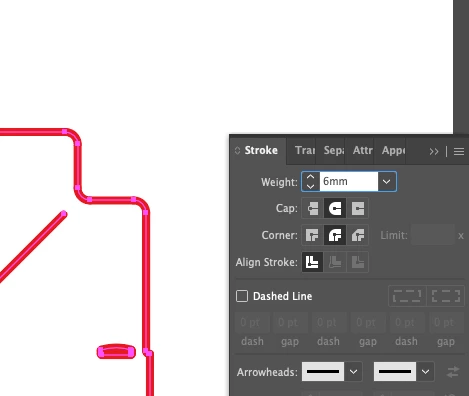
Next, select the isolated cutter, and go to Stroke > width 6mm, set the corners and ends to rounded.
What this does is give the cutter a 3mm bleed, and by rounding the corners and ends you eliminate any corner artifacts that may arise due to it being a segmented path.
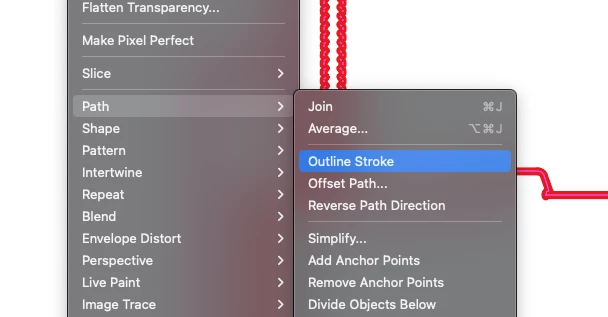
Step 4
With the cutter selected, go to Object > Path > Outline Stroke
Step 5
Then go to Pathfinder > click "Unite" (if you can't find it, go to Window > Pathfinder to activate the Pathfinder menu).
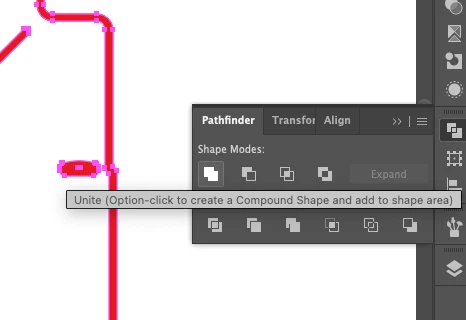
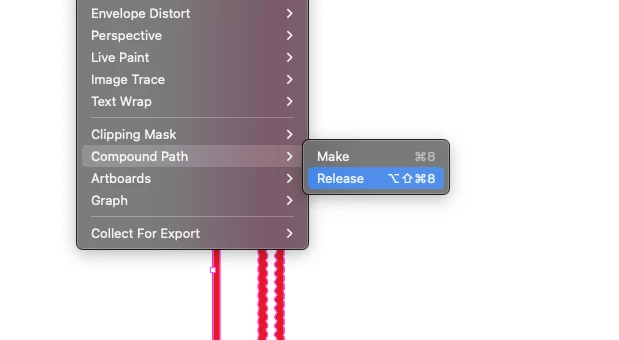
Step 6
Go to Object > Compound Path > Release
Step 7
Go back to Pathfinder > click "Unite" again, and you'll have a solid shape exactly with 3mm bleed outside of the cutter guide line center point.
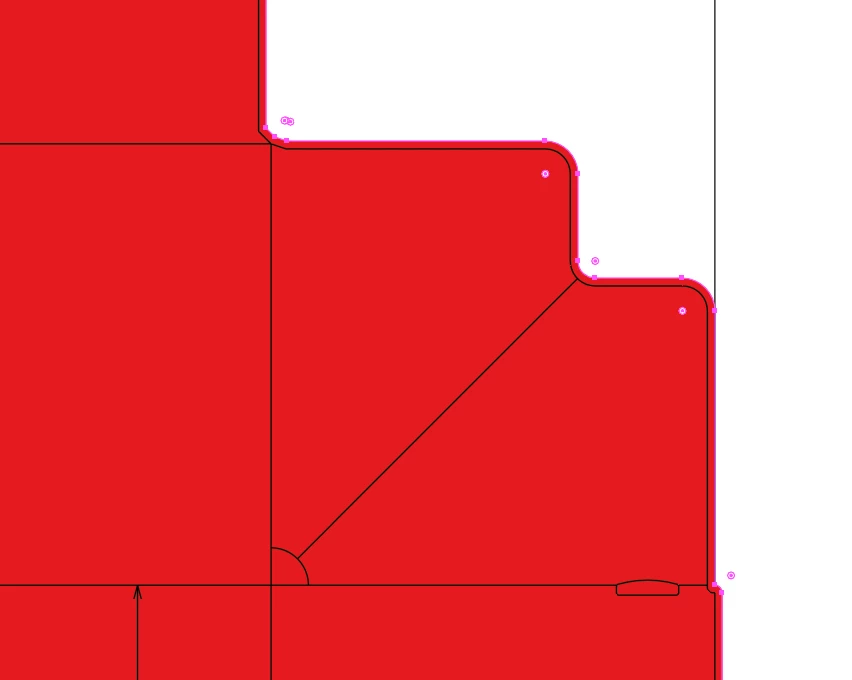
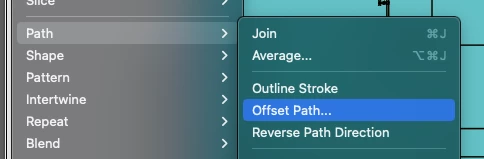
You can use this solid shape to create background patterns, clipping masks etc etc.To adjust the bleed you can simple go to Object > Path > Offset Path and set how many mm/inches you want to amend the bleed by.
Now you can use this to build out automations for converting masses of PDF cutter guides into workable masks with 3mm bleed, so long as you instruct the manufacturer supplying the guides to be consistent on spot colour titles and / or colour breakdown.
Another trick I like to use is to link directly to a PDF compatable AI file from photoshop visuals (via a linked smart object) so that whenever an artwork files is amended you can automatically update visuals by simply updating the link. If you'd like to see a guide on that let me know.
I hope you found this useful, or if you have an easier / quicker method please let me know 🙂