 Adobe Community
- Home
- Illustrator
- Discussions
- Re: Pattern brush to create segmented path in illu...
- Re: Pattern brush to create segmented path in illu...

Copy link to clipboard
Copied
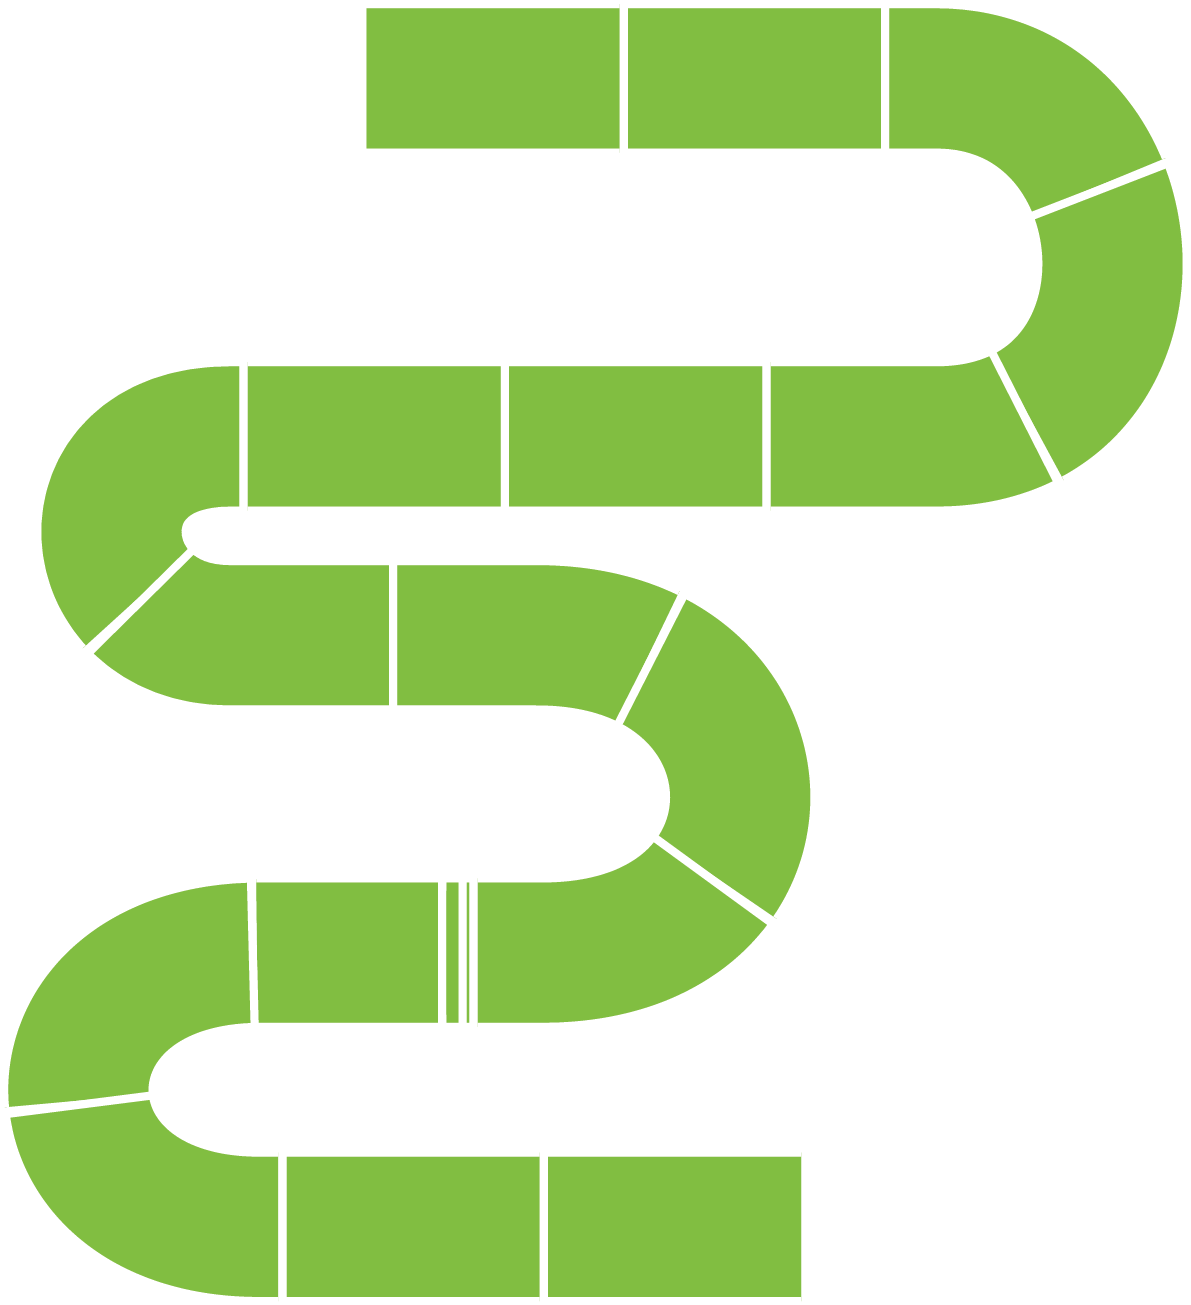
I am trying to create a windy path (kind of like the one attached), and was wondering what the easiest way to create this would be? I tried creating an illustrator pattern brush, but then all rectangles are the same colour and exactly the same length, and I want to be able to adjust the colour of each rectangle and be able to change the length as well. My attempt is the lime green path attached. Any thoughts?


 1 Correct answer

Explore related tutorials & articles
 14
Replies
14
14
Replies
14

Copy link to clipboard
Copied
Hi Choco,
Please check these tutorials.
How to work with brushes in Illustrator
Here is a link for similar artwork, here snakes are created for the game, similar steps you can use for path.
http://www.pixsilver.net/snakes-and-ladders-with-illustrators-pattern-brush/
Hope this helps !
Regards
Srishti

Copy link to clipboard
Copied
Fill your patterns with 50 black then

Then change you stroke color

your path needs to have all corners though.
I had the alignment working, but cannto get again and have to go back to work. Try adding a rectangle filled with none.

Copy link to clipboard
Copied
Adjusting the length freely will not work.
Apart from that: try a dashed stroke. And then apply multiple strokes to your path in different colors with different, but matching dashes settings.
Copy link to clipboard
Copied
Hi Monika (or anyone),
Align dashes to ends often does not appear to work on closed paths. Do you have any idea how to get this to work.

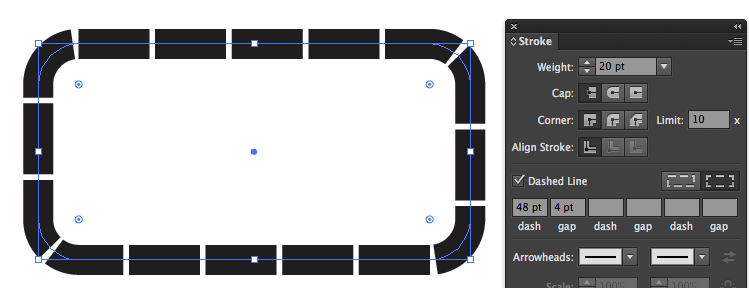
When I work on for example a rounded rectangle beer label design and want put dashes around the edge, I could really use this feature instead of manually creating. I get my design perfect, and then they change the label size a little so I have sot start all over.
Copy link to clipboard
Copied
Thank you Monika! I will try and see how this works. 

Copy link to clipboard
Copied
Monica's idea of using multiple Strokes is a great one.
You may also want to take a look at Stroke Styles.
Look under the Options menu of Stroke panel and choose Stroke Styles and in the dialog window that opens, press the New button and choose Dashed from the Type popup menu.
In the dialog window that opens:
- By clicking and dragging in the white area next to a Dash, you'll create a new Dash.
- You can move Dashes by clicking and dragging on them.
- You can delete Dashes by dragging them out of the window.
You can have up to five Dashes and Gaps with Stroke Styles. Two more than with "ordinary" Dashes. So this should give you more options to work with.
You'll find your custom Stroke Styles at the bottom of the Type popup menu in the Stroke panel.
You may want to take a look at my article in the current issue of InDesign Magazine titled "Super Strokes." Issue 98: https://indesignsecrets.com/issues
Copy link to clipboard
Copied
I'm going to try this and see if it works. Thank you!

Copy link to clipboard
Copied
This should work with minor adjustments. Too bad the "aligned" dash line approach does not with rounded corners.
Copy link to clipboard
Copied
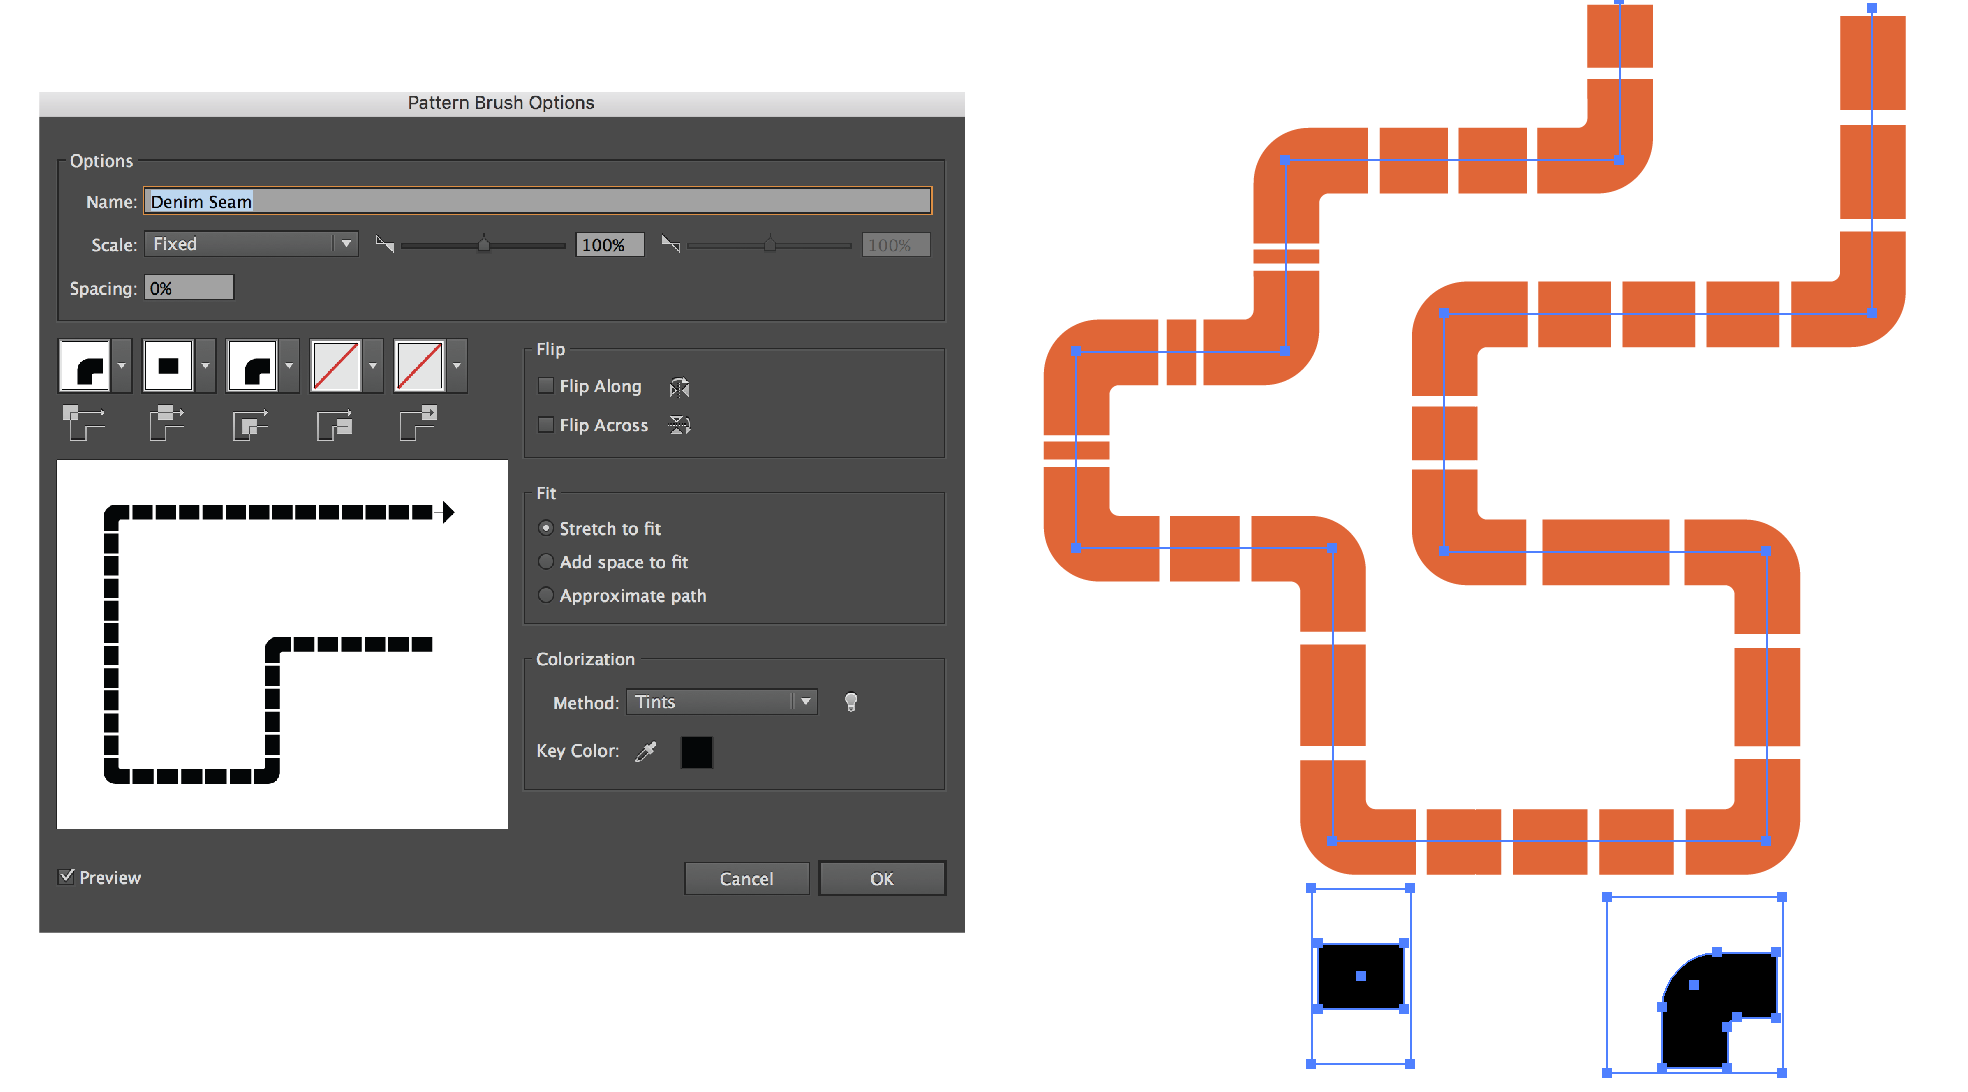
HI! This is the way I created my path as well, but I am not able to change the rectangle segments to different colours...is there a way to do that? Is there a way of making the brush elements into objects so I can modify each segment separately?
Copy link to clipboard
Copied
Is there a way of making the brush elements into objects so I can modify each segment separately?
You can expand the appearance and edit the colors any way you want. You can also set the Brush to "Tints & Shades" or "Hue Shift" and get some funky effects.

Copy link to clipboard
Copied
Amazing, thank you so much! I will play around with it and see what I can do. Thanks everyone for all your help!
Copy link to clipboard
Copied
In the interest of always one more way to do something...
Copy link to clipboard
Copied
Ooh very nice...that is definitely a different way of doing it. I was able to create the green path I had uploaded with a pattern brush, but it still doesn't let me change the colour of each segment.  Thank you for taking the time to upload this video!
Copy link to clipboard
Copied

 AdChoices