

- Home
- Illustrator
- Discussions
- Square brush with specific scatter pattern
- Square brush with specific scatter pattern

Copy link to clipboard
Copied
Hello all,
I've done quite a bit of looking around, but I couldn't find anything to even point me in the right direction.
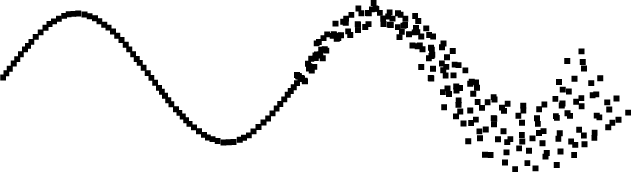
I want to do something like this:

More specifically I would like to trace a path with a square brush, but I would like to increase the scattering of the squares the farther right the path gets. How can I achieve this? I know I can randomize most of the properties of the scatter brush, but I haven't been able to gain more control over them.
On a side note: I've noticed that when I trace the path (which is a sine shape), the brush seems to ignore the smoothing of the path and rather follow point to point in a straight line. This behavior resulted in a more pointy shape. Is this normal? Did I miss a setting?
Thanks in advance for any pointers!


 1 Correct answer

You could use the square scatter brush you already created and apply it to two paths that come together on one end and then flare apart.

Then create a Blend.

Explore related tutorials & articles
 7
Replies
7
7
Replies
7
Copy link to clipboard
Copied
You could use the square scatter brush you already created and apply it to two paths that come together on one end and then flare apart.

Then create a Blend.

Copy link to clipboard
Copied
Hi Barbara.
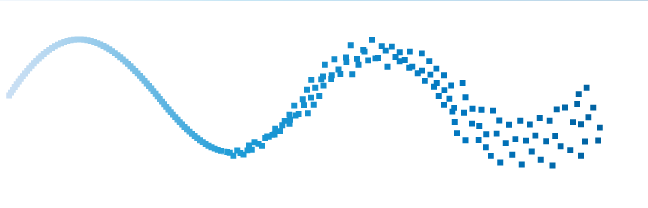
thanks for the hint. This gets close to what I want to achieve. Here's what I did with it:
A better description of what I would like to draw is: I would like my sine wave to start out neat and get "noisier" towards the end. What I don't like about the current version is that you can clearly see, where the noisy part starts. I would like this transition to be a gradual one and don't know how to achieve it this way. If I blend along the complete path, my square density is way too high at the beginning.
On top of it all, I would prefer if the scattering were only in the y-direction. Generally, it would be nice to have a bit more control over the behavior of the brushes.

Copy link to clipboard
Copied
Would you try Symbol instead of Scatter Brush? It might be more controlled
Copy link to clipboard
Copied
Nice. As you discovered, Illustrator doesn't have the level of control needed to take it further. You might need more individual paths.
It would be a bit tedious but once you get close to the look you want, you could expand the paths, then move the individual squares into place.
Symbols and the symbolism tools are another option.

Copy link to clipboard
Copied
Can you show a sketch (perhaps manually arranged) that shows what exactly you want to achieve?
It may then be easier to suggest other approaches.
Copy link to clipboard
Copied
It may look a bit like this:
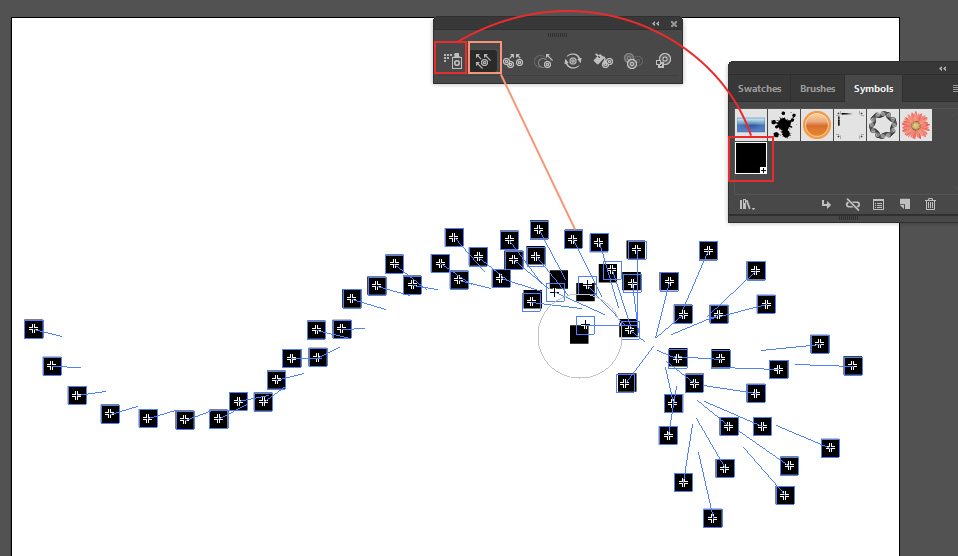
create a symbol, chose it and add to your artwork by Symbol Sprayer. Then move the instances by Symbol Shifter. You can adjust the original spray density and tool intensity like you need.
Copy link to clipboard
Copied
Hi Anna,
thank you for this suggestion. The Symbol Brush functionality is quite interesting. However, the Symbol sprayer doesn't give me the control I want. I played around with symbol brush and pattern brush. If I use the pattern brush on my path, I can't see to use the symbol shifter afterward. I think the best way going forward will be painting the path with a regular scatter brush- with no scatter at all- and move the squares individually.
As I mentioned before, when I do this, the brush doesn't seem to follow the path exactly. You can see this near the peaks in my next image. I had to add a few points to remedy this.

Ultimately I used the version from my earlier post and just corrected a few of the squares. After expansion I could even use it as a mask.
So thanks to everyone for your input.

 AdChoices