Participant
October 4, 2019
Answered

Text Tutorial Request

  • October 4, 2019
  • 4 replies
  • 862 views

Hello, Illustrator Professionals.  I need help creating a certain text style. 

I've searched Youtube high and low, and I'm unable to find a tutorial for Illustrator like this one below.


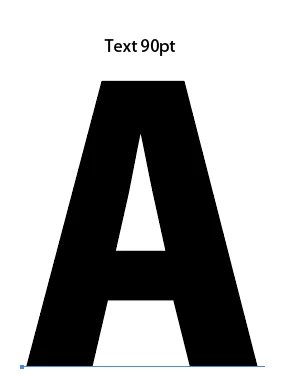
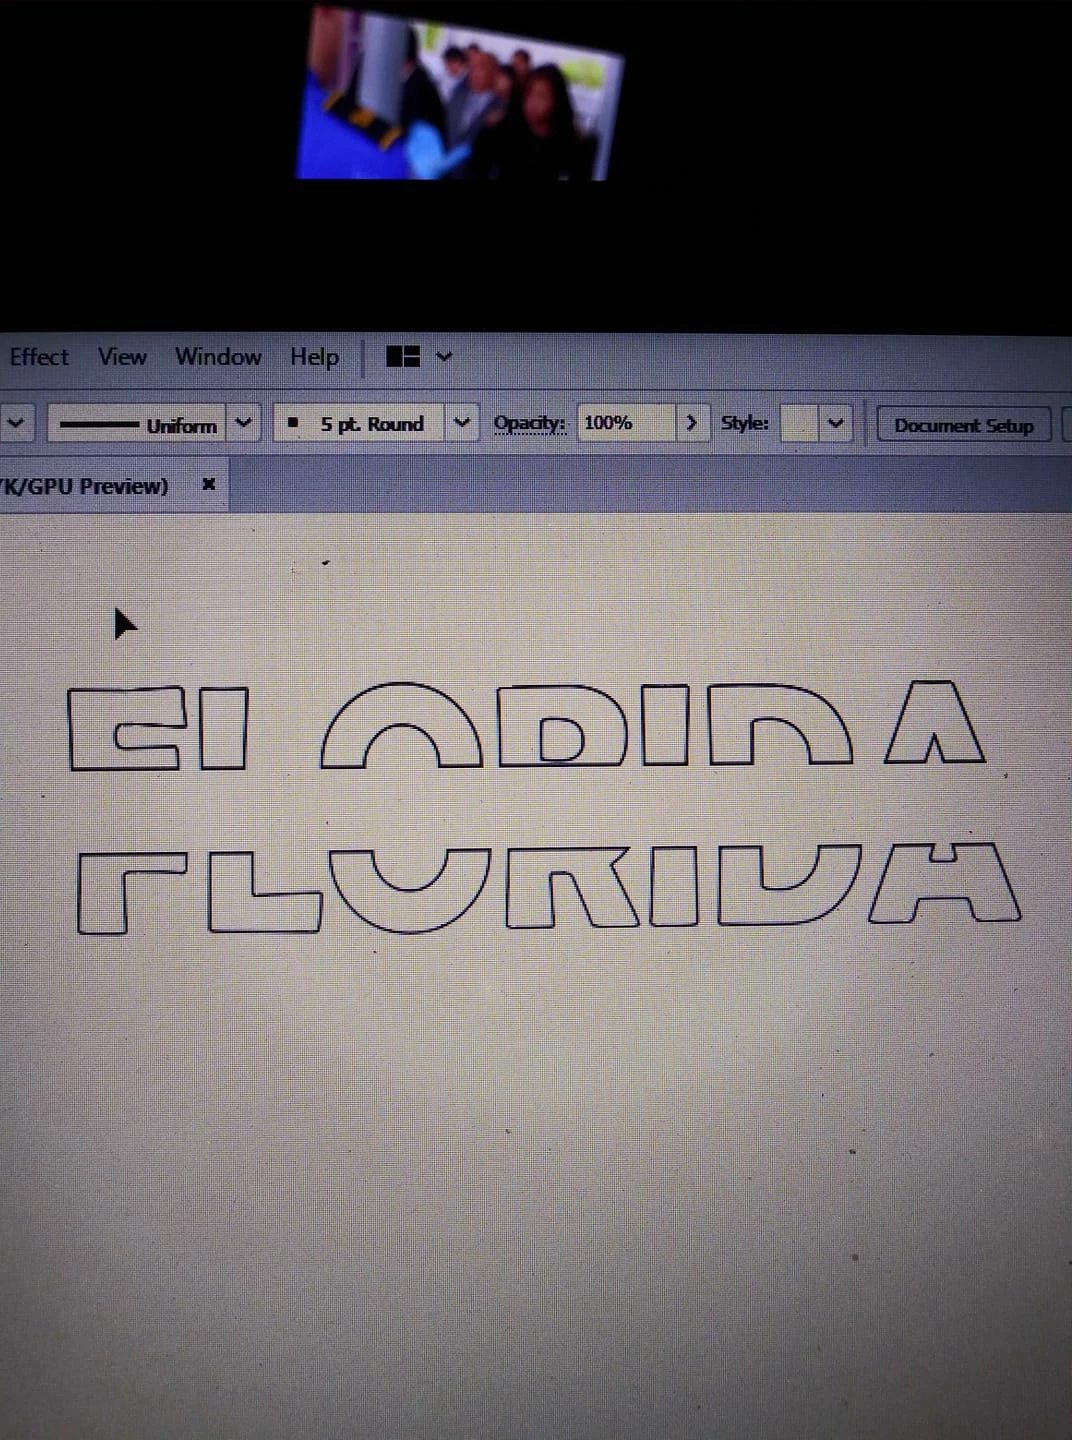
I'm able to create the design, however, I'm unable to have the sliced text open like the one in the video, my text remains closed like the below image.  I hope I'm making sense.  If someone could be so kind as to create a tutorial or direct me to a link showing me how I'd really appreciate it. 


Sincerely,


Dawn

    This topic has been closed for replies.
    Correct answer キィィ─!!!

    There are also the following methods, so please challenge.


    Make a 90pt "A".


    Set the following appearance in the Appearance panel.
    Then register for Graphic Styles.
    (Sorry, I am using the Japanese version.) 


    Apply this graphic style to text.

    Object> Expand Appearance
    Object> Expand
    Object> Outline Stroke
    Pathfinder> Merge
    Select all white objects and delete them.

    It's the end.

    4 replies

    Legend
    October 4, 2019

    Wow!, well I have checked your example though I could not descifry each step on the apperance panel.

    Thus I followed your main concepts and it works!

    Enclosed find the Appearance panel in English, I have started just with the type. I have not used that selected horizontal line.

    I have just Outline Object (Effects) and Add a Fill (green) as an Effect too, with your settings, then I have made two copies using the Transform Effect upwards and another 2 downwards. Please notice the distance is the same, thus for a more precise example instead of 2 copies we should do two transformations of each with a increasing distance.

    Then I have just copied your final steps (Thanks again), the fianl setp I needed was to slect with the Direct selection the path of my (green) background and delete it.

    Your is the merit.


    The exercise is just like placing cards in Solitaire games, but with the central one on top. We need to add a fill (white) background around each. Duplication with Effects, placed each one -behind- the central, main one.


    キィィ─!!!
    Participating Frequently
    October 4, 2019
    Hello, federico_platon Thank you for understanding the concept. Anyway, explaining in poor English using a Japanese panel may be rather confusing. I'm sorry and thank you very much.
    キィィ─!!!
    キィィ─!!!Correct answer
    Participating Frequently
    October 4, 2019

    There are also the following methods, so please challenge.


    Make a 90pt "A".


    Set the following appearance in the Appearance panel.
    Then register for Graphic Styles.
    (Sorry, I am using the Japanese version.) 


    Apply this graphic style to text.

    Object> Expand Appearance
    Object> Expand
    Object> Outline Stroke
    Pathfinder> Merge
    Select all white objects and delete them.

    It's the end.

    Legend
    October 4, 2019

    Please disregard, I read quite fast and did the opposite, the capture, not the video.


    With the Text Tool, (use default Black Fill and None Stroke)  click and

    1. Type your Text, choose Typeface and font (e.g Myriad Bold) adjust the size.
    2. Select the text with the Selection Tool and (Type menu) Create Outlines
    3. Select the Line Segment Tool (you could use also the Pen) hold Shift (to draw an horizontal line) an draw it across your textUse the arrow (up/down) keys to center it. (Keep it selected)
    4. Choose (Object menu) Path>Divide Objcts below
    5. Ungroup
    6. Use the Selection Tool to drag and select the top or the bottom half, use the keyboard arrow keys to displace it up/down.
    7. Now Swap Fill and Stroke.

    Done.


    tromboniator
    Community Expert
    Community Expert
    October 4, 2019

    Draw a rectangle over the portion of the text that you want to show, select both the rectangle and the text box, then got to Object menu > Clipping Mask > Make or keyboard shortcut  cmd/ctrl + 7.

    Peter