- Home
- Illustrator
- Discussions
- Aligning objects or text along a curved path
- Aligning objects or text along a curved path
Copy link to clipboard
Copied
I have a variable number of text lines I would like to arrange along the path of half a circle. I would like the text to look like each text-string is radiating from the circle (the path I have as half a circle).
I would like to do this in adobe illustrator
I would like the text to be evenly spaced along the path dependent on how many lines of text I have.
I have seen other discussions suggesting either the blend-tool or the brush-tool. But both of these ideas does not really help me. The blend-tool would make distorted shapes in between, and would twist and distort the text. The brush tool would make each text a little bit 'cone-shaped', and I would prefer having the text without such a 'cone-shape'.
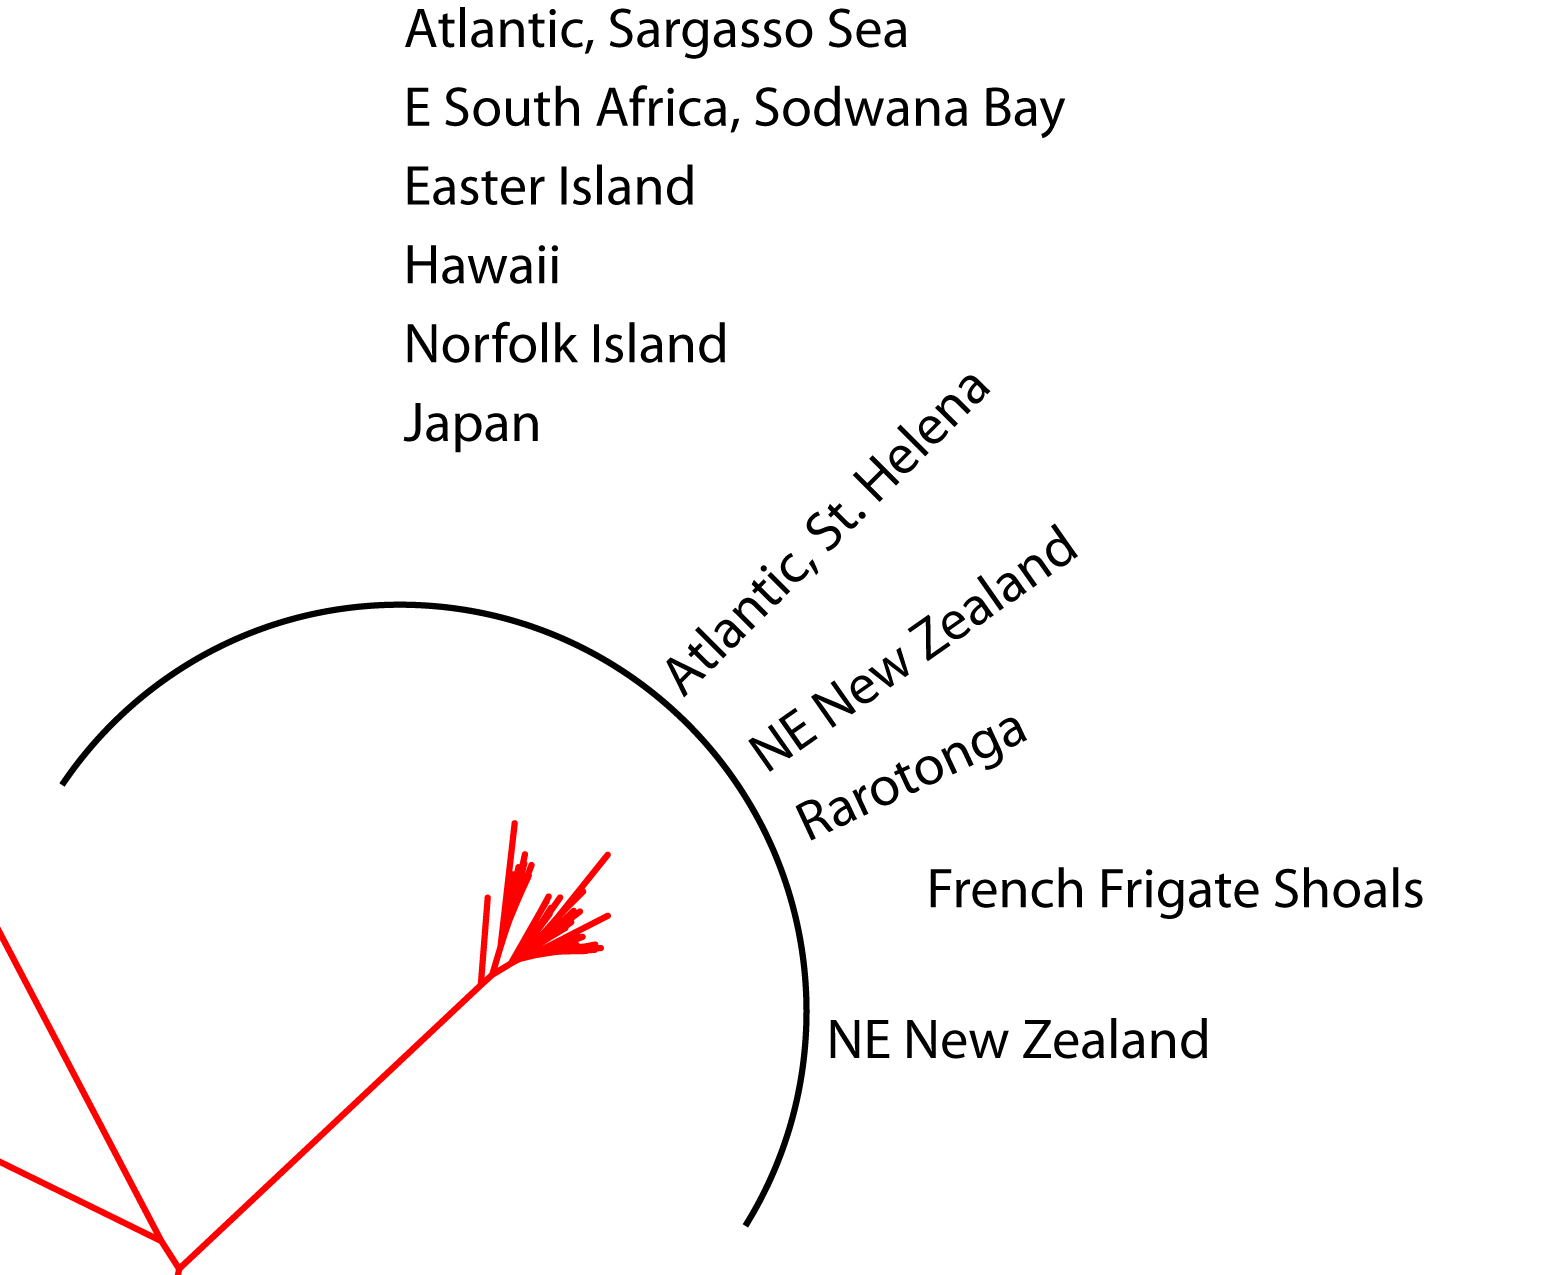
I am attaching a picture that halfway shows my intentions. In this diagram I have started rotating the first 4-5 text-lines. I have more text-strings (just above the half-circle) that I also would like to include along the path the half-circle is indicating.
The final goal is to get each of these locality-names raditing from the tips in the little red tree.
Is it possible in illustrator to align the text along a path like this? It is almost similar to the normal align objects and distribute objects.
I am working on a Mac OSX 10.5 Adobe Illustrator CS3.
Thanks in advance for your time and help
 1 Correct answer
You can also use this. On the image below I typed the letter I with the Type on a Path Tool. The Character panel gives full control of the letter distribution by using kerning (space between two letters) and tracking (space between all letters) and also the height of the letter. Then Outline the text, Ungroup, Compound Path > Release, and use the outlined paths of the letter I to paste each line of text on them. Smart Guides will make this easier.
edit: If it is just a circle or part of it, you c
...Explore related tutorials & articles
Copy link to clipboard
Copied
Make a blend using simple straight lines. Turn these into path text objects afterwards by selecting them all and Type > Threaded Text > Make
Then let your text flow onto this.
Copy link to clipboard
Copied
Thanks. But I would need you to explain in further details.
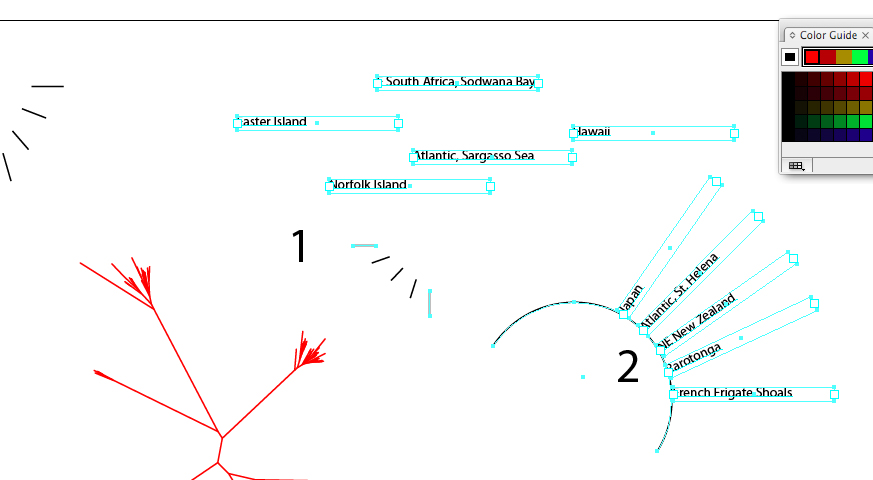
A blend with a handful of straight lines is not following the 'backbone' of the circle. They have an 'inward' curve instead?
I labelled this (1) in this snap-shot figure.
I don't think I can follow your idea.
What I was trying to do is more in the line of what I have labelled (2) in this figure.
Each text-string (or text-box) is independent of the other, so my intention was not to thread the text, and have it flowing from one box to the other.
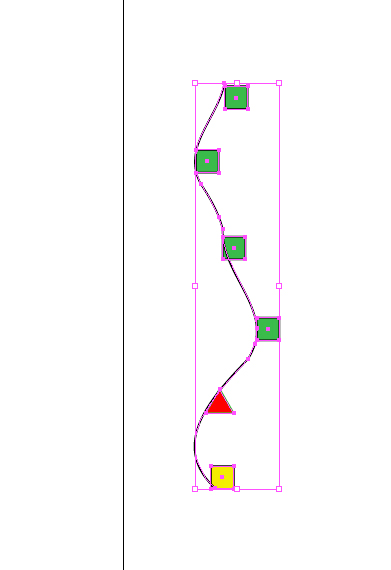
In my case, I am trying to align and distribute text-boxes along a path. It could just as well be objects of different sorts. Like in this second snap-shot picture. In this case I have tried aligning squares and triangles along a curved path.
The objects have to be evenly distributed laong the path, and they have to 'adjust themselves' to an angle that also follows the path

Copy link to clipboard
Copied
SW,
If I understand it in the right way, you may:
1) Create the path and Object>Path>Add Anchor Points a number of times (you have done it enough if things look right in the end;
2) Create the kind of (type) container you need, whether a line (Line Tool), a rectangle (Rectangle Tool) with the desired size,
3) Move a copy to the left (or right) to have coinciding ends and remove storke (and fill),
4) Group 2) and 3) and move a copy somewhat downwards (the exact amount matters little,as long as you can see what you are doing,
5) Object>Blend>Options set to Align to Page and set the number of copies to two less than the total number,
6) Object>Blend>Make,
7) Select 1) and 6) and Object>Blend>Replace Spine,
8) Object>Expand, with only Object ticked,
9) Save a copy for further elaboration,
10) Ungroup and delete unwanted parts so you only have the individual containers.
This will leave you with containers (for your type) evenly distributed along the length of the path. You may go back to 9), release the Blend, and change the number of steps, if you need to change the number of containers.
Copy link to clipboard
Copied
You can also use this. On the image below I typed the letter I with the Type on a Path Tool. The Character panel gives full control of the letter distribution by using kerning (space between two letters) and tracking (space between all letters) and also the height of the letter. Then Outline the text, Ungroup, Compound Path > Release, and use the outlined paths of the letter I to paste each line of text on them. Smart Guides will make this easier.
edit: If it is just a circle or part of it, you can use the suggestions in this thread http://forums.adobe.com/thread/992211?tstart=0
Copy link to clipboard
Copied
Thanks. This appeared to be the easiest approach.

