Copy link to clipboard
Copied
This is in Lightroom Classic 13.0.1 on Win11, shooting with a Sony A7 IV.
I've recently noticed some behaviour with Before and After that I can't figure out, if anyone can point me in the right direction.
Screenshot 1: I import a RAW image from SD card, apply no import changes to it. The Before and After are identical, we'll call them reddish/warm. In this scenario, the imported image has profile Camera ST
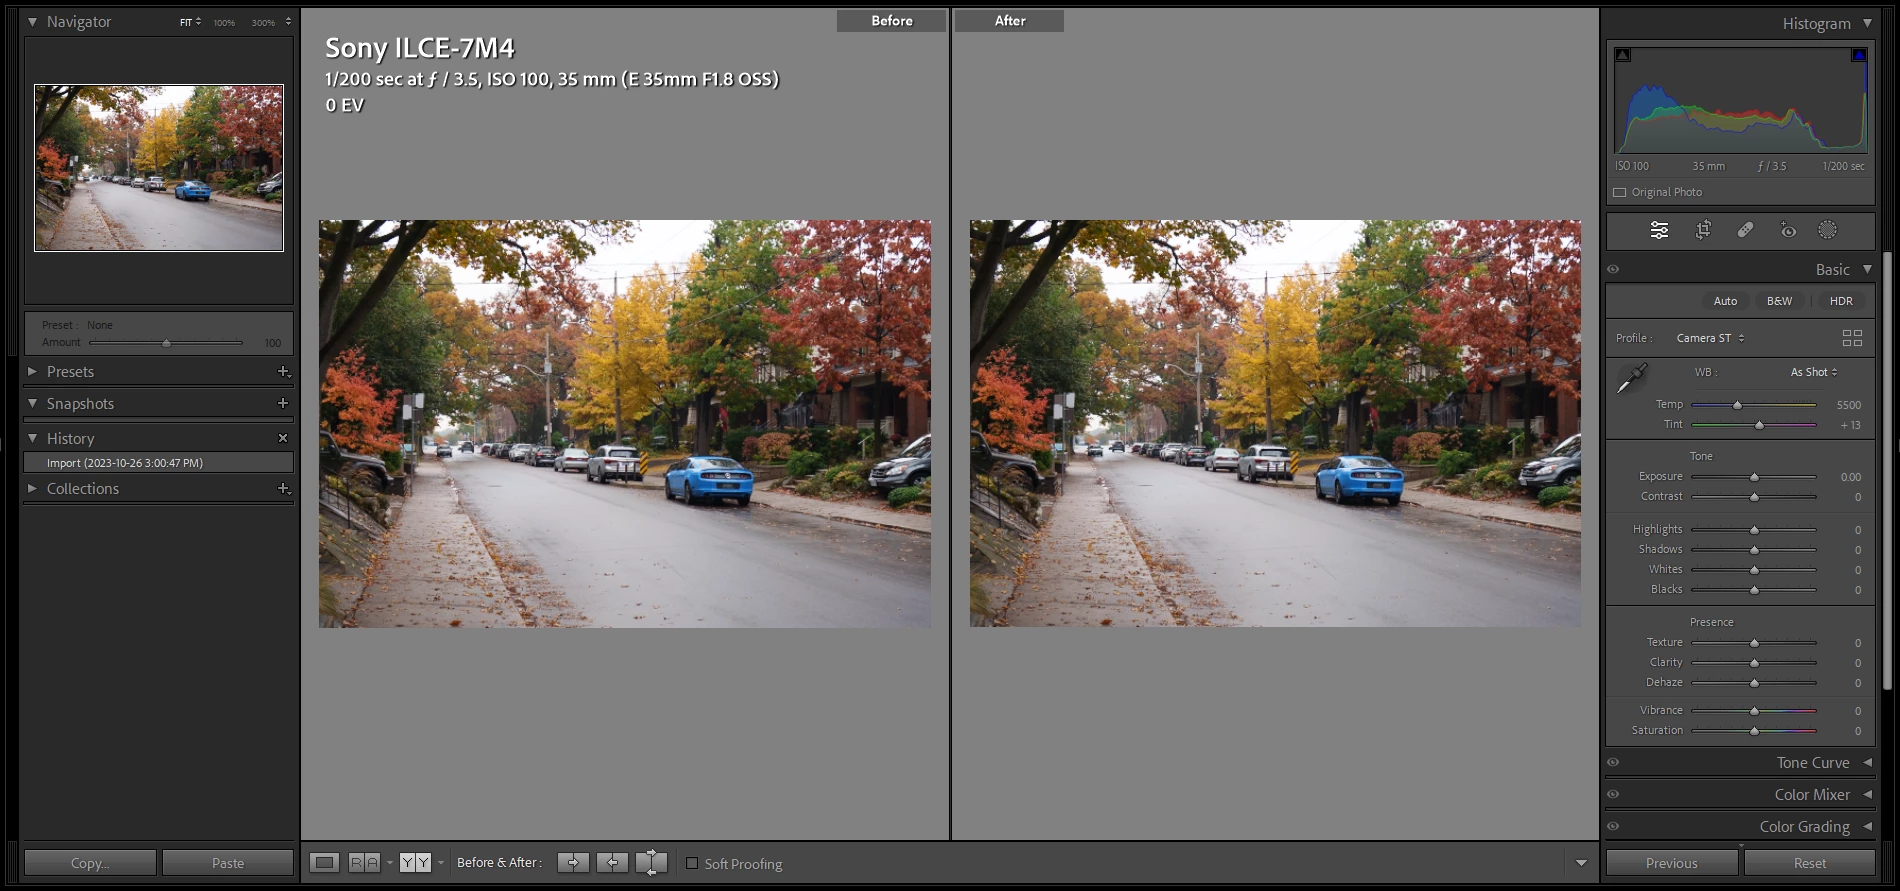
Screenshot 2: I import a RAW image from SD card, apply my baseline develop settings (which specifies profile Camera ST). The Before is a neutral/cool looking image, and the After is the same reddish/warm result as scenario 1.
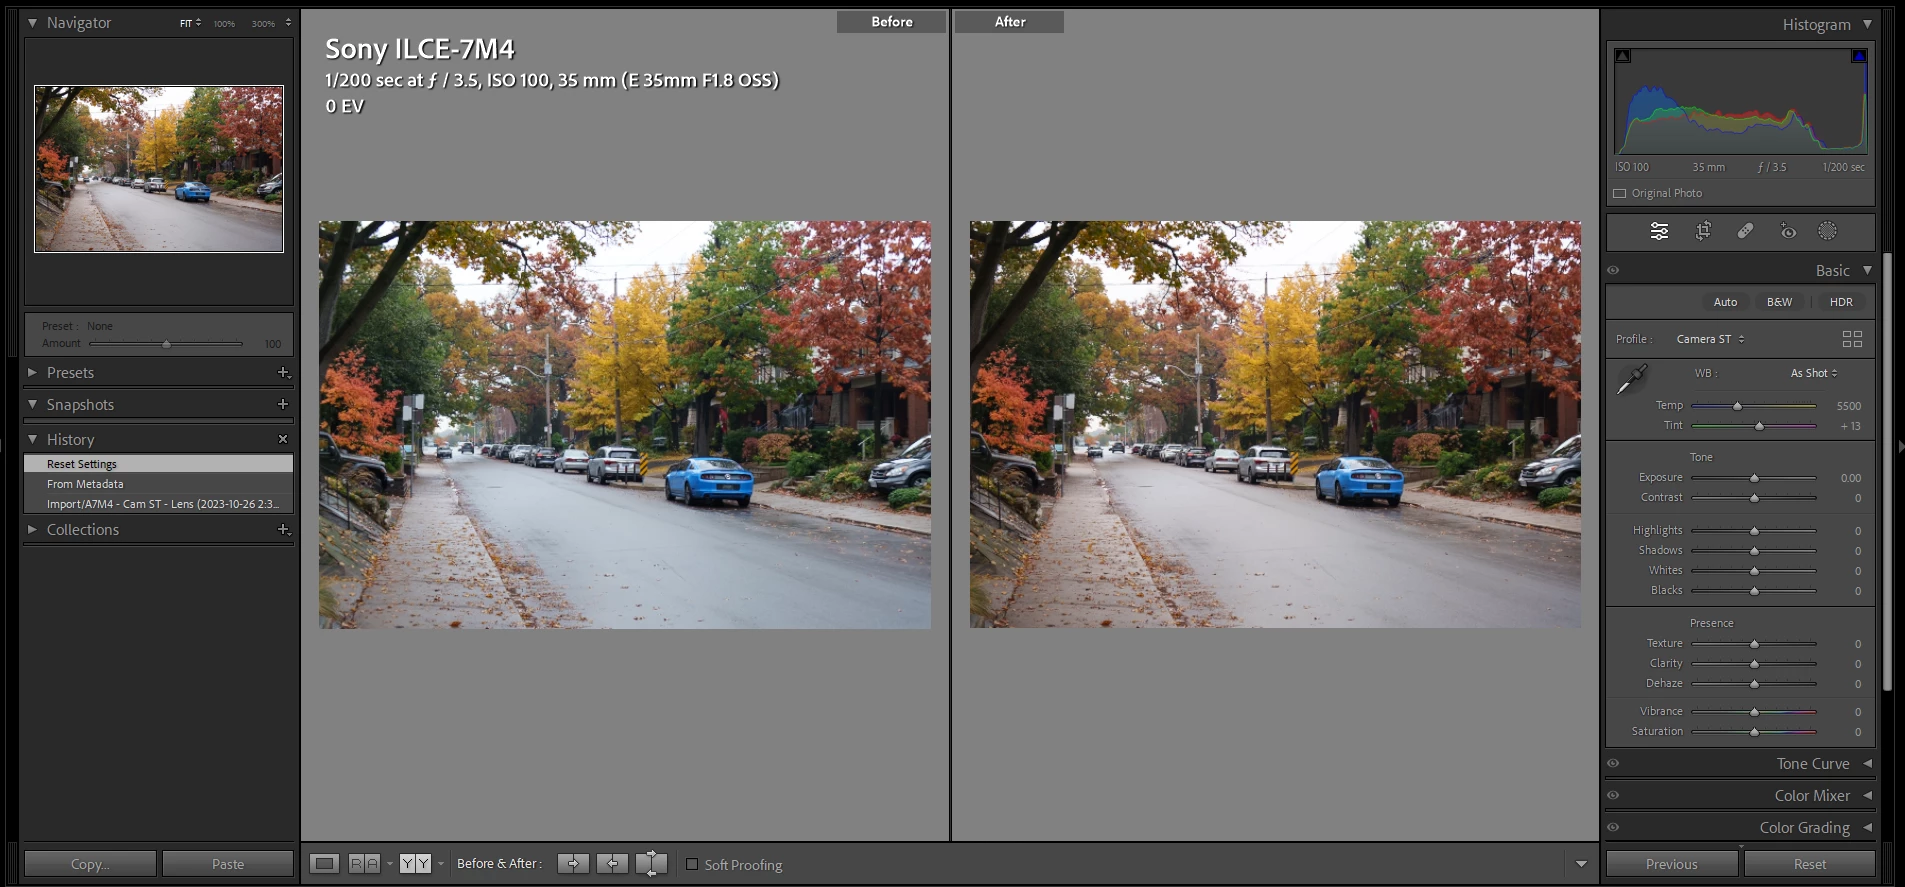
Where is this Before image coming from? Even if I do a "Reset All Settings" on the image or do a Copy Before>After, there seems to be no way to get the After image to look like the Before version.
thanks
Copy link to clipboard
Copied
There seems to be an issue with the preview...I might know what's happening but I need to verfy.
Can you share the file + XMP in scenario 2 with the edits applied on import (compress them and attach them here).
.
Copy link to clipboard
Copied
Sure, here's a DNG from scenario 2. Imported only, nothing else done to it.
Automatically write changes into XMP is enabled so everything should be in there (I checked with exiftool)
Copy link to clipboard
Copied
strange.. I try to attach the DNG here and it tells me
"The attachment's content type (image/DNG) does not match its file extension and has been removed."
Copy link to clipboard
Copied
I tested with your file.
1. I imported it (it had few edits)
2. Reset it
3. Showed the Before and After Y/Y (before shows the photo with the settings when imported)
4. Applied Before settings to After (photo after reset)
No issues in my tests.
No edits or visual discrepancy whatsoever.
P.S.
I find the Before and After totally obsolete now.
IMO is much better to hover over the history steps or Snapshots to visualize the differences.
The Before and after split views are difficult to sue because LrC doesn't really tell us what state was used for Before.
Copy link to clipboard
Copied
Ok thanks. So were you able to see or get it to show the neutral/cool Before image as in scenario 2 above?
Copy link to clipboard
Copied
@Gwarf I see no difference in the color in the images.
That issue is not present in the file you shared.
Copy link to clipboard
Copied
But you see the difference in the scenario 2 screenshot I included above right?
The reason for my post is: where did that neutral/cool Before image come from? I want to work with it to figure out which is more accurate, because the colours looks better as a starting point, but there's no way for me to 'get access' to it.
Copy link to clipboard
Copied
I did the same test while shooting with RAW+JPEG, to see if the Before is coming from an embedded preview or something, but it's not, as you can see here the overall tone of the jpeg is the same as the After:
Copy link to clipboard
Copied
Yes I see the difference of colors.
I think that the preset you applied on Import might be using an older process version or a old Adobe Profile that have different color interpretation and thus colors looks different.
Without sharing the exact file I can't tell.
When you reset you apply the RAW default so the "cold colors" are lost.
If you prefer the colder version BUT don't know the settings exactly the you can start by lowering Temperature to the 5000k range.
.
Copy link to clipboard
Copied
Copy link to clipboard
Copied
@Gwarf I am away from my Laptop now, I will check the Preset when I can.
Please check what crs:CameraProfile you have in that Preset.
Copy link to clipboard
Copied
@Gwarf I have downloaded the profile and there is nothing that could have caused the cool colors for that file.
I can't figure out why you images have cooler tones..
If you hover over the import step is it previewed correctly.
.
Copy link to clipboard
Copied
I'm not sure what is causing it either, doesn't seem to be an embedded jpeg preview or something like that. Anyone have any ideas?
Copy link to clipboard
Copied
This could be caused by an incompatible or defective monitor profile, or by a bug in the GPU driver, which carries out the conversion of colors from the document profile to the monitor profile.
Start by disabling the GPU in Preferences > Performance. (set Use graphics processor to Off)
If this fixes the issue, make sure that your graphics driver is up to date, then try to turn the GPU back on. If it already is up to date, or if updating it doesn't help, you most likely have a defective or incompatible monitor profile.
As troubleshooting, and as a possible temporary fix, try setting the monitor profile to sRGB. Use Adobe RGB if you have a wide gamut monitor.
Press the Windows key + R, type colorcpl in the box and press Enter. Add the sRGB profile, then set it as default.
If this fixes the issue, you should ideally calibrate your monitor with a hardware calibrator.
This will also create and install a custom monitor profile which will be more accurate than sRGB or Adobe RGB.
Copy link to clipboard
Copied
Handy info/reminders thanks!
When I disable GPU in LrC, instantly the Before image switches to match the After image. This is a Dell Precision 7670 with Intel UHD Graphics and an Nvidia A3000. GPU drivers are up to date though and this is a pretty fresh Windows install too.
In Windows Color Management, I can't seem to get this behaviour not to occur despite trying with the sRGB profile specified like you mention, restarting etc.
Copy link to clipboard
Copied
Disabling the Intel UHD Graphics might fix the issue, dual GPUs don't play well with color managed software.
Copy link to clipboard
Copied
Wouldn't having the GPU boxes all ticked accomplish the same thing? otherwise specifying it in 3D settings in Nvidia control panel. Or would you suggest a different method?
Copy link to clipboard
Copied
You have to disable the UHD Graphics in Windows.
Close LrC, then right click My Computer in the File explorer and choose Manage from the context menu.
In the next window, double-click Device manager, then right click the UHD grapics, and choose Disable.
Launch Lightroom, and turn the GPU back on in Preferences.
Copy link to clipboard
Copied
I've disabled the 'integrated' Intel UHD graphics from the BIOS, so it's not even presented to the OS now.
Next thing I tried is importing the sample image in its native ARW form, vs importing it as a DNG. The cooler/bluish Before version is only showing up in the DNG.
Imported as ARW (Import option 'Copy'):
Imported as DNG (Import option 'Copy as DNG'):
And if I untick the 'Use GPU' option on the DNG, the cooler/bluish Before instantly changes to the same tone as the After on the right side.
Would still love to figure out where this cooler/bluish Before is coming from!
Also the reason it's an issue for me is because in my Develop workflow I'm constantly using the backslash key to compare Before/After, but since the Before seems to not actually exist anywhere, it's frustrating.