- Home
- Lightroom Classic
- Discussions
- Re: Color Banding in Library but not in Develop mo...
- Re: Color Banding in Library but not in Develop mo...
Copy link to clipboard
Copied
Hello there,
I've noticed that I get Color Banding in Library mode (and on exported images) that I don't see in Develop and I can't fix it. Straight to examples. All are from the same RAW file, it's a right/upper corner at 1:1 scale. The only adjustments I did were a bit of highlights and shadows changes. No colors were changed.
Here is in develop mode. Perfectly good gradient.

Just switched a tab to Library. Boom, color banding. Histogram is the same but this seems to be just a stale histogram from Develop mode.
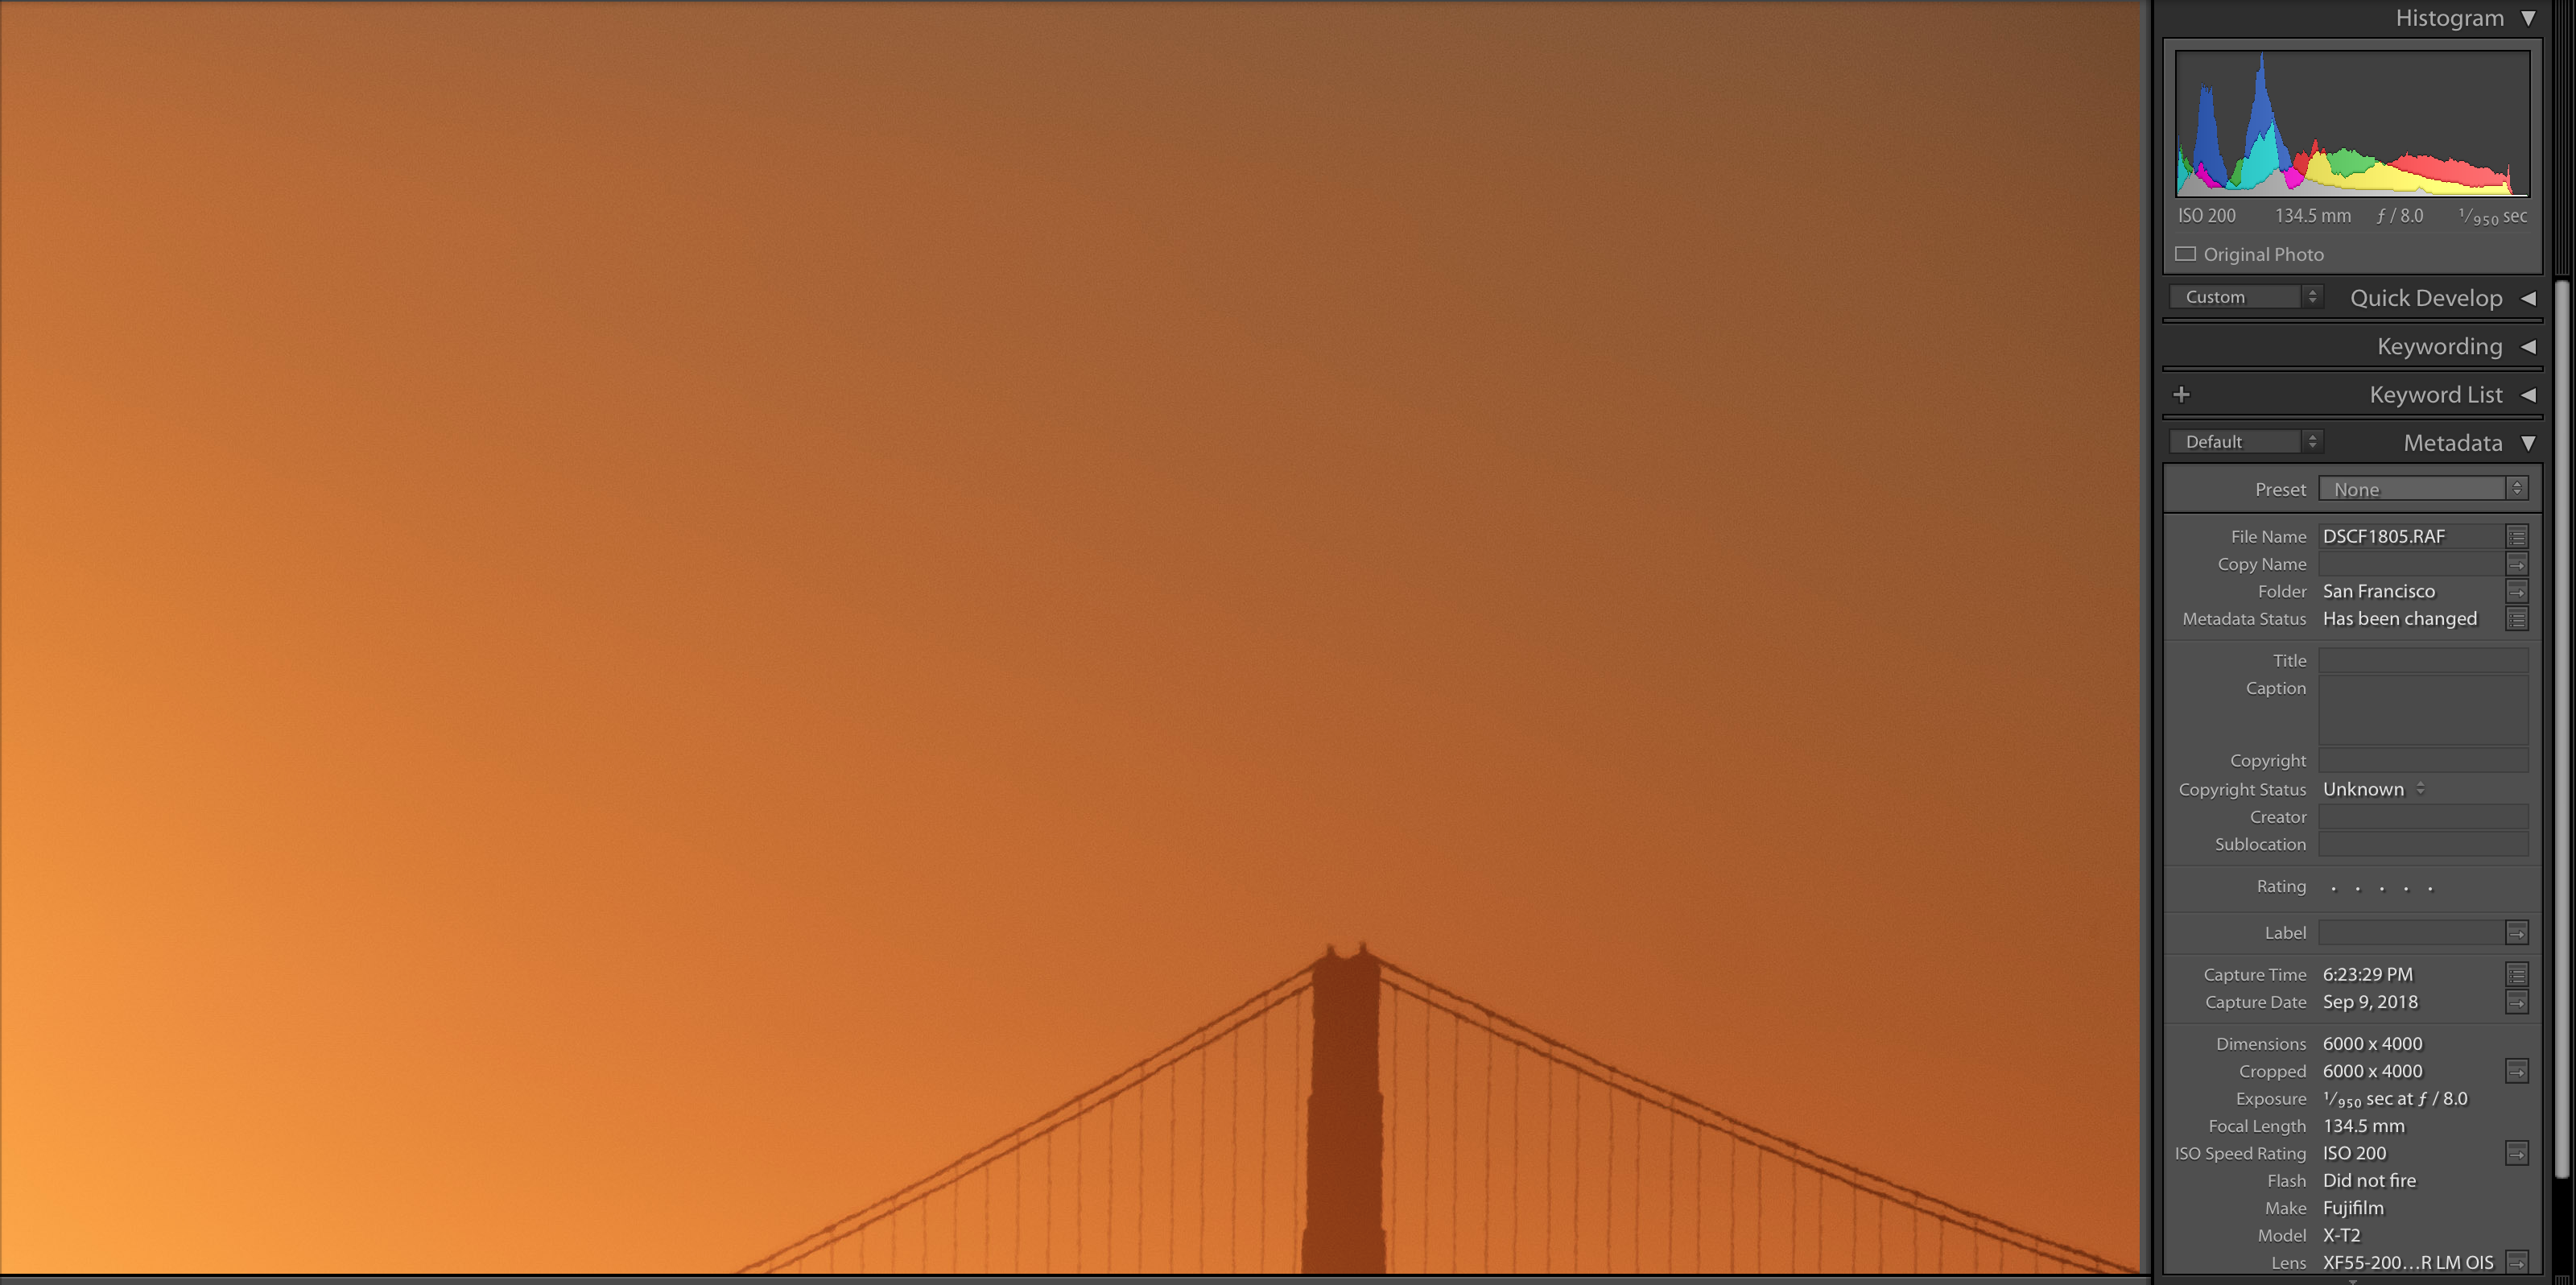
Close and open LR, open Library Mode. Color banding still there. but look at histogram, it's different, it's not smooth anymore. If I go to develop mode I get the original histogram and no color banding.
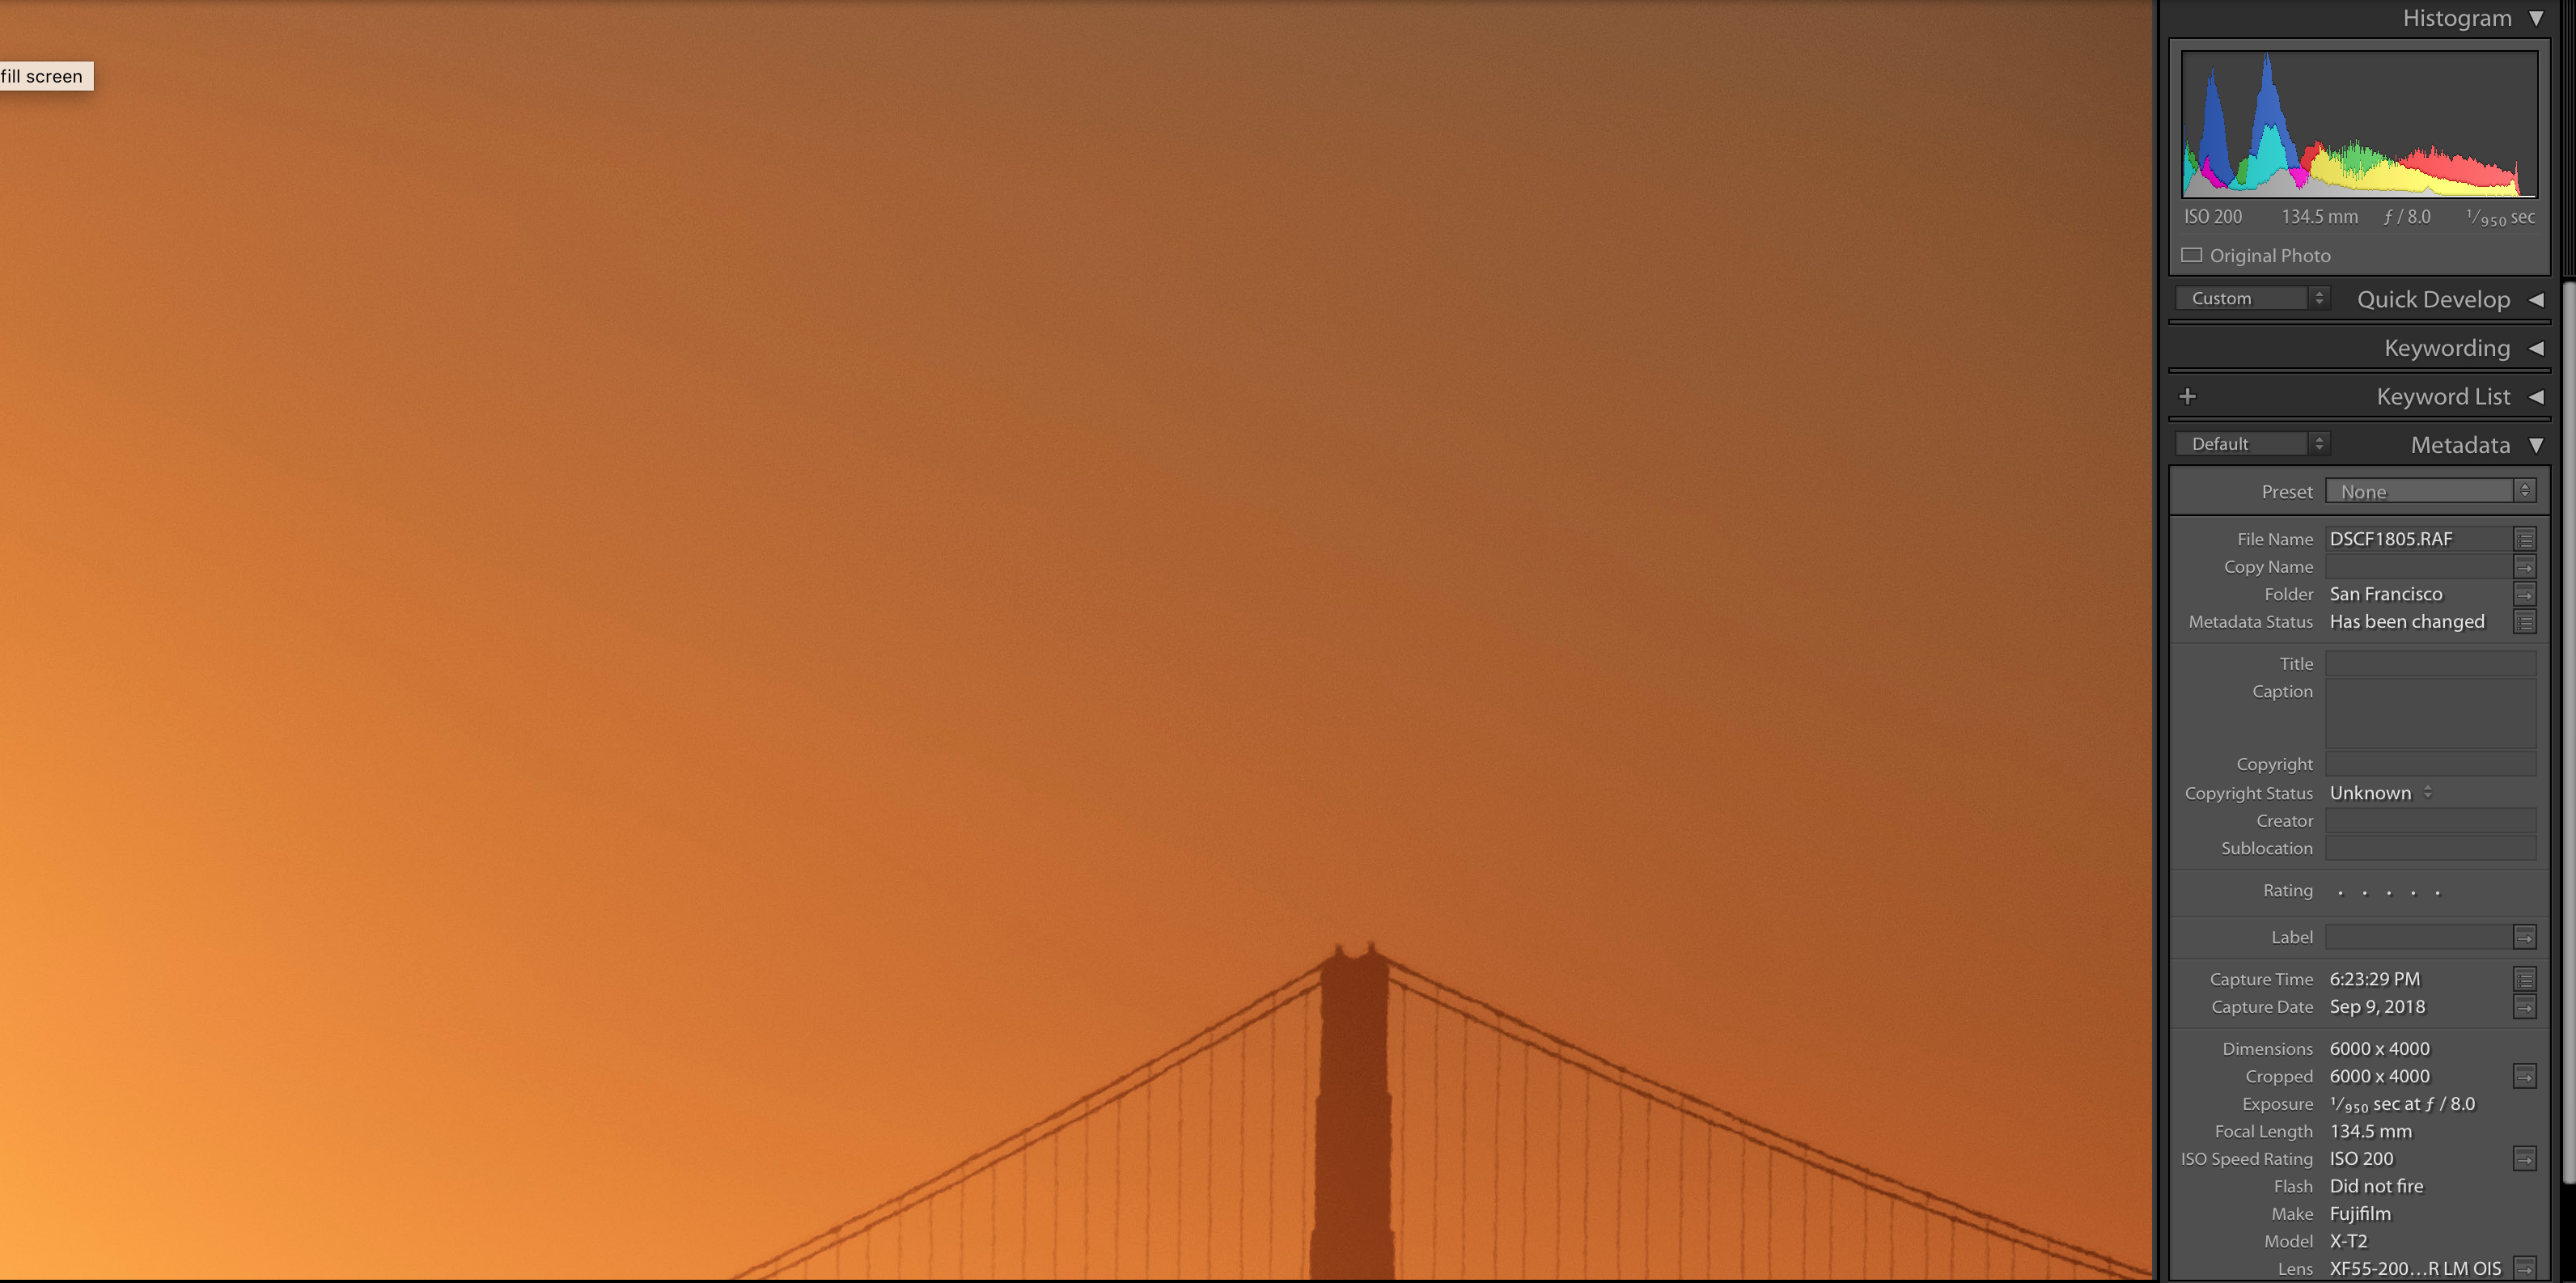
I was trying ti find an answer among existing question but all of them does not exactly match to my issue. I do not have any color gradation (maybe some nut not too much). I've tried to check it under Soft Proofing in Develop Mode (it's still looking good). I've reset all modification and play with just a RAW file (it still there).
I have plenty of short ruined because of that but I always thought that this was an issue of export (I usually export at lower quality for WEB). But even if I export to Flickr with full quality it still look bad. Then I thought, that it's just a display issue (first I've noticed that on display of my friend). But I have an amazing 4K display and still can see that. Then, finally, yesterday, I've noticed that directly in light room just while switching modes.
So, two questions.
Less desired approach: How to make Develop show me the actual result that I will get (what I see in library mode)?
Desired approach: How to make export look like what I see in Develop mode?
This particular shot was made with Fuji X-T2 and 55-200mm lense. Here is a RAW file Dropbox - DSCF1805.RAF.
Could it be an issue of a LR poor support for Fuji's RAW files?
Thank you for your help.
 1 Correct answer
The Library previews are jpegs. Not only are jpegs 8-bit to begin with, but the chroma component is much more heavily compressed than the luminance component. Color banding in smooth gradients is very common in jpeg.
If you then have a less-than-perfect monitor profile, or video card calibration tables, or a monitor of less than stellar quality - this inherent banding will get amplified. Again, a typical display chain is 8-bit to start with. There will be banding - the question is if it's pronoun
...Copy link to clipboard
Copied
This may be a color space issue. Lightroom uses different previews for develop and library. The develop preview is in a kind of linear ProPhotoRGB, so a huge color space. The library module preview is AdobeRGB, so quite a bit smaller. The color space of exported image is set in the export dialog, so that can be different again.
Copy link to clipboard
Copied
Hi Johan, thanks for your response. Are you saying if I set export as ProPhotoRGB I will get what I see in Develop mode? I less worry about library mode view rather the outcome of the export.
Copy link to clipboard
Copied
FunRoman wrote
Hi Johan, thanks for your response. Are you saying if I set export as ProPhotoRGB I will get what I see in Develop mode? I less worry about library mode view rather the outcome of the export.
Yes, you should indeed get the same result (although ProPhotoRGB is not linear, so it's still not the same as the internal version used in the develop module). The question is whether you can use this color space in your exported image, of course. That depends on how and where you are going to use it.
Copy link to clipboard
Copied
Hi there,
Could you please check the Catalog File Handling settings (preview size and quality). You should be seeing the Standard preview initially, then when you click to magnify it creates a 1:1 preview. If you're Preview Quality is set low, see what changing it to Medium does for you.
Regards,
Sahil
Copy link to clipboard
Copied
Hi Sahil, thanks for your answer. I will definitely try that. Will changes in preview settings affect the export results?
Copy link to clipboard
Copied
On screen banding is always in the display chain, unless it's an 8 bit RGB file. That means calibration, monitor profile, or the panel itself. Or possibly a buggy video driver.
Remember that your display pipeline is 8 bit depth, or even 6 bit + temporal dithering in most TN panels. That's a lot less bits than the original image data.
Lightroom Develop uses some sort of dithering - or so I'm told - to avoid banding. I haven't been able to find out precisely what kind of dithering.
At the bottom is the fact that the actual conversion from image data into your monitor profile is different in Library vs. Develop. A defective monitor profile could handle one and choke on the other. Indeed, a difference between the two modules is very often indicative of a bad monitor profile.
Copy link to clipboard
Copied
Hi D Fosse,
I am not quite sure I understand your point about monitor. It just does not make much sense that the same monitor showing different pictures in Develop and Library mode is considered as a failure of monitor rather than the software issue.
If we start to considered this is a hardware problem, that make sense to post my hardware info:
Apple 13" MacBook Pro (new model)
LG 27UD88-W 27" Class 4K UHD IPS LED Monitor
I see the same issue on MacBook and external monitors. And other monitors and other machines. This all still makes me think that this is LR issue. I've attached the RAW file and I would really appreciate if you could try it on your machine/setup and tell me if you get different results. That would be super helpful to nail down the root case of issue.
Copy link to clipboard
Copied
So, I've tried to use Pro Photo RGB at export with 60% and 90% quality. The problem remains to be there. (with 90% it's not as severe is with 60% which was really bad).
I've run another test and here are my observation.
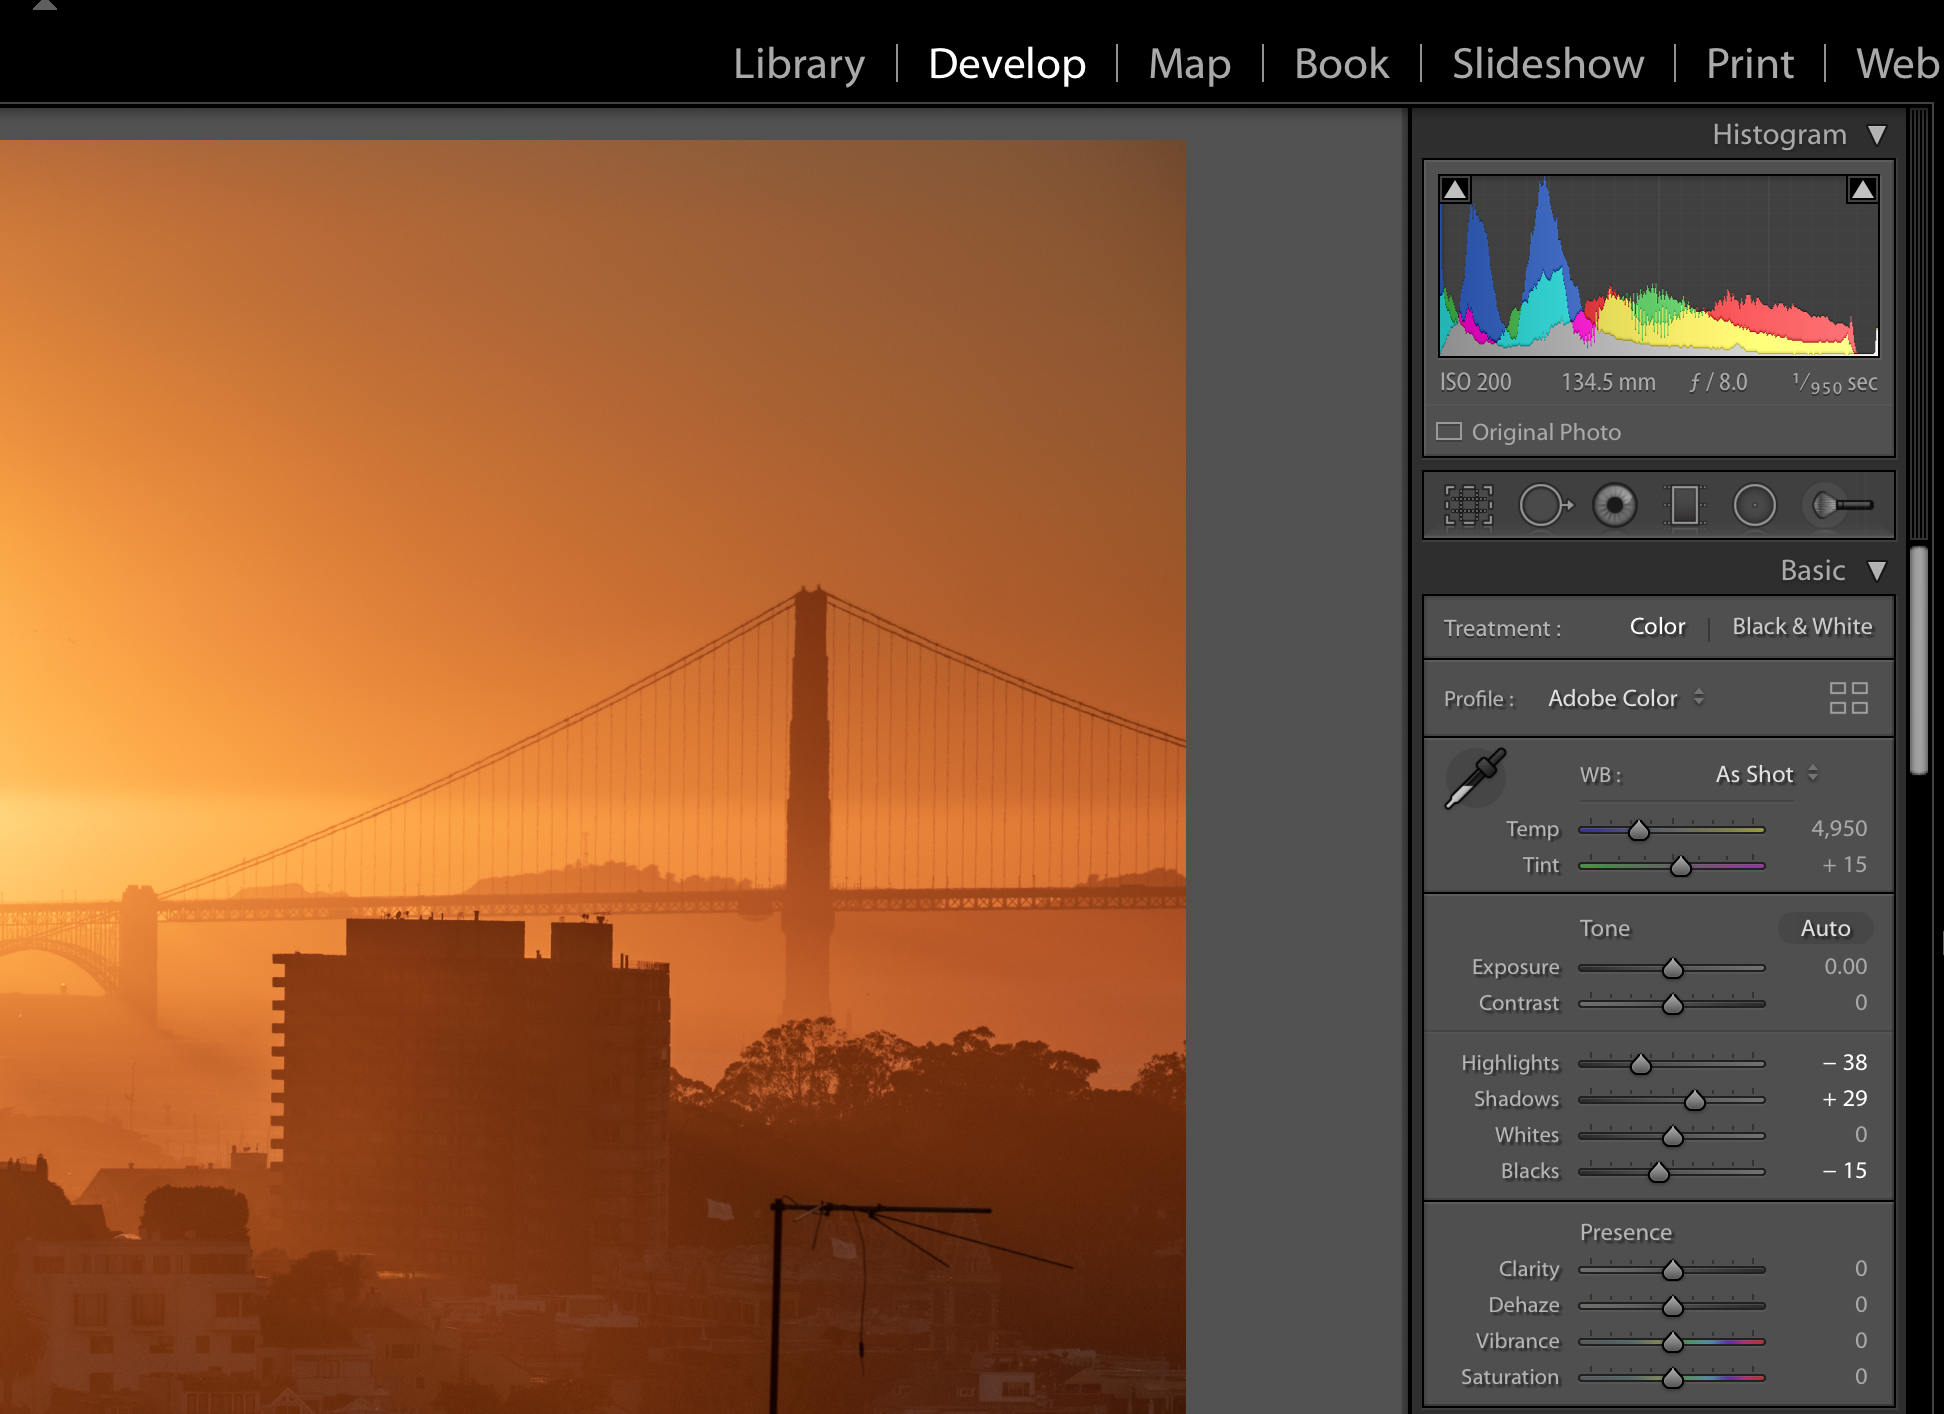
When I work in develop mode I get this moth nice histogram
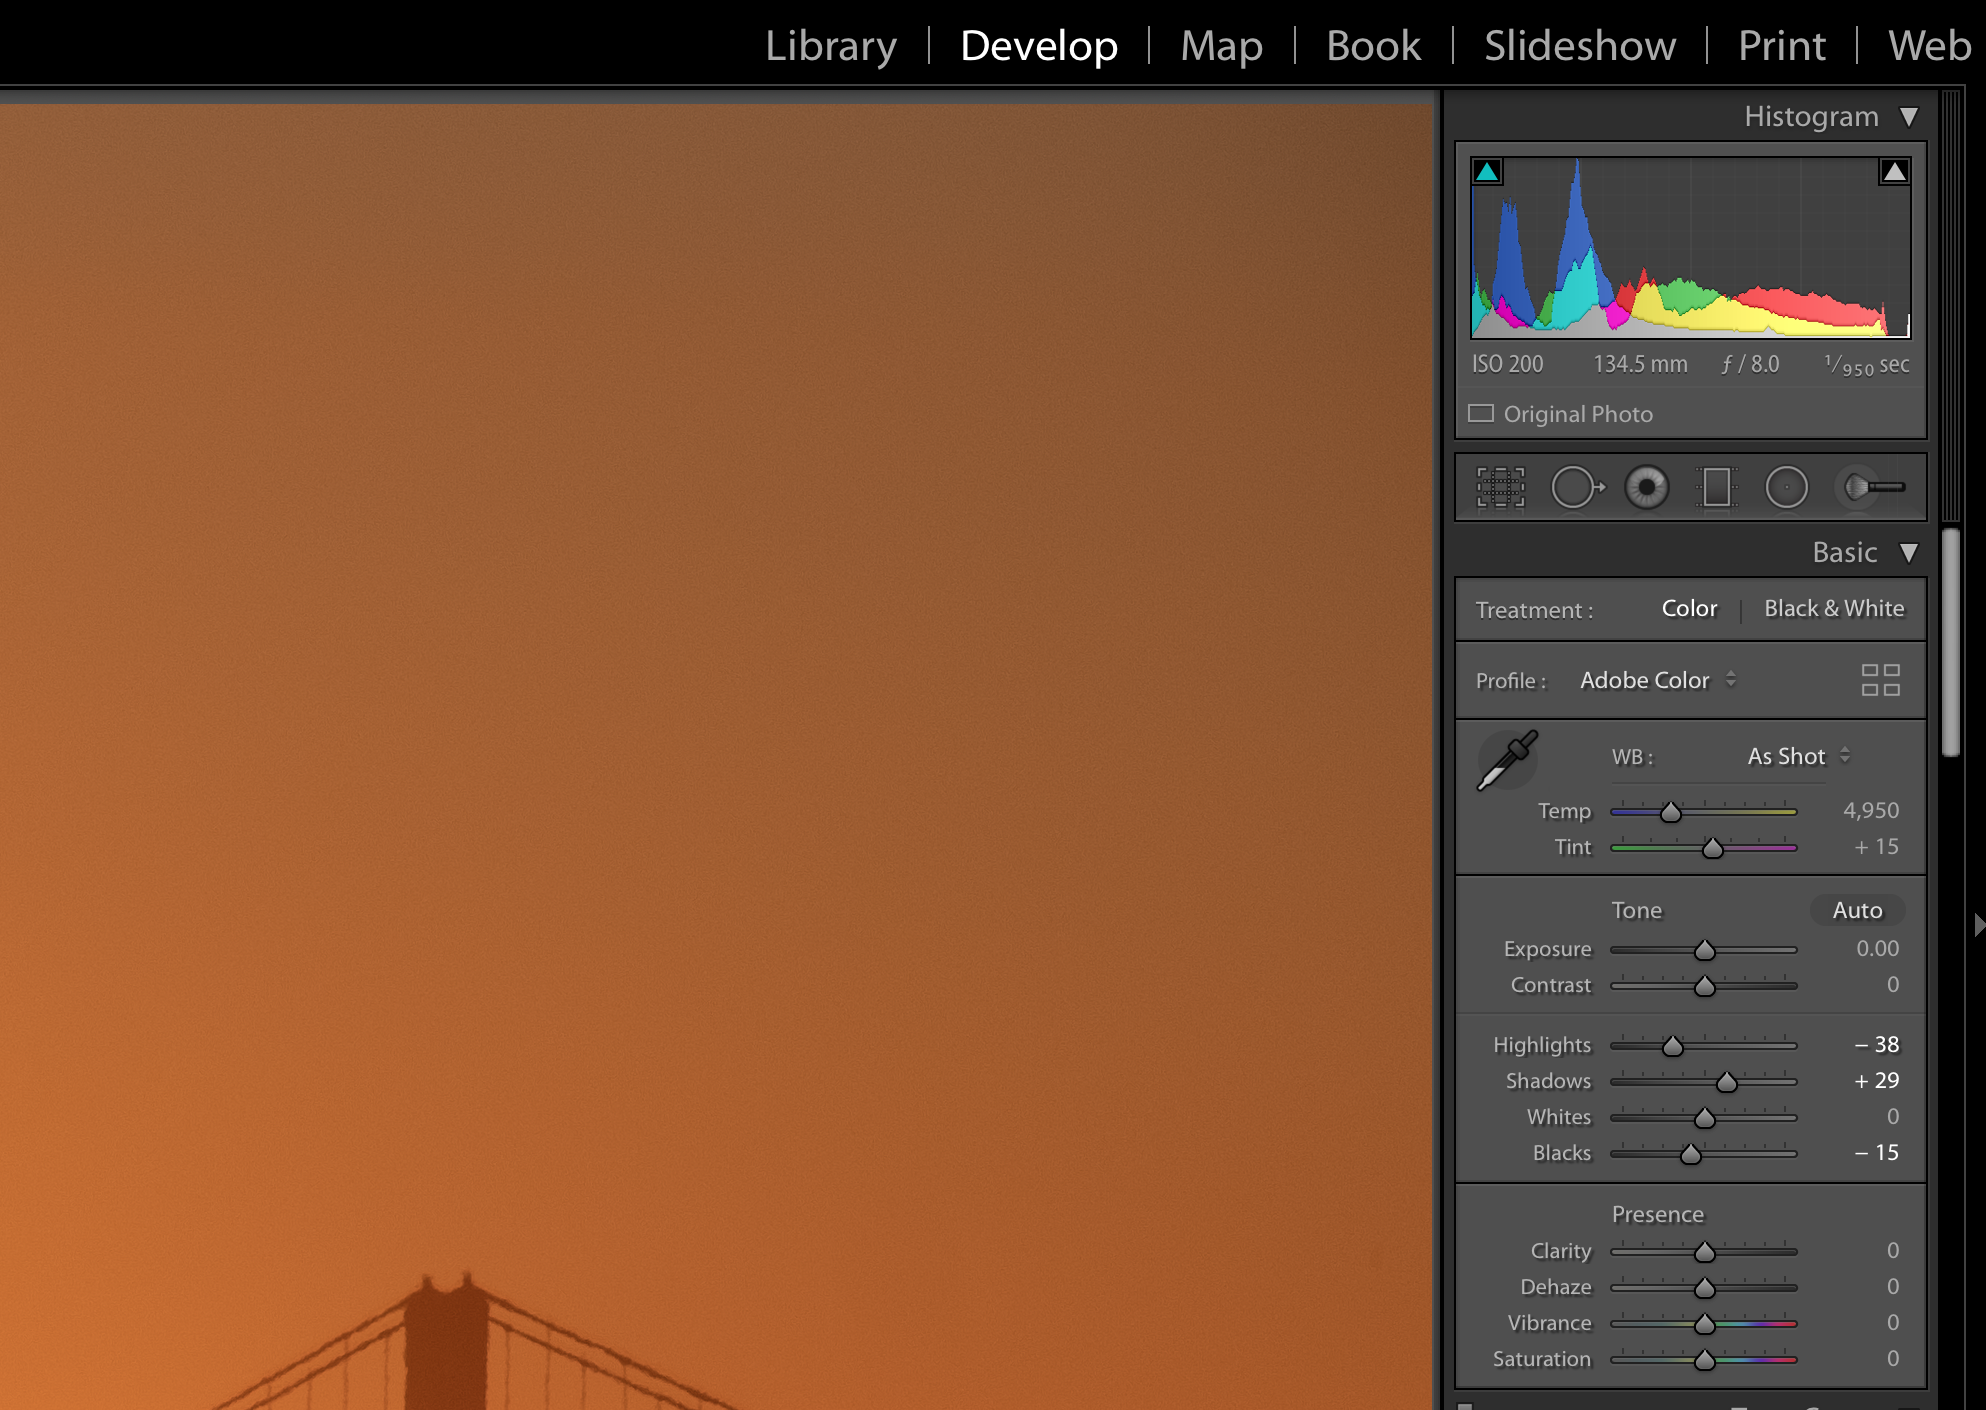
I close LR, I open LR. I get on the same Develop Mode. Look at he histogram. It's different. I believe its the one that give that "color" banding issue. Thought, it's still not visible in Develop mode.
Copy link to clipboard
Copied
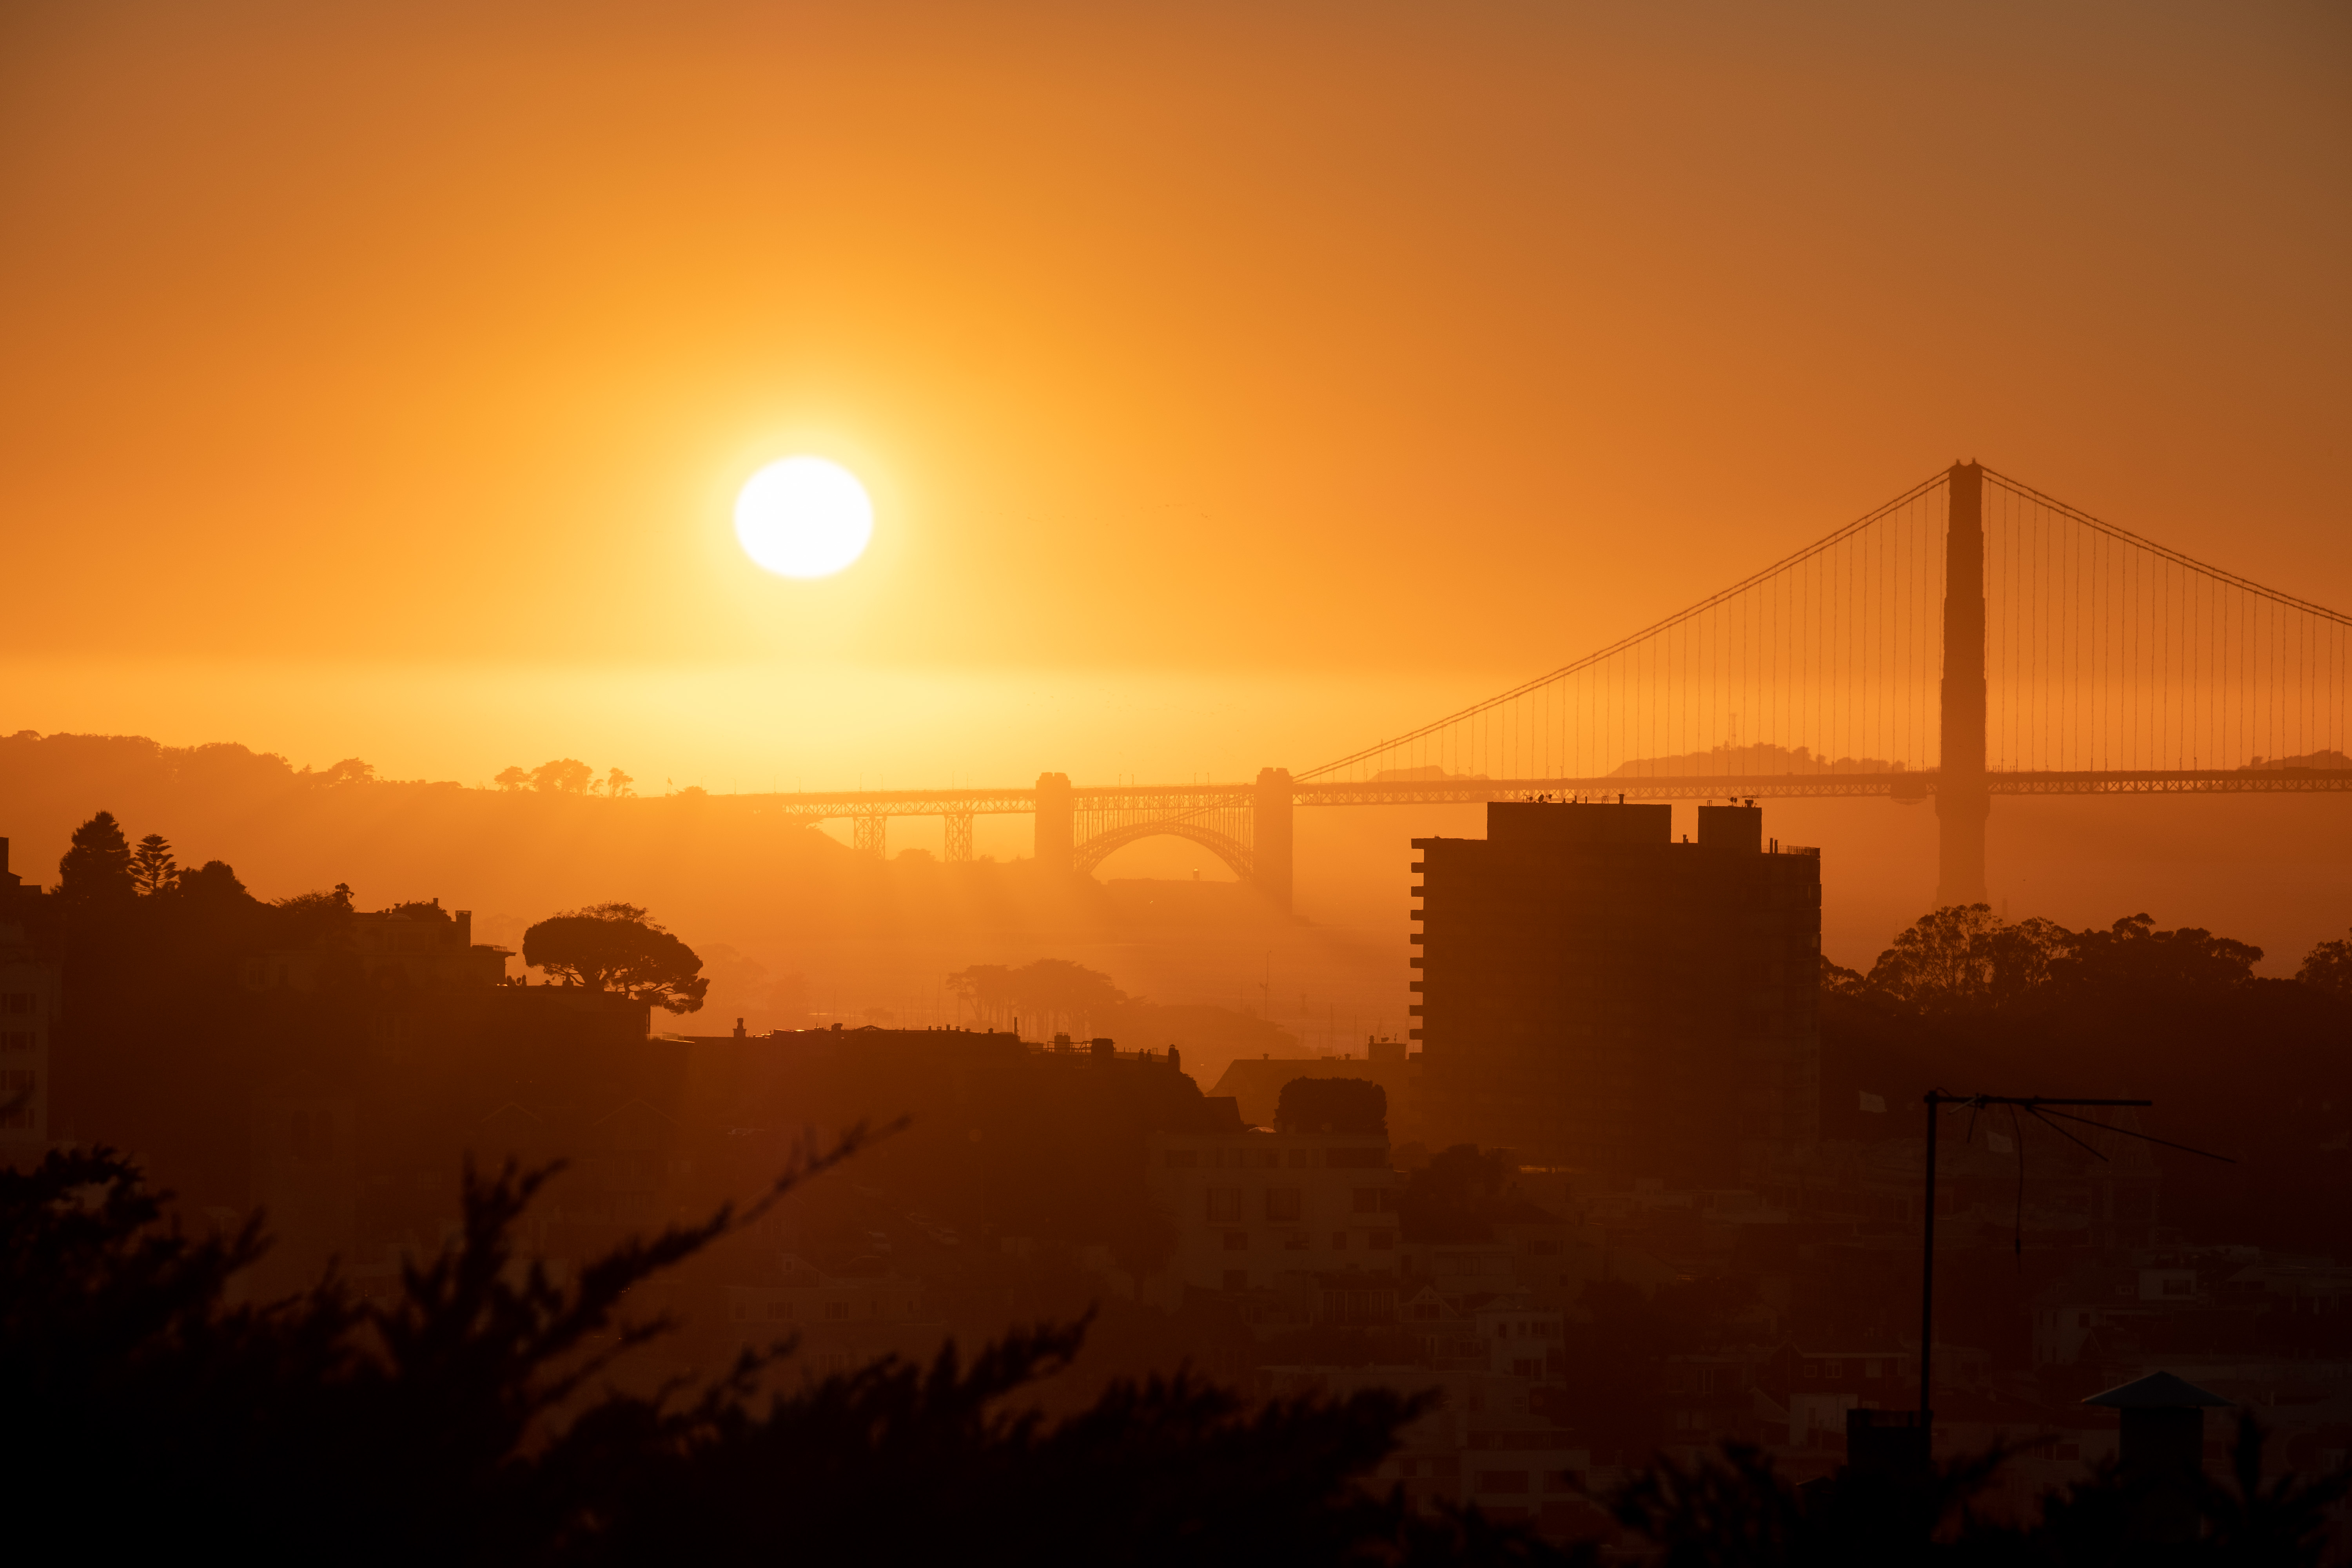
I took your RAF image at your settings that I could see. Export sRGB - which to my knowledge tends to maximize compatibility with most web platforms etc. JPG, 80%
No banding that I can see at all. To my eyes, when I view it through Microsoft's standard pic viewer, and jump back and forth to view in LR develop, they are indistinguishable. That's what I -usually- see at 70% jpg, but sometimes with a gradient like this you might have to go higher so I took it to 80%.
Copy link to clipboard
Copied
Joefry, thanks for trying it on your hardware. I believe that 60% vs 80% in sRGB does make quite a difference in that particular case. I still cat see these lines in the sky but the are less visible that it was before.
Copy link to clipboard
Copied
As ProPhotoRGB is a huge color space, you can't export an 8 bits ProPhotoRGB jpeg and expect to see a good result.
Copy link to clipboard
Copied
The Library previews are jpegs. Not only are jpegs 8-bit to begin with, but the chroma component is much more heavily compressed than the luminance component. Color banding in smooth gradients is very common in jpeg.
If you then have a less-than-perfect monitor profile, or video card calibration tables, or a monitor of less than stellar quality - this inherent banding will get amplified. Again, a typical display chain is 8-bit to start with. There will be banding - the question is if it's pronounced enough to be noticeable, or when it passes that threshold.
I downloaded your original file and didn't see any banding, other than the very slight hint I'd expect from a jpeg.
Beautiful shot BTW, and perfectly exposed - too bad the delicate color is probably caused by pollution...![]()
Copy link to clipboard
Copied
https://forums.adobe.com/people/D+Fosse wrote
The Library previews are jpegs. Not only are jpegs 8-bit to begin with, but the chroma component is much more heavily compressed than the luminance component. Color banding in smooth gradients is very common in jpeg.
Exactly and the only 'accurate' way to preview the data is in Develop which uses different data and preview path at 1:1 or greater. The other modules simply don't use the same/correct preview path for speed.
Copy link to clipboard
Copied
If you're seeing this quite often try changing the Preview Quality setting to the next higher level. I could barely see any banding in the Library module with your Develop settings and 'Medium' Preview Quality. This will increase the size of the Preview cache, which is a trade-off.

Copy link to clipboard
Copied
> If you're seeing this quite often
Todd, I see that only on the some sky gradients which are supposed to be magical, but ended up being not so great because of that thing. sRGB with 80% did handle that more less acceptable.
The last question I have. What I the purpose of super-duper extra color support in Develop mode? Is it possible to transfer that quality to somewhere else? Like if I'm going to make a print. Will I get the quality of Library mode or Develop Mode. I know this a dumb question about printing and probably involve make other aspects. But specifically about the Develop Mode accuracy, where else it could be used but in that module?
Or maybe the problem is that I export in JPEG and I should switch to use another export format?
Copy link to clipboard
Copied
FunRoman wrote
> If you're seeing this quite often
Todd, I see that only on the some sky gradients which are supposed to be magical, but ended up being not so great because of that thing. sRGB with 80% did handle that more less acceptable.
Thinking about this some more you may want to leave your Preview Quality setting where you have it. This way you know when it may affect the JPEG Export image file and can use a higher Quality setting Export module.
An Export JPEG Quality setting of 80 should be good. You can also use 90, but 100 is only useful if the JPEG will be edited and resaved. There are actually only twelve Quality settings in the LR Export module same as in PS. More information here: Jeffrey Friedl's Blog » An Analysis of Lightroom JPEG Export Quality Settings
JPEG QUALITY SETTINGS | ||
Photoshop | Description | Lightroom |
0 | Low | 0-7% |
1 | Low | 8-15% |
2 | Low | 16-23% |
3 | Low | 24-30% |
4 | Low | 31-38% |
5 | Med | 39-46% |
6 | Med | 47-53% |
7 | Med | 54-61% |
8 | High | 62-69% |
9 | High | 70-76% |
10 | Max | 77-84% |
11 | Max | 85-92% |
12 | Max | 93-100% |
FunRoman wrote
The last question I have. What I the purpose of super-duper extra color support in Develop mode?
The Develop module builds its previews real-time so you can see the affect of setting changes as you move or apply controls. It uses 16 bit image data in Prophoto RGB color space with an sRGB tone curve, which is why you don't see banding in the Develop module. The Library module uses pre-built JPEG previews in Adobe RGB color space (i.e. smaller gamut than ProPhoto RGB) to help minimize banding due to 8 bit data. Most wide gamut displays have very little gamut outside Adobe RGB so you normally won't see a "color" difference when switching between the Library and Develop modules.
FunRoman wrote
Is it possible to transfer that quality to somewhere else? Like if I'm going to make a print. Will I get the quality of Library mode or Develop Mode. I know this a dumb question about printing and probably involve make other aspects. But specifically about the Develop Mode accuracy, where else it could be used but in that module?
Or maybe the problem is that I export in JPEG and I should switch to use another export format?
Ideally you should use 16 bit TIFF file format with ProPhoto RGB color space when Exporting or using Edit in PS. If using a locally connected printer LR uses the full 16 bit ProPhoto RGB image data. However, most printers use 8 bit data and only OS X supports 16 bit printer data path. In general you won't see banding with inkjet printers since they use dot pattern dithering. When using an outside print service it's best to follow their instructions as some insist on sRGB JPEG files. In this case go ahead and use the 100 JPEG Quality setting just to be safe.
Copy link to clipboard
Copied
https://forums.adobe.com/people/Todd+Shaner wrote
The Develop module (...) uses 16 bit image data in Prophoto RGB color space with an sRGB tone curve,
Actually it's a linear tone response curve, aka gamma 1.0. But the sRGB curve is used in the histogram. A linear TRC histogram wouldn't make much sense. This histogram color space - prophoto primaries and sRGB TRC - is what became known as "Melissa RGB", presumably after the engineer who came up with it. The internal working color space, gamma 1.0/PP primaries, doesn't have any particular name.
Copy link to clipboard
Copied
> Beautiful shot BTW, and perfectly exposed - too
Thanks D Fossee ![]()
Copy link to clipboard
Copied
Thanks everyone for your help. Today I've learned something new.
Copy link to clipboard
Copied
Here is a short video by Matt Kloskowski on banding in Lightroom Library Module.
Find more inspiration, events, and resources on the new Adobe Community
Explore Now