How to edit night sky images using Lightroom
Get started with editing your astrophotography images using Lightroom Classic with this easy step-by-step guide.
Editing images is a very personal thing. Some people like a lot of contrast in their images, some like a lot of color and others like to keep things as natural as possible. In this tutorial, I will show you the basic workflow I use to edit my Astrophotography night-time images. You can either use your own image to work on as you follow these simple steps or you can download my sample photo here.
The image I am using for the tutorial was taken on a Nikon APS-C camera mounted on a tripod in portrait orientation. I used an 18-55mm kit lens set at the maximum aperture of f/3.5 for 30 seconds at ISO1600. For this particular image, I left the shutter open slightly too long and as a result, you may see some star trails because the Earth's rotation, but zoomed out the stars look acceptably round. The ideal shutter speed for this scenario, considering that it was shot on a cropped sensor Nikon camera, would have been about 15 or 20 seconds.
Follow these steps as a starting point for editing your night sky shots:
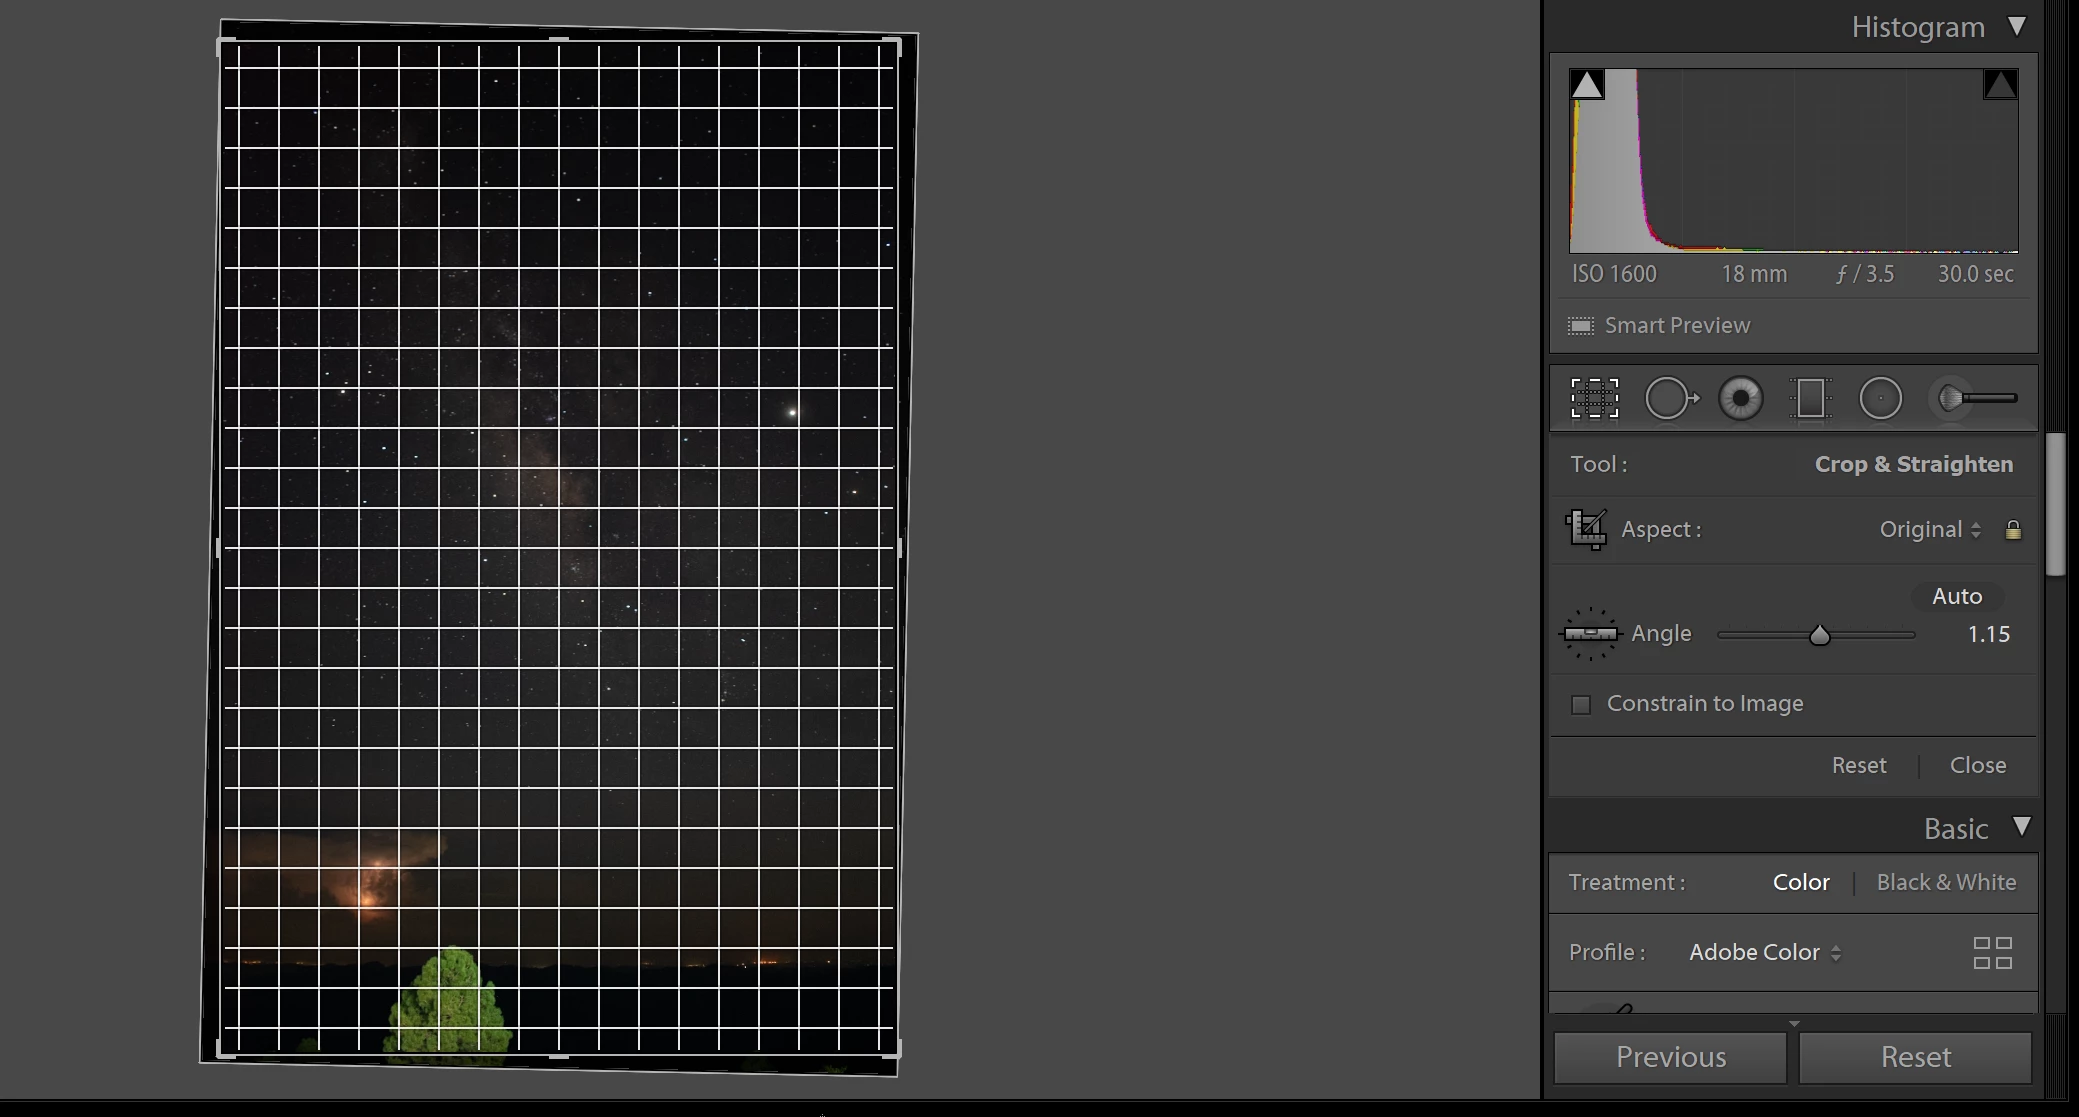
❶ Crop
The first thing to do is to crop the image to straighten it so that we have a level horizon. This gives the image a much better perspective.
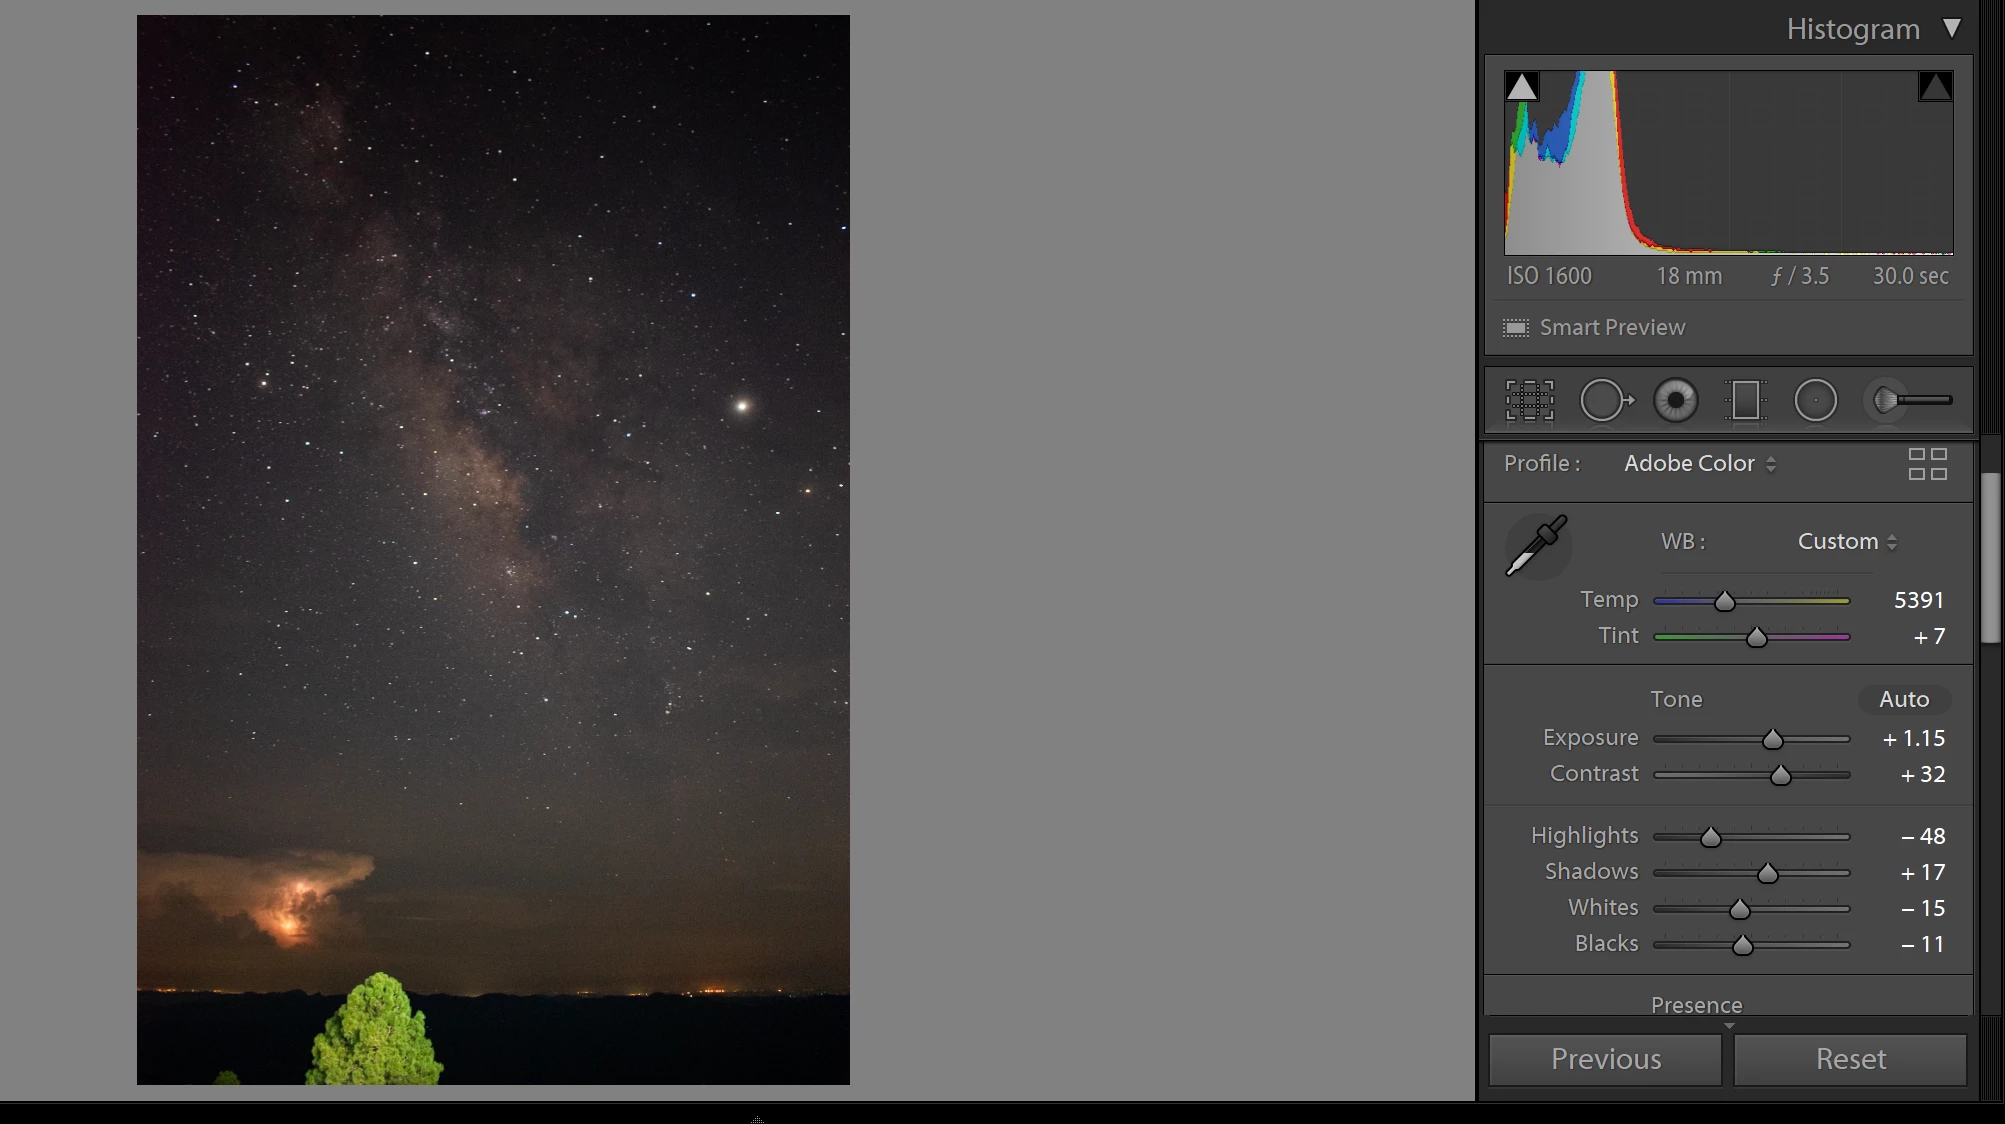
❷ White Balance
Next, change the White balance of the image and add a little tint to make the image look a bit warmer. This brings out the orange in the Milky Way and the lightning in the background.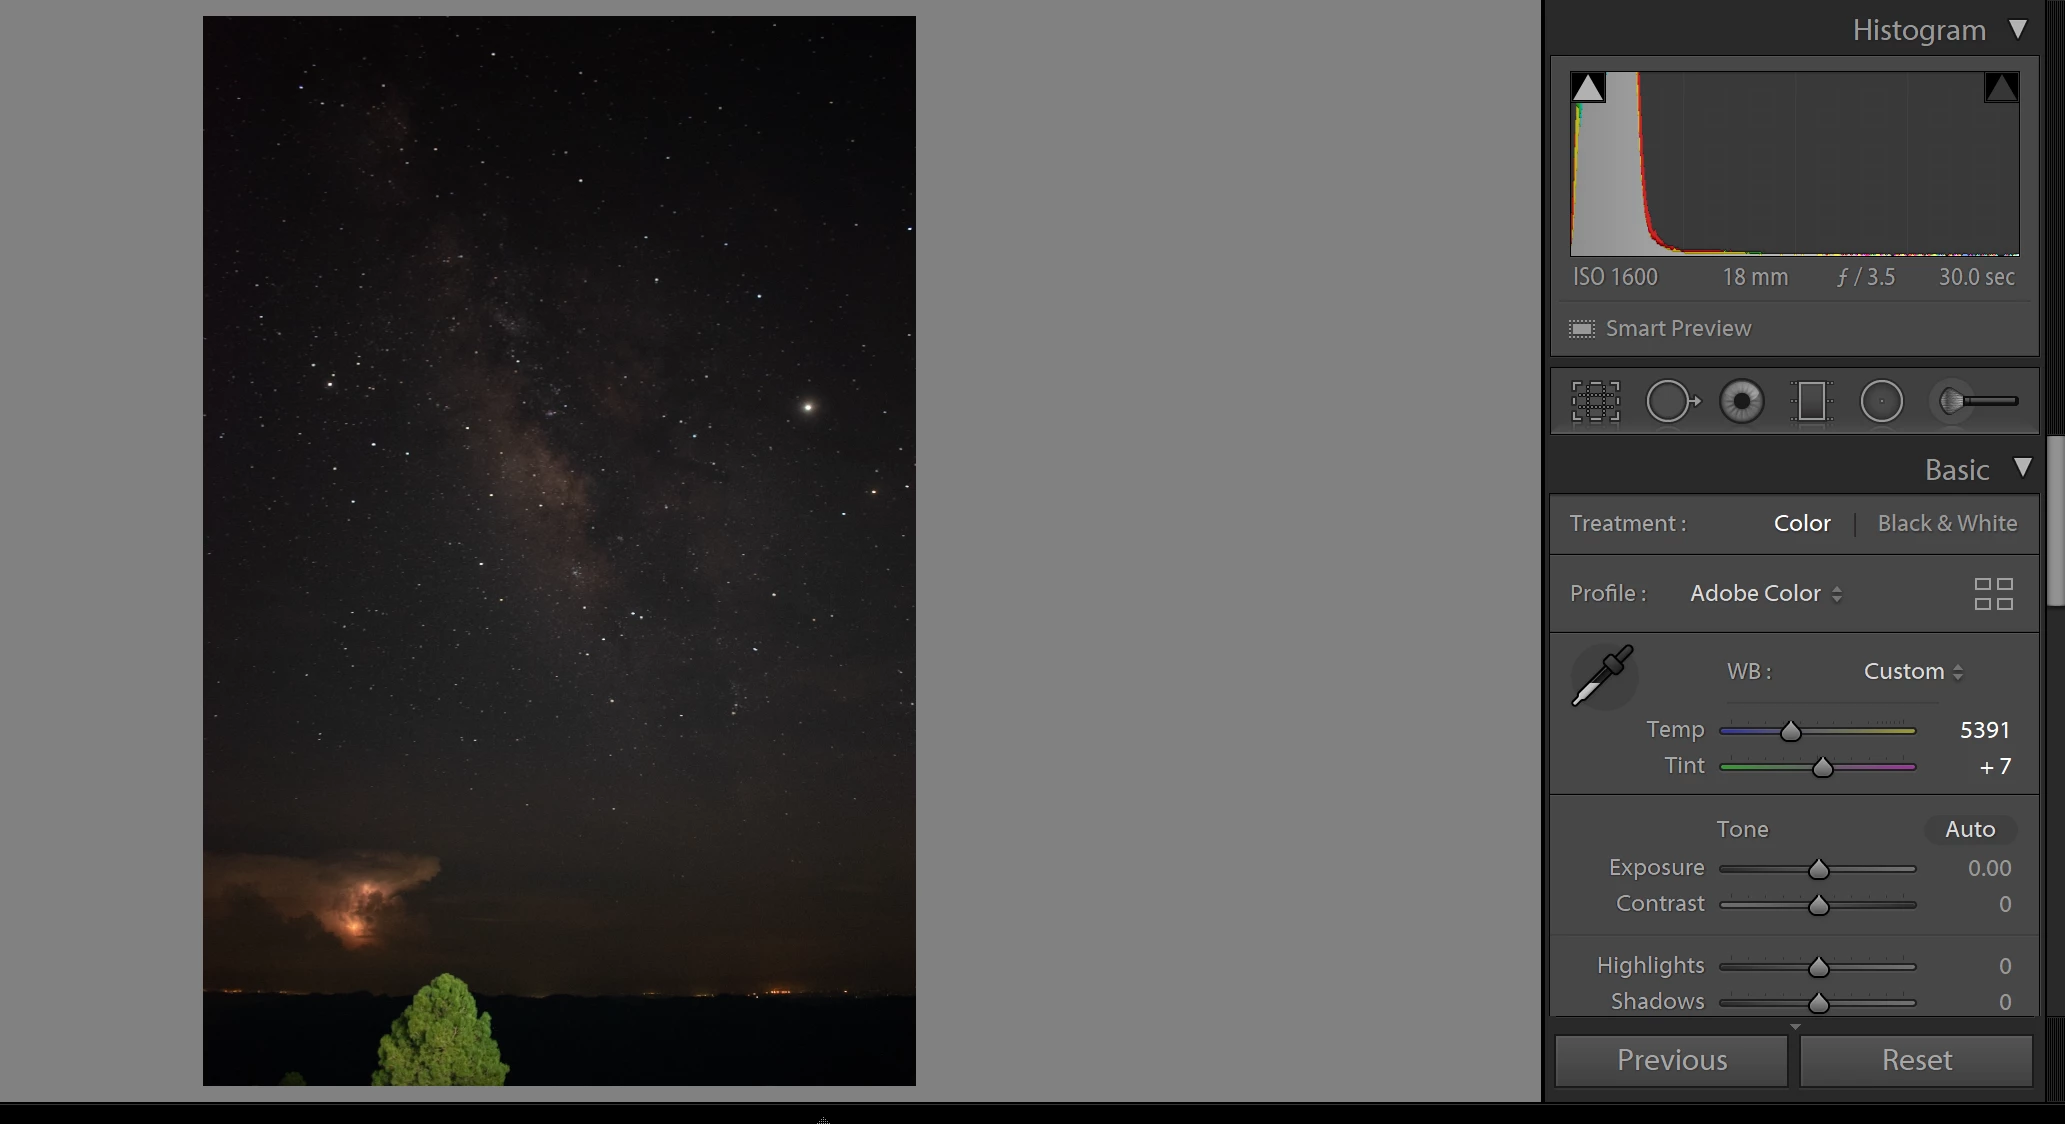
❸ Exposure
Next, increase the Exposure a little bit and add some Contrast to the image. This makes the stars pop and the Milky Way more visible.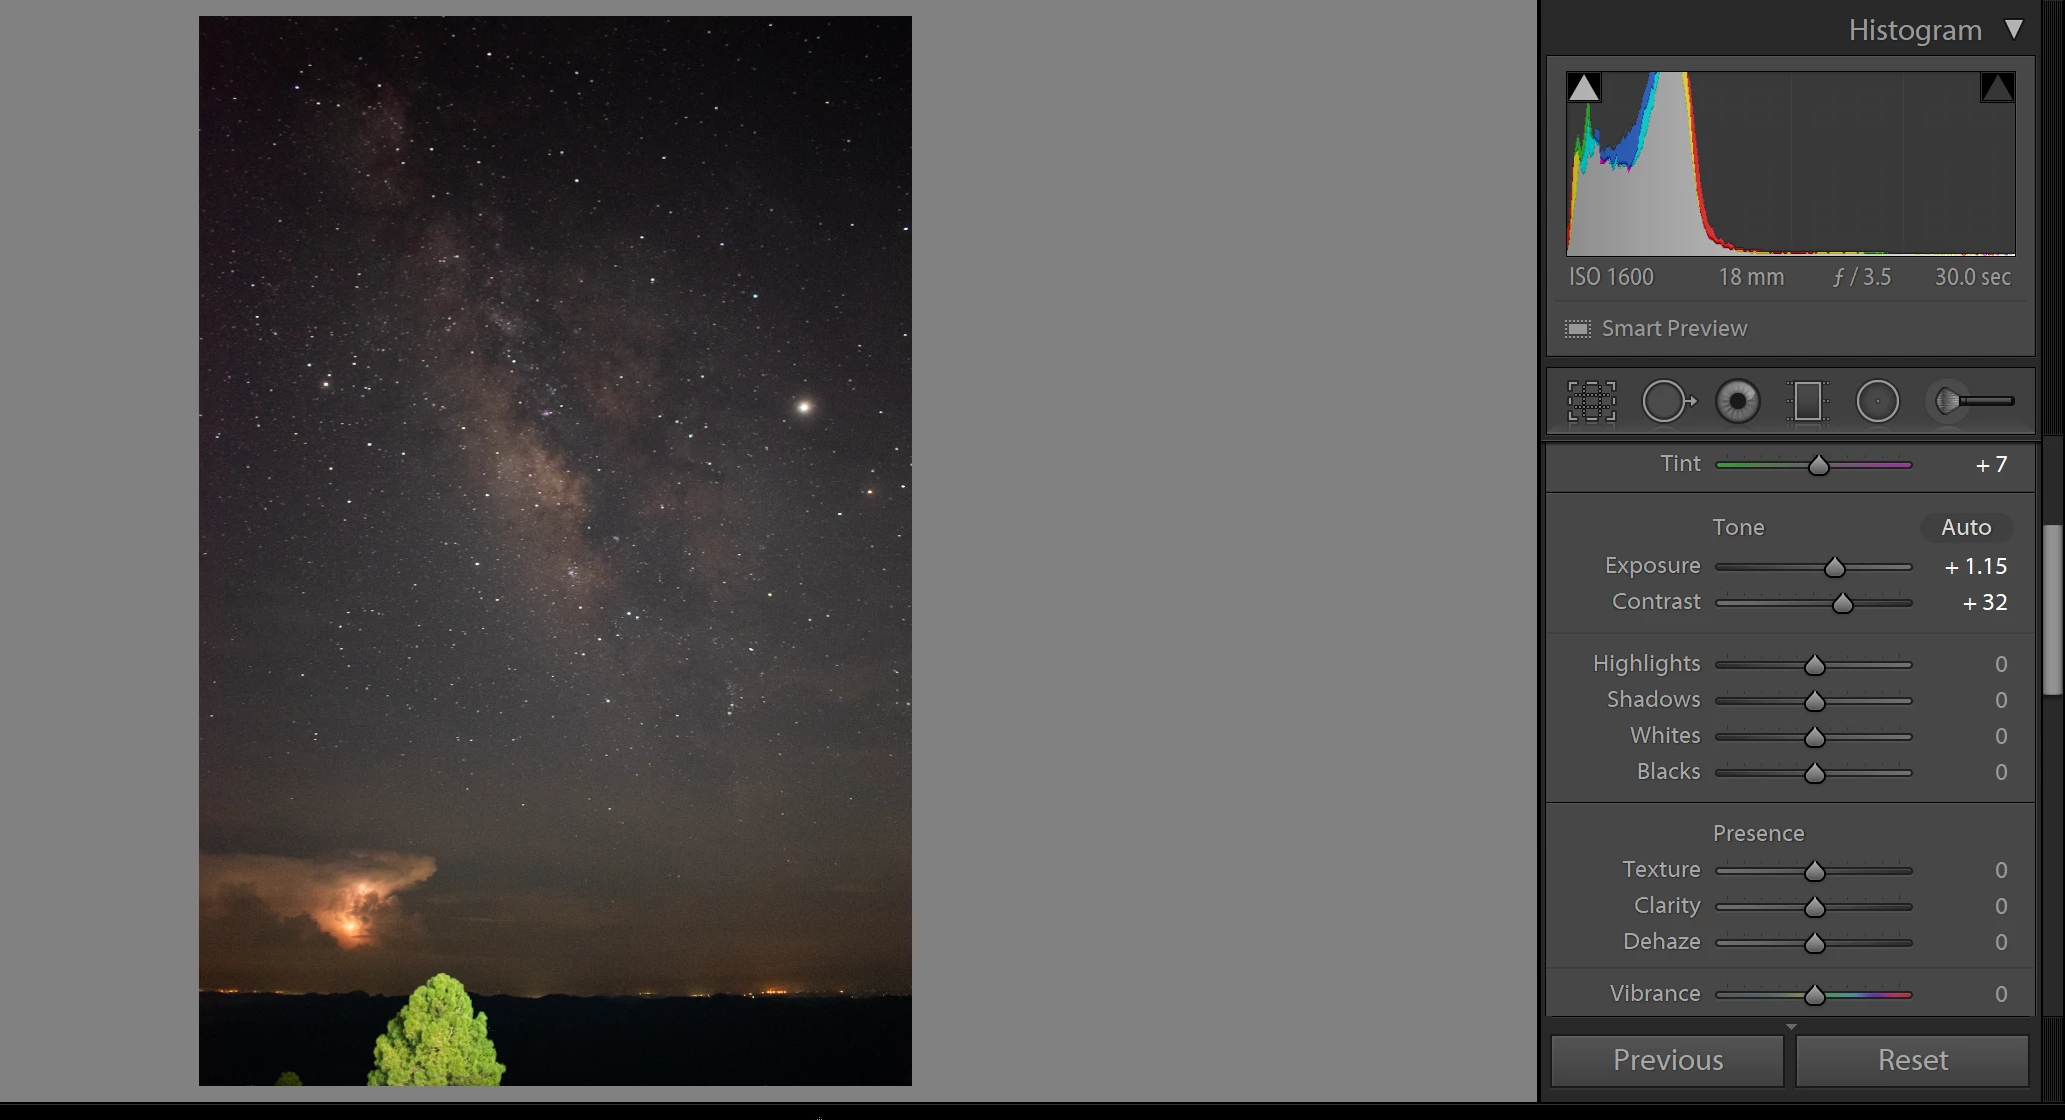
❹ Highlights, Shadows, Whites and Blacks
Now, change the Highlights, Shadows, Whites and Blacks (the settings depend on the look you are going for). In this case, I took the Highlights and Whites down somewhat and increased the Shadows. I also took the Blacks down a little to add more contrast to the image.
❺ Tone Curve
For now, skip over Texture, Clarity, Dehaze, Vibrance and Saturation and go to the Tone curve area. Adjusting the lower part of the curve will bring down the blacks and increase the contrast of the image. To accomplish this, click on the lower half of the tone curve and bring it down slightly until you are satisfied with how the image looks.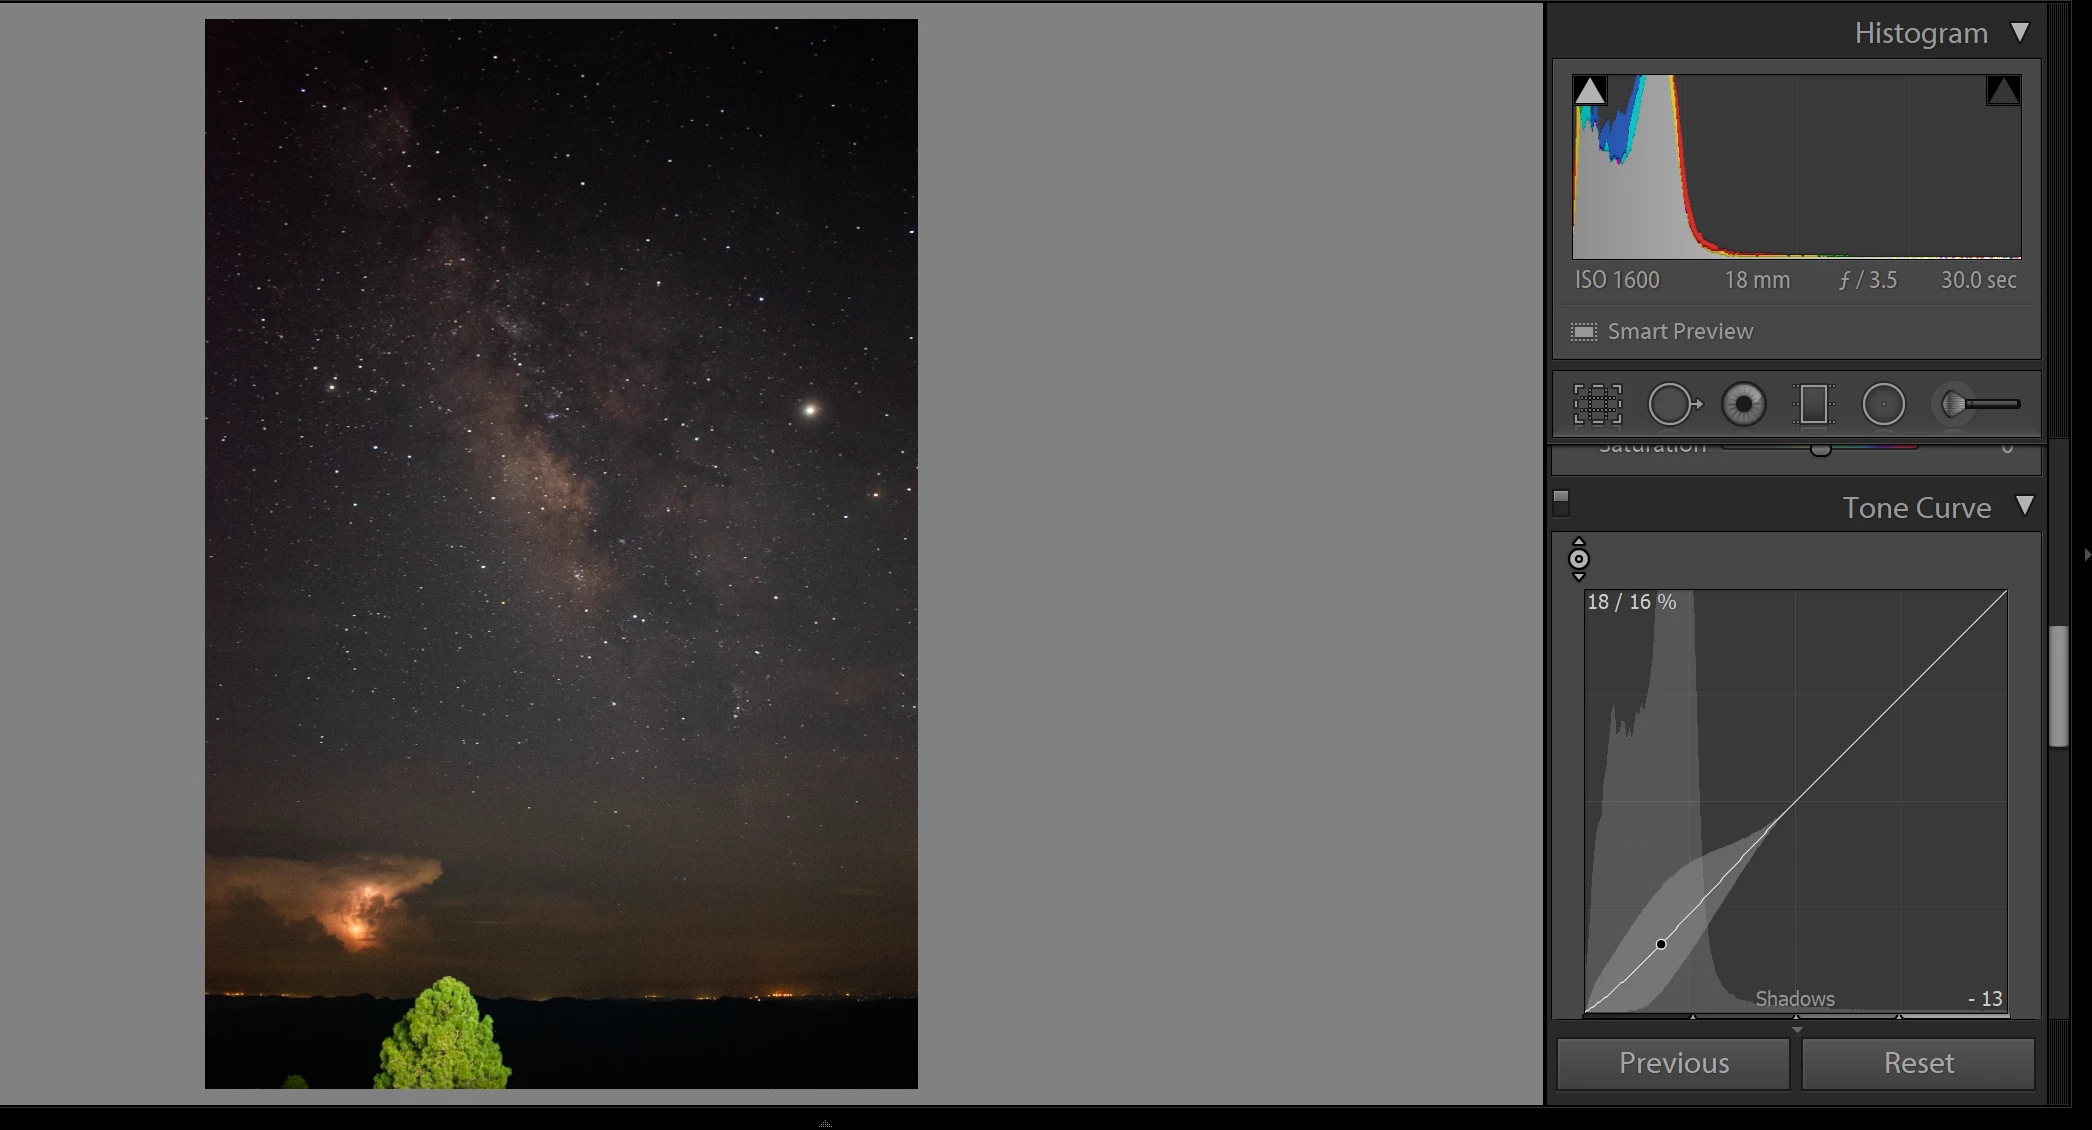
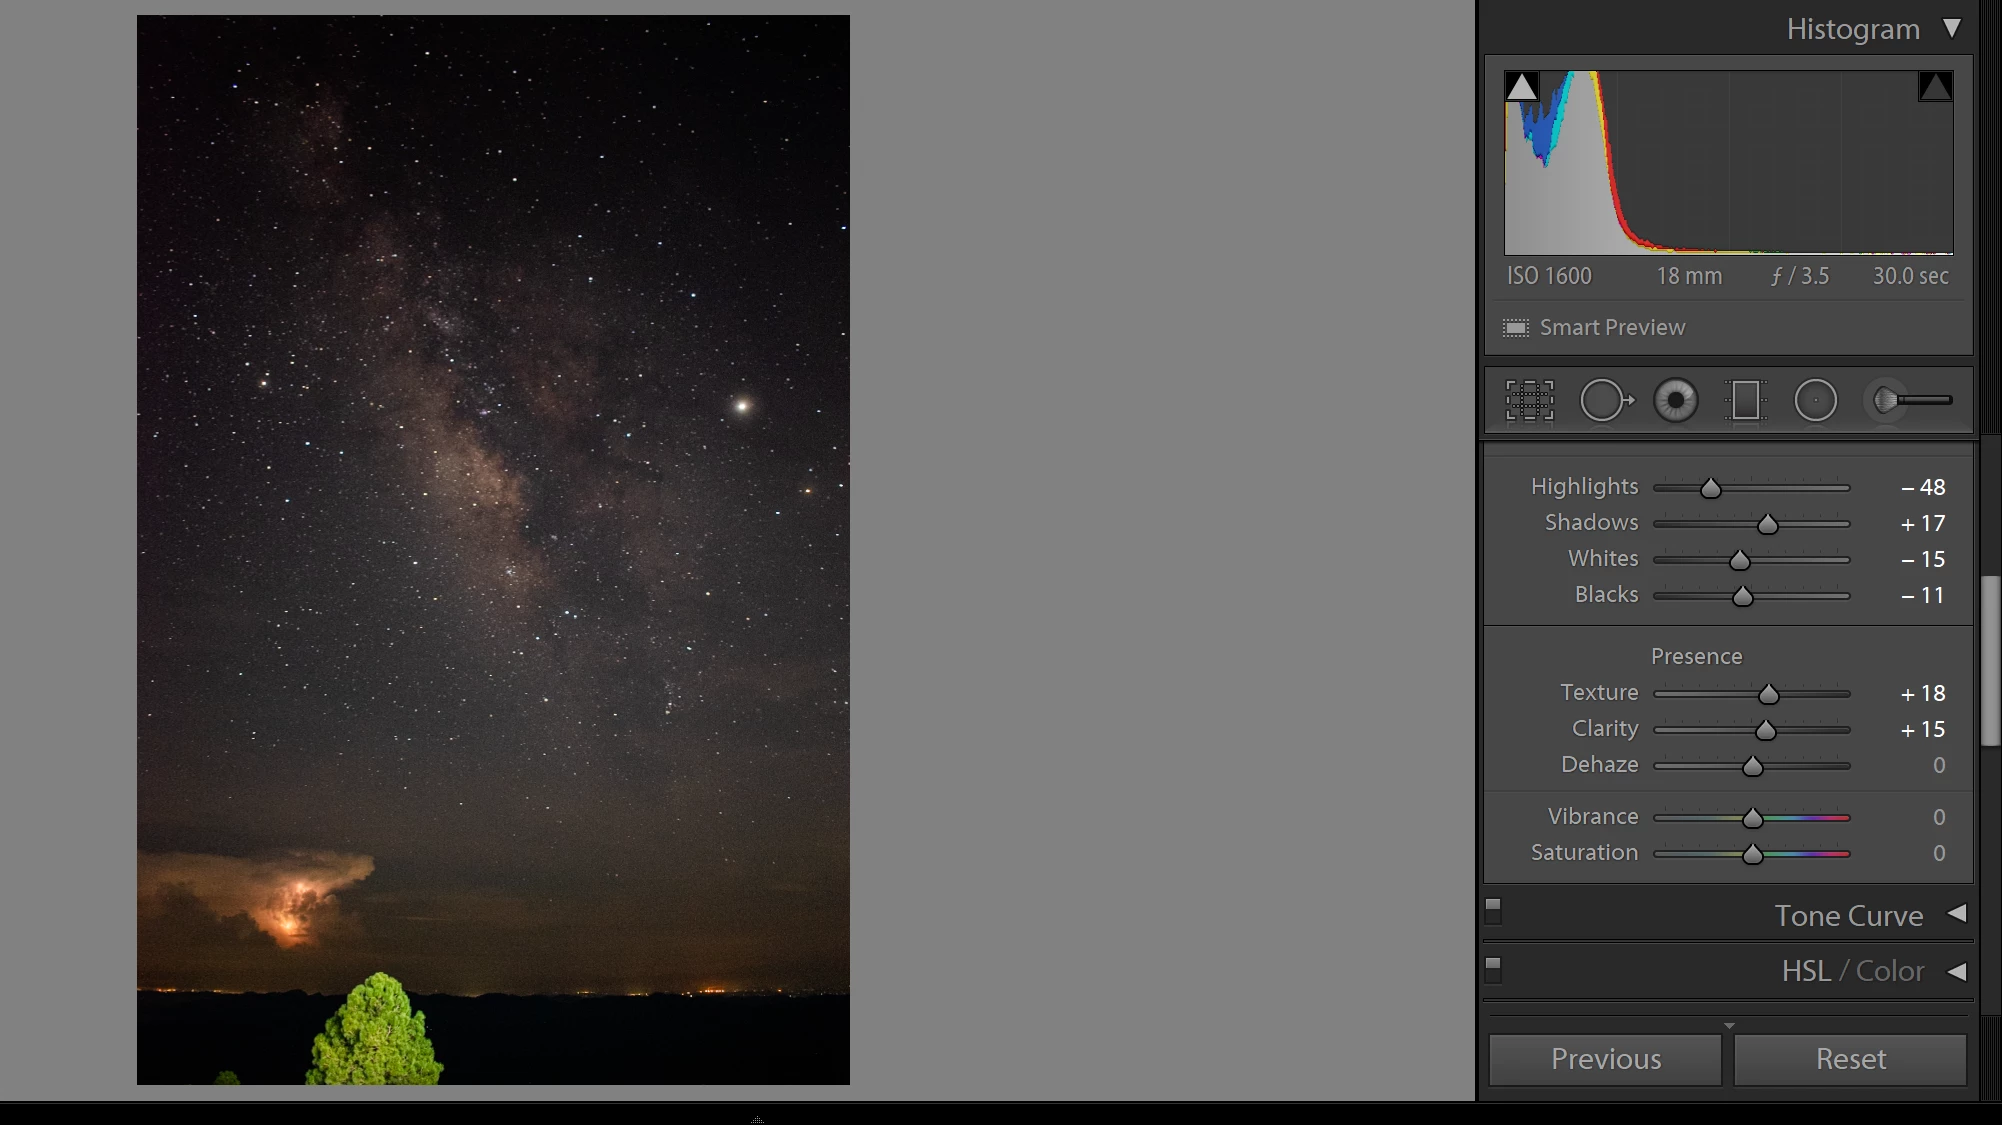
❻ Texture and Clarity
Next, add some Texture and clarity to make the night sky appear more clear. Be careful not to overdo these changes as they can introduce noise in the image.
❼ Dehaze
Using the Dehaze feature can help counter the effects of light pollution, but as with Texture and Clarity, increase settings sparingly to avoid introducing noise in the image. In this image, applying a little Dehaze was required, but it may not be required in every scenario.
❽ Vibrance and Saturation
Adding Vibrance and Saturation to the image will help make the colors of the Milky Way pop. Adjust these options to suit your personal taste. Some people prefer a subtle change, while others like vivid colors. The image below shows the values I chose for this image.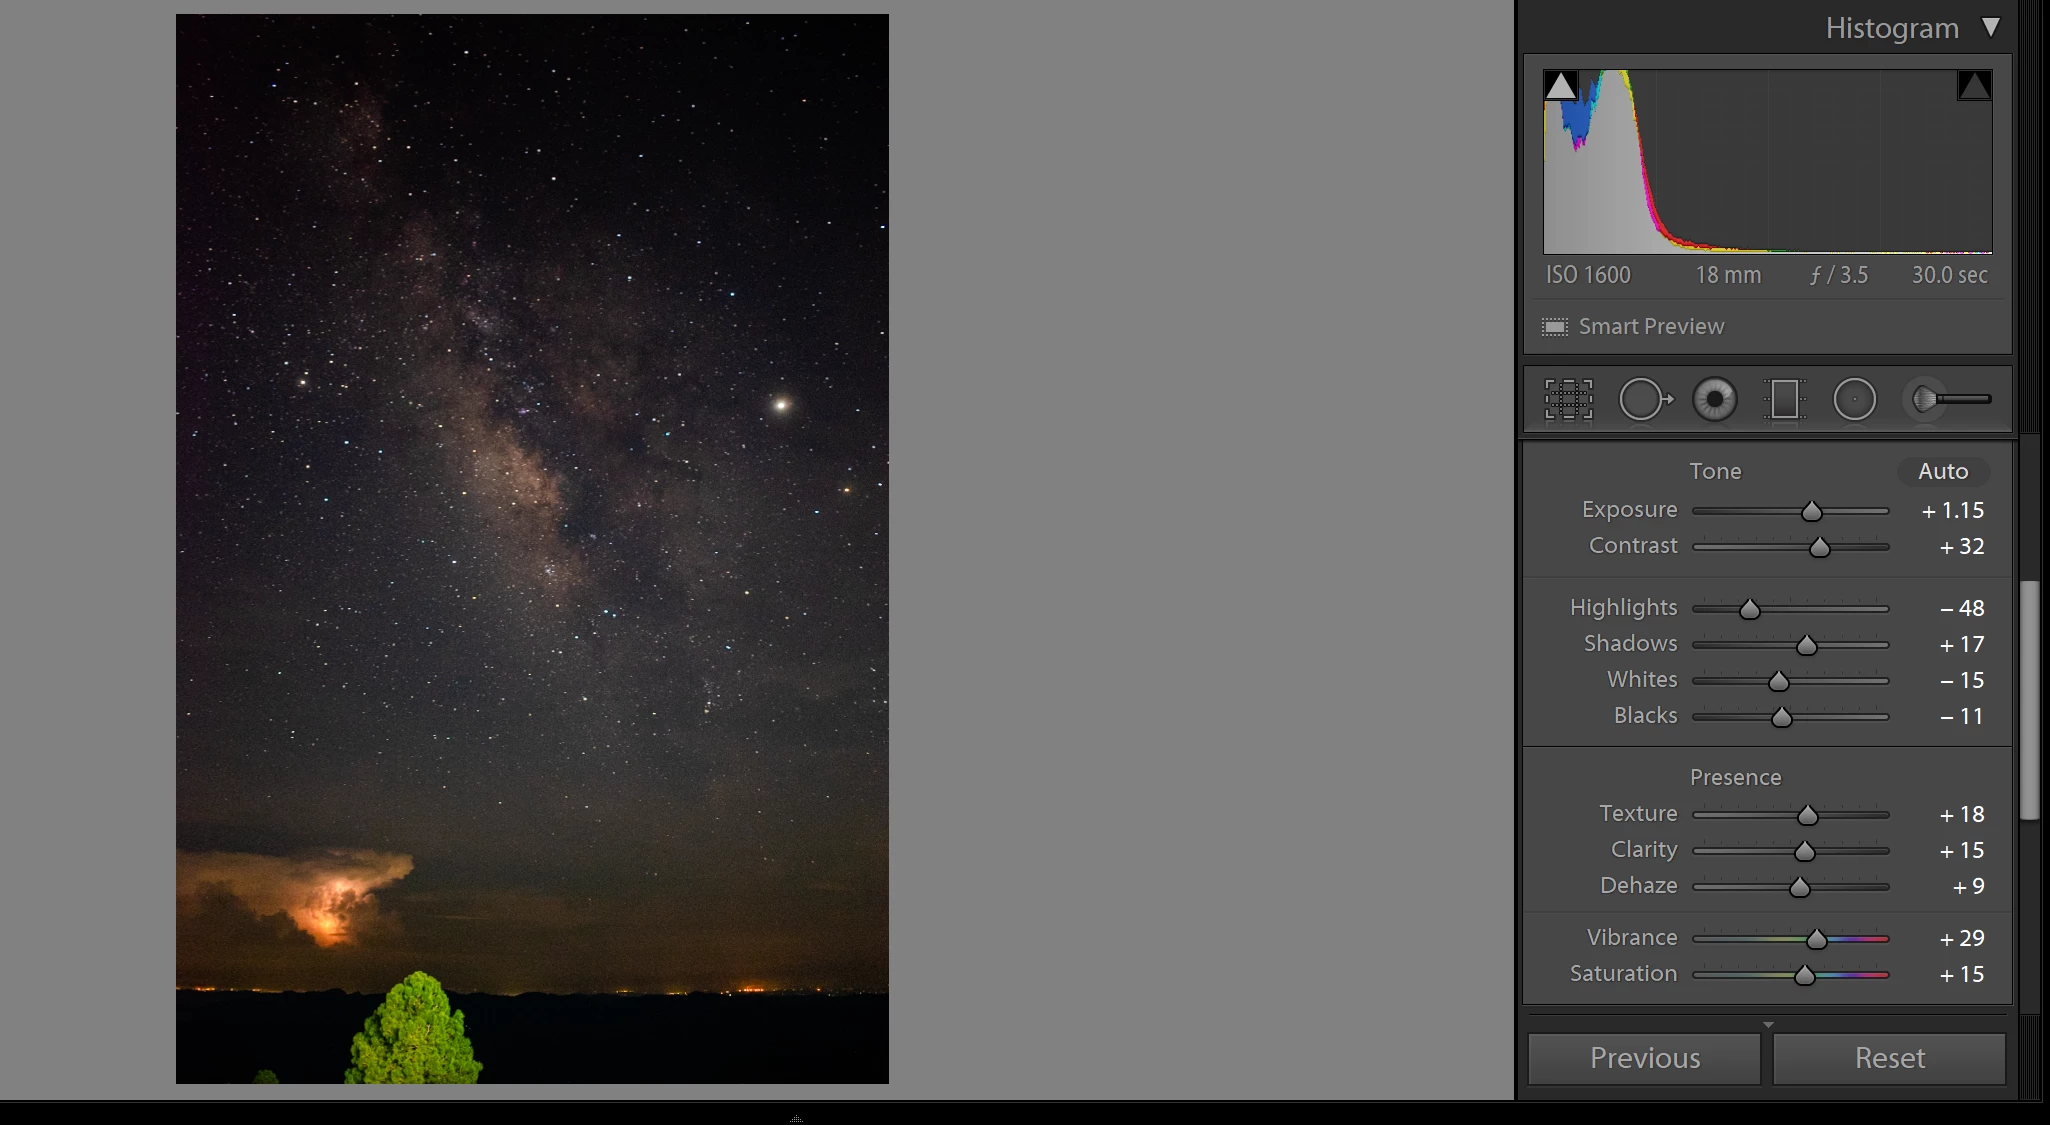
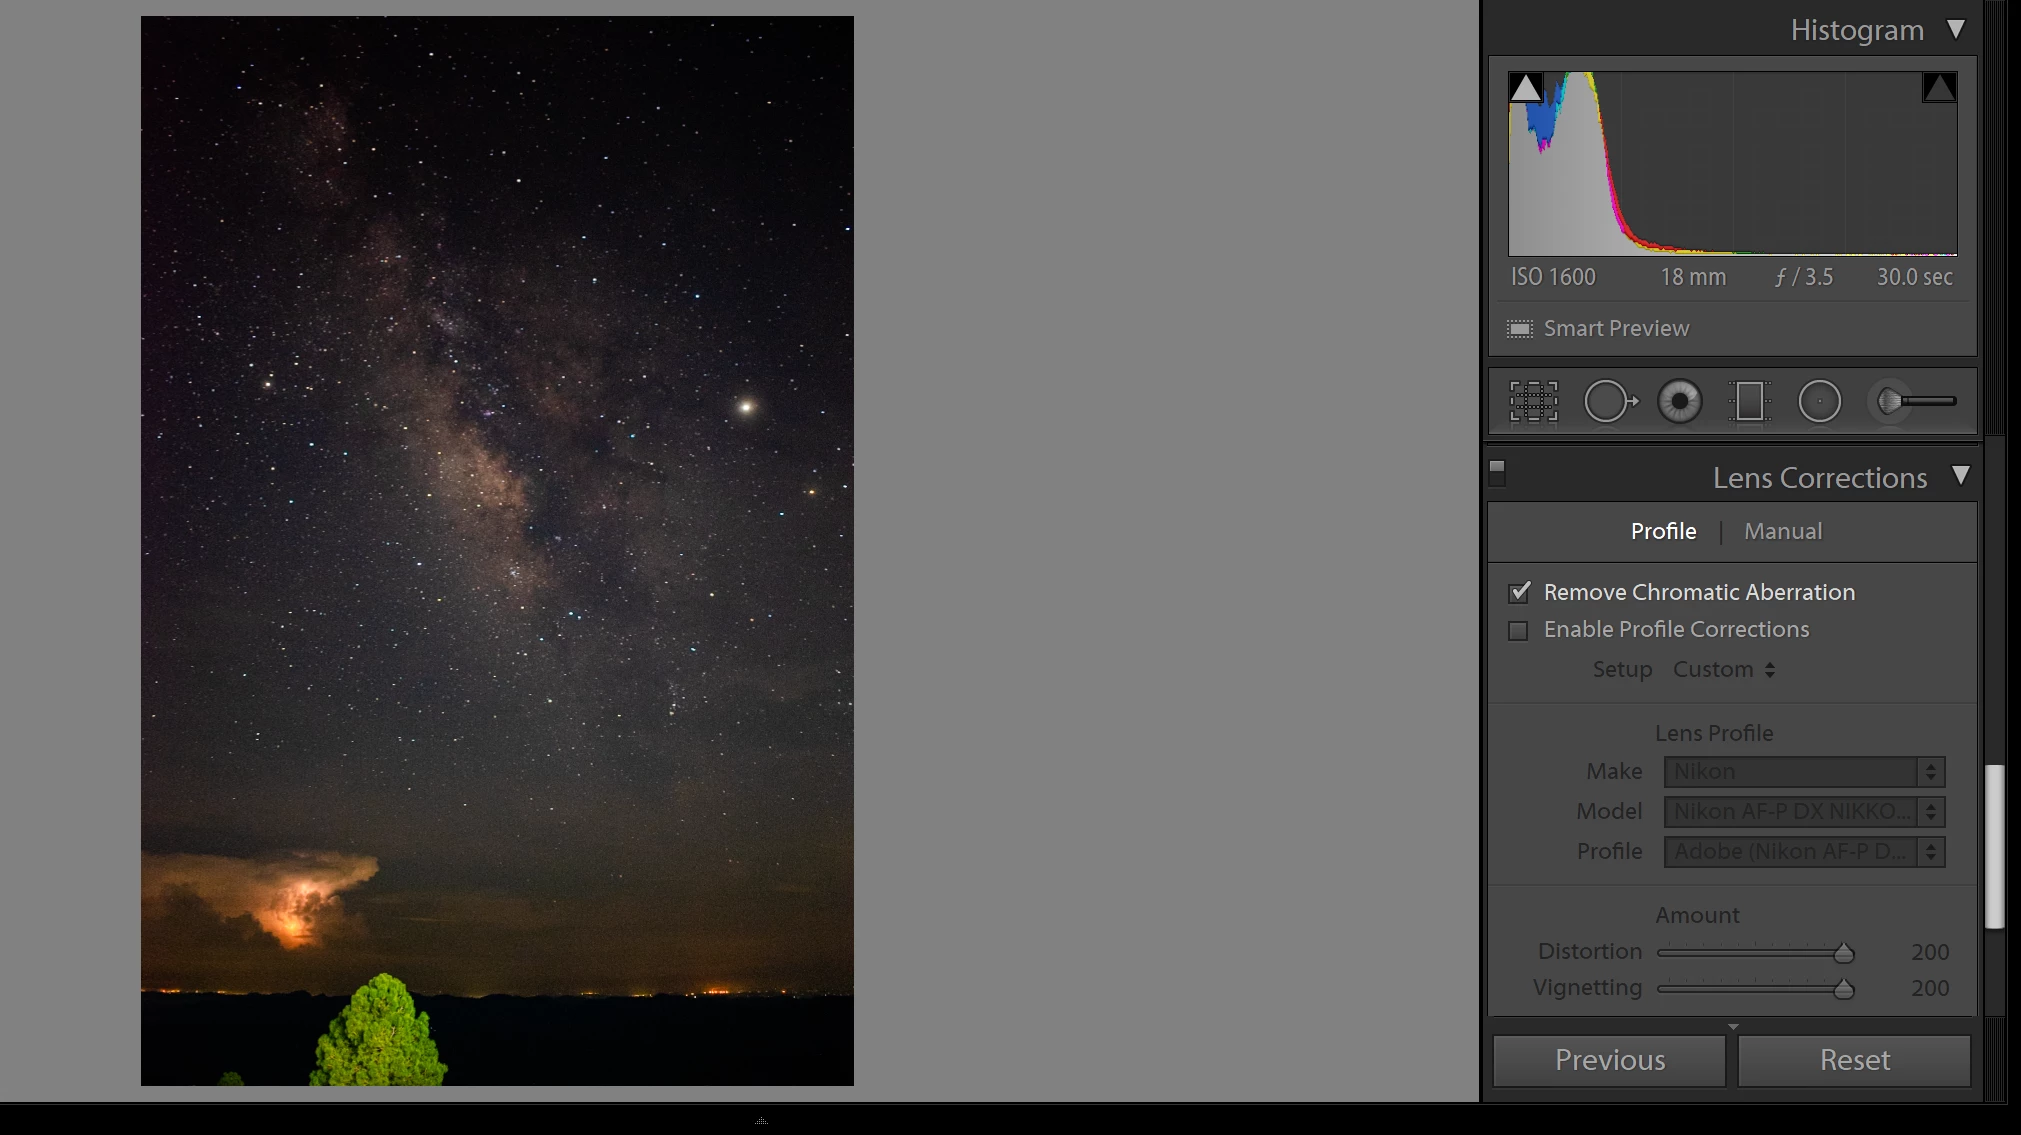
❾ Lens Correction
Some lenses introduce Chromatic Aberration which is where the lens fails to focus all of the colors to the same point in the image. Using the lens correction feature can limit this problem. Check the option to Remove Chromatic Aberration in the Lens correction section of the Develop module.
Note: Depending on the need for correction, you may not notice a difference in your image.
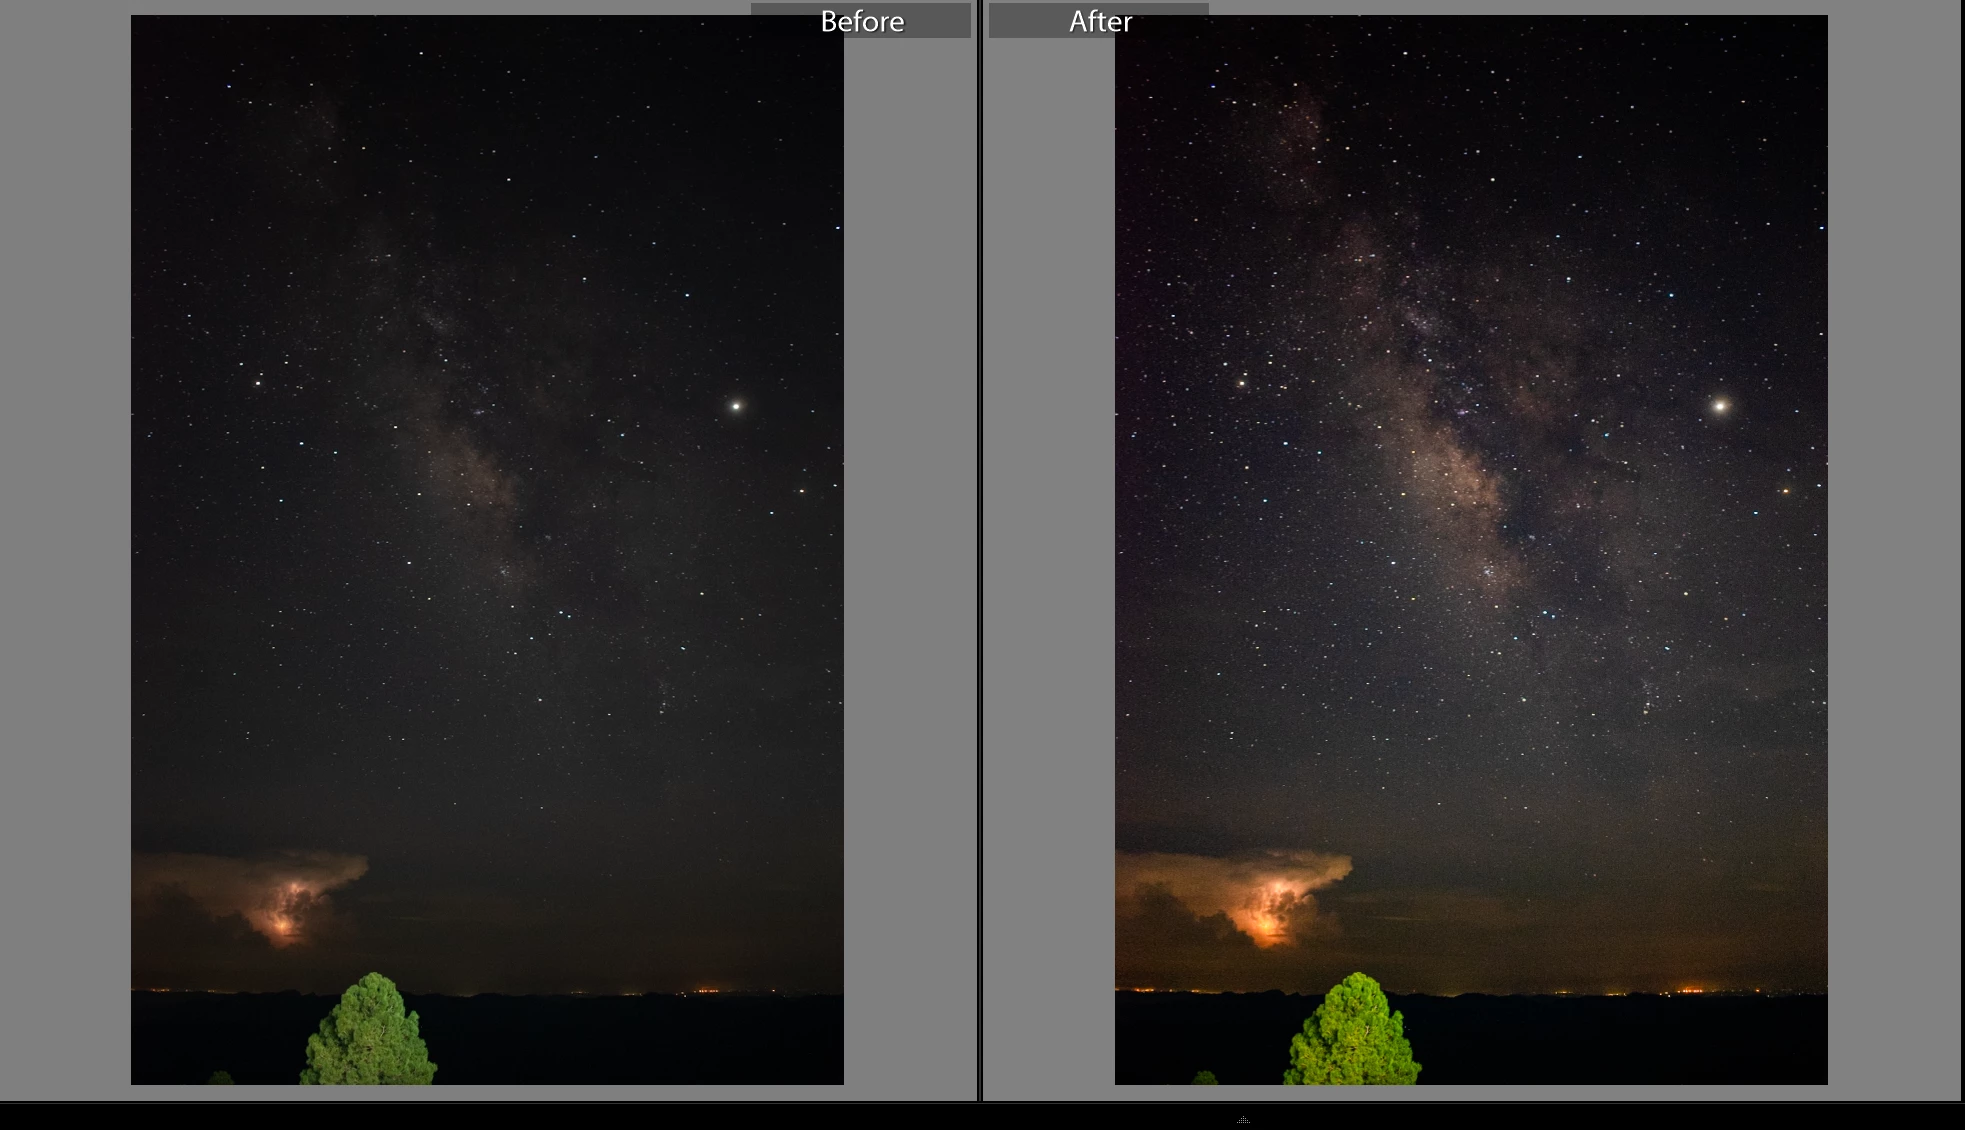
Lastly, here is a comparison between the before and after of the image. Again, the way you choose to edit your image is a matter of personal preference, but I hope this quick start guide will help you learn the basics of editing astrophotography in Lightroom so that you can begin to discover what your creative preference is!