 Adobe Community
- Home
- Lightroom Classic
- Discussions
- Re: Photoshop not seeing export color space settin...
- Re: Photoshop not seeing export color space settin...
Photoshop not seeing export color space setting in Lightroom 4

Copy link to clipboard
Copied
MY LR or PS programs are not acting as expected.
When my Lightroom 4 is set to export to Photoshop in either the sRGB color space or the AdobeRGB color space, and Photoshop is set for the sRGB space, Photoshop gives a color mismatch error in both cases, saying the image is an AdobeRGB embedded image. However, if the color space in PS is set for AdobeRGB, even if the export setting in Lightroom is sRGB, there is no mismatch error.
Apparently, PS sees every image as embedded with AdobeRGB.
I have a Sony NEX6 camera. I have taken pictures in the camera sRGB color space and the AdobeRGB space, which I used for this test. Since I shoot in RAW, this should not matter, so I don’t think it is the issue, and, in fact, I get the same result no matter which color space the camera is in.
If LR export and PS color space are the same, why should there be a mismatch, and why is PS not seeing the sRGB space? Might there be a setting in Lightroom or Photoshop that I am missing?


 66
Replies
66
66
Replies
66

Copy link to clipboard
Copied
howdego wrote:
I am, however, trying to decide on the right color space to use, which is how I noticed this problem. I rarely make prints of my photos. I make bluray movies using Proshow Producer. I recently got a new monitor and Samsung LED HDTV, and found that my photo videos did not display right and I am trying to find out why. I found the normal viewing settings of the TV have too much color and sharpness, so I established another group of settings for photos, which helped. However, I am still not satisfied.
These are two separate but related issues.
1) It's almost impossible to get accurate Color and Luminance level rendering inside LR if you don't use a hardware monitor calibrator to adjust your computer monitor.
2) LCD TV's use settings to "enhance" color, brightness, and contrast that is usually very, very inacuuarte. But this is what most non-photography people seem to like so TV manufacturers crank up the "default settings." I also have an older 52" Samsung TV (LN-T5265F) that I've manually adjusted for more accurate color. Try using the 'Movie' mode, which is the most accurate mode and turn the Backlight setting down. Here are the settings I use with my Samsung TV. I assume your Samsung TV's controls are similar:
| Setup Screens | HDMI 1 (Cable Box) & Coax (Cable) | HDMI 2 (Panasonic Blu-Ray Player) | ||||
| PICTURE - 1 | Movie | Standard | Dynamic | Movie | Standard | Dynamic |
| Contrast | 82 | 82 | 82 | 82 | 82 | 82 |
| Brightness | 43 | 45 | 45 | 43 | 45 | 45 |
| Sharpness | 25 | 25 | 35 | 15 | 15 | 25 |
| Color | 42 | 45 | 45 | 44 | 45 | 45 |
| Tint | 77 R | 77 R | 84 R | 77 R | 77 R | 84 R |
| Backlight | 5 | 6 | 7 | 5 | 5 | 6 |
| PICTURE - 2 | ||||||
| Color Tone | Normal | Normal | Normal | Normal | Normal | Normal |
| Detailed Settings | ||||||
| Black Adjust | Off | NA | NA | Off | NA | NA |
| Dynamic Contrast | Low | NA | NA | Low | NA | NA |
| Gamma | -1 | NA | NA | -1 | NA | NA |
| Color Space | Auto | NA | NA | Auto | NA | NA |
| White Balance | ||||||
| R-Offset | 13 | NA | NA | 13 | NA | NA |
| G-Offset | 15 | NA | NA | 15 | NA | NA |
| B-Offset | 17 | NA | NA | 17 | NA | NA |
| R-Gain | 15 | NA | NA | 15 | NA | NA |
| G-Gain | 12 | NA | NA | 12 | NA | NA |
| B-Gain | 17 | NA | NA | 17 | NA | NA |
| My Color Control | ||||||
| Pink | 15 | NA | NA | 15 | NA | NA |
| Green | 15 | NA | NA | 15 | NA | NA |
| Blue | 15 | NA | NA | 15 | NA | NA |
| White | 15 | NA | NA | 15 | NA | NA |
| Edge Ehnacement | On | NA | NA | On | NA | NA |
| xvYCC | Off | NA | NA | Off | NA | NA |
| Digital NR | Low | Low | Low | Low | Low | Low |
| Active Color | Off(NA) | Off(NA) | Off | Off(NA) | Off(NA) | Off |
| Dnie | Off(NA) | Off | Off | Off(NA) | Off | Off |
| SETUP - Screen 2 | ||||||
| Energy Saving | Off | Off | Off | Off | Off | Off |
| SETUP - Screen 3 | ||||||
| HDMI Black Level | Low | Low | Low | Low | Low | Low |
| Film Mode | Off(NA) | Off(NA) | Off(NA) | Off(NA) | Off(NA) | Off(NA) |
howdego wrote:
So it occurred to me that some colors might be wrong, or too saturated, because I am not seeing them on my monitor as they will appear on the HDTV. I am thinking that since sRGB is my final color space, I would try to do everything in the sRGB space, including setting my monitor to sRGB (I have a Dell 2413 which supports adobeRGB too). I was inn the process of trying this when I found the issue at hand. Might you have any thoughts about this color space choice
If you have a wide-gamut monitor you are better off using it in Adobe RGB mode with a monitor calibrator. But then the monitor will not look correct in non-color managed applications:
http://www.gballard.net/photoshop/srgb_wide_gamut.html
You can circumvent this issue by using your monitor in sRGB mode, but I'd still suggest you use a hardware monitor calibrator. Either way it is imortatnt that you have a proper monitor profile assigned in Windows or OS X Color Management. The monitor manufacturer provides these, but they don't always work well with LR for numerous reasons.
To insure the best image quality you should do all of your editing in PS using 16 bit TIFF with ProPhoto RGB profile format until you are ready to Export. For use with ProShow you can use TIFFs or JPEGs, but use sRGB color profile to avoid any color management issue. JPEGs are fine and a LR Quality higher than 80 (10 in PS) is a waste of disk space for slideshow images.
In short you've got a lot of "variables" between the uncalibrated monitor and out-of-the-box non-adjusted TV. The former requires a good hardware calibrator aad the latter a good "eye" to adjust it.
Copy link to clipboard
Copied
REply to 12.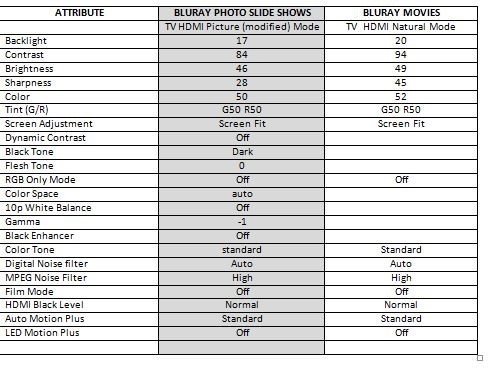
Just got my new xrite i1 display Pro and matching Passport. Will figure how to work it and apply sometime this week.
I checked my Samsung 7500 HDTV settings and tweaked the movie settings a bit for what I think is best, but they are nowhere near your numbers. See second column in attachment. That is a big problem, because it means that I cannot take a bluray disc or give it to someone with another TV and expect the photos to look right.
My workflow is to do most of my editing in LR, resize, fix if necessary and maybe sharpen in PS, and save back to LR as a PSD. That way I keep the image in 16 bit, with all its layers, so I can make additional changes before exporting to Proshow. Don't see why saving as a TIFF would affect the quality of the picture, and it would add more steps to my workflow. However, I guess working in prophoto in both LR and PS, would be ok if the monitor is calibrated and in sRGB mode, as even if there are more colors in the image data, my monitor will only see the sRGB gamut, just as my TV does. Do I have that right?
Copy link to clipboard
Copied
I suggest discussing the i1 Display, Passport, and TV settings issues after you've resolved the PS issue. They are separate but related issues which you should probably discuss in a separate post.
Your Samsung TV setup controls are different than mine, so the specific settings I posted would not apply. The point is that the out-of-box settings are not necessarily optimal for photographic slideshows or even Blu-ray movie playback. I have one (1) custom set of settings that I now use for all viewing. It shouldn't be necessary to adjust the TV differently for different sources or types of Blu-ray disks (Cable, Blu-ray, etc.). I think you will find that your LR edited images will look more "accurate" after hardware calibration of your monitor with the i1 Display device.
howdego wrote:
My workflow is to do most of my editing in LR, resize, fix if necessary and maybe sharpen in PS, and save back to LR as a PSD. That way I keep the image in 16 bit, with all its layers, so I can make additional changes before exporting to Proshow.
What you've just described can probably all be done from inside LR, except for the "layers." What are you adding to the image in layers?
howdego wrote:
Don't see why saving as a TIFF would affect the quality of the picture, and it would add more steps to my workflow.
TIFF and PSD are a lossless file format that supports 16 bit/color. JPEG is lossy and only supports 8bit/color. If your intention is to edit the PS file further in LR TIFF or PSD will provide the best results. Once your LR editing is 100% complete you can export with resizing and output sharpening in sRGB JPEG format based on your image usage in ProShow. I don't use the ProShow plugin so can't give advise. I prefer to be in control of the resizing and output sharpening process, but the ProShow plugin may work fine by itself
howdego wrote:
However, I guess working in prophoto in both LR and PS, would be ok if the monitor is calibrated and in sRGB mode, as even if there are more colors in the image data, my monitor will only see the sRGB gamut, just as my TV does. Do I have that right?
Is the gamut of your TV really sRGB and are you using a wide-gamut or standard gamut monitor? For most images the onscreen image differences you see between the computer monitor and TV screen should be minimal, assuming both are calibrated or at least properly adjusted. If you really want to see what your LR/PS images will look like on your TV you need to soft proof them using a profile that matches you TV's LCD screen. One example here:
http://forums.audioholics.com/forums/televisions-displays/79910-tv-calibration.html
Copy link to clipboard
Copied
trstrainor, comment 19:
I use the same settings ("basically the Samsung "natural") for both cable and DVR movies. However, as we discussed, they are wrong for my photos, pre calibration. I agree that I should hold off on that till I resolve this colorspace mismatch issue
I use Photoshop to do a number of things, like removing objects, removing wrinkles and blemishes, color tone changes that I missed in LR, changing skies, whitening teeth, etc. I also use photoshop to downsize my images to 1920X1079 as I am told it has the best downsizing software, and finally to sharpen beyond the LR sharpening, if necessary. I like to keep each operation on a separate layer when I can,
The Proshow plug-in changes the images to JPEG, and therefore to 8 bit color, and also to sRGB. I don't want the plugin to sharpen (and I don't believe it does) as I 've sharpened in LR and PS. Also, I think my TV images seem a bit grainy at times and I had to resharpen, But, I haven't tried sharpen on export to see what it would do.
My monitor is a Dell u2413, which is rated at 100% sRGB, and I think 98% adobe RGB. I think all TVs are rec. 709, which is like sRGB. Which is why I have decided to use the sRGB setting. I can't figure how I can compare the monitor output with my tv profile on my monitor.
Anyway, I still don't have a resolution for my embedded profile problem!

Copy link to clipboard
Copied
I have tested LR 5.2 with PS-CC 14.1.2/ACR 8.2 on Windows 7 64-bit and I don’t see the issue being described:
If I set my Export profile to sRGB and set the LR post-processing action to open the JPG in PS-CC, I see sRGB as its incoming profile.
If I set my Edit-In-PS profile to sRGB and use Edit-In-PS from inside LR, the raw file opens in PS-CC and it has sRGB as its incoming profile.
The “incoming profile” is listed in a warning message that I have enabled for showing me mismatched profiles, since my normal PS Workspace is set to ProPhotoRGB.
If you are using LR 4 as your initial message subject indicates, perhaps this is a bug that was fixed in LR 5.
Copy link to clipboard
Copied
I've used every version of LR since 1.0 with PS and never had an issue with the wrong color profile being assigned to an Export or 'Edit in PS' image. Currently I am using both LR4.4.1 and LR5.2 Final with PS CS6 on my Windows 7 system with no such issues.
The only other suggestion I can provide is to uninstall PS and LR, manually delete the PS and LR Preferences files, and then a reinstall both using a new download of the latest PS and LR installers.
Copy link to clipboard
Copied
It is possible this was an ACR issue with ACR 7.x but we're both using ACR 8.2 so don't see it.
Copy link to clipboard
Copied
It is also possible that there is confusion between going from LR to PS via Edit In or Export and actually opening the file in ACR and seeing Adobe RGB at the bottom, which is what ACR, itself, saves files as, not what the Edit In or Export save them as. If the workflow is more complicated than just using Edit In or Export to Disk then perhaps there is something else in the process that is using ACR's settings. You might want to check those and see if they are set to AdobeRGB and set them to sRGB if they are. Here is a long thread about this confusion on another user's part, and in reply 15 we see a screen shot with the blue Workflow options link indicating AdobeRGB:
Copy link to clipboard
Copied
SSprengel, comment 29:
WHOOOOOOOH!!!! Not sure I understand the first part, but, I opened a RAW photo directly from photoshop, which, of course, opened in ACR. I noticed that the info at the bottom of the photo said it was an adobeRGB image. Remember, that is how I was processing images until now. (But, I now have my LR edit in and PS color space set for sRGB). I reset the ACR hyperlink to sRGB. I then opened LR, selected a raw image and sent it to PS using the photo>edit in>CS6 command. Shockingly, It opened in sRGB, no error message. Great, right?
So the conclusion one comes to is that the ACR attached to PS is setting the color space that PS sees, not LR. BUUUUT, leaving ACR in sRGB mode, if I change the "edit in" setting in LR preferences to prophoto, and set the color space in PS to Prophoto, and then choose the edit in CS6 command in LR, the photo opens. The previous conclusion suggests that I should have gotten an error message.
So, maybe it is not a corrupted program, but a settings issue?
Copy link to clipboard
Copied
howdego wrote:
WHOOOOOOOH!!!! Not sure I understand the first part, but, I opened a RAW photo directly from photoshop, which, of course, opened in ACR. I noticed that the info at the bottom of the photo said it was an adobeRGB image. Remember, that is how I was processing images until now. (But, I now have my LR edit in and PS color space set for sRGB). I reset the ACR hyperlink to sRGB. I then opened LR, selected a raw image and sent it to PS using the photo>edit in>CS6 command. Shockingly, It opened in sRGB, no error message. Great, right?
If you use the Export command, not Edit in Photoshop, LR should provide the color space you ask for. The Edit in Photoshop command in LR uses ACR to render the raw data. It should still honor the color space you ask for in LR, not what's setup in the ACR Workflow Options.

Copy link to clipboard
Copied
The version mismatch seems to be the issue.
With both current versions (5.2 and CC) everything behaves as expected: Ctrl + E to Edit in Photoshop opens the image in the color space set in Lightroom preferences - irrespective of what the ACR workflow options say.
But then I opened my Lr 4.4 copy and did the same, Edit in Photoshop CC. This time, the ACR workflow setting consistently overruled the Lightroom setting, every combination.
Bug or feature? I don't know. It seems reasonable that with a version mismatch Lightroom relinquishes all control and hands everything over to ACR. I'v mostly had versions in step, so I haven't much experience with these scenarios.
EDIT: beat by a second again  . Yes, we're seeing exactly the same thing.
Copy link to clipboard
Copied
twenty_one wrote:
The version mismatch seems to be the issue.
That's been the issue from day one, however, LR should pop a warning dialog in this case. Perhaps the OP saw it and clicked on the "don't show again" option?
Copy link to clipboard
Copied
For me:
In the LR 4 preferences, the reset warning dialogs button is grayed out indicating there are no suppressed warnings.
LR 4.3 gives options in a popup.
LR 4.4 does not give any warnings and silently renders using ACR (as if ACR was a matched version).
Copy link to clipboard
Copied
ssprengel wrote:
For me:
In the LR 4 preferences, the reset warning dialogs button is grayed out indicating there are no suppressed warnings.
LR 4.3 gives options in a popup.
LR 4.4 does not give any warnings and silently renders using ACR (as if ACR was a matched version).
What is the version of ACR? I'd expect a warning with 4.3 but not 4.4 depending on the version of ACR but to be honest, I can't recall with those dot releases what they are supposed to sync in terms of the an ACR version. If the two are on parity, there should be no warning as both ACR and LR have the same processes. If the two are not in sync, if ACR is older, LR should pop a warning. If not, that sounds like some kind of bug although we're talking about old versions anyway. Bottom line is, doesn't mater (shouldn’t matter) if the two are out of sync, don't use the Edit In command, just Export. That should be working and the profiles should be honoured in Photoshop. If not, that's news to me, I've never seen that behavior.
Copy link to clipboard
Copied
For all purposes using 'Edit in PS' it is best "synchronize" your 1) PS Color settings, 2) Camera Raw 'Workflow Options,' and LR 'External Editing' preferences to ProPhoto RGB, 16 bit, TIFF format. As mentioned this insures the best possible image quality when editing the LR image inside PS. Once done editing you can convert the image to a different profile, bit depth and file format using a multitude of different tools available inside PS, including the Image Processor, Actions, Droplets, Scripts, or simple 'Save As.' Yes, you will need to 'Synchronize" the folder to bring the image file(s) back into LR, but really how hard is that! This also prevents the color profile ambiguity form occurring when using different versions of ACR in PS and LR.
If you simply want to convert a file to a different format or color space from inside LR then Export makes a lot more sense. File format, color space conversion, and resizing should be the very last step after all processing has been completed, regardless of the application you use (PS or LR).
Copy link to clipboard
Copied
As mentioned in previous replies of mine, these are all with PS-CC 14.1.2/ACR 8.2.
The mismatch problem is when LR is newer than ACR as you say, but we’re talking about the opposite situation, where LR is older than ACR, and since the newer ACR version can certainly do all the adjustments the older version of LR can do, then there’s no need for LR to render to a TIF due to ACR not understanding LR.
A valid reason might be if the LR-to-PS communication protocol has changed so PS is expecting information like LR 5 would tell it and LR 4 doesn’t have that infomration—if LR isn’t telling PS enough for it to pull up ACR and render the file. If this protocol has been stabilized and there were no changes between CS6-7.4 and CC-8.x, which seems reasonable since PS-CS6 is supposed to be able to use ACR 8.2, then theoretically and old LR can call the new PS and things would work as seamlessly as if the LR and PS were synched completely.
Copy link to clipboard
Copied
It gets even more interesting:
With the opposite scenario, new Lr / old Photoshop, you no longer get the three options "Render Using Lightroom/Open Anyway" etc. I set Lr 5.2 to use CS 5.1 as additional editor and got this:
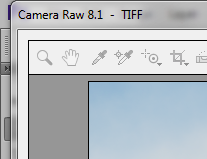
If you then go ahead it opens in ACR:
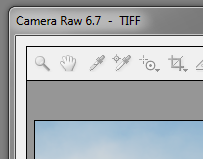
However, if you already have Photoshop CC open, it opens in ACR 8.1:
So clearly there's been an integration attempt, and the profile issue is an oversight/bug.
EDIT: actually it just occurred to me that on this machine Lr / ACR haven't yet been updated to .2 (just postponed because of a slow internet connection). So the dot numbers aren't correct above, but the main point is still that the fundamental version mismatch behavior has changed.
Copy link to clipboard
Copied
These problems can all be avoided by simply synchronizing color settings across all Adobe applications. If you use multiple Adobe Creative Suite applications that's what you should be doing anyhow, regardless that Lightroom isn't considered a CS product.
Why would you want to output your 12-14 bit, wide-gamut ProPhoto RGB, loss-less raw image for editing in PS in 8 bit, lower-gamut sRGB, lossy JPEG mode? The primary reason the OP is doing this to see how the image will look on an sRGB gamut TV:
Post #10
"So it occurred to me that some colors might be wrong, or too saturated, because I am not seeing them on my monitor as they will appear on the HDTV. I am thinking that since sRGB is my final color space, I would try to do everything in the sRGB space, including setting my monitor to sRGB (I have a Dell 2413 which supports adobeRGB too). I was inn the process of trying this when I found the issue at hand. Might you have any thoughts about this color space choice?"
This can be done using 'Soft Proof in LR or 'Convert to profile' with soft proof in PS using sRGB destination space. It does not require setting the monitor to sRGB mode, or working in PS in sRGB mode. Andrew Rodney's video covers this near the end:
Copy link to clipboard
Copied
trshaner wrote:
These problems can all be avoided by simply synchronizing color settings across all Adobe applications.
Well, yes and no. ACR doesn't honor those settings anyway, it goes its own way.
And I believe it's far more important to have all color management policies set to "Preserve". I have my color settings deliberately unsynchronized between Ps and Id/Ai, for specific reasons, but that causes no problems as long as all incoming RGB profiles are honored. I don't even need to have the mismatch warnings on.
(For CMYK it's a little more complicated. Id and Ai are set to preserve numbers, not profiles. That's to avoid some common pitfalls such as 100 K black turning into 4 color black).
Copy link to clipboard
Copied
twenty_one wrote:
trshaner wrote:
These problems can all be avoided by simply synchronizing color settings across all Adobe applications.
Well, yes and no. ACR doesn't honor those settings anyway, it goes its own way.
That's exactly why I suggested synchronizing (i.e. manually setting) all Adobe apps to the same RGB color space options to prevent these conflicts from occurring in the first place, and that includes ACR. I'll repeat it again here:
For all purposes using LR 'Edit in PS' it is best "synchronize" your 1) PS RGB Color settings, 2) Camera Raw 'Workflow Options,' and LR 'External Editing' preferences to ProPhoto RGB, 16 bit, TIFF format. As mentioned this insures the best possible image quality when editing the LR image inside PS.
twenty_one wrote:
And I believe it's far more important to have all color management policies set to "Preserve". I have my color settings deliberately unsynchronized between Ps and Id/Ai, for specific reasons, but that causes no problems as long as all incoming RGB profiles are honored. I don't even need to have the mismatch warnings on.
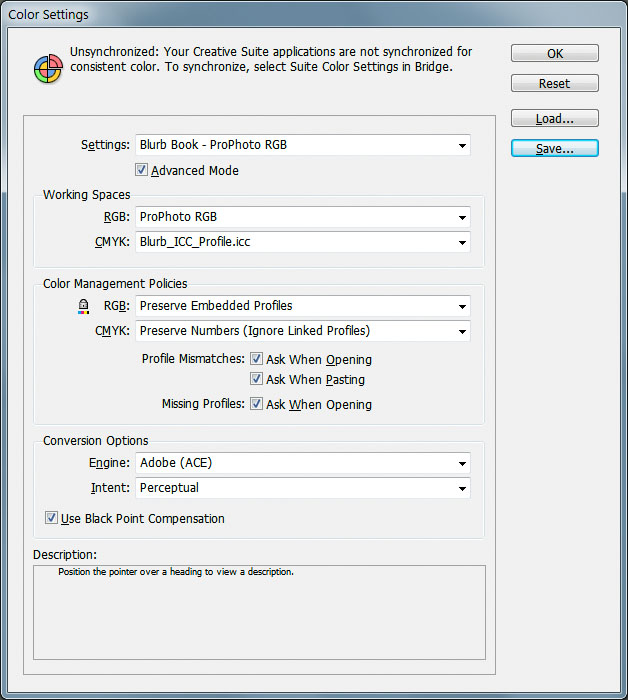
Agreed. I do my Blurb books using their InDesign template and PDF Export preset with ID color settings "unsynchronized:" But in this case we are only talking about PS's, ACR's and LR's 'RGB' color settings, which I am suggesting be set the same.
My apologies to the OP howdego for going a bit off topic, since your issue is with RGB image editing in LR and PS only.
Copy link to clipboard
Copied
Too all:
Okaaaa! I think I get it. There is a problem with the interface with regards to color space matching if one has LR4.4 and PS6 (not the cloud version). Even if the LR4 edit in setting is X, and the PS color pace is X, the image may open in X, or may give a mismatch error message, depending on what color space the ACR workflow is set at. So, while I haven’t tried this yet, if I manually set ACR workflow to X, every image should open correctly. Adobe should fix this, but, for someone like me who is just trying to determine the single right color space to work in for my purposes, and will not, hopefully, need to change it, I can work with that.
I am very grateful to you guys for figuring this out, so I can now move to the next step and not be worrying about corrupted programs or image files. I will likely leave the alert on mismatch policy to on. If I am wrong about any of this, please let me know.
If I am right, could you advise me on the second issue? I assume I can now calibrate my monitor . If yes the question arises as to which color space to use. Based on you guys, as well as Schewe. Evening and Kelby, I should work in 16 bit prophoto mode while in RAW, PSD or Tiff format in order to retain all the captured colors as long as possible( I recognize that TRShaner recommends using TIFF, but I am not yet convinced that PSD format would not serve just as well). In order to take advantage of the greater range of colors, I would think I would want to set my monitor to AdobeRGB (to at least see the 98% of them that my monitor can display).
So, Just to review my workflow, I:
1. 1. Edit using Lightroom 4.4, including detail sharpening.
2. 2. Open image in PS6 (stand alone version), using the LR “edit in” command, as psd, 16 bit.
3. 3. In PS6, I edit further, resize to HI Def (1920 X 1080) and sharpen a bit more, if necessary. I guess to me, this is the output sharpen stage.
4. 4. Save the photo as 16 bit PSD, which shows up at the top of a stack in LR.
5. 5. Export a group of photos from Lightroom to Proshow Producer using the Lightroom Proshow plug-in. The plug-in converts the images to sRGB, JPEG, thereby flattening the PSDs and changing them to 8 bit mode
But here lies the second issue. If I keep the monitor in AdobeRGB mode, will selection of the softproof option in LR, after completing my editing in LR and before I send the pictures to Proshow, properly show me what the photo will look like in sRGB format, ( assuming, as discussed previously, my TV is sRGB and I use the settings on the TV that show my pictures best), even though the monitor is still set for AdobeRGB?.
Copy link to clipboard
Copied
howdego wrote:
If I keep the monitor in AdobeRGB mode, will selection of the softproof option in LR, after completing my editing in LR and before I send the pictures to Proshow, properly show me what the photo will look like in sRGB format
Yes, if you softproof to sRGB the gamut will be limited to sRGB on-screen (even if the monitor is capable of a larger gamut), so that's perfectly safe.
Setting the monitor to sRGB mode is only required in a non-color managed environment. Sending an image with sRGB numbers to a wide gamut monitor, without a remapping of those values into the monitor profile (color management), will result in oversaturation and garish colors. But Lightroom wil do that monitor profile conversion in any case, soft proof or not. The soft proof merely limits the gamut to the proof profile, which is what you want.
You should always calibrate and profile the monitor with its full native capabilities. The monitor setting that Dell calls "Adobe RGB" is actually not a perfect match to Adobe RGB, but an emulation/approximation. If the monitor has a "custom" or "native" setting that would be even better, that way you get the most out of it.
Copy link to clipboard
Copied
twenty_one, reply 56
My monitor has a "custom" selection, as well as a "standard," s and adobeRGB, , CAL 1 and 2, and various other formats. Changing the display from one setting to another definetely changes the colors a bit. The Custom setting is much greener than the adobe and standard (whatever that is) settings. So I guess I would use the "custom" setting per your recommendation. I assume I would thereafter be getting a custom profile developed by the calibration tool, and would keep my monitor in the the new custom color space?
Copy link to clipboard
Copied
Don't worry about how it initially looks with the different settings. In fact you can build a profile based on any of those settings, and they would all be valid as long as the display is kept at that setting. The point is that you want the monitor's initial state to be as "unrestricted" as possible. Even the Adobe RGB setting will limit the gamut a little bit, since the native gamut is a slightly different triangle, with the three primaries shifted a little.
And now an important distinction: We speak routinely of "calibration". But it's actually two things; calibration and profiling. They are not the same. Bear with me:
CAL 1 and 2 means you can save your calibrations. I'm not sure how changing calibration on the fly is supposed to work, because there's a second part to this: the monitor profile. The profile is a complete and detailed description of the monitor's behavior, in its now calibrated state, and this profile is what a color managed application like Lightroom uses to display the image. In short, the image is converted from the source profile, to the monitor profile, as you adjust the image. So changing calibration invalidates the profile.
IOW, the color management chain hinges entirely on the profile. The calibration is just a basic adjustment to make the monitor slightly more well-behaved, and is not part of color management as such. With a good monitor you can skip calibration altogether and just profile it.
All right. Just clearing the concepts a bit. Did anyone bother to read all that...? 
What I'm getting at is this: Within a color managed application, anything you throw at the monitor is remapped into the monitor profile, and as such represented truthfully. Adobe RGB, sRGB, ProPhoto, it'll all look as it should.
What proofing does is to introduce another link into the chain: the proof profile. So now it goes source profile > proof profile > monitor profile (I'm sure that's not how it actually works, but it's a good analogy). The end result is the same as it would be without the proof profile, with one exception: the gamut is now limited to the proof profile. So what you now see on-screen is how it would look if the file was indeed in the proof color space, in this case sRGB.
Copy link to clipboard
Copied
howdego wrote:
(I recognize that TRShaner recommends using TIFF, but I am not yet convinced that PSD format would not serve just as well).
TIFF and PSD are both loss-less file formats. Unless you need the ability to adjust layer visibility inside InDesign TIFF format files can do everything PSD can. PSD files with layers must be saved in 'maximize compatibility' mode to make them compatible with LR, which adds a flattened copy of the image to the file. If you use TIFF with 'ZIP' compression for both the image and layer compression the file size should be the same or smaller than PSD.
howdego wrote:
So, Just to review my workflow, I:..........
I suggest NOT doing any resizing or output sharpening in PS for your Proshow images. Save the full-size PS edited file and do the resizing and output sharpening using LRs Export module. The actual image size for use in Proshow should be larger than the target screen size (1920 x 1080). Many of the effects provided in Proshow use image "zoom," which enlarges the screen image up to 2X. If your image file is only 1920 x1080 it will noticebaly "soften" with these zoom effects due to interpolation (upsizing).
http://www.slideshowblog.com/2012/08/tips-for-resizing-files-for-your-proshow-slideshows/
The default for the Proshow plugin in LR is 2800 x 2800 is probably a good size for most 1080p shows, but I never use the Proshow plugin iinside LR. Using LR's export module allows you to choose the output Sharpening amount that looks best based on testing with your TV. The Proshow plugin uses a "fixed" non-user adjustable amount of sharpening. I have Proshow Producer 5 and it is capable of producing very high quality slideshow videos if you follow these guidelines.

 AdChoices