- Home
- Lightroom Classic
- Discussions
- 😢 Lightroom Luminance Down Causes Color Disruptio...
- 😢 Lightroom Luminance Down Causes Color Disruptio...
Copy link to clipboard
Copied
Hello everyone,
I have the following question:
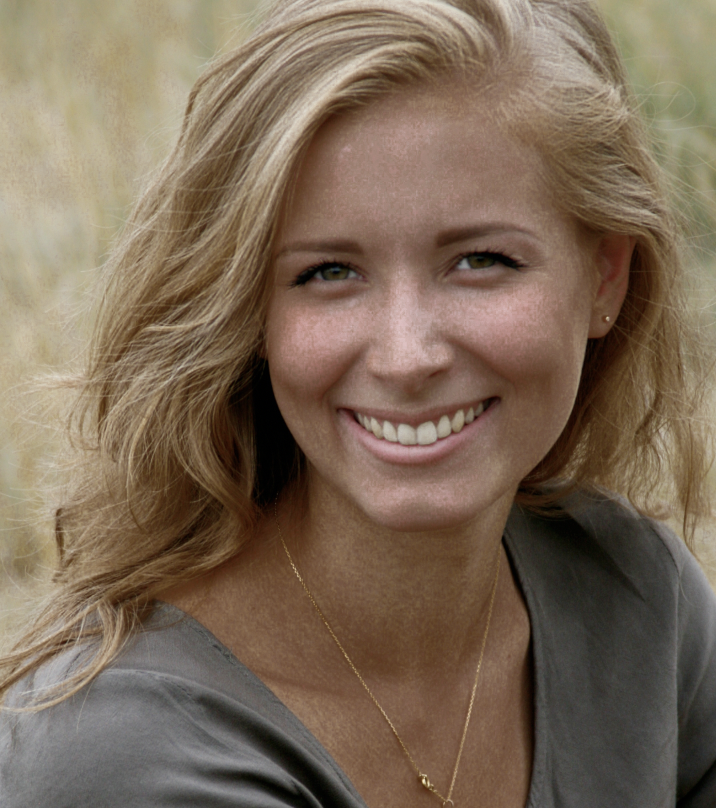
When I drop luminance in Lightroom Classic CC (JPEG pictures), the color tones change dramatically; the change causes some sort of weird pixel shift... I don't even know how to describe it. It doesn't deepen the color as it is supposed to, but rather makes an object super ugly and unnatural.
Please help! I have tried multiple images and different colors (bringing down the luminance).
Attaching examples here. On the first image - orange luminance down -100; second image - orange luminance down -78.
Thanks in advance!


 1 Correct answer
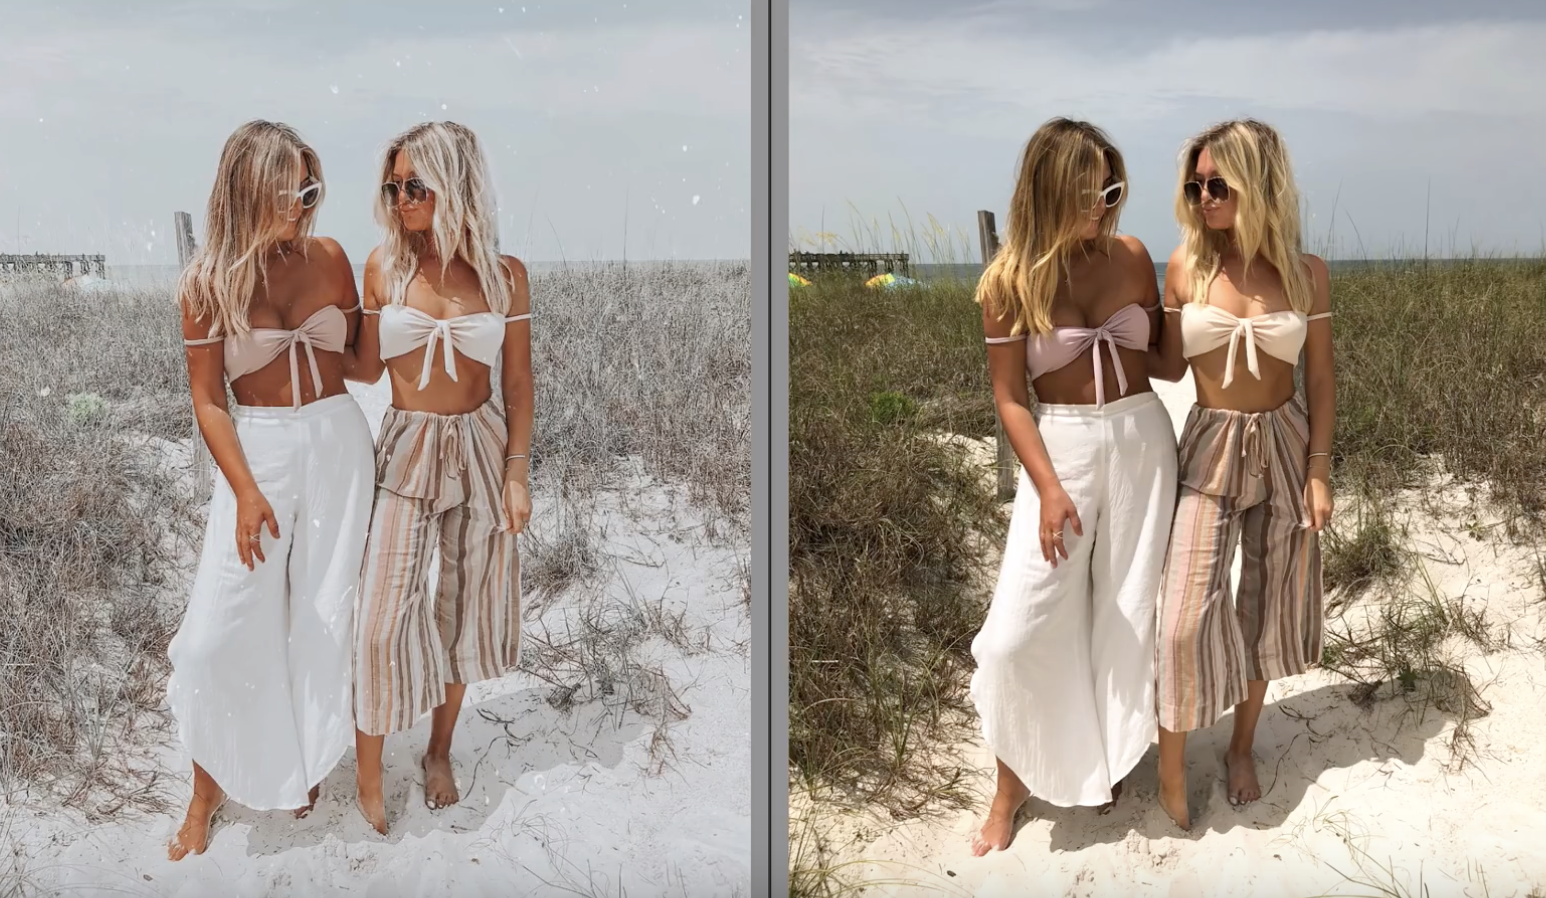
Also, watched the video to the point he is doing the red and orange luminance. It only works in his image (crazy how obviously the girls are photoshopped in looking at the area in the middle between them) because it is low resolution (so very little variation in the skin tones because of local structure) and they are smaller in the image - again meaning much less detail so you don't get the splotchiness. Also their skin tone is much more saturated to begin with.
Nothing wrong with your Lightroom,
...Copy link to clipboard
Copied
I am not sure what you expected to happen. This looks exactly like what I would expect to happen if you drop orange luminance especially if you do it that extreme. Luminance is the brightness of a color, not it's saturation. If the HSL sliders are implemented correctly, you will not see a "deepening" of the color, you should just see a darkening as you see here.
Copy link to clipboard
Copied
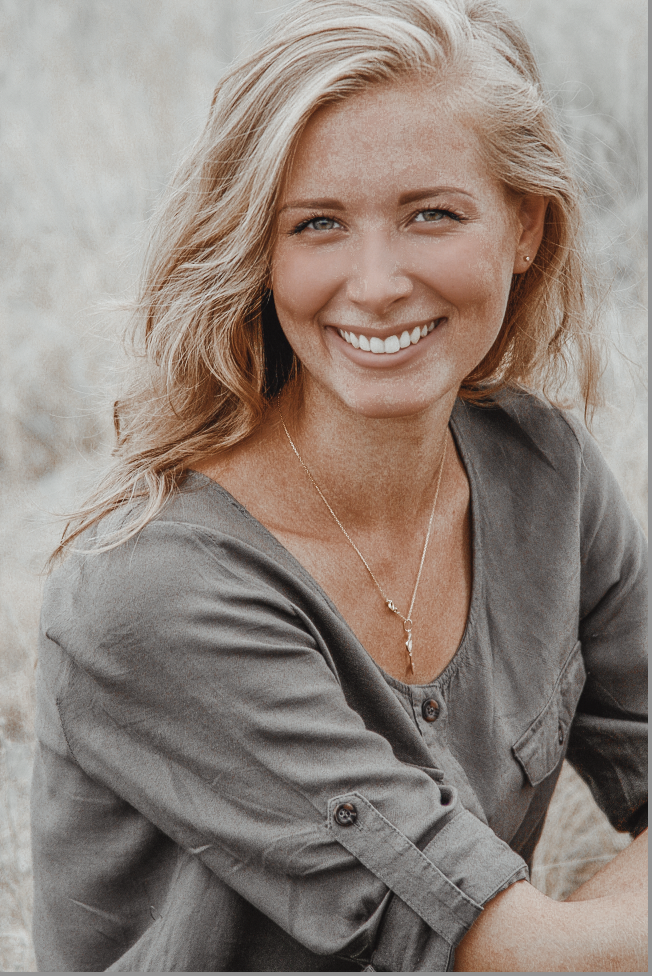
I am asking that because another photographer did the same adjustment on one of his YouTube videos, and the "darkening" was consistent, with no pixelation and interruption as you see above. His images did not like these ones at all... I will attach the results he got here(left is the"after") : (Jpeg; dropping the orange luminosity to -40) I followed every step and got this (the second picture)
Copy link to clipboard
Copied
Link to that YouTube posting?
Copy link to clipboard
Copied
Sure! Here you go: How to Edit WARM GOLDEN Photos Like @ej.haben | Lightroom Tutorial For Instagram Like Tezzamb - YouT...
I asked the person who created it multiple times, providing examples and pictures, but he keeps telling me weird things that don't even relate to the problem.
Copy link to clipboard
Copied
The selective color trick will only work this way if there is no similar color in the skin tone here. In the upper image, the skin tone of the girls is very different from the grass. In your image they are not as separated and you will leak into the skin. In this case, I would use Photoshop with a mask instead of Lightroom's HSL sliders. You can also do the following on your image since the skin tones here are really quite different than in the example. Keep all the luminance sliders at 0 but drop the yellow saturation to -100. That gives you this:
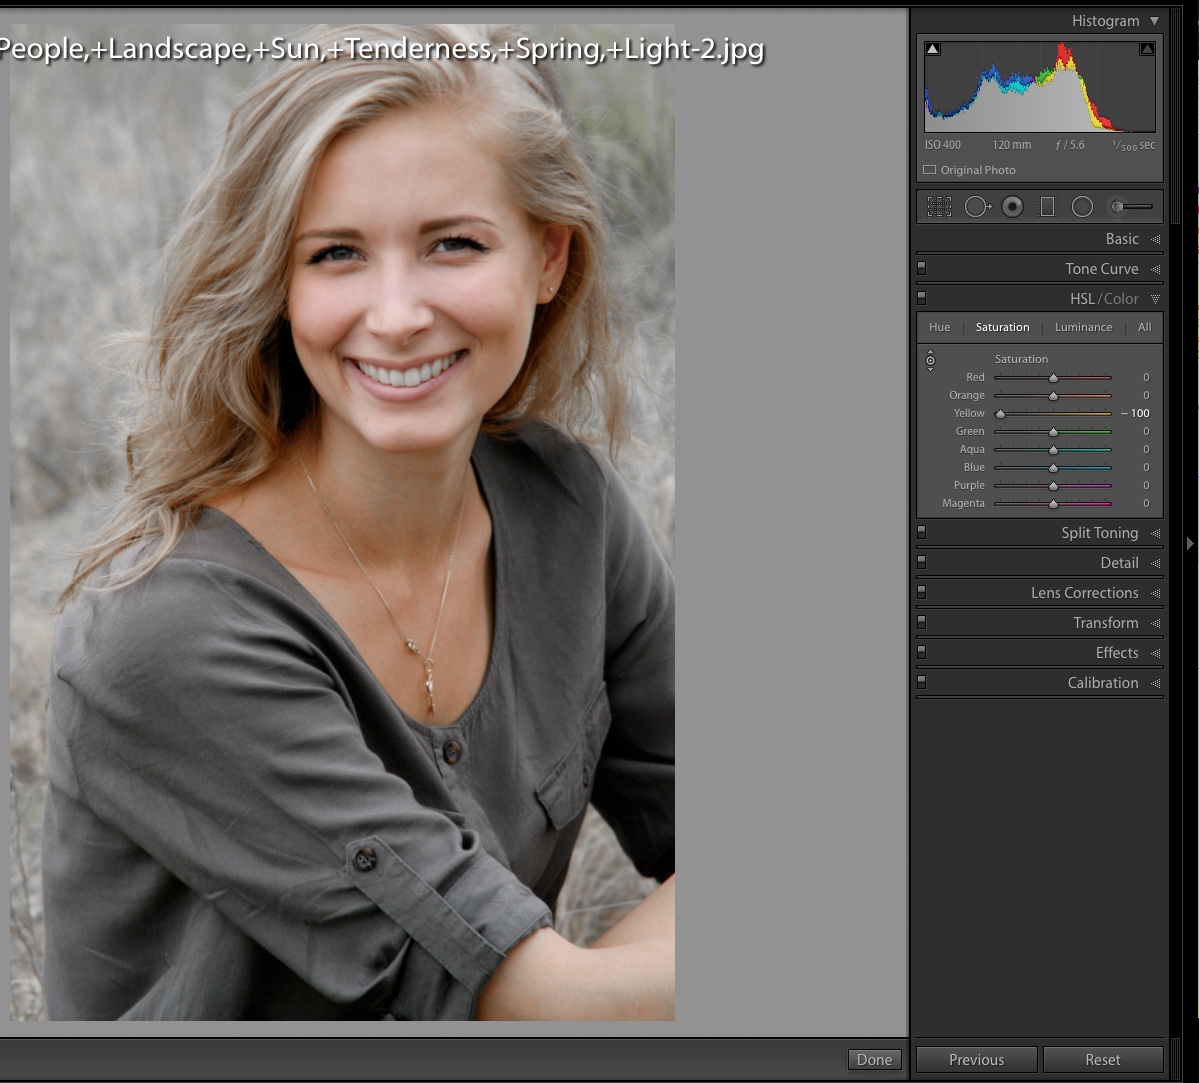
I would probably do a global + saturation or brush + saturation in this case to get some color back in her face as it paled a bit too much. Doing the Photoshop thing similarly gives this using a quick brush to give color back to her face, hair and arm as you can see in the mask:

Copy link to clipboard
Copied
Thank you for the tips and taking your time to try adjusting it. Maybe there's something wrong with my Lightroom?? (I don't think so since I update it regularly and even set it to the original settings recently). Look at what I get when I drop Yellow luminance to -100 just like you did

Her teeth are now greenish and there's so much noise in the skin tones...
Copy link to clipboard
Copied
I dropped yellow saturation! Not luminance
Copy link to clipboard
Copied
Sorry, my fault. So you're saying that the luminance drop will only work on the images where the color I am adjusting looks distinctly divergent from the ones that surround it? I am not sure if I understand how that affects luminance...
Copy link to clipboard
Copied
You can do this within LR using the Adjustment Brush with a Color Range Mask. I used three sample areas with the eyedropper dragged to increase the sample size.
Color and Luminance Range Masking in Adobe Camera Raw - YouTube
(EDIT: Updated screenshot to show Adjustment Brush settings.)
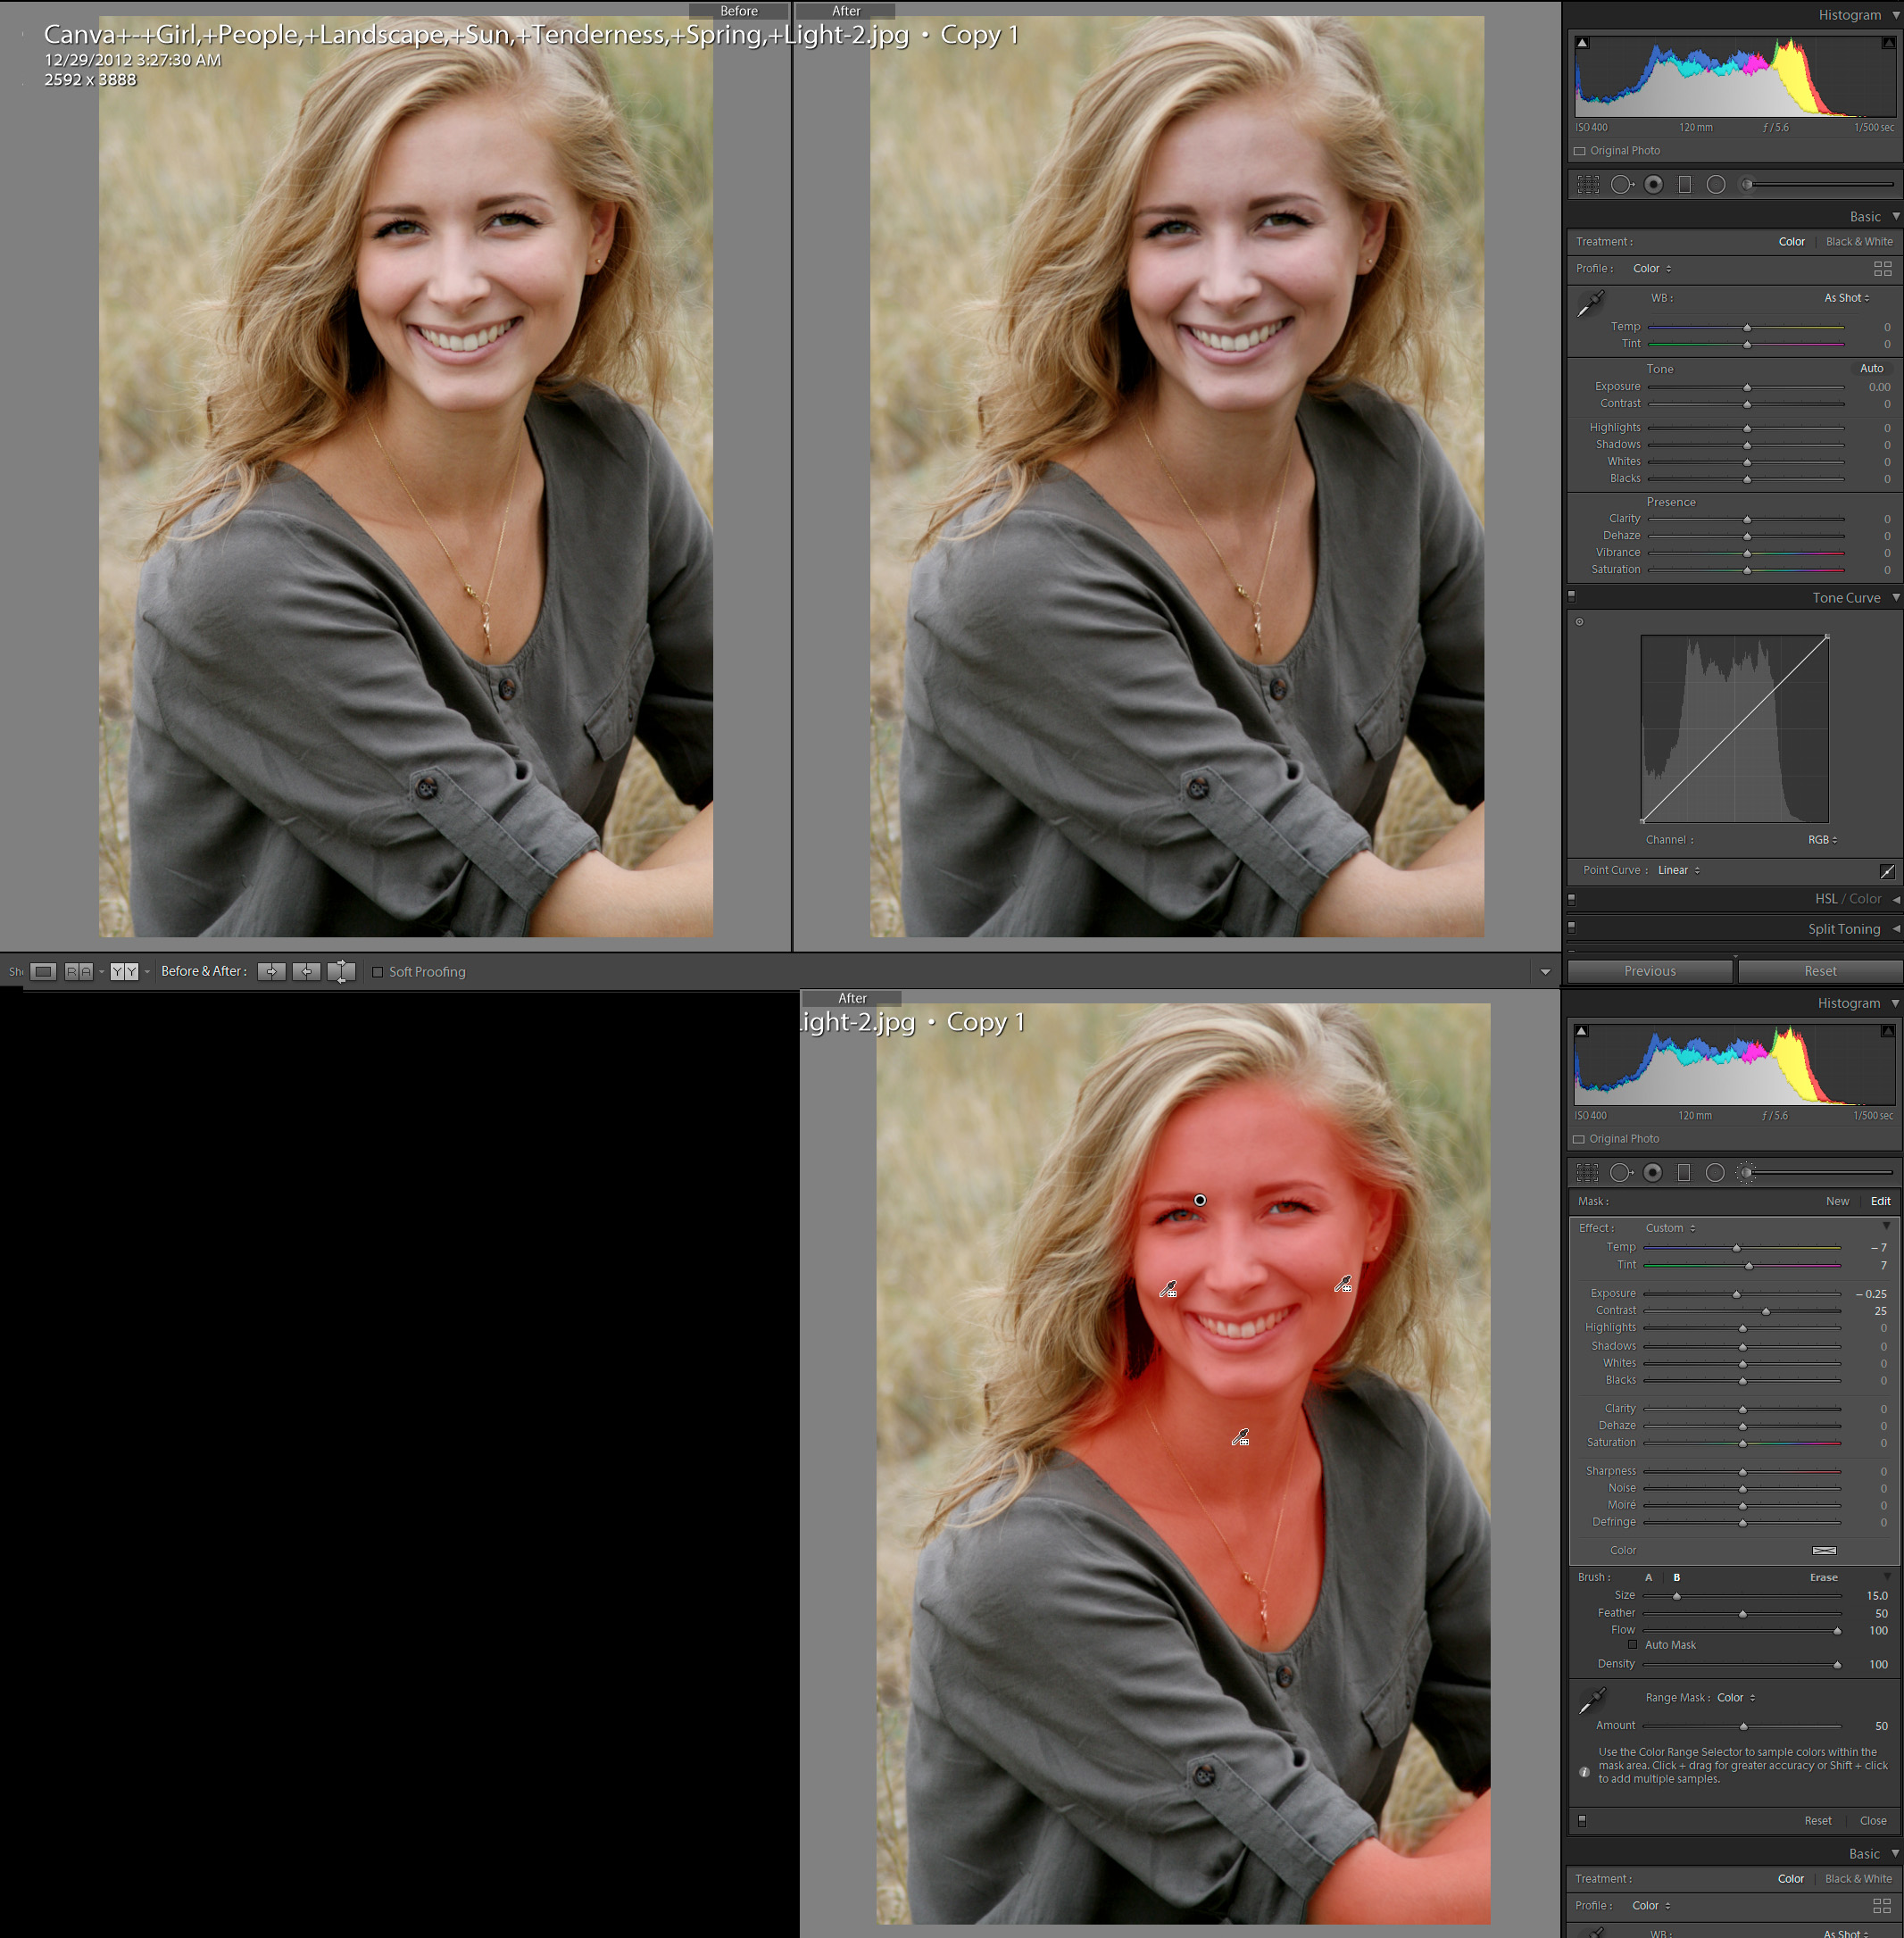
Copy link to clipboard
Copied
After looking at the portrait again it appears the WB is simply off for the whole image. Using the WB eyedropper on the gray sleeve corrects the skin tone nicely. Sometimes we make things more complicated than they need to be.....perhaps? At least it's a better starting point for further editing.

Copy link to clipboard
Copied
Also, watched the video to the point he is doing the red and orange luminance. It only works in his image (crazy how obviously the girls are photoshopped in looking at the area in the middle between them) because it is low resolution (so very little variation in the skin tones because of local structure) and they are smaller in the image - again meaning much less detail so you don't get the splotchiness. Also their skin tone is much more saturated to begin with.
Nothing wrong with your Lightroom, your images just need some different way of dealing with them
Copy link to clipboard
Copied
Thank you! I think it makes sense now ![]() And that's interesting that you say one of the reasons might be low resolution (the person who filmed the video told me that I might have a "bad camera" which won't allow my JPEGs to be edited in then right way).
And that's interesting that you say one of the reasons might be low resolution (the person who filmed the video told me that I might have a "bad camera" which won't allow my JPEGs to be edited in then right way).
Really appreciate your help! Have been trying to deal with the issue for quite some time.. Now I just won't mess much with luminance sliders when it comes to hight quality JPEGs
Copy link to clipboard
Copied
(the person who filmed the video told me that I might have a "bad camera" which won't allow my JPEGs to be edited in then right way).
Yeah that is nonsense. If anything your image is actually too good for this treatment. Most well shot images with good skin detail (yours is a really nice portrait in my opinion) will not lend themselves well to this specific treatment. Notice that in the instagram picture the women have basically no discernible skin structure owing to their size in the image. They also have a very bronzed look to start with.
Find more inspiration, events, and resources on the new Adobe Community
Explore Now

