- Home
- Photoshop Elements
- Discussions
- Re: Can't capture part of image in replace backgro...
- Re: Can't capture part of image in replace backgro...
Can't capture part of image in replace background
Copy link to clipboard
Copied
I'm trying to replace a background using the guided edit. In selecting the image, I can't capture it finely enough to replace the sky color between the feathers (see photo). When I go back to editing mode, I've not been able to get clone stamp or any of the tools that will allow me to make the space between the feathers darker so it matches the new background. Thanks for any guidance.
.
Copy link to clipboard
Copied
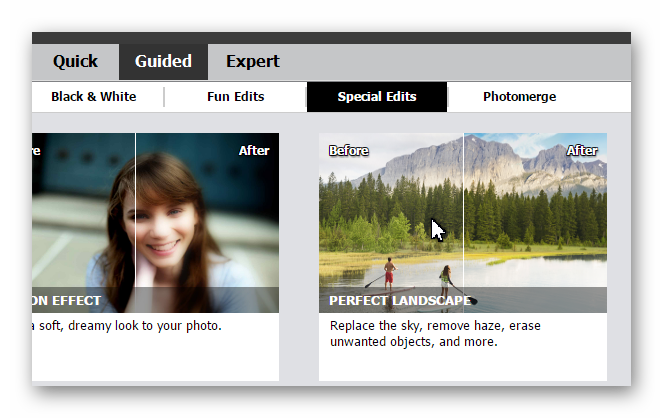
Which Guided Edit are you using? If you have Elements 2021, you should be using the Guided>Special Edits>Perfect Landscape feature.
With two clicks, you can get something like this:
Let us know if you have a different version of Elements, and we can make other suggestions.
Copy link to clipboard
Copied
Thanks. I've got Elements 2018.
Copy link to clipboard
Copied
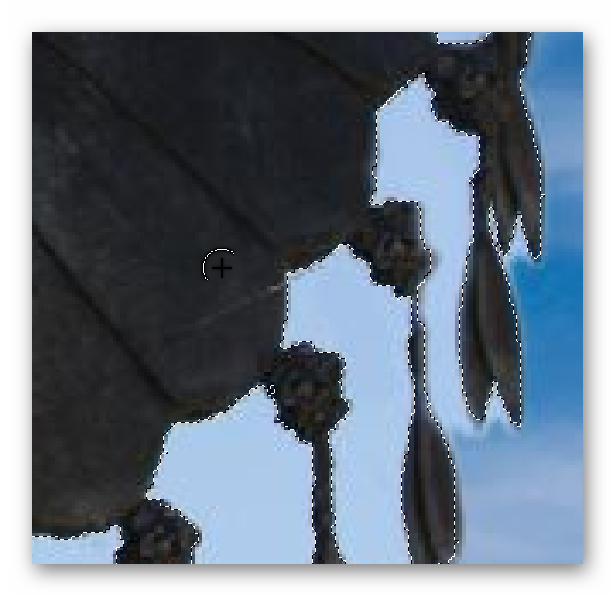
OK. So, I assume you have used the Replace Background Guided Edit and that you have first tried the Auto selection tool to select the object. In this case, that is probably not the best option to use. You would probably have done better to use the Quick Selection tool which could achieve a result something like the following:
Since your screenshot is a little fuzzy around the edges, the original may get a better result depending on the original background and resolution of the image.
In any event, you can improve the selection by using (1) the Refine tool, even if you start with the Auto selection. This tool then gives you three different views of your selection. In my following screenshot, I have chosen the Overlay view (2) which covers the background area which is to be replaced. I then used the Push option (3) to add to the feather selection area which remains black (or the original colors) and paints red over the area which is to be removed. When using this Push brush, you hover over the selection and the cursor will have a plus sign to show that it will add to the selected area. You simply push the brush toward the edge of the object and it will fill in any gaps in the selection. Conversely, if you hover over the background, the cursor will change to a minus sign and you push from the red background area into the areas that are not yet covered by the red (in this case, the areas of blue sky).
With a bit of practice, this is a very useful way to get a good selection around the edges of the object.
Now, having said all of that, instead of using a guided edit, it would have been preferable in this case to use the Magic Wand selection tool in Expert Mode. Because the object and the sky are well defined in the image with different colors, it would be possible to select either the black or the blue areas. Perhaps the original image background is more complicated, in which case you would select the black object. You could then inverse the selection so that the sky would be selected using the Select>Inverse menu command or the Shift+Ctrl+I keyboard shortcut. Then you press the Delete key and the sky background will be removed. A different sky photo can then be added and the layer placed behind your object for the replacement.
There are several other ways to skin this cat, but hopefully I have given you some ideas to consider. Of course, your issues may be different because you have not given us the original image to work with and the Guided Edit method you used gave you a poor selection. which is why your replacement sky does not match what I assume is the original cloudless background sky.
Copy link to clipboard
Copied
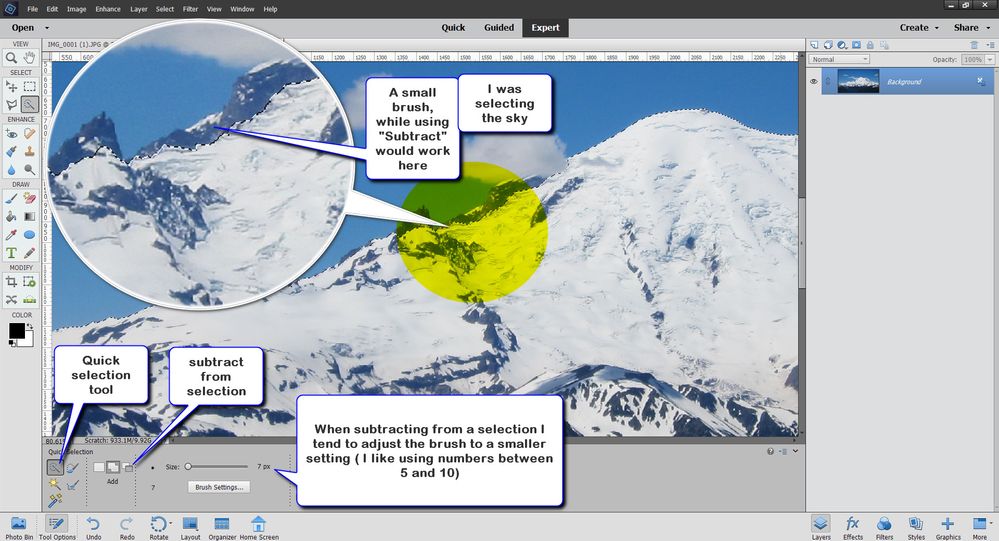
This is what I do--- I've tried liking that "push / pull option found in the rrefine selection options, and I don't like the inteface so I do it like this:
Copy link to clipboard
Copied
Try this. You will need a picture of a nice blue sky with clouds, nothing else on it. You can take the picture yourself or obtain one from another source, e.g. Google or Sky Pictures | Download Free Images on Unsplash
1.Open the picture of the replacement sky in PSE and go to Select>all, then Edit>copy
2. Open your picture with the trees, then Edit>paste. The replacement sky will be on a separate layer
3. Activate the move tool and position the new sky over the sky in your original picture. The new sky should cover the sky areas between the branches & fine arborization as well. Still on the sky layer, set the blending mode to darken
4. Set your foreground color chip to white
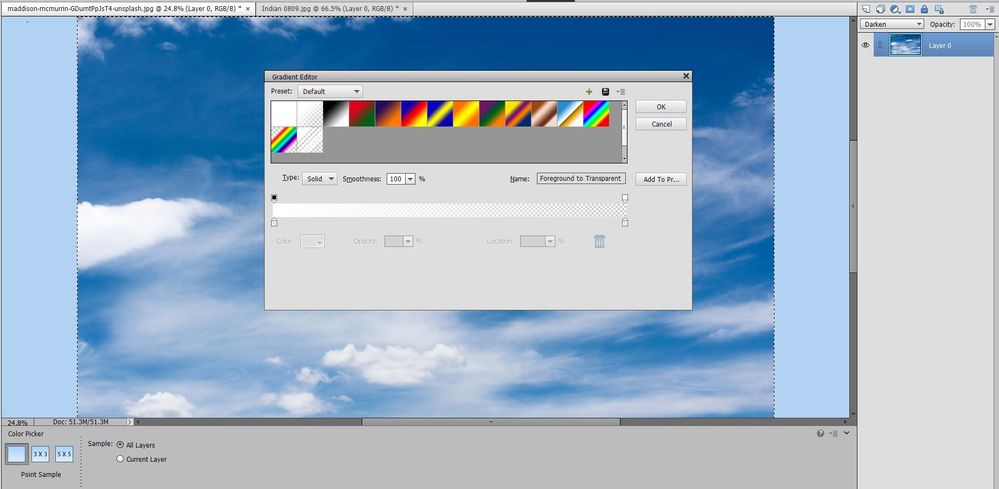
5. Activate the gradient tool and select the foreground to transparent (linear) gradient. Drag the gradient, from South to North, while holding down the shift key to the top of the tree line.
6. If you wish, a nice touch is to paint the horizon with a low opacity white brush - - gently
7. If there is an indication to touch up, Light sky color that I utilize if C7D7EA, Dark sky color is 628DC0
Copy link to clipboard
Copied
Thanks for this. When I get to step 3, the new sky completely covers the original photo. (I can only see the original photo if I reduce opacity.) I executed step 4. At step 5, I got lost. I don't know what you mean about moving the gradient. Here's a screenshot to show where I get stuck.
FYI, the original photo is open according to the top of the screen (Indian 0809.jpg).
It's been some time since I learned PSE so I greatly appreciate your help.
Copy link to clipboard
Copied
@Kenneth5E05, I think Hatstead misunderstood your question, perhaps because Glenn used an example of selecting a sky along a horizon. It is my understanding that your example is totally different and will not work with Hatstead's instructions. In order to give you more definitive instructions, it would be best if you posted the original photo before any editing by you. The real issue is how do you separate a complex object from a background.
Copy link to clipboard
Copied
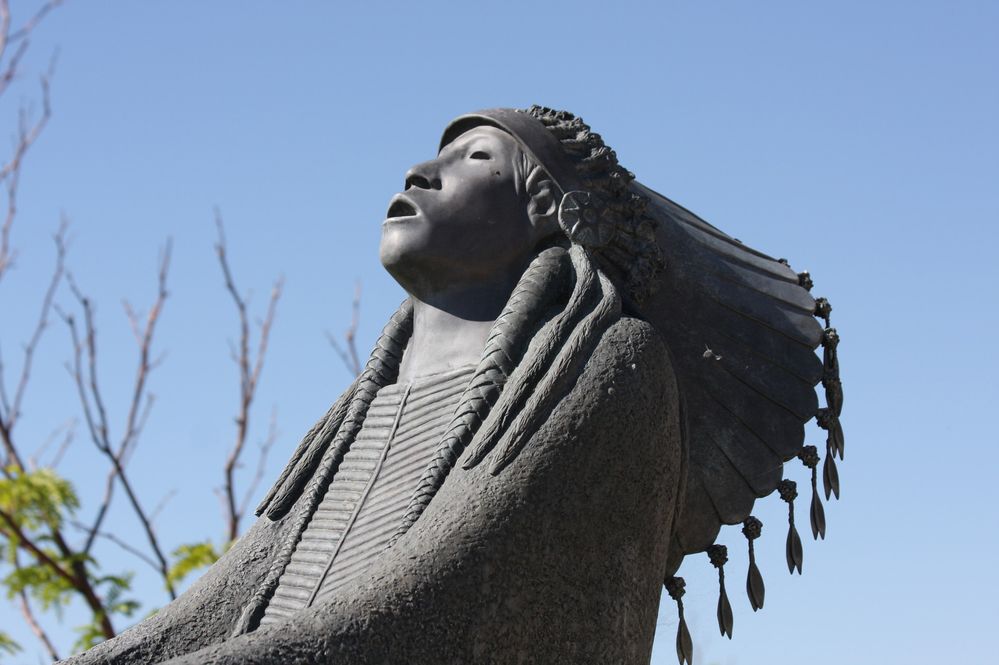
Per suggestions, I'm posting the original photo. The branches on the left seem to me distracting so I want a different background. Rather than use just a single color, which seems to stark, I thought a sky would offset the statue. So here's the original:
Thanks again to everyone for quick responses to my quandary.
Copy link to clipboard
Copied
Using a quick selection brush works pretty well.... very quick n dirty.....
Copy link to clipboard
Copied
Works for me. If you want more clouds, one can add them readily with a cloud brush.
Copy link to clipboard
Copied
@Kenneth5E05, as I said before, there are usually several different ways in Photoshop to achieve the same result. We each have our own personal preferences as to what tools and methods work for us, and sometimes there is a difference between speed and accuracy. Different techniques sometimes work better for one kind of photo rather than another and vice versa. In this discussion, you have been provided with several different methods to replace the sky in your statute photo. All of them are valid, but let me explain some of the differences in what you are seeing and why.
hatstead's method involves placing the new sky layer over the statue photo and applying a Darken blend mode to the sky layer. This method can work well with a landscape photo with a clear horizon or a sky peaking through between branches and foliage that will generally be darker than the sky. Here's why: The darken blend mode compares the base photo with the sky layer. If the pixels on the base are darker than the sky, they will continue to show through the sky layer. However, if the sky pixels are darker than the original pixels, they will cover up the pixels underneath. This is why it was my opinion that this method has some downside for your particular statue image. I think you will see that in hatstead's screenshot, some of the highlights on the statue have been replaced by the new sky pixels in that they have taken on a blue tinge. For example, look around the eyes. And there are areas of the sky that do not transition well between the old and the new sky. See the difference in the horizontal areas around the level of the top of the head.
As hatstead suggests, you can cover this up with other clouds, using a cloud brush. But that involves more steps. The good thing about this method is that it is non-destructive and it is easy to change the new sky photo or move it around to fit your image. And as I said, it usually works well with a pure landscape image with dark land, buildings or ocean and a lighter sky. That is why we always ask to see the original photo you want to edit so that we can make a better judgment about what is needed.
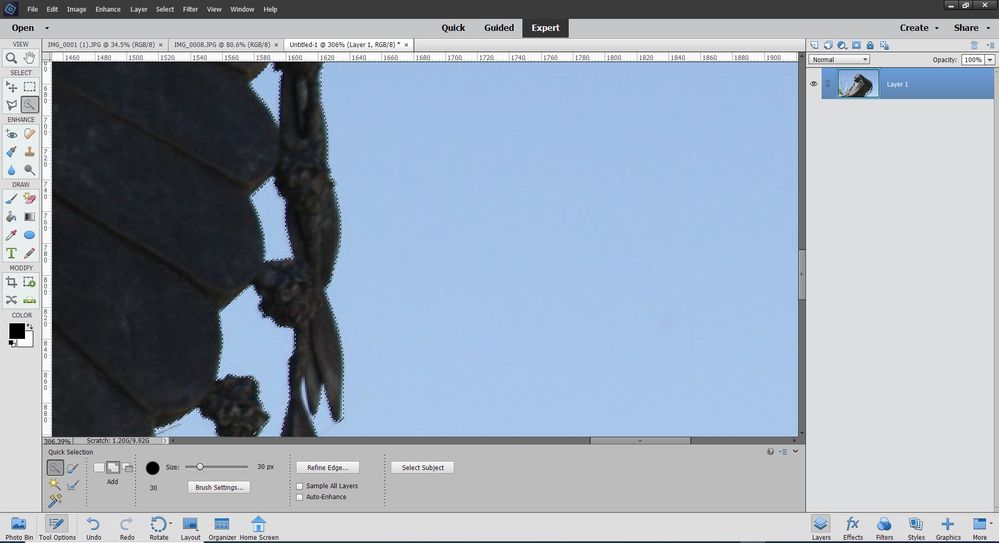
Glenn has suggested using the quick selection tool to select the statue. This is also one of my favorite selection tools and I use it all the time. But depending on the intricacy of the object being selected and how it blends with the background, this can take several mouse click-and-drags to get it right.
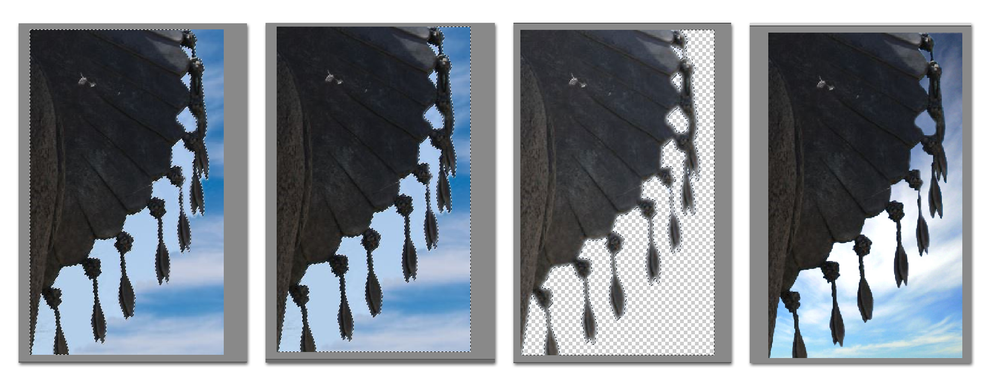
In your photo, there is a fairly uniform sky color. So, for me, the Magic Wand tool is the ideal solution. You can select the entire sky with two or three clicks. The original sky can then be deleted with one keystroke and replaced with a new sky layer underneath which will show through the transparent areas of the original photo. The downside of this is that the technique is destructive and once you have deleted the background, it is a little more difficult to correct any selection mistakes. That is why you should always copy the original background layer (using Ctrl+J) before performing any editing work.
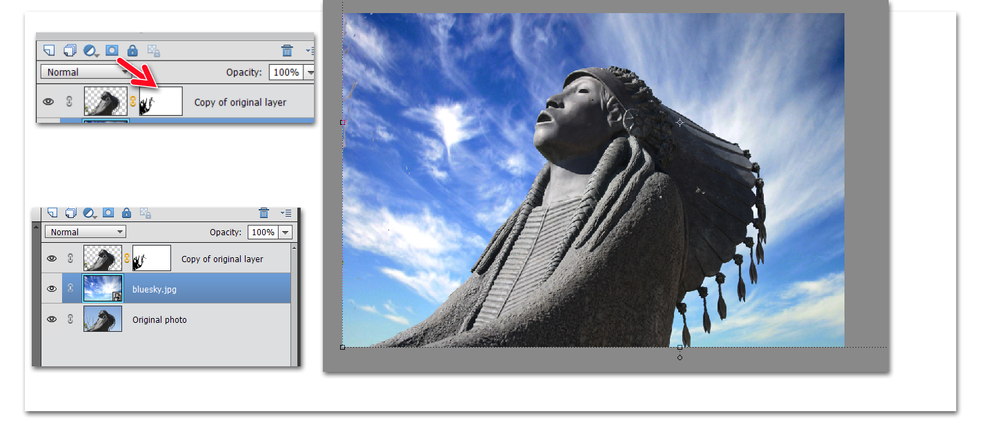
Now, because you have said that you find the branches distracting, here is yet another technique to remove them. In the following screenshot, you will see that I have the original image layer at the bottom, the new sky layer above it, and a copy of the original image that I have edited by selecting the sky (with the Magic Wand tool) and deleting the selection. I have also added a layer mask using the 4th icon from the left in the layers panel. With a black foreground color, I selected the Mask and painted over the branches with broad strokes to entirely eliminate them.
No finesse required.
I'm sure I have presented far more information than you wanted or needed, but hopefully we can all learn together.
Copy link to clipboard
Copied
I want to thank all of you for helping me with this problem. I took an online course in Elements several years ago but haven't used many of the advanced features and clearly need to educate myself better. I barely remember what layers are. I have the lessons and files from that class and plan to go through it again. It takes some time for me to mess with photos because I have visual issues and am still coping with an injury in my dominant hand.
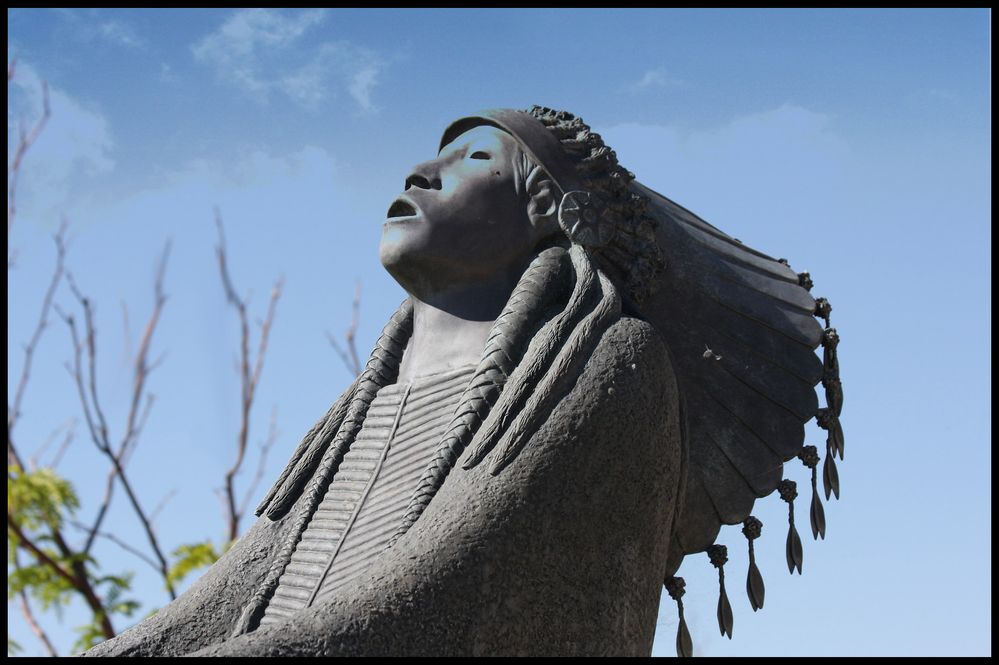
I love Greg_S's sky background above. It looks as if the clouds emanate from the statue! Could you tell me where you found this background?
Thanks again. This really does feel like a community to me and I'm overwhelmed by the supportive atmosphere.
Ken


